Crochet Textured V-Stitch Headband with Adjustable Fit
Bring cozy texture to your everyday style with this crochet headband, featuring repeating V-stitch clusters, flexible sizing, and quick rows that make fitting simple.
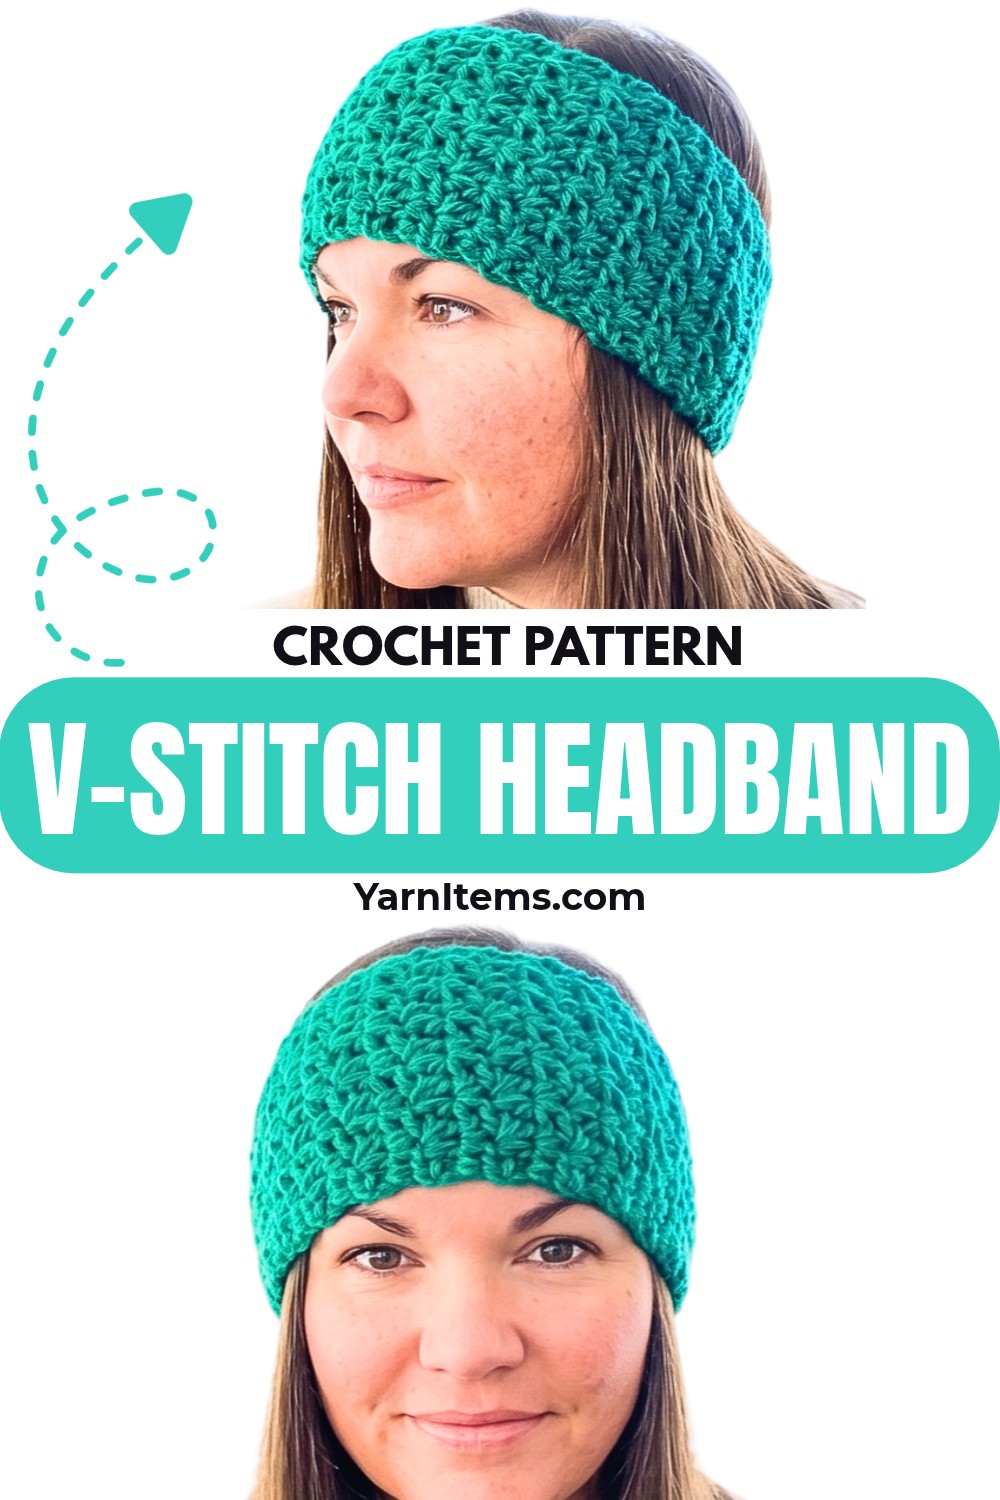
Soft wool-blend yarn gives this crochet headband its warm, slightly chunky feel, while repeating V-stitch clusters create texture without requiring complicated stitchwork. Its simple crochet shape also makes it easy to wear, gift, or adapt for different head sizes.
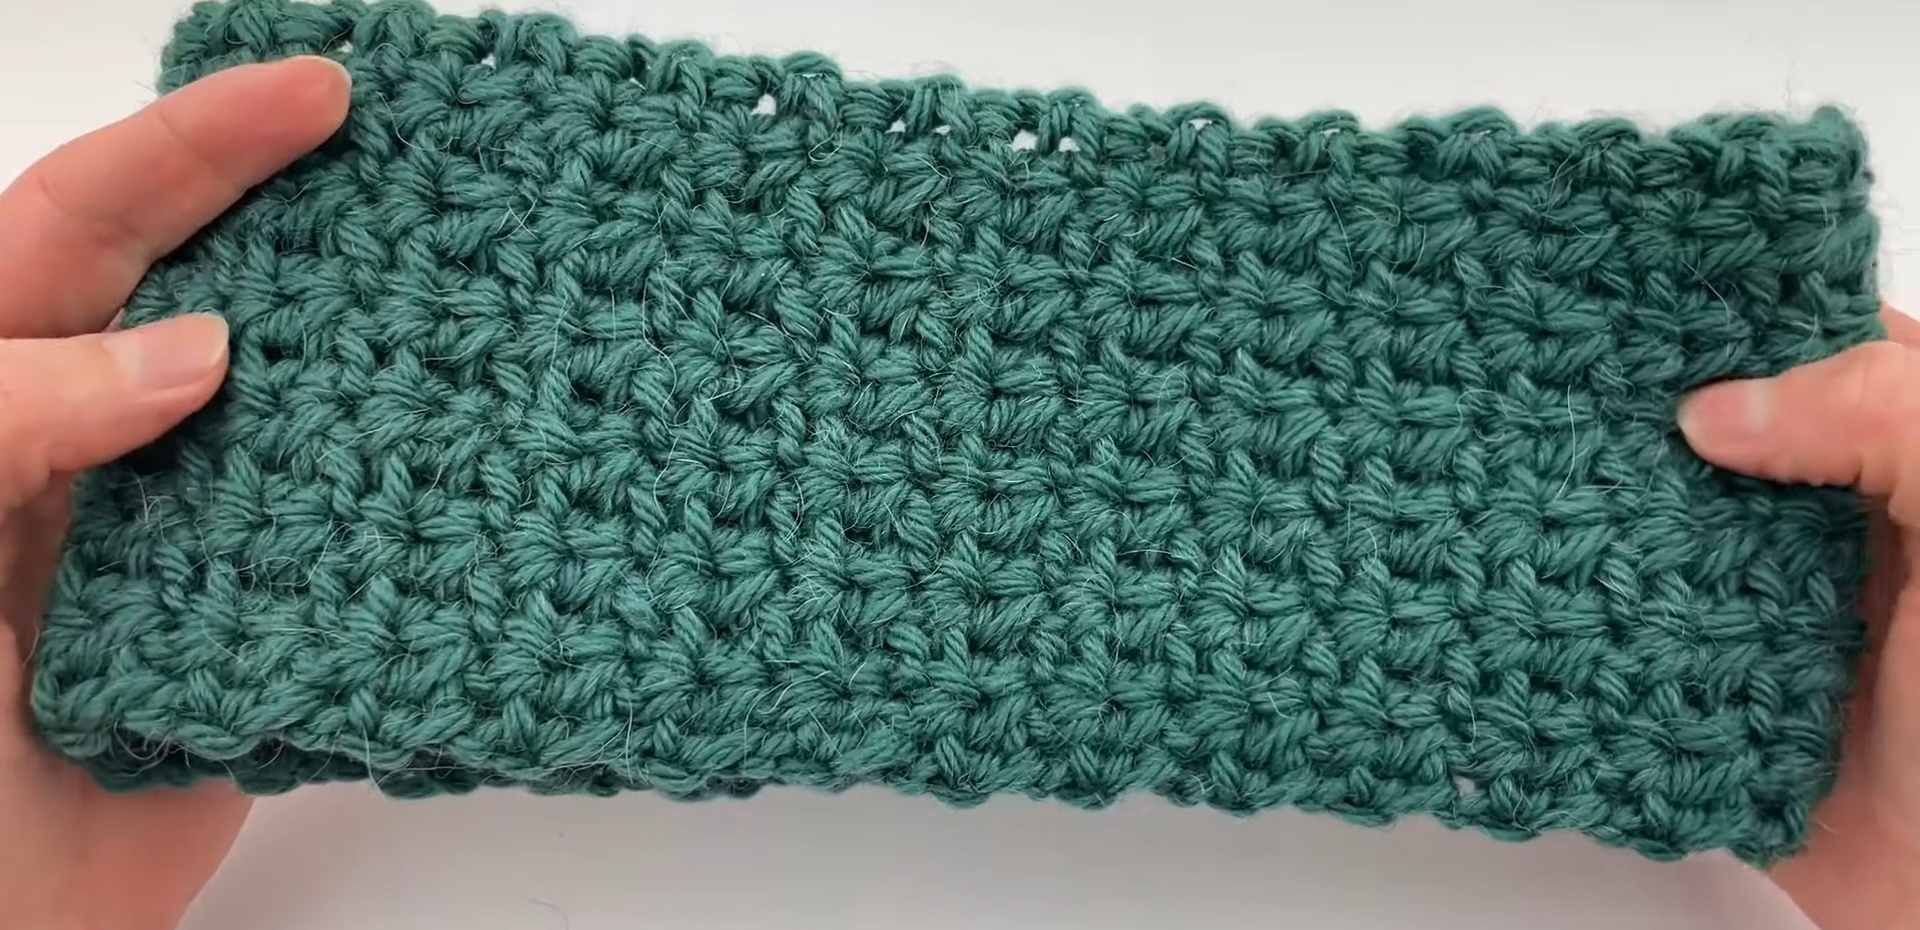
Once your foundation row is complete, each new row builds on those small V-shaped gaps, creating a steady rhythm that becomes easy to recognize as you continue. Row count controls finished length, so you can check fit as you crochet instead of relying only on 45 rows.
Credit Crochet With Julie
Materials & Tools Needed
- Yarn: 1 skein of Eddie Bauer wool yarn, Alpaca and Merino blend. Label classifies this as size 4 medium-weight yarn, but it works slightly thicker than average size 4 yarn.
- Hook: Size H / 8 / 5.0 mm crochet hook.
- Scissors
- Optional: Beanie tag for finishing.
Finished Size & Customization
Finished Size: Made to measure. Tutorial uses exactly 45 rows for an average adult head, but row count can be adjusted to match exact head size.
If you want to use standard, thinner size 4 medium-weight yarn, switch to Size G / 4.0 mm crochet hook. Since thinner yarn changes both stitch density and finished dimensions, increase starting chain count and total row count as needed to reach desired headband width and length.
Base pattern uses one color, but alternating colors every few rows can create simple stripes without changing stitch sequence.
Pattern Abbreviations & Terminology
- CH: Chain
- HDC: Half Double Crochet
- BLO: Back Loop Only – loop furthest away from you when viewing the top of the stitch
- SL ST: Slip Stitch
- V-Stitch Cluster: Two HDC stitches worked into the gap between stitches from the previous row

Foundation Chain
Drape working yarn over tail to create slip knot. Insert hook and pull knot snug.
CH 14.
This short chain forms the width of each row, while repeated rows will build length around the head.
Row 1 – Foundation Row
Turn work to crochet back along chain. Skip first 2 chains; these act as turning chains. In the 3rd chain from the hook, work 1 HDC in BLO: yarn over, insert hook into back loop, pull up loop, giving 3 loops on hook, then yarn over and pull through all 3 loops. Work 1 HDC in BLO of every chain across.
Stitch Count: 12 HDC.

Working into BLO here leaves front loops available along the foundation edge. Those open loops become important during final seaming.
Row 2 – Establish V-Stitch Gaps
CH 2, turn.
For this row, work into gaps between stitches instead of top loops. Place 2 HDC in the gap between the 1st and 2nd HDC from the previous row. Skip next 2 HDC, then place 2 HDC in the gap between the 3rd and 4th HDC.
Repeat this sequence across the row: skip 2 stitches, then place 2 HDC in the next gap.
At row end, place 1 HDC around chain-2 turning chain from previous row. This final stitch keeps both edges aligned.
Stitch Count: 12 HDC.

Row 3 – Working into V Shapes
CH 2, turn.
Pairs of HDC from Row 2 now create small V shapes. Skip first 2 HDC along edge, then place 2 HDC directly into center of first V.
Continue across the row, placing 2 HDC into the center of every V shape.
At row end, place 1 HDC between final HDC and chain-2 turning chain. This keeps border straight while maintaining repeating texture.
Stitch Count: 12 HDC.
Rows 4-45 – Building Headband Length
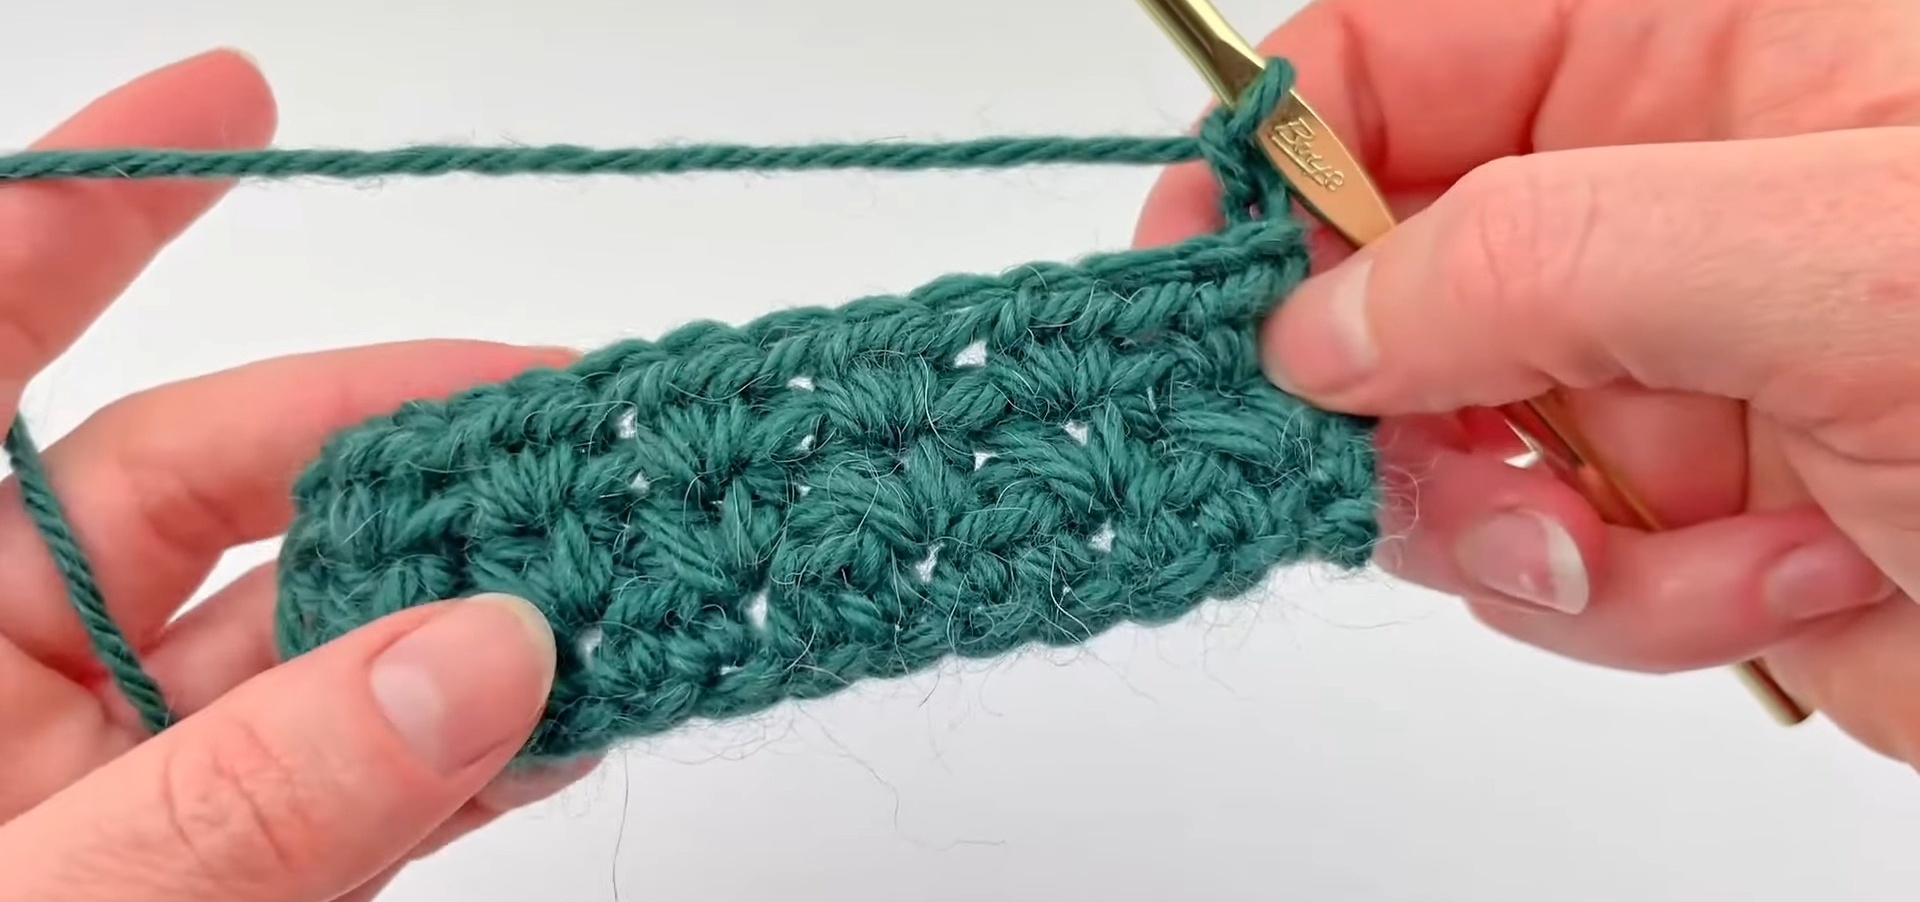
CH 2, turn.
Repeat Row 3 continuously: skip first 2 HDC, place 2 HDC into center of each V, then finish with 1 HDC between final HDC and chain-2 turning chain.
Continue until reaching 45 total rows, or stop once band wraps comfortably around intended wearer’s head.
Keep checking length against head size instead of relying only on row number. Yarn thickness, personal tension, and hook size can all change finished length.
Fit Check Before Seaming
Wrap the crocheted band around head with short edges meeting. Check whether fit feels comfortably snug without stretching excessively.
If band feels too short, continue working more rows before joining. If it already reaches desired length before Row 45, you can stop there. This simple check lets row count follow actual fit rather than forcing every headband to use identical dimensions.
Joining Short Edges
Once the desired length is reached, fold the headband in half so both short edges line up.
CH 1 at end of final row. Skip turning chain.
Slide hook underneath full stitch on current side. Then insert hook into unworked front loop from first foundation row. Because Row 1 was worked in BLO, front loops remain completely open along foundation edge.
Yarn over and pull through all loops on hook to create 1 SL ST.
Repeat this slip-stitch joining process stitch by stitch along short edge until headband is completely closed.
Working through both corresponding edges keeps the seam aligned and gives the finished band its continuous loop shape.
Finishing
Cut yarn, leaving a short tail, and tie off.
Weave yarn tail neatly into newly created seam so loose end stays hidden.
Turn headband right-side out. Slip-stitch seam should now sit inside, leaving outer surface clean.
For optional branding or decorative finishing, attach fold-over or no-sew beanie tag along bottom edge.

Texture Check
Before wearing or gifting, gently flatten the headband and inspect several V-stitch sections. Each cluster should contain 2 HDC worked into one gap, with repeated V shapes lining up across rows.
If one cluster appears shifted, check whether 2 HDC were accidentally worked into top loops instead of a gap. Catching this before final finishing is easier than correcting several rows later.
Repeat full process for additional headbands, adjusting row count or color sequence whenever you want different sizing or striped effects.