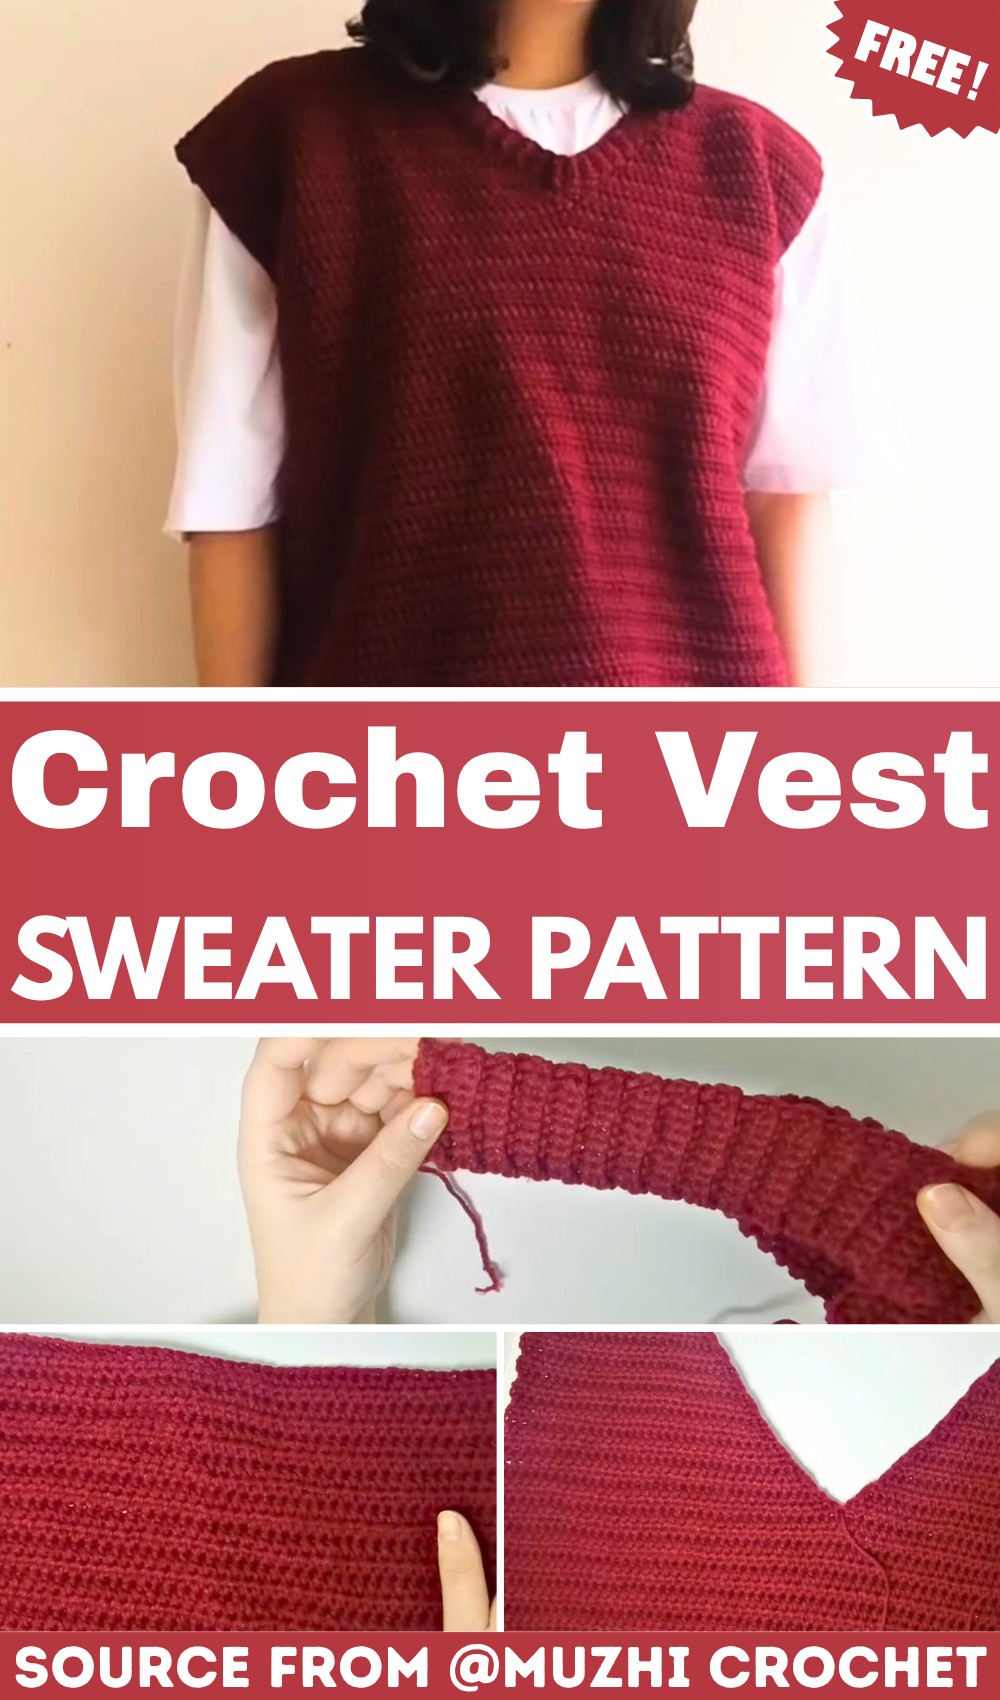
This trendy crochet sweater vest is perfect for layering and adds a chic, handmade touch to your wardrobe—perfect for cozy outfits that blend comfort and style effortlessly.

A sweater vest is a stylish and cozy fashion piece that’s easy to wear and great for layering. This trendy crochet design is perfect because it combines comfort and simplicity with modern flair. If you’re dressing for cooler days or adding a casual touch to your outfit, this vest is both fun to make and practical to wear.
Easy Crochet Sweater Vest Tutorial
Creating this sweater vest starts with basic techniques like making ribbing for the bottom and working up panels for the front and back. The design includes shaping for the neckline, armholes, and stitching everything together seamlessly. With a few essentials, like yarn, a crochet hook, and a needle, you’ll have everything needed to crochet this wonderful wearable piece. Beginners can feel confident starting this, as the tutorial focuses on clear and simple steps.
Credit Muzhi Crochet
Key Features and Construction Overview:
- Classic Ribbed Bottom Hem: Made with rows of single crochet worked in the back loop only.
- Main Body Panels: Built with half double crochet stitches, complete with shaping for armholes and a V-neckline on the front panel.
- Simple Back Panel: Mirrors the front with easy adjustments, minus the V-neck shaping.
- Finishing Touches: Panels are joined with a needle for clean seams, and the neckline features a subtly textured ribbing for a polished finish.
- Customizable Design: Adjust the size easily and experiment with different chain lengths, colors, or yarn types for a perfect fit.
Making the Sweater Vest
The project begins with the textured ribbing at the bottom, constructed using rows of single crochet worked in the back loop only. This creates a stretchy yet sturdy foundation for the vest. By chaining 10 stitches (or more for a longer hem), you create customizable ribbing that wraps comfortably around the waist or hips—adjust the rows to ensure the perfect fit before moving on.

Once the ribbing is complete, the main body panel is made by working half double crochet stitches along the top edge of the ribbing. This row provides a smooth transition from the ribbing texture to the rest of the vest. Alternate rows are worked back and forth while maintaining the same stitch count, and shaping begins after several rows to create the armholes. The V-neck shaping is created by decreasing stitches gradually along the neckline, and careful measurements ensure symmetry on both sides.

The back panel is completed similarly to the front but skips the additional V-neck shaping, making it simpler. For both panels, yarn is fastened off after all armhole and shoulder-shaping rows are complete.

Once both panels are ready, they are sewn together using a darning needle, starting with the shoulder seams, followed by the side seams. This creates a neat, seamless look and provides structure to the overall design. As a finishing touch, the neckline ribbing is added using single crochet in the back loop only, providing elasticity and a cohesive, refined appearance.

Video Tutorial
Step-by-Step Pattern
Materials
You’ll need the following supplies to crochet your sweater vest:
- Yarn: Approximately 350 grams of an 8-ply or double-knit yarn. You can use different types as you prefer (check your gauge!).
- Hook: 4.5 mm crochet hook.
- Darning needle: For weaving in ends and joining panels.
- Scissors: To cut yarn.
Optional: A measuring tape for accuracy, especially if you want to customize for size.
Pattern Instructions
Step 1: Bottom Ribbing
- Create a slip knot and chain 10 (or more for longer ribbing).
- Skip the first chain and work single crochet into the remaining stitches across. You’ll end with 9 single crochets for the first row.
- Chain 1, turn your work, and work single crochet into the back loop only.
- Continue working single crochet back loops only for 86 rows (or the number needed to match the width of your desired vest).
Step 2: Body Panels
Front Panel:
- Work half double crochet across the top of each ribbing row (total stitches will equal the number of ribbing rows, 86 in this case).
- Chain 1, turn, and continue working rows of half double crochet for 40 rows.
Shaping the Armholes and Neckline:
- Row 41: Work half double crochet decrease at the beginning and end of the row.
- Row 42: Repeat the decreases at the beginning and end of the row.
- Row 43: Start shaping armholes and the V-neck simultaneously:
- Work half-double crochet decreases at the beginning and the middle of the row (depending on your total stitch count, divide in half for V-neck shaping).
- Continue decreasing for the neckline in each row while working the body normally for the armholes, until you reach Row 60.
Left Side:
- Attach yarn to the opposite side and work the same instructions as the first shoulder from Row 43 to Row 60.
Back Panel:
- Repeat steps for the ribbing and body panels, but omit the V-neck shaping for the back panel. Work straight rows of half double crochet instead after the armhole decreases.
Step 3: Assembly
- Join the shoulder seams of the front panel and back panel using the darning needle and the long tails left after fastening off. Seam stitch by stitch.
- Join side seams by stitching together single crochets from the ribbing upward to the armhole.
Step 4: Neckline Ribbing
- Flip your vest to the right side. Attach yarn anywhere along the neckline.
- Chain 5 (or more, depending on your preferred ribbing width). Skip the first chain and work single crochet into the remaining chains.
- Slip stitch into the next 2 stitches of the neckline, chain 1, turn, and skip the slip-stitched stitches. Work single crochet (back loop only) back up.
- Repeat this process all around the neckline, creating ribbed texture.
- When finished, fasten off with a long tail, and join the first and last rows of the neckline ribbing using your darning needle.
Step 5: Finishing Touches
- Weave in all tails using your darning needle for a clean finish.
- Trim any excess yarn.
Troubleshooting and Suggestions
- Common Mistake: Uneven Ribbing
Be sure to count your chains and single crochets accurately during the ribbing section. Missing a stitch can result in an uneven hemline. - Shaping Challenges
For the V-neck shaping, use stitch markers to identify decrease points. This ensures symmetrical sides as you work each row. - Yarn Choices
Although the pattern recommends 8-ply or double-knit yarn, you can experiment with chunkier yarns for a cozier vest or lighter yarns for a breathable summer alternative. - Creative Modifications
Swap between solid-colored yarns and variegated patterns to add depth and personality to your vest. You could also embellish the ribbing edges with contrasting colors or even add tassels for a boho-inspired twist.