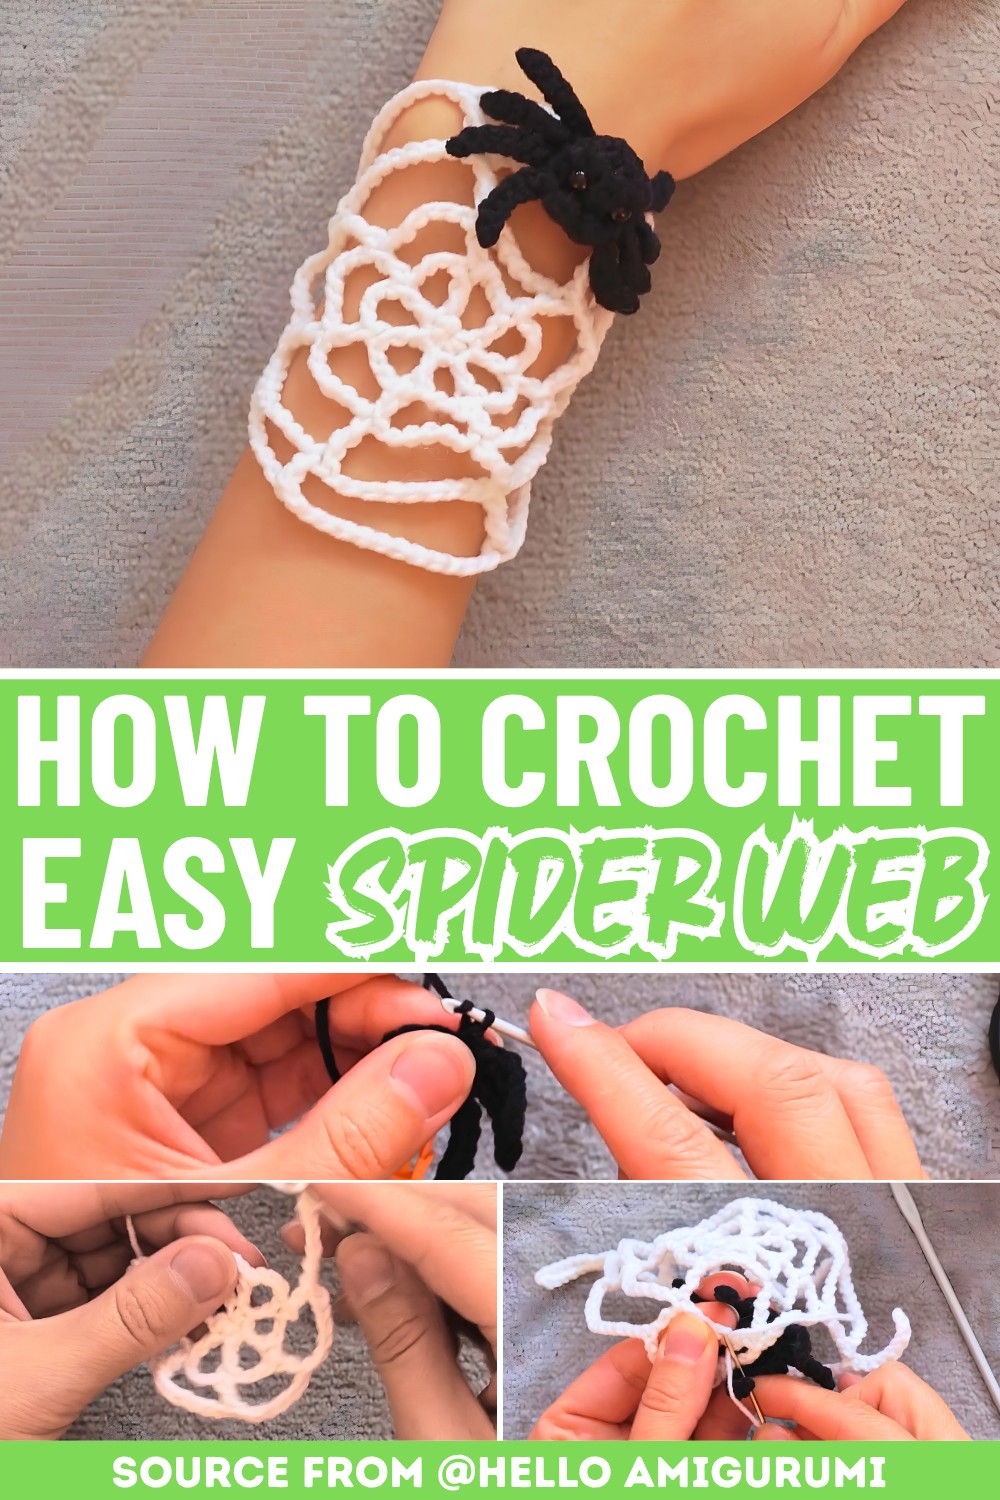
Crochet Spider With Web Jewelry Pattern for Creative Accessory Lovers
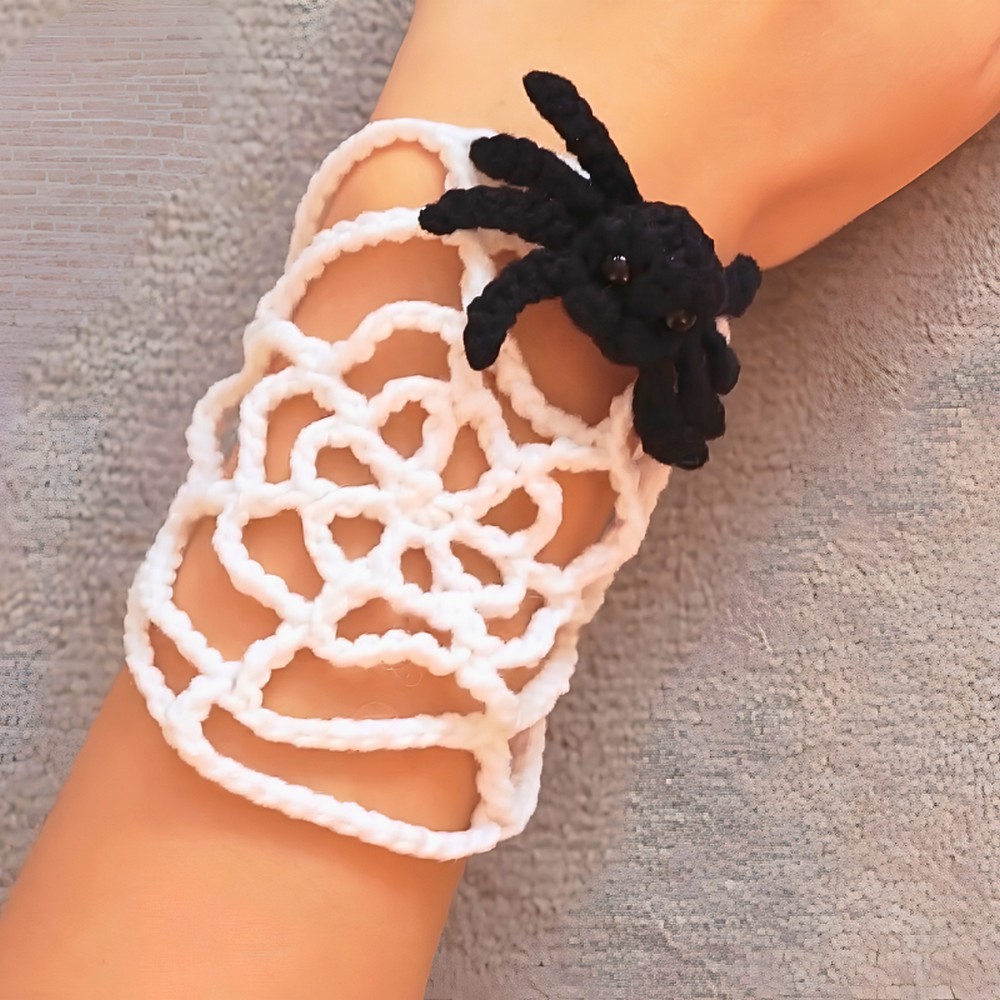
Crochet your own spider web and spider jewelry to make a wonderfully creative and fun accessory for any occasion! This design uses simple yet striking elements like a detailed web and a tiny spider that hangs perfectly from it. The lightweight structure makes it ideal for necklaces, earrings, or even a stylish bracelet. The web design isn’t just pretty—it’s also sturdy, and the jewelry pieces are comfortable to wear. Whether you’re dressing up for a festive event like Halloween or just want something playful to wear, this crochet idea adds a touch of charm to your style.
Crochet web and spider jewelry Pattern
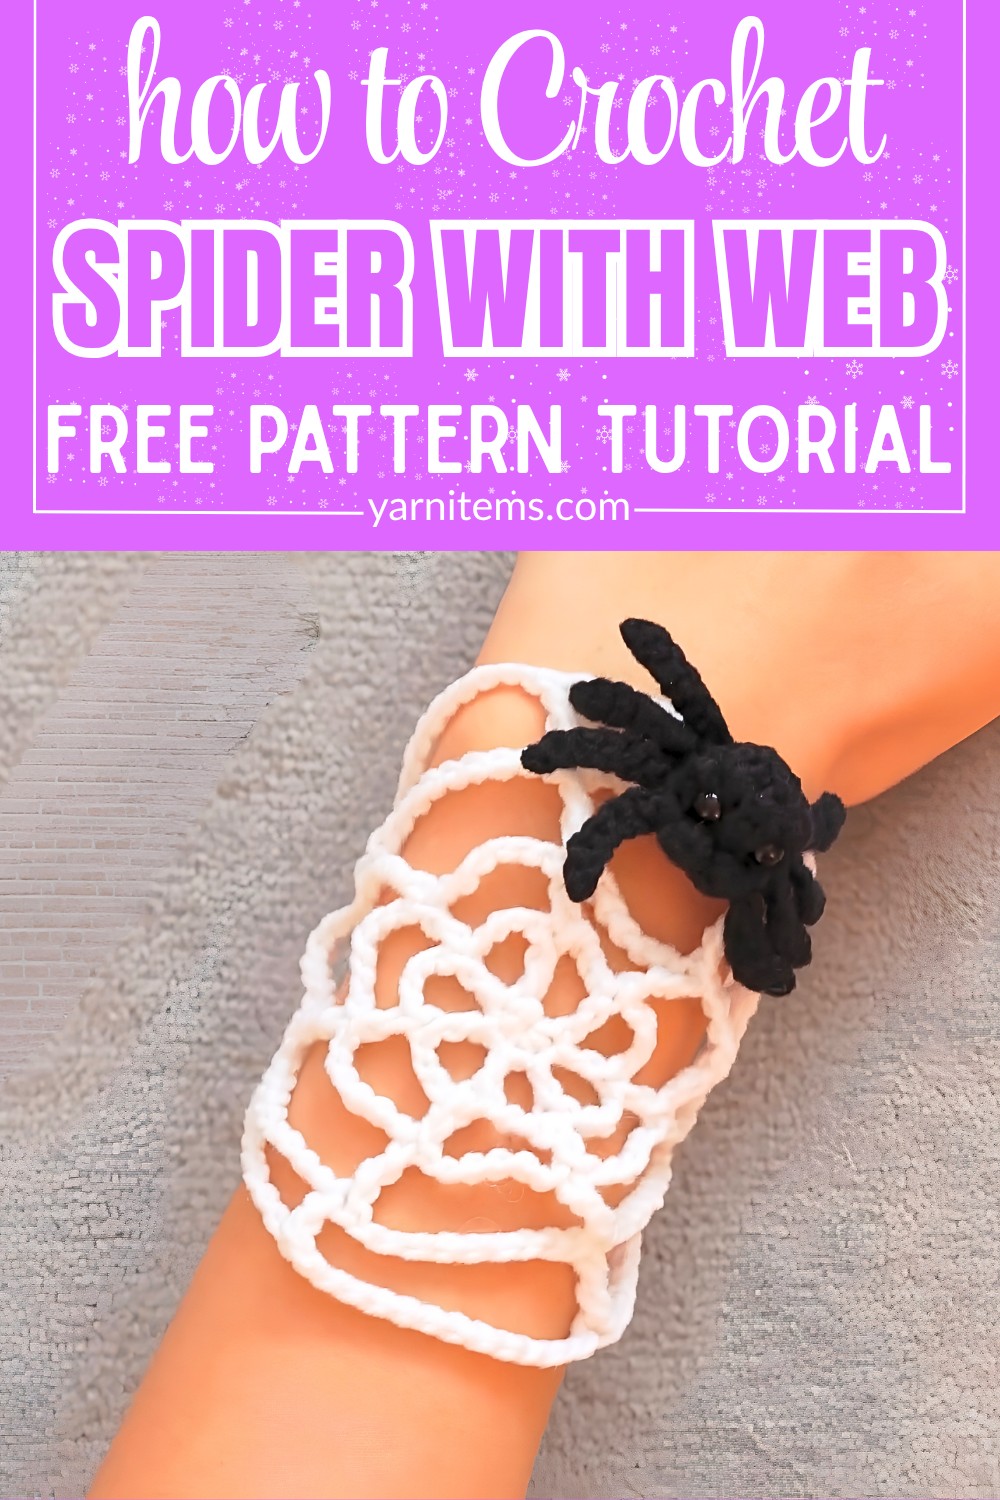
This crochet pattern is perfect for beginners and seasoned crocheters alike, offering easy adjustability and customization. You can make the pieces larger for bold accessories or smaller for a delicate touch. Adding beads, colorful threads, or even a bit of sparkle can make it more personalized. You can also experiment with using metallic thread or black yarn to give it a spookier or more elegant vibe. It’s a pattern that works for anyone, whether you want a standout piece for a party or something small and fun for everyday wear.
To make it special, you’ll use basic stitches like chains and double crochets to form the intricate web, which is then decorated with a cute little spider. If you love adding details, you can use embroidery or even tiny googly eyes for the spider! This pattern inspires creativity and is an exciting way to try new techniques. It’s a simple idea with endless possibilities, making every piece uniquely yours.
Credit Hello Amigurumi
Materials & Tools Needed
-
Yarn: Small amounts of medium-weight yarn in two contrasting colors: white (for the web structure) and black (for the spider body).
-
Crochet Hook: A 2.5 mm hook to keep the stitches neat and tight.
-
Notions & Hardware:
-
A dependable stitch marker to track your rounds.
-
A pair of small black plastic safety eyes with secure washer backings.
-
A small handful of polyester fiberfill stuffing to puff up the spider body.
-
A sturdy yarn needle for seamless sewing and weaving in ends.
-
Sharp scissors.
-
Construction & Key Features Overview
-
Radiating Web Structure: The base of the jewelry is worked in a circular pattern from the inside out, using progressively taller stitches and increasing chain lengths to mimic a real spider web.
-
Built-In Wrist Straps: Rather than fastening a separate band later, the final round seamlessly transitions into extended chain loops that function as adjustable wrist closures.
-
Front-Loop Leg Integration: The spider’s legs are crocheted directly into the front loops of the body rather than sewn on separately, minimizing assembly hassle and ensuring the legs sit perfectly flat.
-
Dimensional Amigurumi Design: The spider transitions from flat work to an enclosed, stuffed three-dimensional shape by working into remaining back loops and following up with rapid decreases.
Step-by-Step Round Pattern
Part 1: The Circular Web & Straps
The web is worked entirely in the round using white yarn to create an open-weave mesh.
-
Round 1: Start with a magic ring, work 6 single crochets (sc) into the center. Pull the tail to close tightly. (6 sts)
-
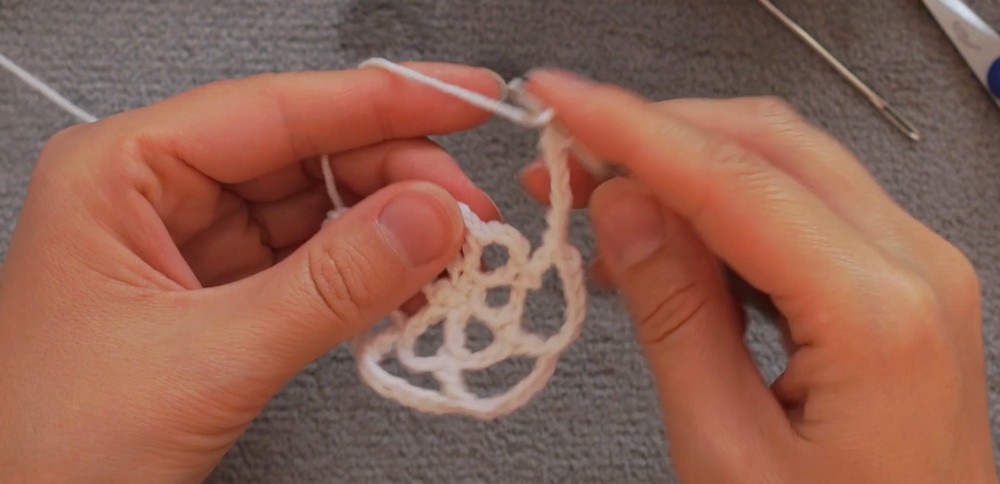
Round 2: Chain (ch) 3 (acts as your first stitch, mark this spot). *(Ch 4, double crochet (dc) into the next stitch)* repeat 6 times around. Ch 4, then slip stitch (slst) into the marked loop to close the round.
-
Round 3: Ch 4, insert your marker. *(Ch 6, dc into the next dc post from the previous round)* repeat 6 times. Ch 6, slst into the marked loop.
-
Round 4: Ch 5, insert your marker. *(Ch 9, triple crochet (tc) into the next dc post)* repeat 6 times. Ch 9, slst into the marked loop.
-
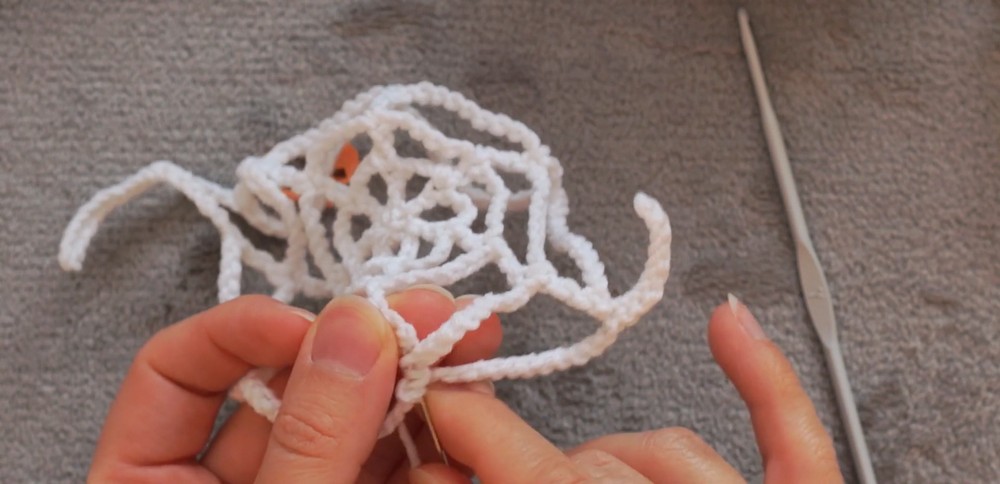
Round 5 (Web Border & Adjustable Straps): Ch 5, insert your marker. Work (ch 12, tc) 2 times. To create the first long wrist strap, ch 16, slst into the 9th chain from your hook (forming a buttonhole or loop), then slst 9 stitches back down the chain to return to the web base. Ch 6, tc into the next stitch. Work (ch 12, tc) 2 times. Create the opposite strap by chaining 10, slst into the 9th chain from your hook, then slst 9 stitches back down the chain. Finish the border with a final ch 12, tc into the next stitch, and slst to the marked loop. Fasten off and weave in the ends safely.
Part 2: The 3D Spider
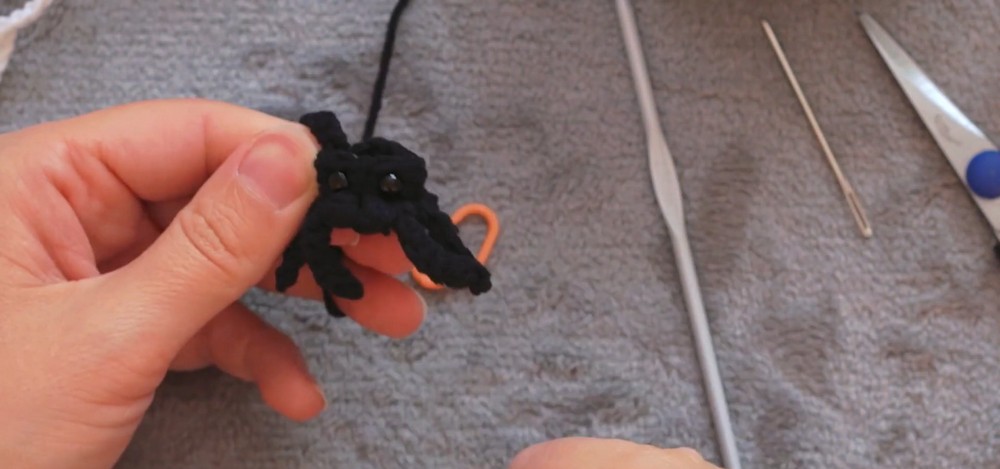
The spider uses black yarn, shifting midway from front-loop surface work to back-loop shaping to allow for stuffing.
-
Round 1: Create a magic ring, work 12 sc into the ring. Pull tight. (12 sts)
-
Round 2: Work 12 sc around, placing a stitch marker in the first stitch. (12 sts)
-
Round 3 (Leg Construction): Note: Work this round entirely in the Front Loops Only (FLO).
-
Work 3 slst.
-
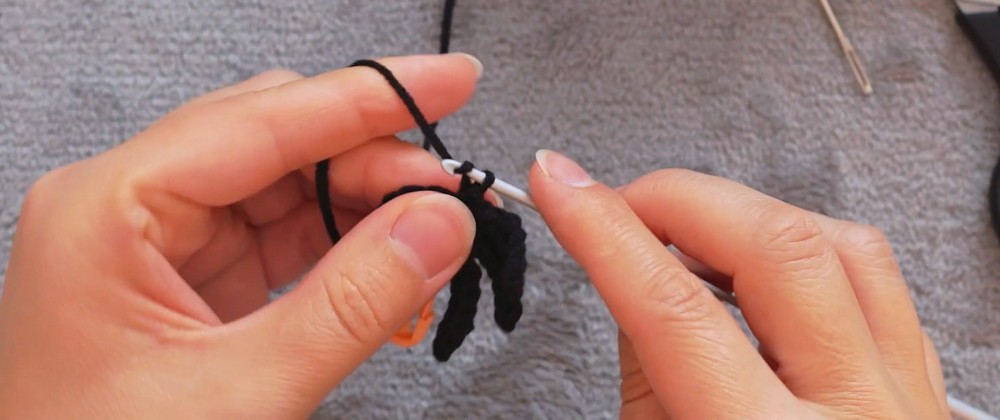
First set of legs: *(Ch 7, slst 6 times back down the chain starting from the second loop from the hook, slst into the next FLO stitch on the body)* repeat 4 times total to form four legs on one side.
-
-
-
Mouth area: *(Slst, half double crochet 2 together (hdc2tog) in the next loop)* repeat 2 times. Slst 1.
-
Second set of legs: *(Ch 7, slst 6 times back down the chain, slst into the next FLO stitch on the body)* repeat 4 times total for the remaining legs. Slst 1. Do not cut yarn.
-
-
Eye Attachment: Take a brief pause to push your plastic safety eyes through the front of the body just above the mouth area. Snap the washer backings tightly into place on the inside.
-
Round 4: Pivot your work to crochet into the unworked back loops left behind from Round 3. Work 12 sc around. (12 sts)
-
Round 5: Work 12 sc around standard loops. (12 sts)
-
Stuffing: Firmly pack a small pinch of fiberfill into the open cavity of the spider body to give it a round, plump shape.
-
Round 6: Work 6 single crochet decreases (dec) around to rapidly close the bottom. (6 sts). Cut your yarn leaving a short tail, then thread it onto your needle to weave through the final 6 stitches, pulling tightly to secure.
Part 3: Finishing & Assembly
-
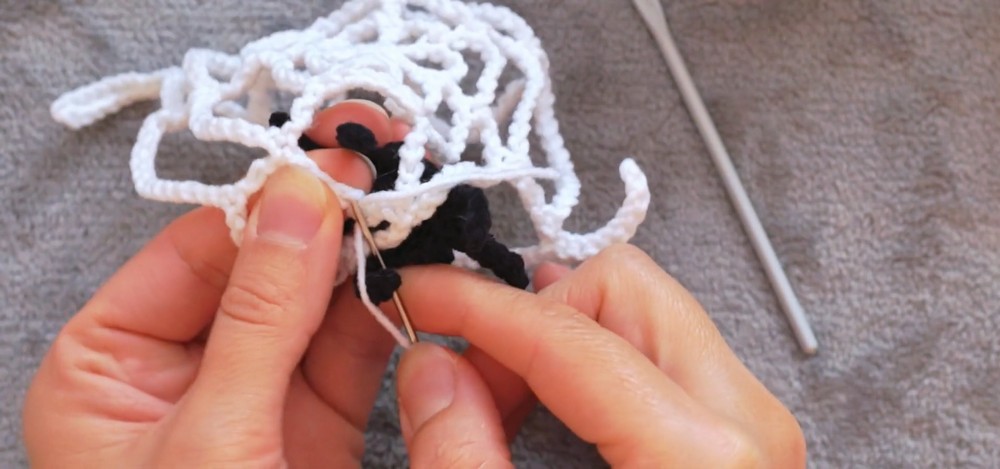
Position the stuffed spider flat onto the center or slightly off-center of your white web piece.
-
Thread your yarn needle with a strand of white yarn.
-
Carefully sew the spider to the underlying mesh chains by stitching through the bottom layer of the spider body.
-
Pull the yarn to the backside of the web, tie a secure hidden knot, clip the excess thread, and your spooky jewelry cuff is complete!
Troubleshooting & Suggestions
-
Fixing Floppy Spider Legs: If your spider’s legs curl up or feel too limp, it usually means your chain stitches were too loose. Try dropping down half a hook size (e.g., to a 2.0 mm hook) just for the spider component, or ensure you are pulling your slip stitches tight when traveling back down the leg chains.
-
Keeping the Web Flat: If your white spider web looks puckered or bowls inward like a cup rather than laying flat, your chain spaces are likely too tight. Block the finished web piece by pinning it flat on a foam board, misting it lightly with water, and letting it dry completely before attaching the spider.
-
Creative Modifications:
-
Glow-in-the-Dark Web: Substitute standard white yarn for a neon glow-in-the-dark yarn for the web base. It makes the bracelet a massive hit for night-time trick-or-treating or dark Halloween parties!
-
Choker Conversion: Easily adapt this piece into a gothic choker necklace instead of a bracelet. Simply prolong the chains on Round 5 of the web until they match your neck circumference.
-
Glittery Embellishments: Use a metallic thread or a yarn with embedded silver tinsel for the web to look like fresh morning dew catches the silk strands. You can also replace the plastic safety eyes with bright red rhinestones or small red beads to give your spider an eerie, glowing gaze.
-