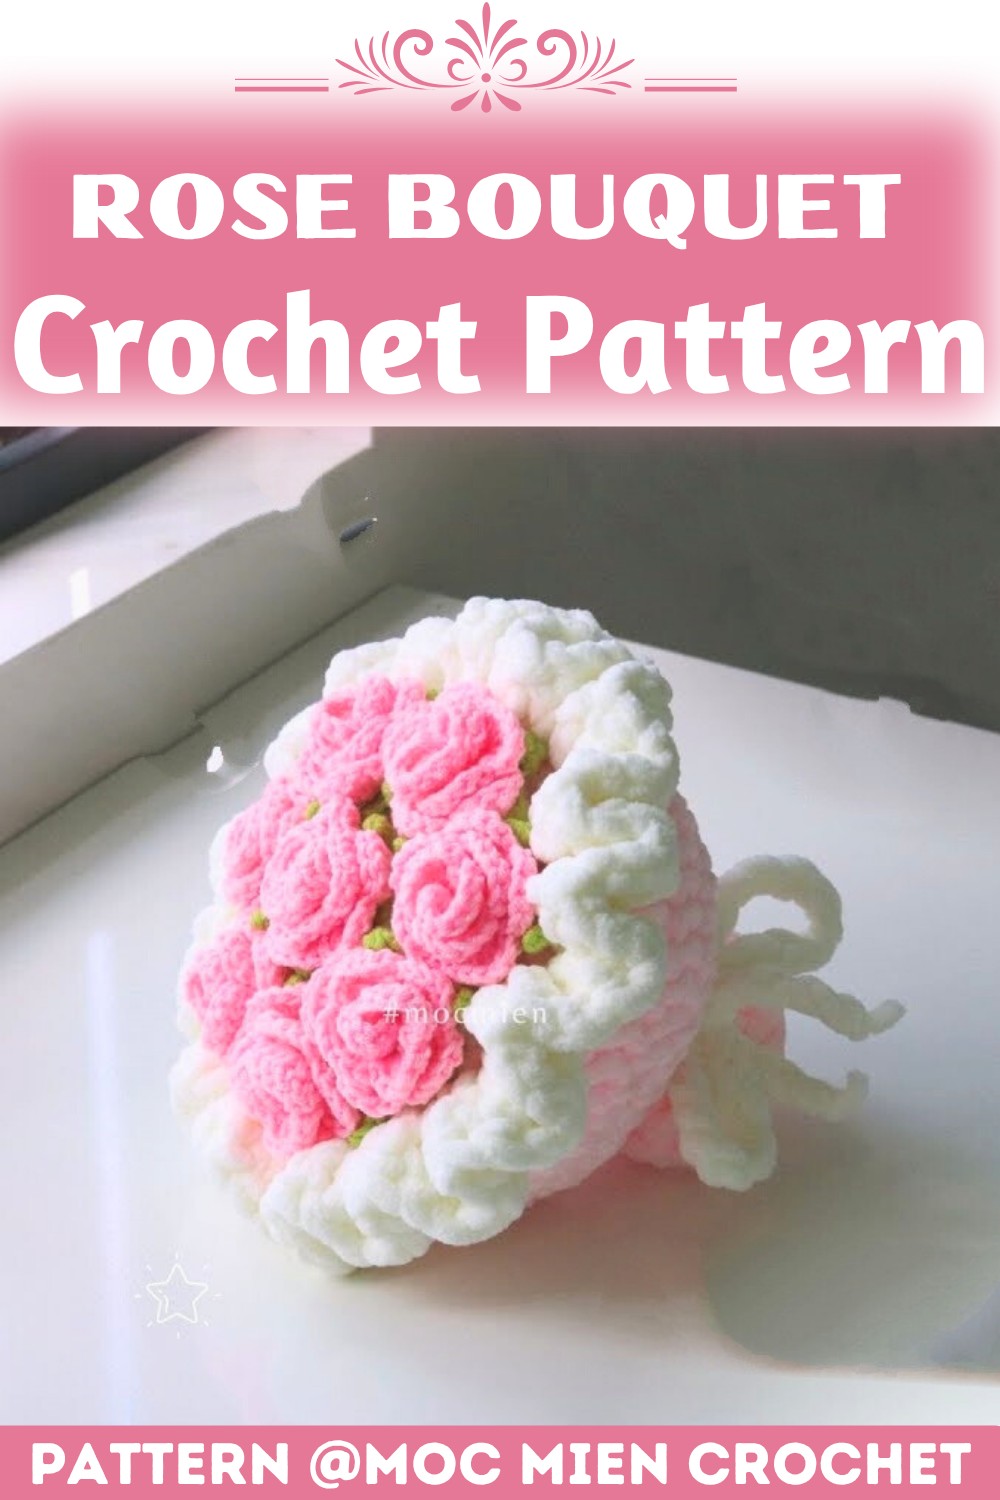
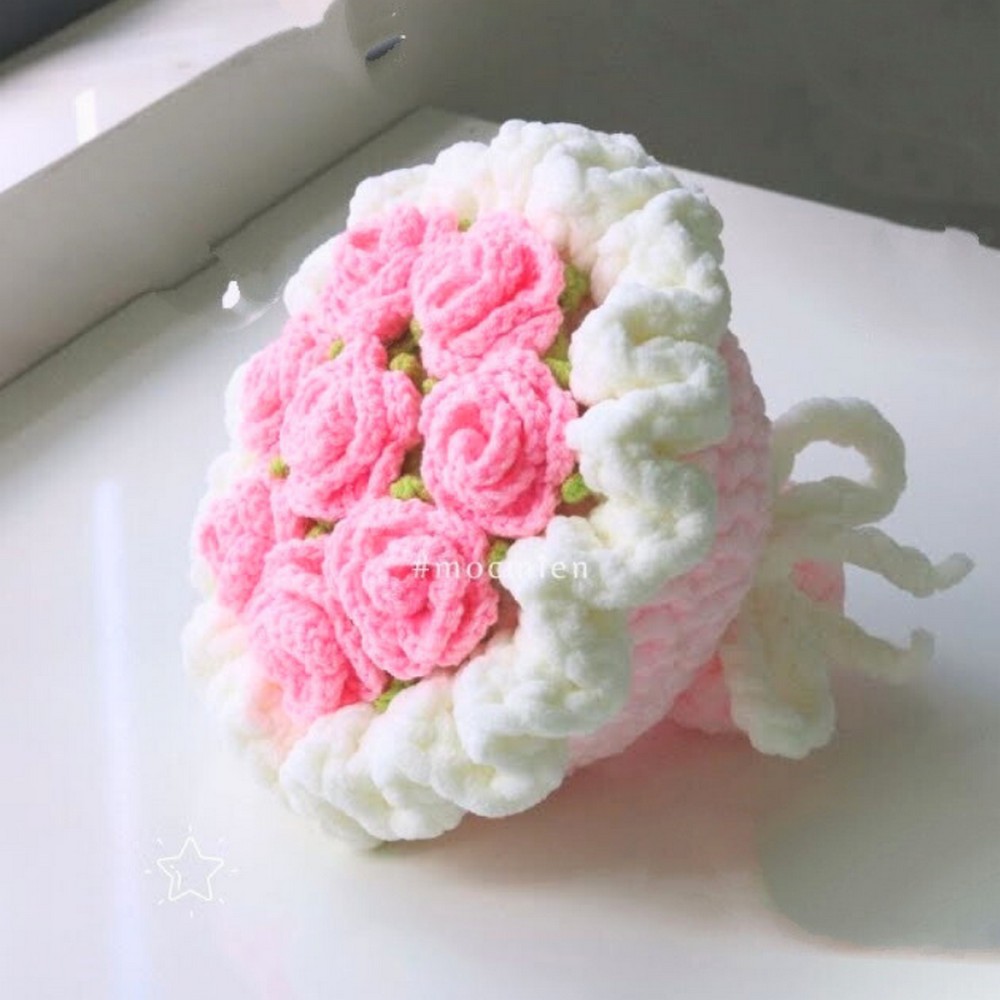
This Crochet Rose Bouquet brings lifelike blooms to life, featuring beautifully layered petals, delicate leaves, and a fully customizable assembly process for a romantic and lasting floral arrangement.

A crochet rose bouquet is a heartwarming creation that looks just like a bunch of real roses, but it’s handmade with care and lasts forever. Each soft and colorful bloom brings a touch of beauty to any space, making this crochet bouquet perfect for home décor, gifts, or even event decorations like weddings and baby showers. Crochet Rose Bouquet is special because it blends creativity and elegance into something you can keep for as long as you want.
Timeless Crochet Rose Bouquet Tutorial
This Crochet Rose Bouquet design doesn’t involve soil, water, or wilting petals, just yarn, gentle hands, and love. The process of making it is simple and enjoyable, even for beginners. Imagine creating roses in your favorite colors or matching them to a theme or season. The final result is a bunch of cheerful, soft flowers that brighten any table or desk.
Credit Moc Mien Crochet
Key Features & Steps
- Foundation Chain Base: The rose begins with a long foundation chain, setting the stage for full, lush petals.
- Layered Petals: Two detailed rows sculpt the petals, alternating between simple and textured stitches to mimic realistic flower layers.
- Rolled Assembly: The petal strip is expertly rolled and stitched to form distinct rose shapes, starting with a tight inner bud and spiraling outward.
- Leaf Details: Individual leaves are worked with tapered sides and attached for added elegance.
- Final Assembly: Roses and leaves are grouped together with floral wire or stems, ready to be arranged into a stunning bouquet.
Description of How It’s Made
This versatile pattern begins with the foundation chain, where you’ll create 50–60 stitches to form the structural base of your rose. The number of chains determines the rose’s fullness—longer chains lead to larger blooms, while shorter chains yield dainty flowers. The first row establishes the spacing for the petals, using single crochets and simple chain spaces to create a scaffold for what will become beautifully shaped layers.

The magic happens in the second row, where each chain space is filled with a sculpted combination of stitches. Working single crochet, half-double crochet, and double crochet in sequence forms the characteristic curve and texture of rose petals. By the end of this step, you’ll have a gorgeous, wavy strip ready to be transformed into your bloom.

To shape the rose, the petal strip is rolled from one end with care. Begin by rolling loosely for the inner bud, then gradually firm up the roll to create a balanced spiral. Using a yarn needle, secure each layer of the rolled rose with stitches at the base. This ensures that your flower holds its shape beautifully and makes it sturdy for assembly.
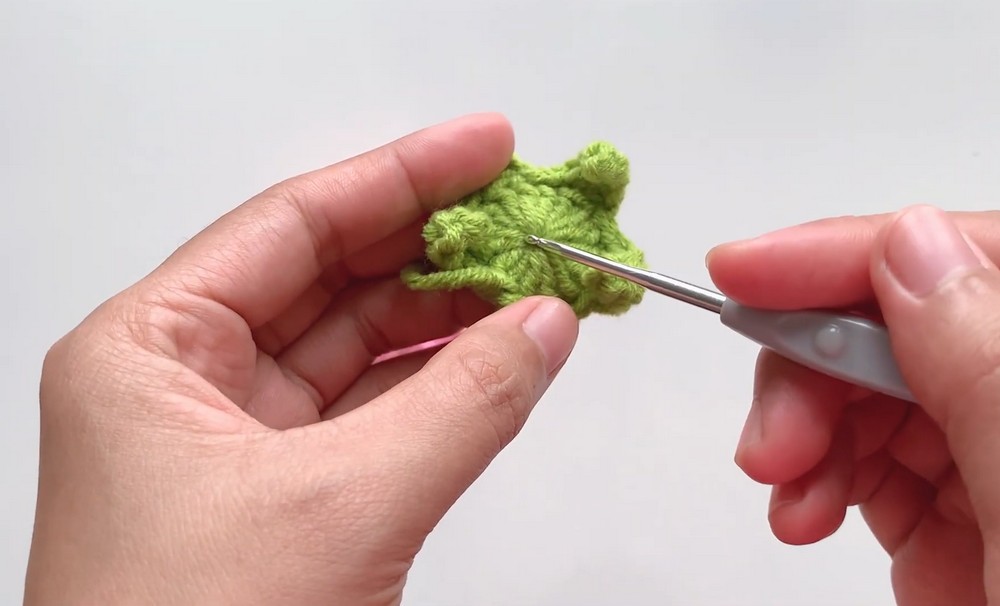
The leaves add an extra touch of realism. Each leaf begins with a simple chain that is worked on both sides to form a crescent shape with soft, tapered points. The combination of single, half-double, and double crochet stitches creates the perfect texture and dimension for lifelike foliage. The completed leaves are stitched to the rose bases or stems for a fully cohesive look.
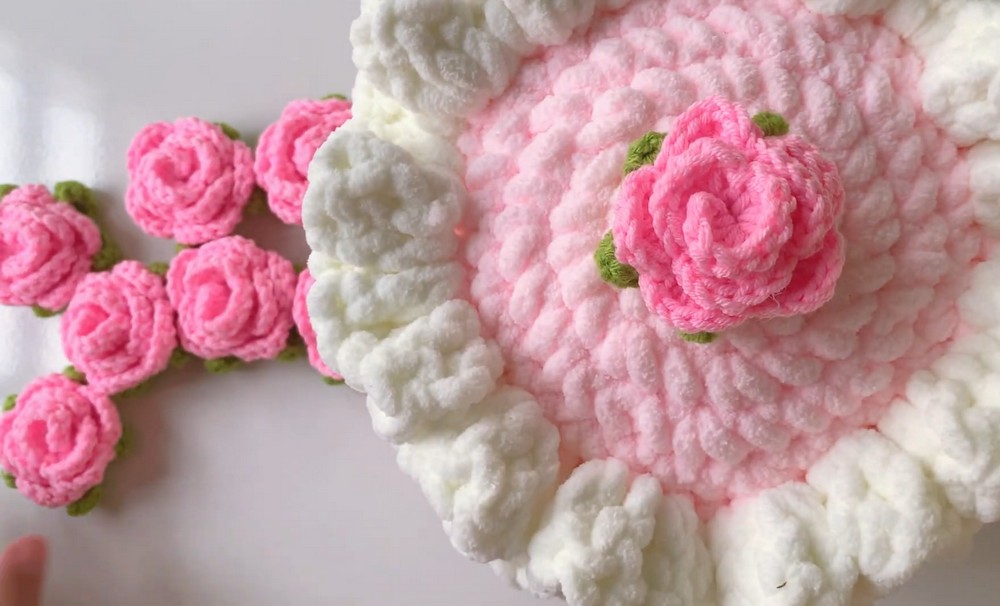
Once all components are ready, the bouquet comes together. Roses and leaves are attached to floral wire or bundled as-is for a handmade bouquet that can be wrapped with ribbon, floral tape, or lace. Personalize your arrangement with multiple colors, sizes, and placements to make it as unique as you like.
Video Tutorial
Materials
To create your Crochet Rose Bouquet, you’ll need the following materials:
- Yarn:
- Choose medium-weight yarn (#4) for sturdy roses, and lighter yarn (#2 or #3) for delicate blooms. Cotton or acrylic yarns work great.
- Colors: Red, pink, or any desired rose shades, plus green for leaves.
- Hook Size:
- Recommended hook size: 3.5 mm or 4 mm (adjust based on yarn weight).
- Additional Tools:
- Yarn needle (for weaving in ends and assembly).
- Scissors.
- Floral wire/stems (optional, for creating bouquet stems).
- Tape or floral wrap (optional).
Step-by-Step Pattern
Step 1: Begin the Rose (Foundation Chain)
- Create the Base:
- Start by chaining 50 to 60 stitches (adjust length depending on how full you want the rose to be).
- This foundation row will determine the overall width of your rose.
Step 2: Crochet the Petals
- In the second chain from the hook, work 1 SC, then chain 1.
- Work the petal rows as follows:
- Row 1: Across the foundation chain, alternate between 1 SC and chain 2 in each stitch.
- Row 2: Turn your work and begin the petal pattern. In each chain space (from Row 1), work 1 SC, 1 HDC, 3 DC, 1 HDC, 1 SC. This creates the layered petal effect.
Step 3: Roll the Rose
- Once the petal row is complete, gently roll the work starting from one end. Here’s how:
- Start rolling loosely to create the inner bud.
- Securely stitch each layer as you roll using the yarn needle, weaving the thread through the base to hold the shape.
Step 4: Crochet the Leaves
- For each leaf:
- Chain 12 stitches.
- In the second chain from the hook, work 1 SC.
- Continue with:
- 1 HDC, 2 DC, 1 HDC (in the next few chains).
- Repeat for both sides of the leaf by working into the opposite side of the foundation chain.
Step 5: Assemble Your Bouquet
- Attach leaves to the base of each rose using a yarn needle and secure tightly.
- If desired, wrap the base of the rose stems with floral wire to create a bouquet.
Finishing Touches
- Fluff out the petals to enhance the natural rose look.
- Arrange your roses and leaves on floral stems or bundle them together into a bouquet. Wrap stems with floral tape if desired.
- Experiment with different yarn colors to add variety!
Troubleshooting and Suggestions
Common Issues:
- Petals Not Layering Properly: Ensure you’re consistent with your stitches, especially in the petal row. It helps to keep an even tension and count your stitch groups carefully.
- Base Doesn’t Hold: If the rose unravels, use more secure stitching while rolling it. Be sure to sew through multiple layers for stability.
- Stiff or Drooping Leaves: If your leaves don’t keep their shape, consider using a slightly thicker yarn or starching finished leaves for added stiffness.
Creative Modifications:
- Mix-and-match colors for gradient-style roses, or use variegated yarn for an organic look.
- Make miniature roses by starting with fewer foundation chain stitches.
- Add embellishments like beading along the petal edges for a shimmering effect.
- Use these roses as embellishments for other patterns—headbands, bags, or even wall art.