Simple Crochet Daisy Granny Square Tote Bag Pattern
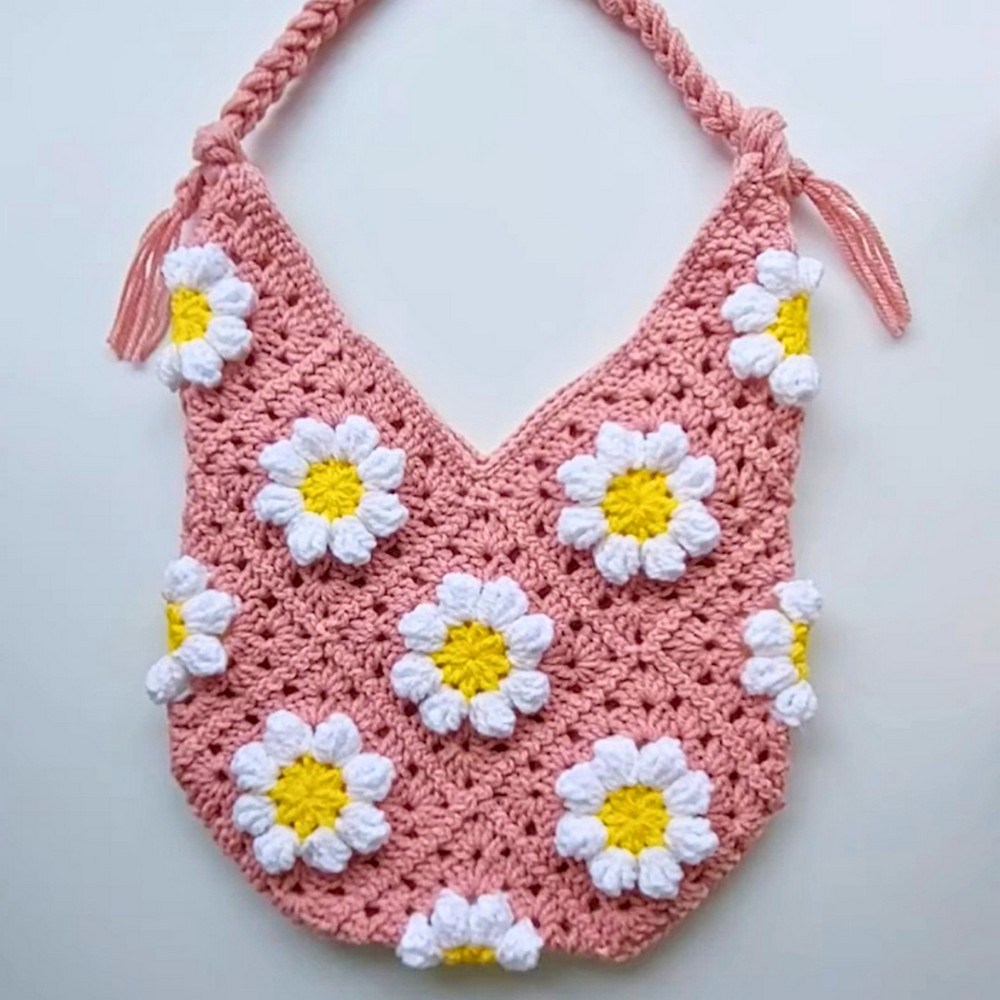
Brighten up your everyday style with a crochet daisy granny square tote bag that brings cheerful floral charm to a practical accessory.
Each daisy-inspired square adds a soft, handmade touch while creating a beautiful pattern that feels both classic and fresh. The roomy shape makes this crochet piece useful for carrying books, groceries, or everyday essentials with ease.
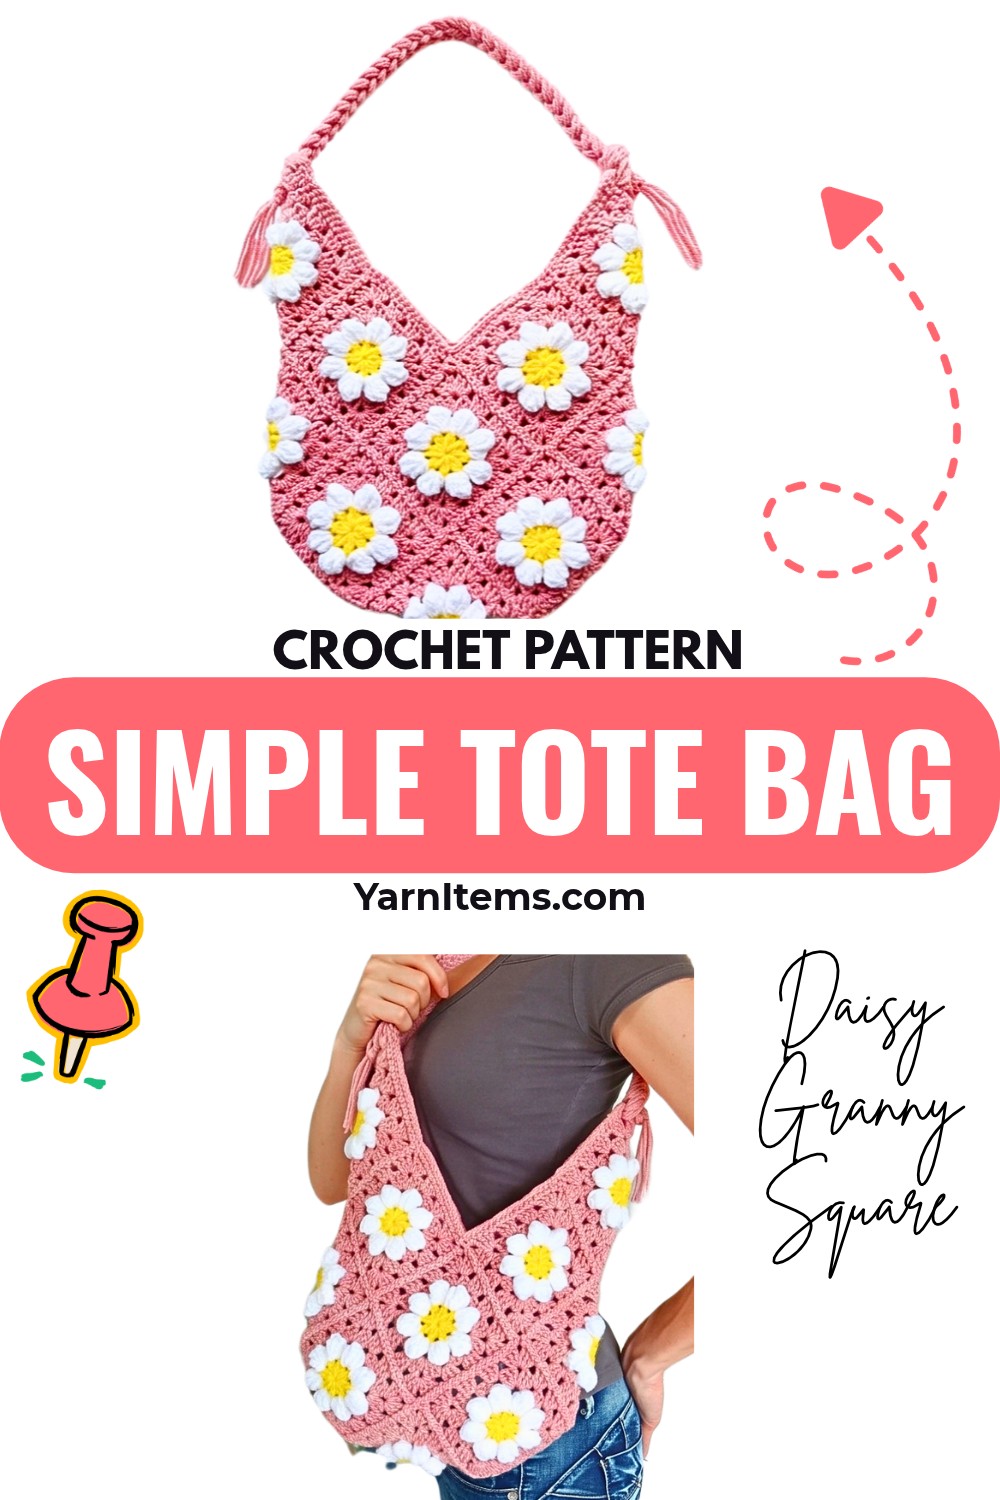
A charming handmade tote can make simple outings feel a little more special, and this daisy crochet design does exactly that. Its lightweight yet sturdy construction makes it suitable for trips to the market, library, casual picnics, or everyday outings.
The simple granny-square style also makes this item enjoyable for beginners while giving experienced makers plenty of room to personalize the colors and details.
Credit Crochet & Yara
Skill Level
Intermediate (or ambitious Easy-Intermediate familiar with popcorn stitches and garment/bag assembly).
Materials & Tools Needed
- Yarn (DK / Medium Worsted Weight):
- Yellow: Small amount (for flower centers).
- White: ~0.5 skein (~50g) for popcorn petals.
- Dusty Pink (Main Color): ~1.5 skeins (~150g, ~360m total) for square borders, joining, opening trim, and strap.
- Crochet Hooks:
- 3.5 mm hook (for granny squares, joining, and bag body).
- 10.0 mm hook (for crafting the thick multi-strand bag strap).
- Notions: Scissors, tapestry needle, measuring tape.
Finished Size
- Square Size: Approx. 10 cm × 10 cm (4″ × 4″) per granny square.
- Bag Body Dimensions: Approx. 30 cm wide × 30 cm long (12″ × 12″) excluding strap.
- Strap Length: Approx. 59 cm (23″) long.
Customization Ideas
- Colors: Swap dusty pink for sage green, lavender, or denim blue for seasonal variations.
- Strap Length: Adjust the 8-strand chain to transform the shoulder bag into a crossbody tote.
- Lining: Add a sewn fabric lining and magnetic snap closure for extra durability and security.
Pattern Notes
- Terminology: US Crochet Terms are used throughout this pattern.
- Construction: The bag is made from 15 identical daisy granny squares.
- Turning Chains:
- Ch 3 at the start of a round counts as 1 Double Crochet (Dc).
- Ch 4 at the start of Round 2 counts as 1 Treble Crochet (Trc).
- Color Changes: Cut yarn and fasten off at the end of Rounds 1, 2, and 4, then join the new color in any chain space as instructed.
Pattern Abbreviations
- MR: Magic Ring
- Ch: Chain
- Sl St: Slip Stitch
- Dc: Double Crochet
- Hdc: Half Double Crochet
- Trc: Treble Crochet
- Sp: Space
- 2 Dc together: 2 Double Crochet cluster/decrease
- Popcorn Stitch (5 Trc Popcorn): Work 5 Trc in the same chain space; cinch the petal closed.
Tips Before You Start
- Maintain Even Tension: Keep popcorn stitches snug for defined 3D petals.
- Weave Ends As You Go: Weaving tails early saves time in final assembly.
- Check Dimensions: Ensure all squares are identical to align seams perfectly.
Step-by-Step Detailed Crochet Instructions
Daisy Granny Square (Make 15)
Each square has:
- Round 1: yellow center
- Round 2: white popcorn petals
- Rounds 3–4: dusty pink square framing
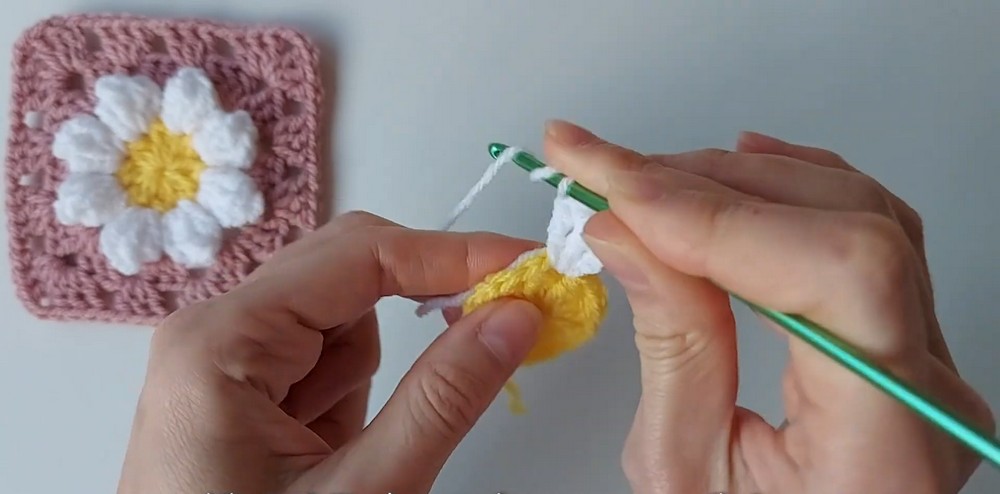
Round 1 – Flower Center (Yellow, 3.5 mm hook)
- Magic ring
- Make a magic ring.
- Ch 3 (counts as first dc).
- Work 1 dc into the ring, then Ch 1.
- Cluster groups
- Repeat the following 7 times into the ring:
- (2 dc together, Ch 1)
- To do “2 dc together”: start a dc but stop before the final yarn-over-and-pull-through (leave 2 loops on hook), start a second dc in the same ring and stop with 3 loops on hook, yarn over and pull through all 3 loops.
- You now have 8 groups total: the first (dc + Ch-3) and the 7 (2 dc together) groups, each separated by a Ch-1.
- Repeat the following 7 times into the ring:
- Finish round
- Pull the center tail firmly to close the magic ring.
- Join with a sl st to the top of the initial Ch-3.
- Fasten off yellow, cut yarn, and weave in the tail.
Stitch Count (Round 1):
8 cluster groups of (2 dc together) separated by 8 Ch-1 spaces.
Round 2 – Popcorn Petals (White, 3.5 mm hook)
- Attach white
- Attach white yarn with a slip knot into any Ch-1 space from Round 1.
- First petal (special start)
- Ch 4 (counts as first trc).
- Work 4 trc into the same Ch-1 space (you now have Ch-4 + 4 trc = 5 tall stitches).
- Drop the loop from your hook.
- Insert the hook from front to back through the 4th chain of the initial Ch-4.
- Grab the dropped loop and pull it through to form the popcorn.
- Ch 3 (this forms the space between petals).
- Petals 2–8
- In each of the remaining 7 Ch-1 spaces around:
- Work a 5-trc popcorn:
- Make 5 trc in the space, drop loop, insert hook into the top of the first trc (or the Ch-4 if you prefer consistency), grab the dropped loop, and pull it through.
- Ch 3 after each popcorn.
- Work a 5-trc popcorn:
- In each of the remaining 7 Ch-1 spaces around:
- Finish round
- Join with a sl st into the top loop at the back of the first popcorn petal (the “back bump” behind the top of the first popcorn).
- Fasten off white, cut yarn, and weave in ends.
Stitch Count (Round 2):
8 popcorn petals separated by 8 Ch-3 spaces.

Round 3 – Square Framing (Dusty Pink, 3.5 mm hook)
- Attach dusty pink
- Attach dusty pink yarn with a slip knot into any Ch-3 space between petals.
- First corner
- Ch 3 (counts as dc).
- Work 2 dc in the same Ch-3 space.
- Ch 2.
- Work 3 more dc in the same space.
- Ch 1.
- This creates: (3 dc, Ch 2, 3 dc, Ch 1) in one space = corner.
- First side
- In the next Ch-3 space:
- Work 3 hdc.
- Ch 1.
- In the next Ch-3 space:
- Second corner
- In the next Ch-3 space:
- Work (3 dc, Ch 2, 3 dc).
- Ch 1.
- In the next Ch-3 space:
- Second side
- In next Ch-3 space:
- Work 3 hdc.
- Ch 1.
- In next Ch-3 space:
- Third corner & side
- In next Ch-3 space: (3 dc, Ch 2, 3 dc, Ch 1).
- In next Ch-3 space: 3 hdc, Ch 1.
- Fourth corner & side
- In next Ch-3 space: (3 dc, Ch 2, 3 dc, Ch 1).
- In next Ch-3 space: 3 hdc, Ch 1.
- Finish round
- Join with a sl st to the top of the initial Ch-3.
Stitch Count (Round 3):
4 corner groups: (3 dc, Ch 2, 3 dc)
4 side groups: (3 hdc)
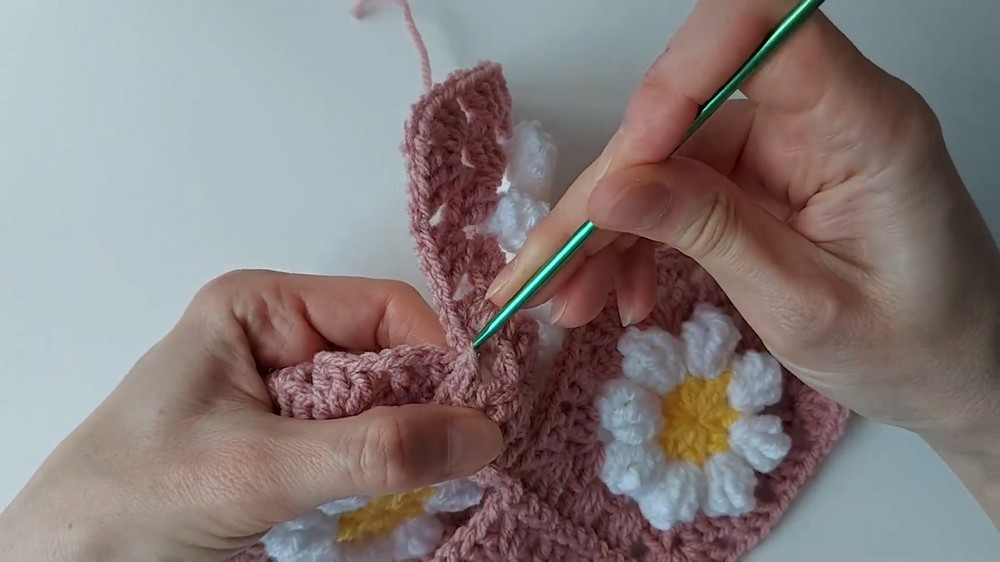
Round 4 – Expanding the Square (Dusty Pink, 3.5 mm hook)
You continue in the same dusty pink; if you ended Round 3 with dusty pink, do not cut yarn.
- Move to corner
- Sl st into each of the next 2 dc stitches to reach the corner Ch-2 space.
- Sl st into the Ch-2 corner space.
- Corner
- Ch 3 (counts as dc).
- Work 2 dc into the corner space.
- Ch 2.
- Work 3 dc into the same corner space.
- Ch 1.
- Side
- In the next Ch-1 space:
- Work 3 dc, Ch 1.
- In the following Ch-1 space:
- Work 3 dc, Ch 1.
- In the next Ch-1 space:
- Repeat around
- For each of the remaining 3 sides:
- In corner Ch-2 space: (3 dc, Ch 2, 3 dc, Ch 1).
- In next Ch-1 space: (3 dc, Ch 1).
- In next Ch-1 space: (3 dc, Ch 1).
- For each of the remaining 3 sides:
- Finish round
- Join with a sl st to the top of the starting Ch-3.
- Fasten off dusty pink, cut yarn, and weave in ends.
Make 15 Squares
Repeat Rounds 1–4 to make 15 identical Daisy Granny Squares, all with the same color placement and size.
Final Assembly – 15-Square Tote Bag
Layout
Use this envelope-style layout (front, back, sides, and base formed by folding). Number your squares 1–15 and lay them out flat on a table following the diagram you provided.
You should end up with:
- A central cross-style layout
- Squares that fold up to form:
- Front and back panels
- Side gussets
- Bottom panel
- Top edges that meet at the bag opening
If needed, lightly pin or clip squares together before seaming to keep them in position.
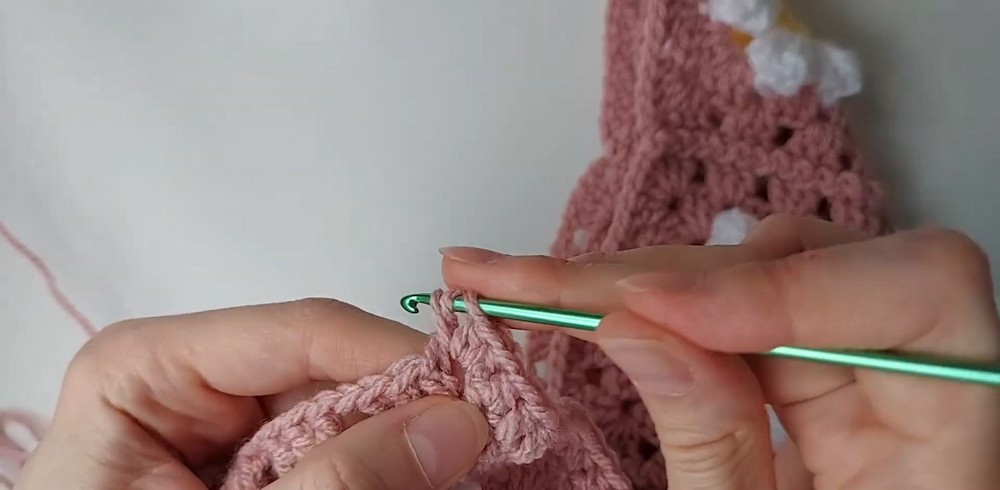
1. Seam Joining – Zig-Zag Slip Stitch Method (with Pink)
- Prepare
- Lay out all 15 squares flat on a table according to your tote bag layout.
- Decide which seams you will work first (typically join rows, then columns).
- Attach yarn
- Attach pink yarn at the corner of a pair of squares to be joined with a slip knot on your hook.
- Zig-zag slip stitch seam
- Place two squares with right sides facing each other or side-by-side (depending on your preferred look).
- Insert the hook under the outer loop of a stitch on the bottom square.
- Insert the hook under the matching outer loop of the stitch on the top square.
- Yarn over and pull through all loops on the hook (sl st).
- Repeat across the seam:
- Alternate in a zig-zag motion along the seam, always catching the corresponding outer loops from each square.
- This creates a decorative, sturdy ridge seam.
- Join all seams
- Continue seaming all adjoining edges following the layout until the entire flat layout is joined.
- Form the bag shape
- Fold the joined layout into a 3D bag shape:
- Fold around the central squares to form front, back, sides, and base.
- Seam the outer side edges together using the same zig-zag slip stitch method.
- Fold the joined layout into a 3D bag shape:
2. Bag Opening Border (Dusty Pink, 3.5 mm hook)
Round 1 – Hdc Round
- Attach pink yarn with a slip knot to any stitch along the top opening edge of the bag.
- Ch 2 (does not need to count as a stitch).
- Work 1 hdc into each stitch and chain space around the entire opening:
- Work into actual stitches across square tops.
- Work into chain spaces where corners meet.
- At peak/corner points along the opening rim:
- Work 4 hdc into that point space to smooth the turn and avoid puckering.
- When you reach your starting point, join with a sl st to the first hdc.
Round 2 – Slip Stitch Edging
- Without cutting yarn:
- Work 1 sl st into each hdc all the way around the rim.
- Join with a sl st to the first sl st.
- Fasten off, cut yarn, and weave in all remaining ends.
This gives a neat, reinforced top edge.
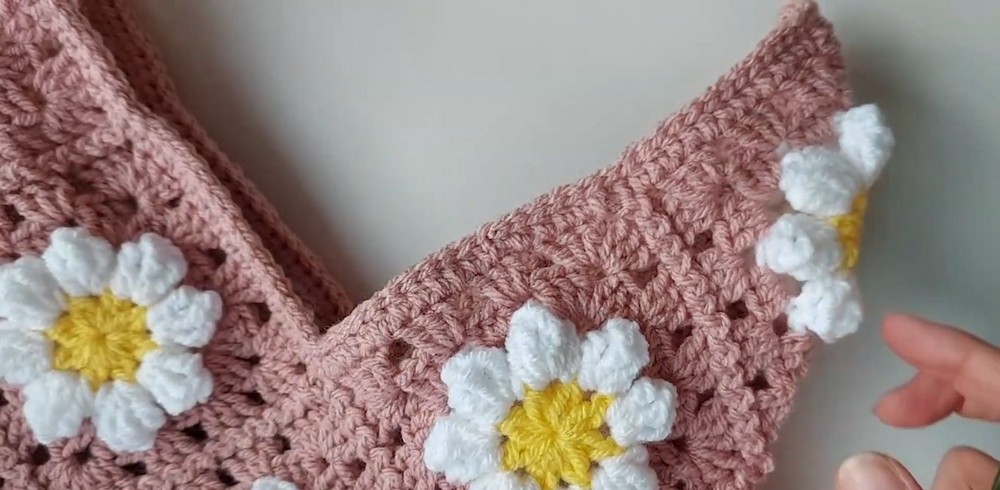
3. Braided / Chunky Chain Bag Strap (Dusty Pink, 10.0 mm hook)
- Measure and cut 8 strands of dusty pink yarn, each about 3.5 meters long.
- Hold all 8 strands together as one thick bundle.
- With the 10.0 mm hook:
- Make a slip knot using all 8 strands together.
- Crochet a thick chain:
- Chain using all 8 strands simultaneously until the strap measures approximately 59 cm (23 inches).
- Cut yarn, leaving about 15 cm tails at both ends.
- Pull tails through the final loop to secure and lock the chain.
4. Attaching the Strap
- On one side of the bag opening:
- Feed the multi-strand tail from one end of the strap through the Ch-2 corner space (peak) of the bag opening.
- Tie a tight, decorative knot around that bag corner peak.
- Trim the excess yarn tails evenly to form a tassel.
- Repeat on the opposite peak with the other end of the strap:
- Feed tails through the opposite Ch-2 corner space.
- Tie a decorative knot.
- Trim tails into a tassel.
Finishing
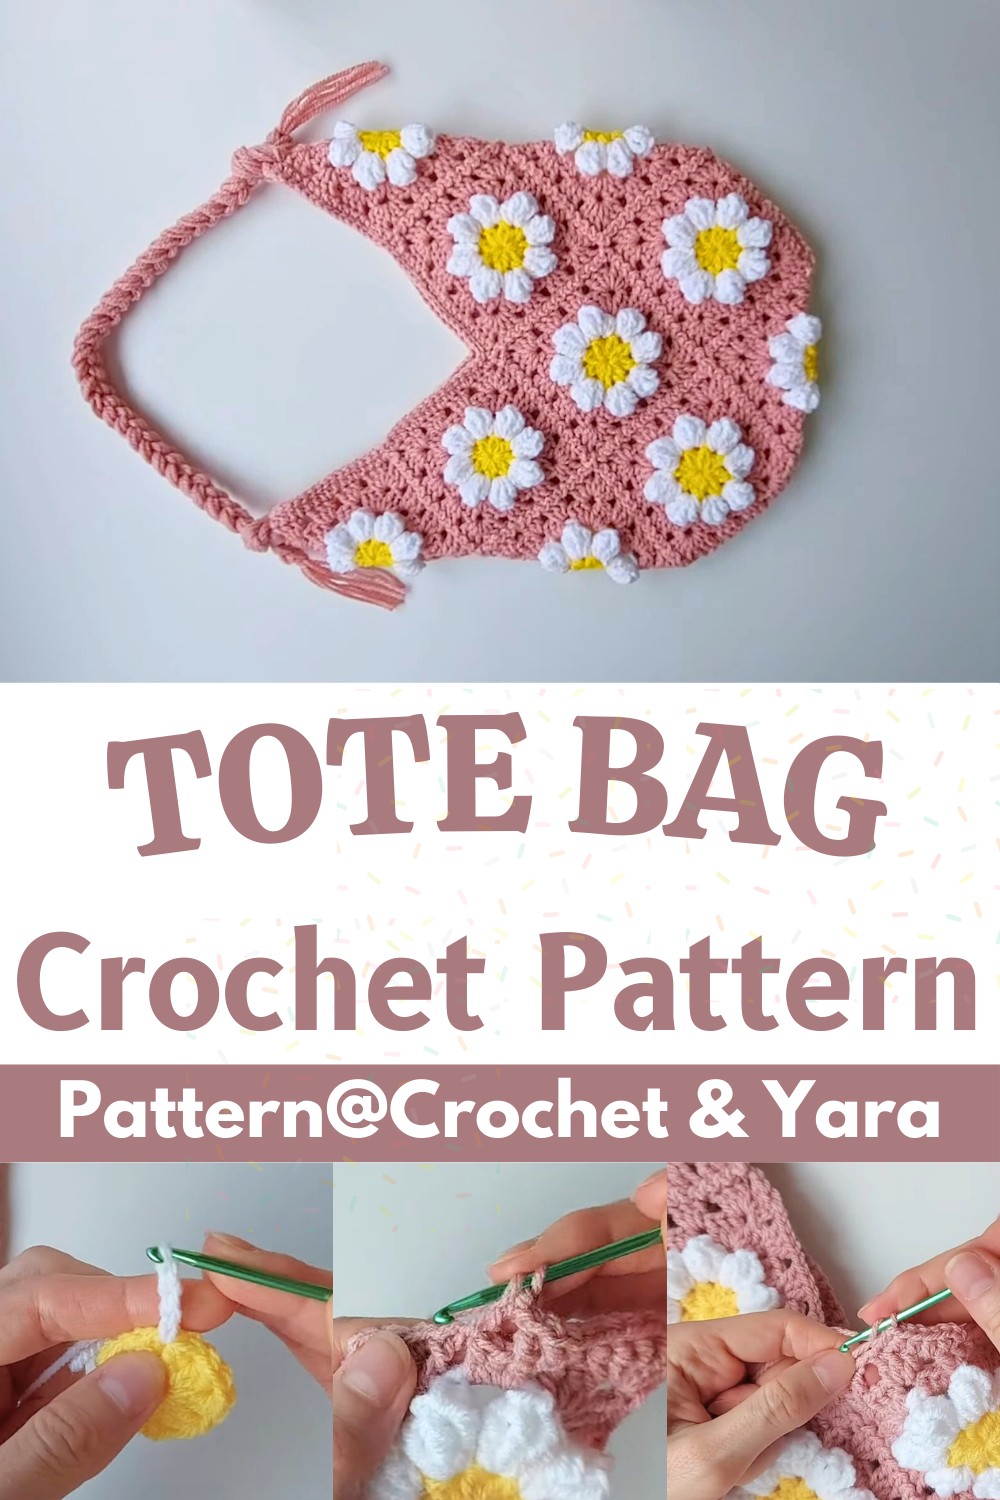
You now have a Crochet Daisy Granny Square Tote Bag featuring:
- 3D popcorn flower centers
- Sturdy zig-zag slip stitch seaming
- A chunky, multi-strand chained strap with tassel ends