Mini Crochet Chicken Amigurumi Tutorial for Beginners
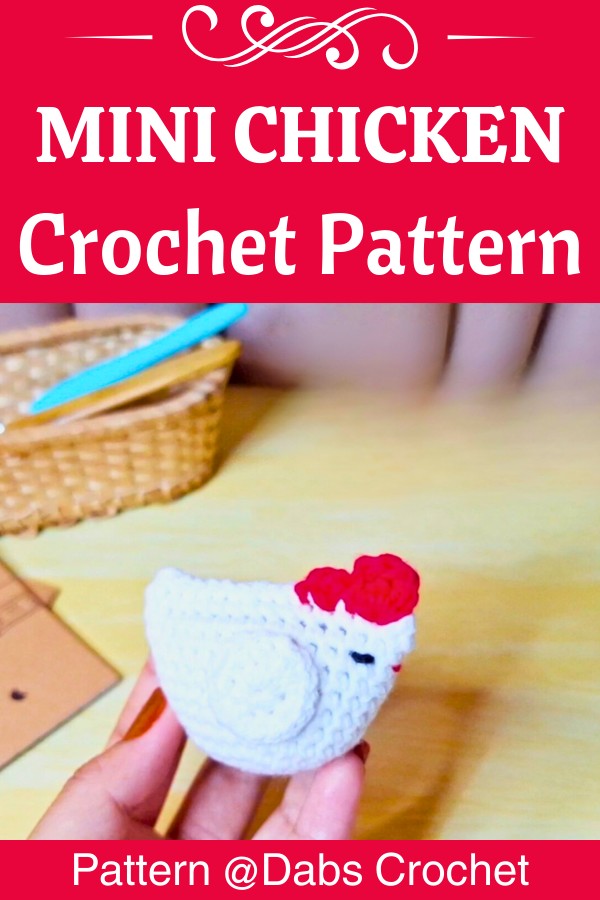
Here’s a pocket-sized crochet chicken tutorial with simple shaping, a bright comb, separate wings, and easy embroidery for a sweet handmade finish.
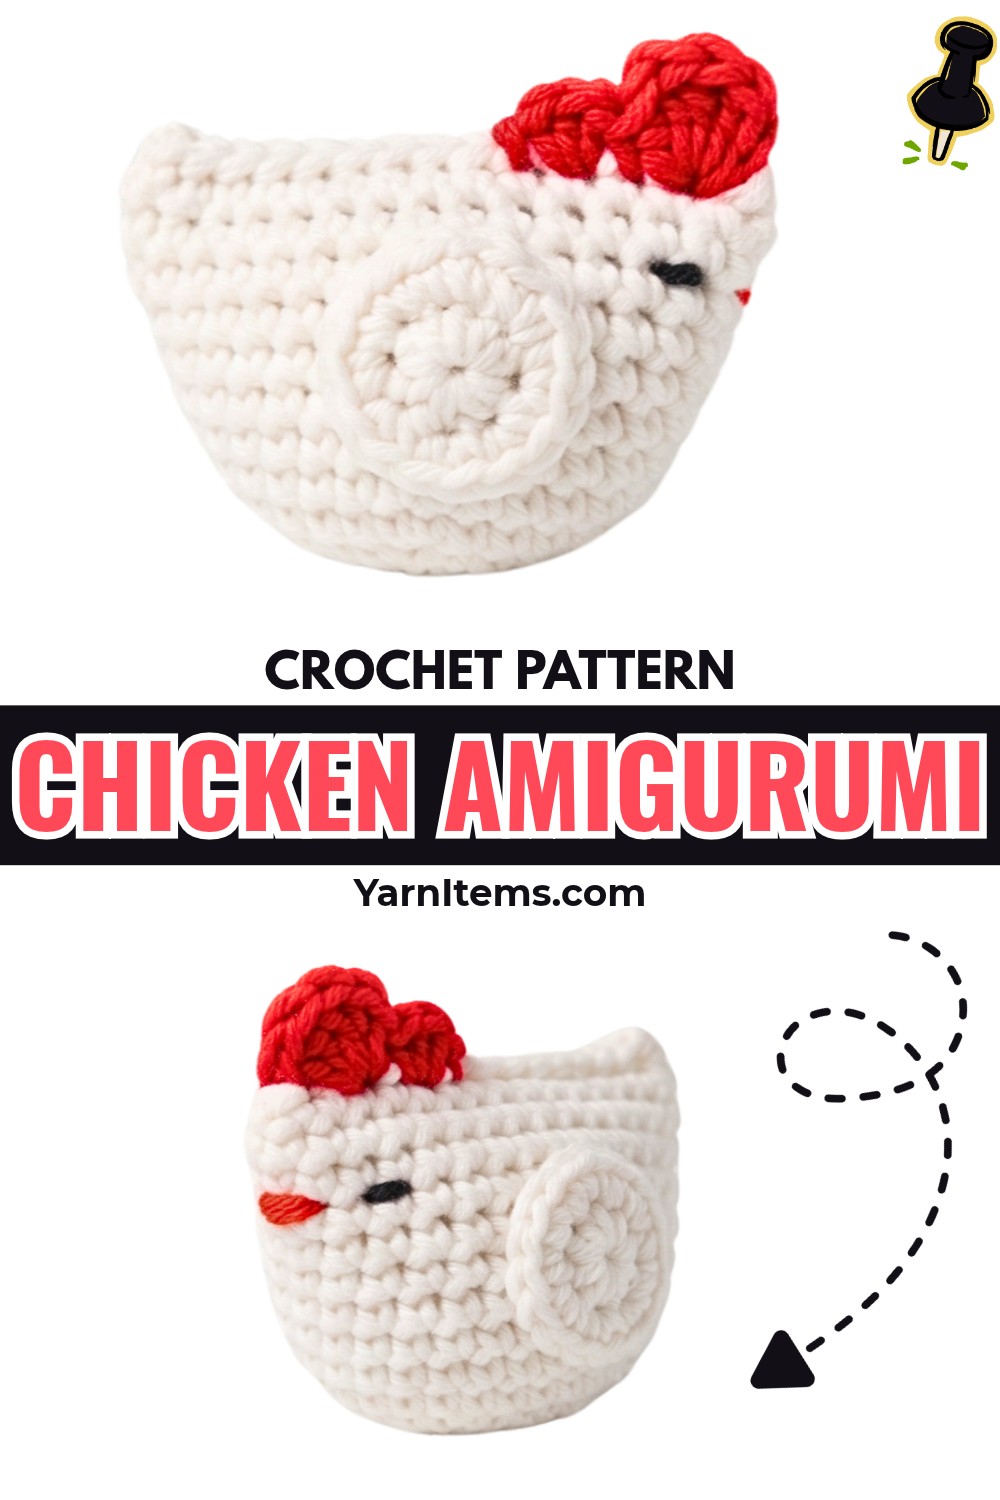
Pocket-sized amigurumi can be especially rewarding when simple shapes come together to create a recognizable little character. This crochet chicken uses basic stitches and compact construction, making it approachable for beginners while leaving room for playful color changes.
This crochet tutorial takes you through the rounded body, red comb, two small wings, stuffing, and embroidered face from start to finish. You’ll also see where each crochet piece fits during assembly, so the finished chicken comes together neatly without guesswork. Let’s begin.
Credit Dabs Crochet
Materials & Tools
- Yarn: 4-ply acrylic yarn in white for the body and wings, red for the comb, and black for facial embroidery.
- Crochet Hook: 3.0 mm crochet hook.
- Fiberfill: For firmly filling the chicken body.
- Yarn Needle: For embroidery, sewing wings, and weaving in ends.
- Scissors: For trimming yarn tails.
Finished Size & Customization
The finished chicken is pocket-sized, approximately palm-sized.
For a softer or more colorful variation, try pastel yellow or multicolored yarn. You can also change the finished size by choosing finer or thicker yarn together with a suitably sized crochet hook.
Pattern Abbreviations
- mr: Magic ring
- ch: Chain stitch
- sc: Single crochet
- hdc: Half double crochet
- dc: Double crochet
- inc: Increase – work 2 single crochets in the same stitch
- slst: Slip stitch
- R: Round

Step-by-Step Crochet Instructions
Step 1: Start the Chicken Body with a Magic Ring
Begin with white yarn by making a magic ring.
Chain 1, then work 6 single crochets into the ring. Join with a slip stitch to the first stitch.
Round 1: 6 sc.
Keep the center of the ring closed and make sure the first round sits evenly before moving forward. This small starting circle forms the base from which the chicken body will grow.
Step 2: Expand the Base
For Round 2, chain 1 and work an increase in every stitch around. Join with a slip stitch.
Round 2: 12 sc.
Each increase places two single crochets into one stitch, widening the circle evenly.
Teaching check: The round should lie evenly rather than forming a narrow tube. This expanded base prepares the shape for the wider middle section.
Step 3: Continue the Increase Pattern
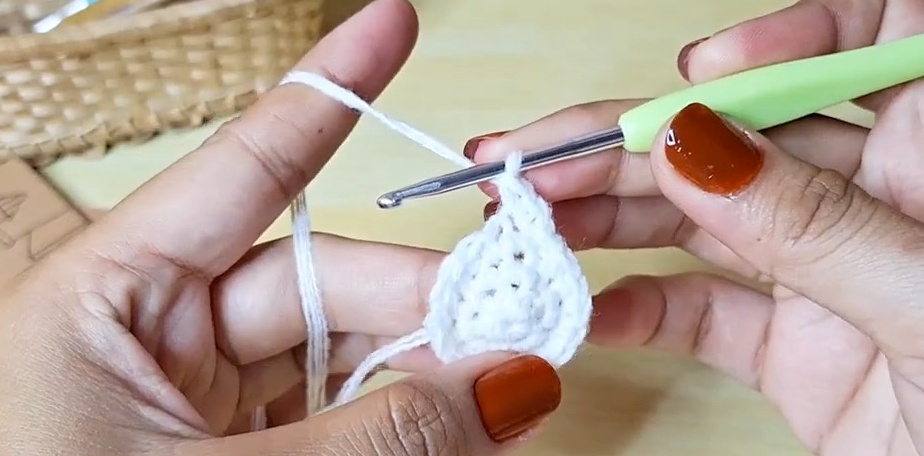
For Round 3, chain 1 and repeat: (inc, 1 sc) × 6
Join with a slip stitch.
Round 3: 18 sc.
The increase pattern is now spaced between single crochets, allowing the body to grow gradually instead of widening too sharply.
Step 4: Build More Width
For Round 4, chain 1 and repeat: (inc, 2 sc) × 6
Join with a slip stitch.
Round 4: 24 sc.
Work the increases at regular intervals around the round. Keeping this spacing consistent helps maintain the rounded shape of the chicken.
Step 5: Complete the Final Increase Rounds
For Round 5, chain 1 and repeat: (inc, 3 sc) × 6
Join with a slip stitch.
Round 5: 30 sc.
The body has now reached its working width. From this point, the pattern stops increasing and uses the same stitch count to build the chicken’s height.
Step 6: Shape the Main Body
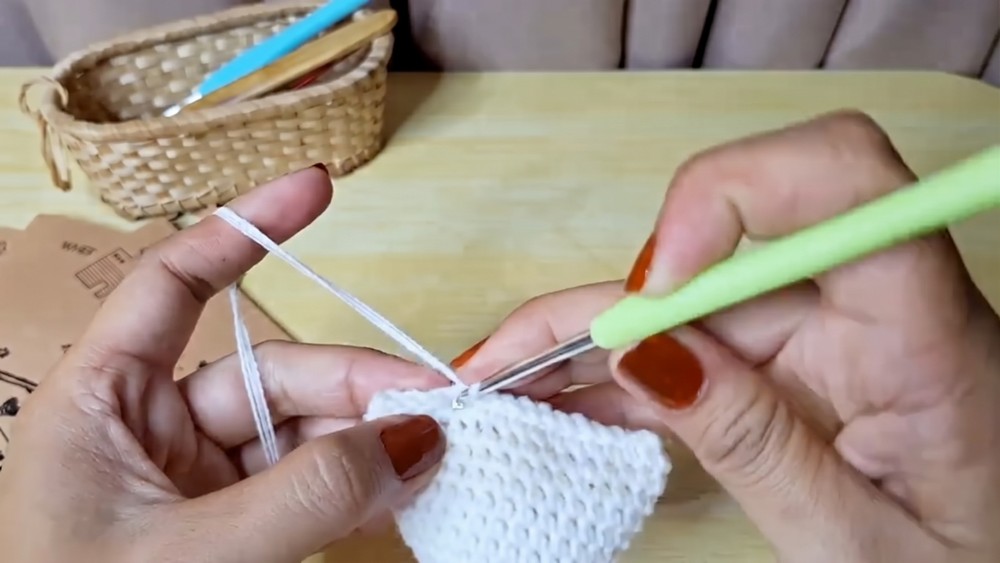
Work Rounds 6-13 by chaining 1, then making 30 single crochets around. Join with a slip stitch at the end of each round.
Rounds 6-13: 30 sc per round.
Keep the sides as even as possible while working upward.
Result check: The piece should resemble a small rounded tube or compact body rather than a flat circle. This is the shape that will later be stuffed and closed.
Step 7: Fill and Close the Body
Before closing the top, firmly fill the chicken with fiberfill.
Add the stuffing gradually so it reaches the sides and gives the body an even, rounded feel.
Fold the top opening flat. Chain 1, then work slip stitches across the opening to close it completely.
Fasten off and weave in the remaining yarn tail.
Helpful tip: Check the silhouette before securing the final yarn end. If one side looks flatter, adjust the stuffing while the opening is still accessible.
Step 8: Add the Red Comb
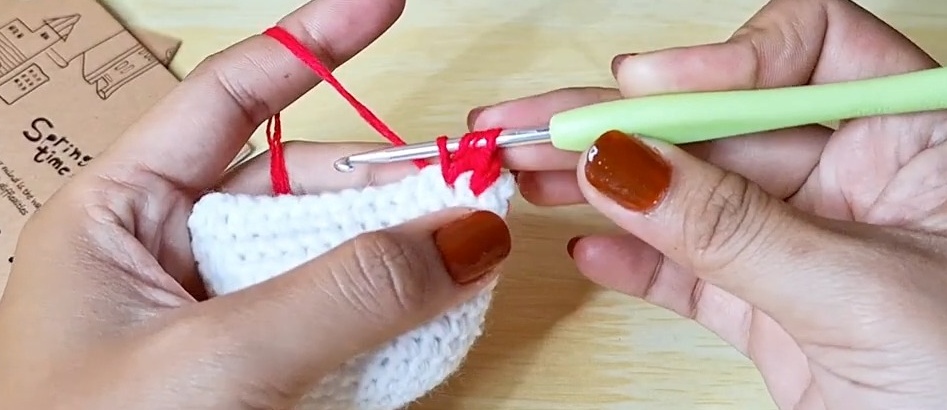
Switch to red yarn and attach it to the top head section of the body.
Chain 1. In the specified top stitches, work: (1 hdc, 1 dc, 1 hdc) in one spot, then slst.
Continue with: (1 sc, 1 hdc, 1 sc), followed by slst, then chain 1.
Fasten off and weave in all loose ends securely.
The combination of half double crochet and double crochet creates the raised crown shape, while the surrounding slip stitches keep it attached neatly to the top.
Step 9: Crochet Two Small Wings
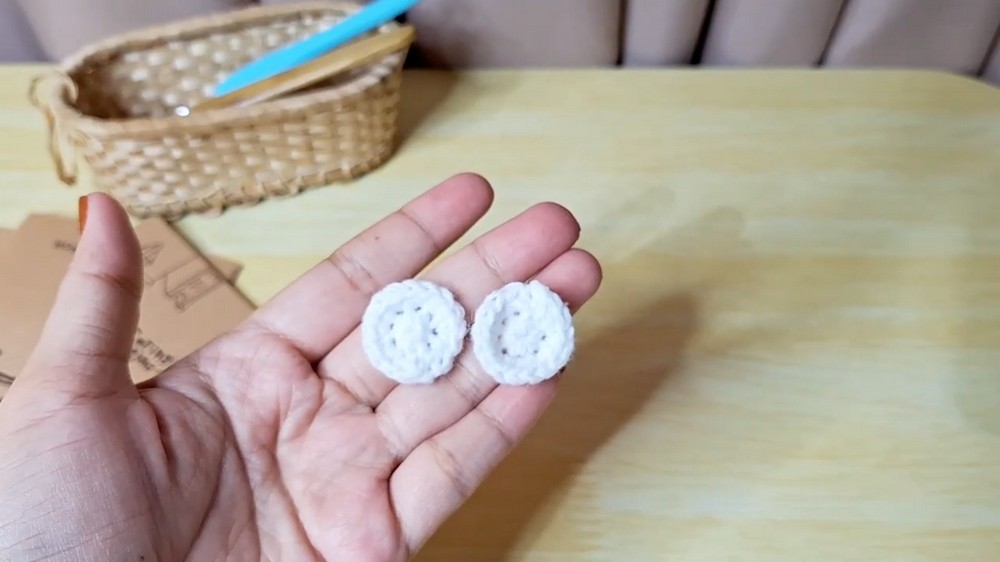
Make 2 wings using white yarn.
For each wing, begin with a magic ring, chain 1, and work 8 single crochets inside the ring. Join with a slip stitch.
Wing Round 1: 8 sc.
For the next round, chain 1 and work an increase in every stitch around.
Wing Round 2: 16 sc.
Fasten off, leaving a long yarn tail for sewing.
Teaching check: Each wing should form a small, flat circular piece. Keeping both wings worked with the same stitch count helps them match when attached.
Step 10: Position and Sew the Wings
Place one circular wing on each side of the stuffed chicken body.
Check their height and spacing from the front before sewing. Both wings should sit at approximately the same level and follow the rounded sides of the body.
Use the long yarn tails left from the wings to sew them securely to the body.
Work through the wing edge and corresponding body stitches, keeping the stitches firm without pulling so tightly that the wing puckers.
Once secure, weave the remaining tails into the body and trim any excess.
Step 11: Embroider the Face
Use black yarn and a yarn needle to create the facial details.
Embroider closed eyes onto the front of the chicken, keeping their placement balanced on either side of the face.
Add a small embroidered beak between and slightly below the eyes.
Helpful tip: Look at the face from straight ahead before finishing the embroidery. Even spacing gives the tiny chicken a more balanced expression.
Your pocket-sized chicken is now complete, with a rounded white body, red comb, matching wings, and simple embroidered features.