Crochet Bunny Bag Pattern for Easter Purse
Need an Easter bag with extra charm? This crochet bunny bag combines pastel colors, ruffled trim, floppy ears, and sliding hat detail in one useful handmade design.
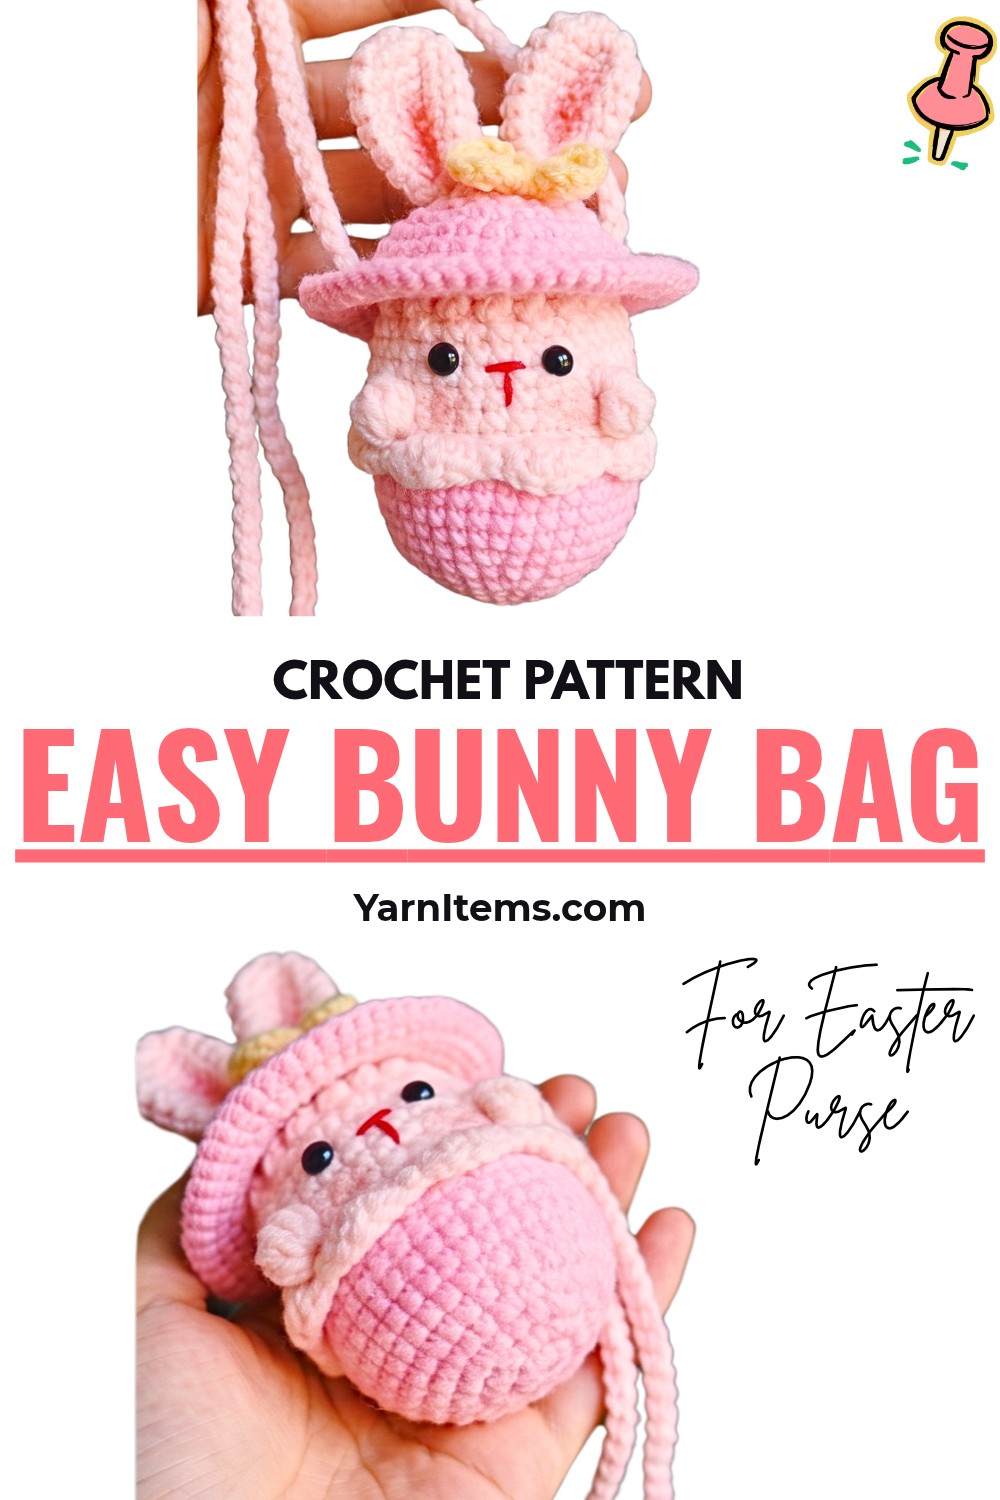
Pastel yarn, bunny details, and useful storage come together in this crochet bunny bag, giving beginners clear shaping practice while creating something made for Easter treats, small toys, or little treasures.
This crochet tutorial covers body shaping, color changes, strap slots, ruffled trim, bunny hat, ears, bow, facial details, and final assembly. Short guidance throughout helps keep each stage manageable. Let’s begin.
Credit Crochet Anywhere
Materials & Tools
- Yarn: Sport or DK-weight cotton yarn in:
- Pink: Main body and hat dome
- White/Cream: Upper body, bunny ears, and strap
- Yellow: Decorative bow
- Pink or red embroidery floss: Facial features and nose
- Crochet Hook: Suitable size for chosen yarn, typically 2.5 mm to 3.5 mm for amigurumi-style structure
- Safety Eyes: Approximately 6 mm or 8 mm
- Yarn Needle: For sewing pieces and weaving in ends
- Stitch Markers
- Scissors
Finished Size & Customization
Finished bag measures approximately 4.5 inches wide × 6 inches tall, excluding strap. This size works well for small Easter treats, candies, or little toys.
For different seasonal colors, replace pink with pastel blue, lavender, or mint green. Strap length can also be changed by adjusting starting chain length for either shorter carrying or longer crossbody wear.
Pattern Abbreviations & Terminology
- st / sts: Stitch / stitches
- ch: Chain stitch
- sl st: Slip stitch
- sc: Single crochet
- hdc: Half double crochet
- dc: Double crochet
- inc: Single crochet increase – 2 sc in same stitch
- dec: Single crochet decrease – sc2tog
- BLO: Back Loop Only
- FLO: Front Loop Only
- FPDC: Front Post Double Crochet
- BPDC: Back Post Double Crochet
- (…) × n: Repeat instructions inside parentheses n times

Step-by-Step Crochet Instructions
Step 1: Establish the Bunny Bag Base
Start with pink yarn and create a Magic Ring.
- R1: Work 6 sc into ring. Slip stitch to first stitch and ch 1. (6 sts)
- R2: Work 6 sc inc around. Slip stitch and ch 1. (12 sts)
- R3: Work (sc, inc) × 6. Slip stitch and ch 1. (18 sts)
- R4: Work (sc, inc, sc) × 6. Slip stitch and ch 1. (24 sts)
- R5: Work (5 sc, inc) × 4. Slip stitch and ch 1. (28 sts)
- R6: Work (6 sc, inc) × 4. Slip stitch and ch 1. (32 sts)
- R7: Work (7 sc, inc) × 4. Slip stitch and ch 1. (36 sts)
These increasing rounds gradually widen base, giving pouch its usable rounded footprint. Keep stitch counts aligned at each round so later straight sections sit evenly.
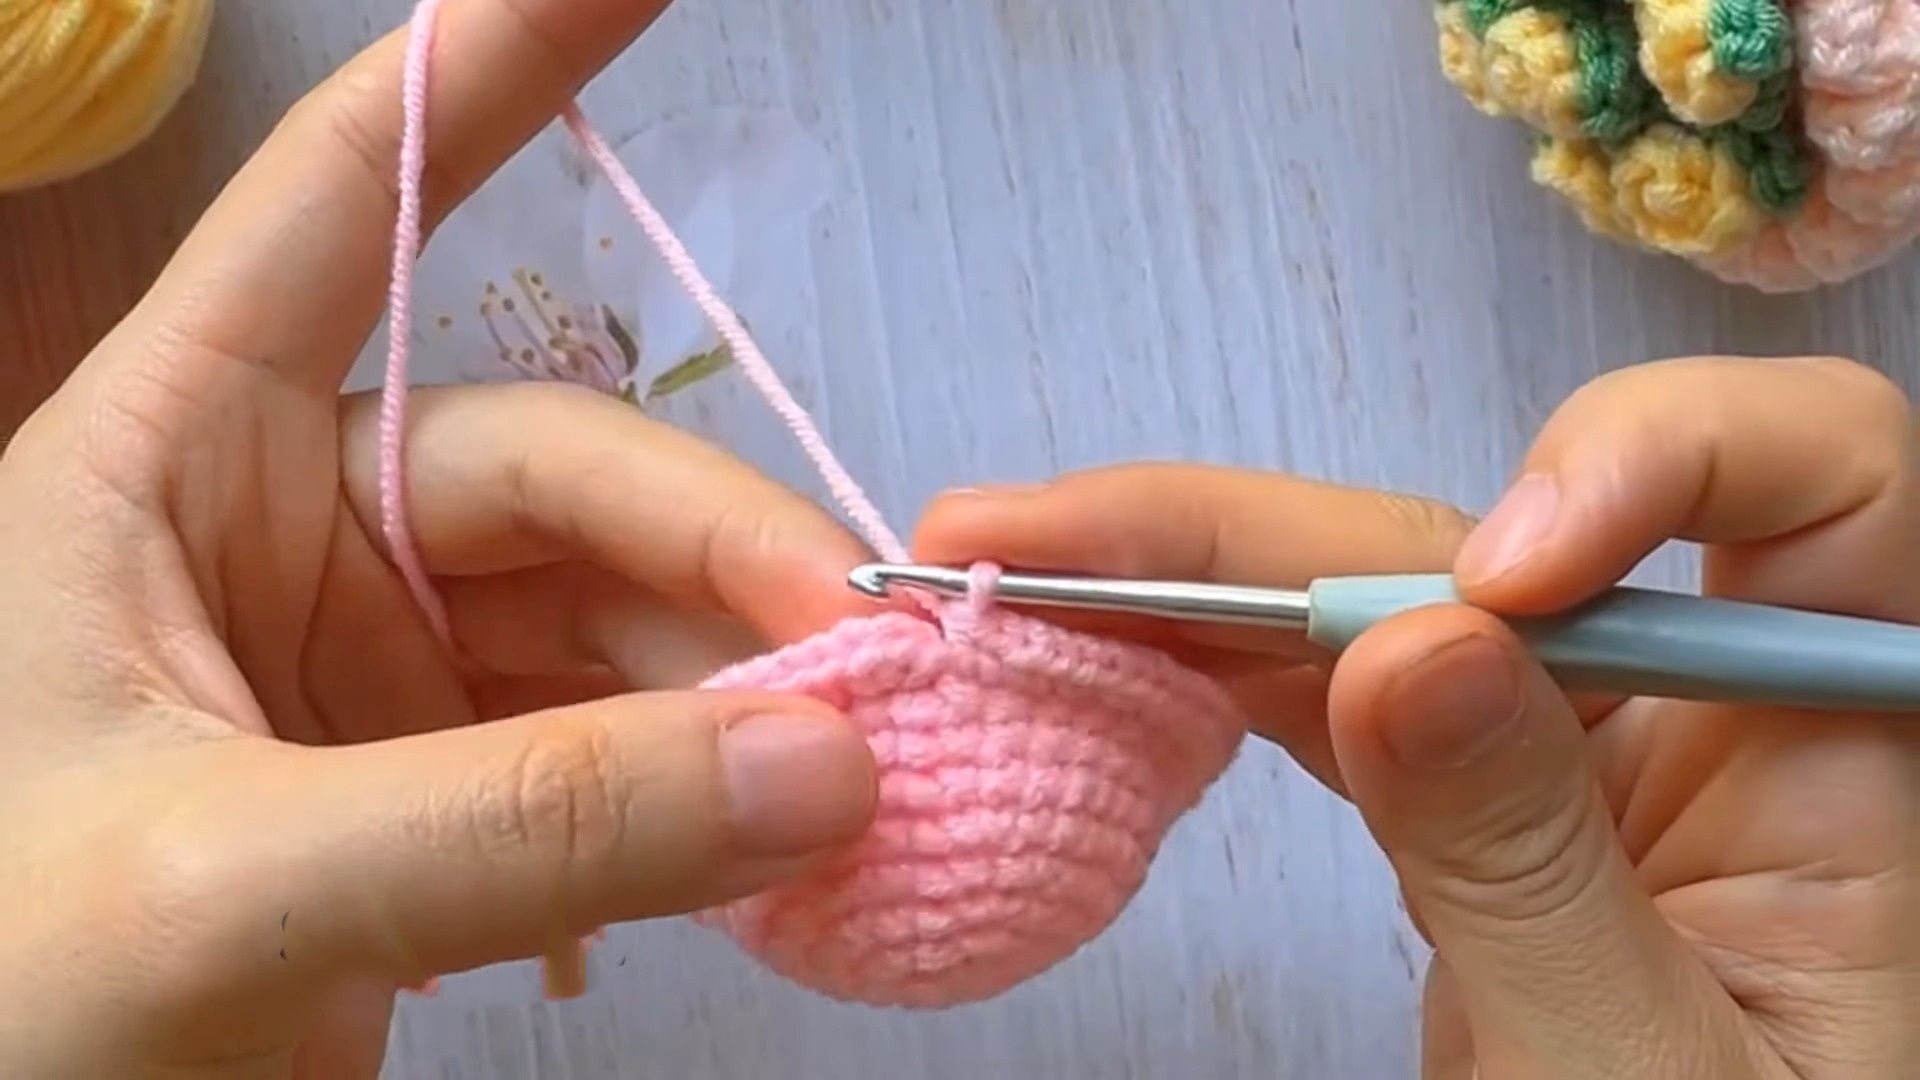
Step 2: Build Straight Pouch Walls
Work 36 sc around for R8-R10, joining with slip stitch and adding ch 1 after each round.
These straight rounds stop further widening and begin forming pouch walls.
Check your shape: Base should remain flat enough to support bag while sides should begin rising evenly. If stitch count has changed unexpectedly, correct it before moving onward.
Step 3: Introduce White Upper Section
For R11, begin shaping upper transition: 6 sc, dec, (7 sc, dec) × 3, sc.
Slip stitch, then change to white/cream yarn at join. (32 sts)
For R12, work 32 sc around in white/cream, then slip stitch and ch 1.
Color change now creates clean separation between pink lower pouch and lighter upper section.
Step 4: Create Foundation for Ruffle
Work R13 in BLO, making 32 sc in back loops only. Slip stitch and ch 1. (32 sts)
Working through back loops leaves front loops exposed. Those unused front loops will later provide attachment points for decorative ruffle.
Helpful check: Look around bag after R13. You should be able to see exposed front loops forming an even line around upper section.

Step 5: Add Strap Slots
For R14, create two openings that will later hold strap.
Work: 11 sc, (ch 1, skip 1 st, 1 sc into next stitch), 8 sc, (ch 1, skip 1 st, 1 sc into next stitch), 11 sc.
Slip stitch and ch 1.
These two small chain spaces create side openings instead of requiring separate attachment points later.
Step 6: Complete Upper Body and Ribbed Edge
Work 32 sc around for R15–R18, joining with slip stitch after each round.
At end of R18, make 3 ch, which counts as first stitch of ribbing.
For R19, work alternating post stitches: (FPDC, BPDC) × 16 around.
Fasten off and weave in ends.
Result check: Upper edge should have visible ribbed texture, while strap slots should remain open and easy to identify.
Step 7: Turn Exposed Loops into Ruffled Trim
Return to front loops left exposed from R13 and attach white/cream yarn.
Across these front loops, repeat: [sc, (hdc, dc), (dc, hdc), sc]. Repeat this sequence 8 times across front loops.
Fasten off.
The combination of sc, hdc, and dc creates height changes that form layered frill around bag rather than leaving upper section flat.

Step 8: Shape Bunny Hat Dome
Switch back to pink yarn for bunny hat.
- R1: Magic Ring, 6 sc. Slip stitch and ch 1. (6 sts)
- R2: 6 sc inc around. Slip stitch and ch 1. (12 sts)
- R3–R5: Continue expanding dome evenly with increase rounds up to (3 sc, inc) × 6. Slip stitch and ch 1. (30 sts)
- R6–R8: Work 30 sc straight around for 3 rounds. Slip stitch and ch 1. (30 sts per round)
Keep increases distributed evenly during dome shaping so upper portion stays rounded rather than developing uneven points.
Step 9: Flare Hat Brim
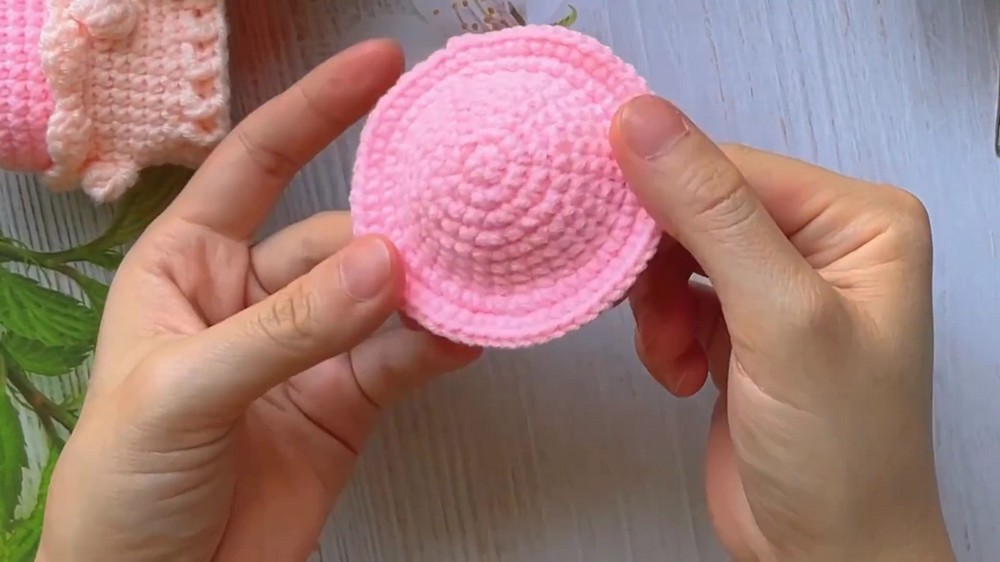
For R9, increase dramatically to create brim: 30 sc inc, placing 2 sc into every stitch. (60 sts) Slip stitch and ch 1.
For R10, work 60 sc around to finish brim edge. Fasten off and weave in ends.
Check the shape: Brim should spread wider than dome, creating overhanging lid shape that can sit over bag opening.
Step 10: Make Two Bunny Ears
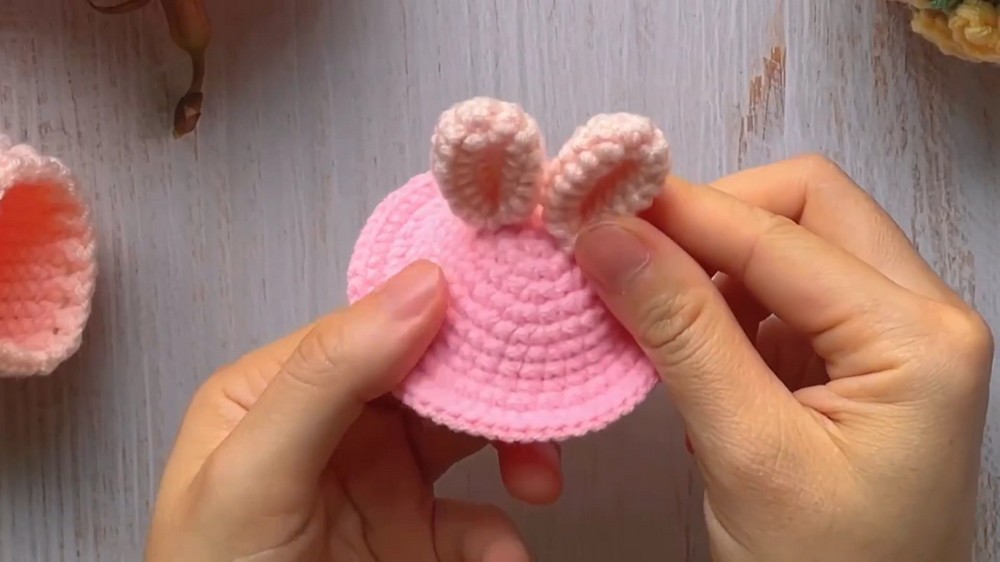
Create 2 ears using white/cream yarn.
For each ear:
- R1: Magic Ring, 6 sc. Slip stitch and ch 1. (6 sts)
- R2: 6 sc inc around. Slip stitch and ch 1. (12 sts)
- R3–R8: Work 12 sc straight around for 6 rows.
Fasten off, leaving long tail for sewing.
Flatten each ear slightly before attachment. This gives ears softer, flatter shape instead of leaving them fully tubular.
Step 11: Form Yellow Bow
Using yellow yarn, begin with Magic Ring.
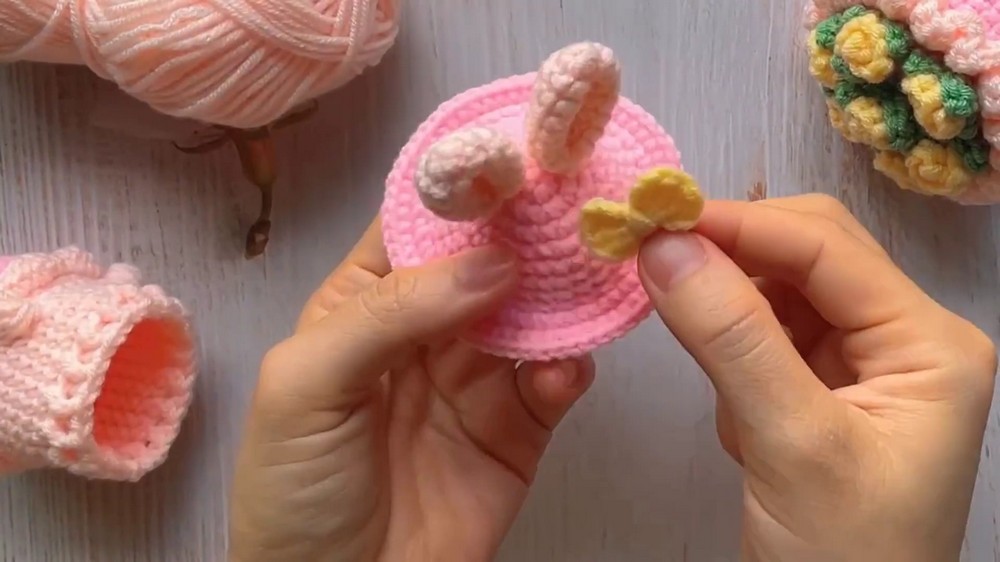
Work: (3 ch, 3 dc, 3 ch, sl st, 3 ch, 3 dc, 3 ch, sl st) inside ring.
Pull Magic Ring tight. Wrap yarn around center several times to hold bow shape, then fasten off.
Keep center wrap firm enough to define two bow loops without flattening them completely.
Step 12: Make and Attach Bag Strap
Attach white/cream yarn to inner rim of bag.
Chain 150 ch to form carrying strap.
Secure opposite end firmly to inner rim on other side with slip stitch, then fasten off.
Before final securing, check strap length against intended use. Starting chain can be adjusted in future versions when shorter handle or longer crossbody length is preferred.
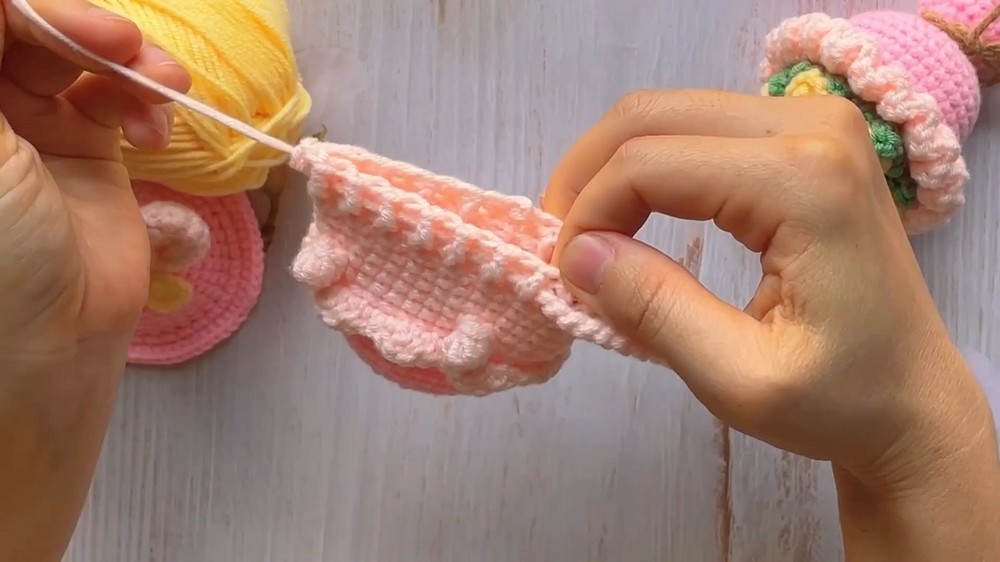
Step 13: Thread Strap Through Hat Slots
Bring strap ends through side buttonholes/slots created during R14.
This placement allows bunny hat lid to slide upward and downward along strap.
Useful check: Move hat gently along strap before finishing all attachments. Lid should slide smoothly without pulling strap slots out of shape.
Step 14: Add Bunny Face
Place small safety eyes on upper white portion of bag body.
Use pink or red embroidery floss to stitch small nose and smile centered between and below eyes.
Take time to check symmetry before securing facial details. Even spacing helps maintain cute bunny expression.
Step 15: Attach Ears and Bow
Sew both flattened bunny ears securely onto top center of pink hat dome, leaving their long tails available for firm attachment.
Position yellow bow directly between ear bases.
Secure bow center and check both ears from front so they sit at balanced angles.
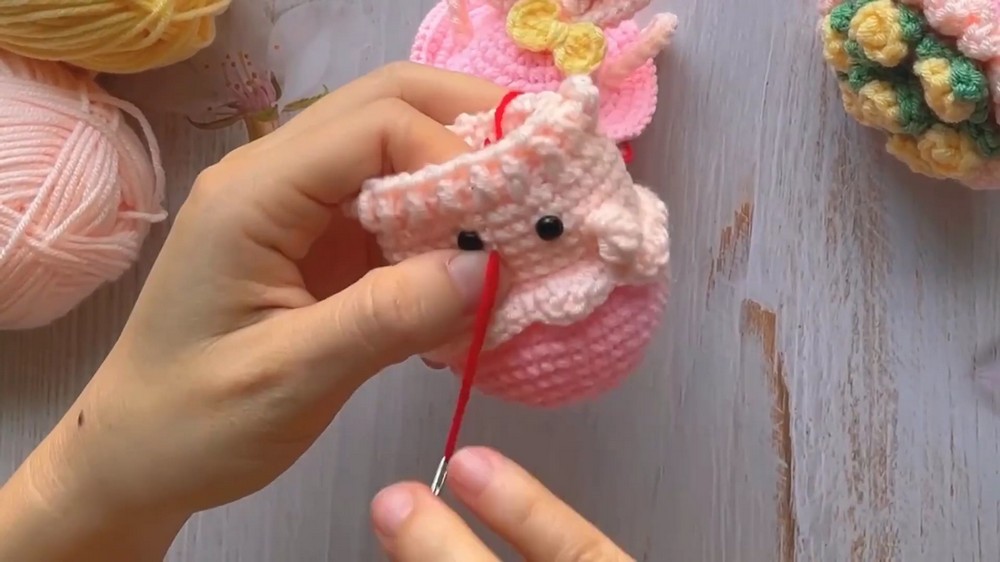
Step 16: Complete Final Assembly
Review all attachment points:
- Strap should be firmly secured at both inner sides.
- Hat should move smoothly through strap slots.
- Ears should remain firmly attached.
- Bow should sit between ear bases.
- Facial details should remain centered.
- Ruffled trim should sit evenly around bag.
Once all details are secure, weave in and hide remaining yarn ends.
Your finished bunny bag combines functional carrying space with Easter-themed details, including sliding hat lid, floppy ears, ruffled trim, and decorative bow.