Crochet Rooster Christmas Ornament Pattern Free
Add a cheerful crochet rooster to your Christmas tree with green, red, and yellow yarn, while simple shaping and colorful details bring this festive ornament to life.
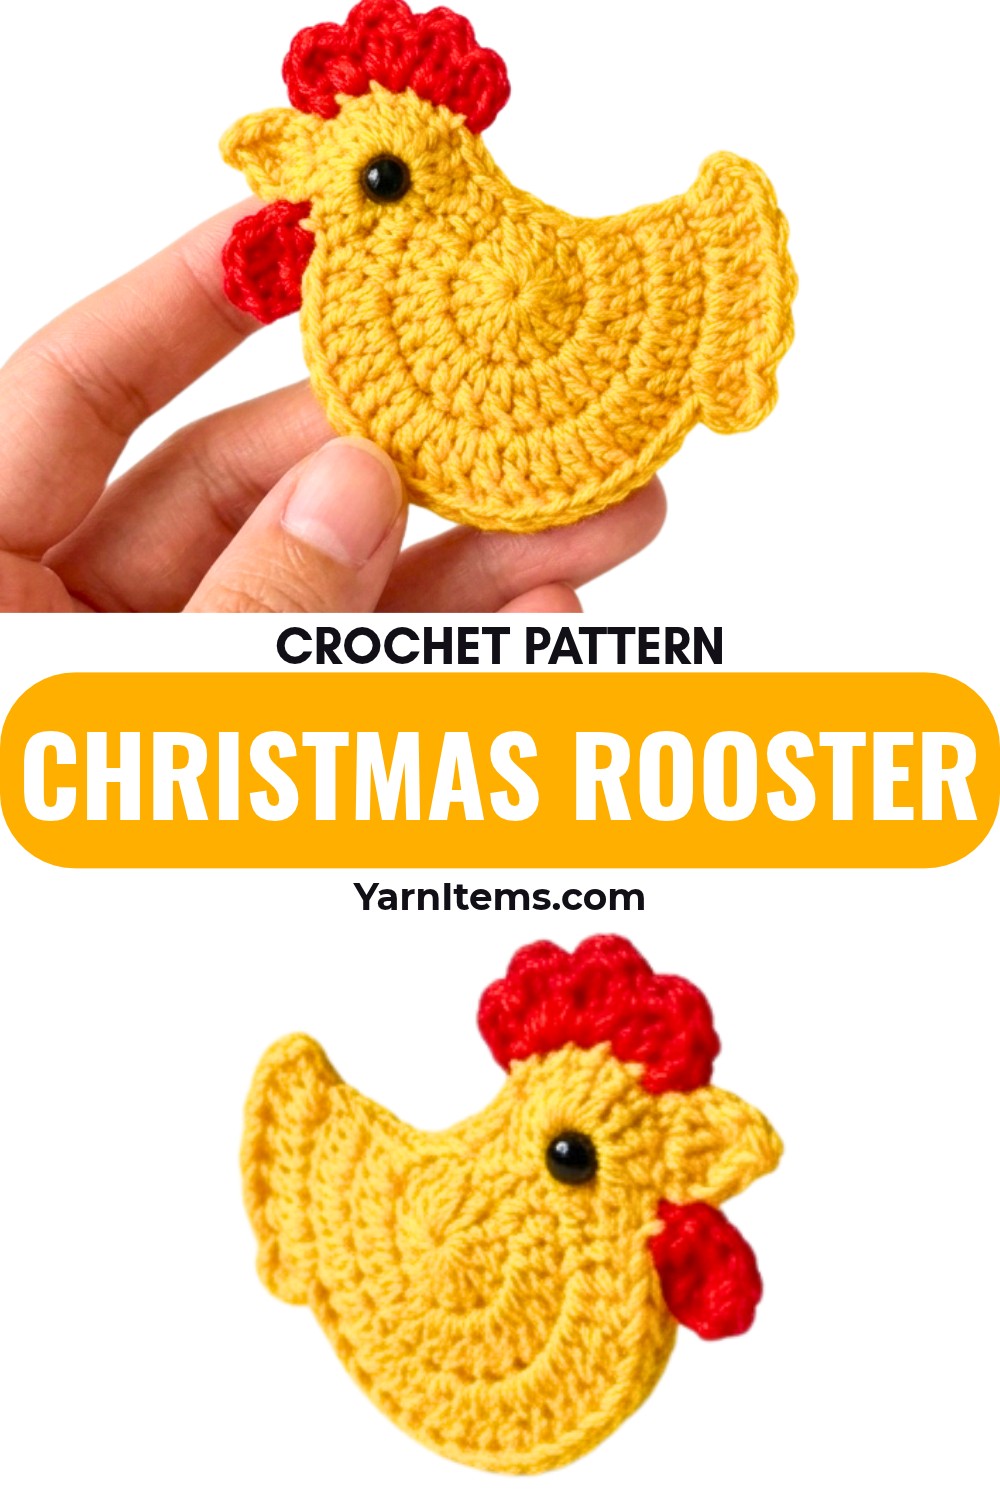
A crochet rooster makes a playful addition to a Christmas tree, especially when its bright comb, beak, and wattle are worked in contrasting colors.
This flat crochet ornament comes together from a small green body, with a few carefully placed details giving it its recognizable shape and character.
The body shaping is the part worth watching most closely as you crochet. The unworked stitches, turning points, tail, and small side details all help define the rooster’s silhouette, so following each line in order will make the finishing stages much easier.
Credit Crochet Patterns Free
Materials & Tools Needed
- Yarn: 3-ply yarn in green for the main body, red for the comb and wattle, and yellow for the beak.
- Crochet hook: 3.0 mm crochet hook.
- Googly eyes: One for each side of the head, or use black embroidery floss instead.
- Yarn needle: For securing and finishing yarn ends.
- Scissors: For cutting yarn.
- Green and red yarn strands: For making the hanging loop.
Pattern Abbreviations & Terminology
- ch: Chain
- st/sts: Stitch/Stitches
- sl st: Slip stitch
- dc: Double crochet
- tr: Treble crochet
- inc: Increase; work 2 stitches into the same stitch
- sk: Skip
- rep: Repeat
Before You Start
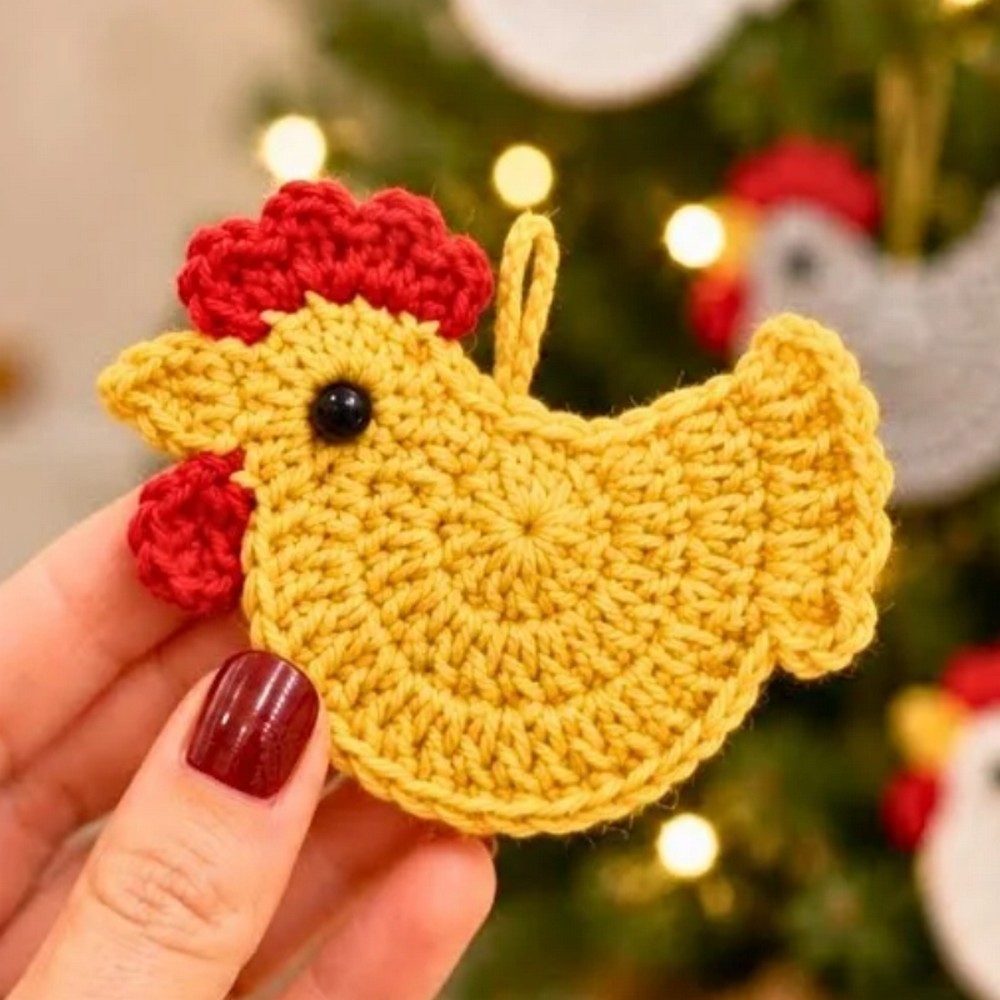
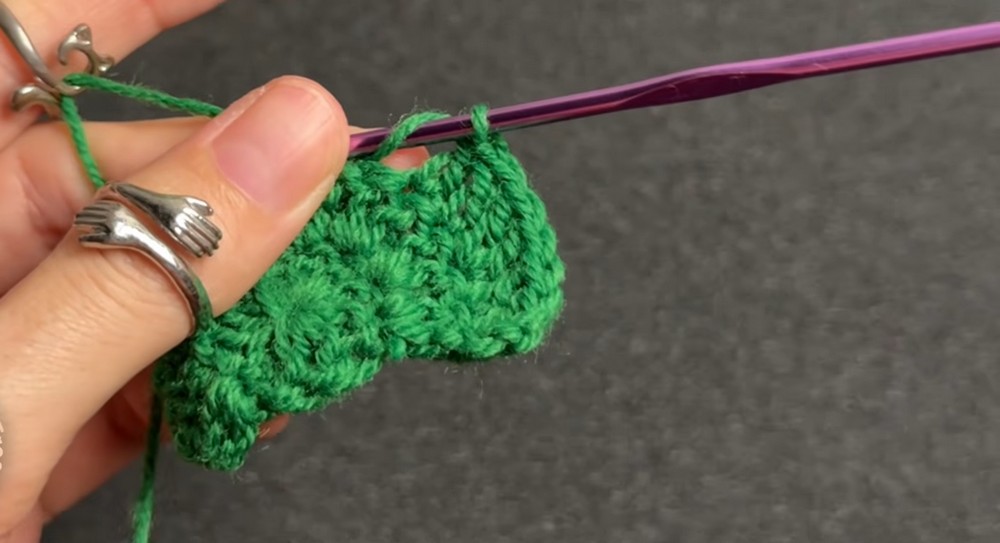
This rooster is shaped rather than worked as a simple flat circle, so the stitch counts and unworked stitches in the early body section matter. In particular, Round 2 deliberately leaves 3 stitches unworked, and Row 3 leaves the last 5 stitches unworked. Keep those turning points exactly as written so the body develops the intended outline.
The tail is also formed directly from the body by working several double crochets into one stitch. This creates the fan-like tail shape without needing a separate piece.
Step-by-Step Crochet Rooster Pattern
Main Body – Green Yarn
Round 1: Start with a magic ring, work 2 ch, then work 11 dc into the ring; join with a sl st to close the round. (11 dc)
Round 2: Work 2 ch, 1 dc in the same stitch, then 2 dc in each of the next 8 sts; leave the remaining 3 sts unworked and turn. (18 dc)
Row 3: Ch 2 and turn; work 1 dc in the first stitch, then [1 dc, 1 dc inc] across the row, leaving the last 5 sts unworked; turn.
Row 4: Sk 2 sts, work 9 dc into the next single stitch, then secure with a sl st in the last stitch.
Back Edge: Work 8 sl sts along the back edge to define the spine and prepare the area for the red comb; fasten off the green yarn.
Shape Check
At this point, take a moment to look at the silhouette before continuing. The body should already suggest the rounded head and body with the tail extending from the opposite side. The skipped and unworked stitches are intentional, so avoid filling those spaces just to make the edge look more complete.
Wing / Neck Accent
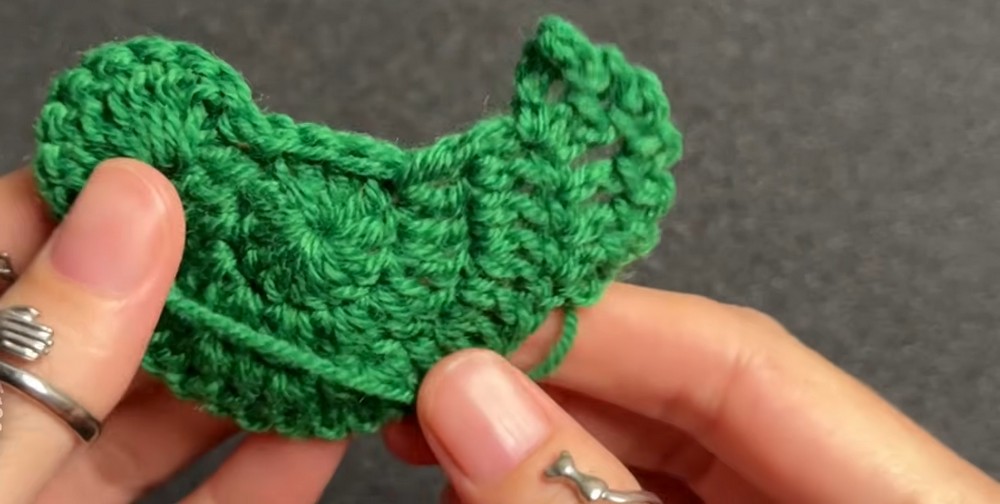
Attach yarn to form the side curve, then work 4 ch, sk 1 st, sl st in the 2nd chain, and dc in the same stitch.
Accent Row: [1 ch, sl st in the next dc, dc in the next st] 4 times.
Accent Finish: Work 2 ch, then sl st in the same last stitch; fasten off.
This small curved detail adds definition along the side of the rooster, so keep your slip stitches neat rather than pulling them too tightly.
Comb – Red Yarn
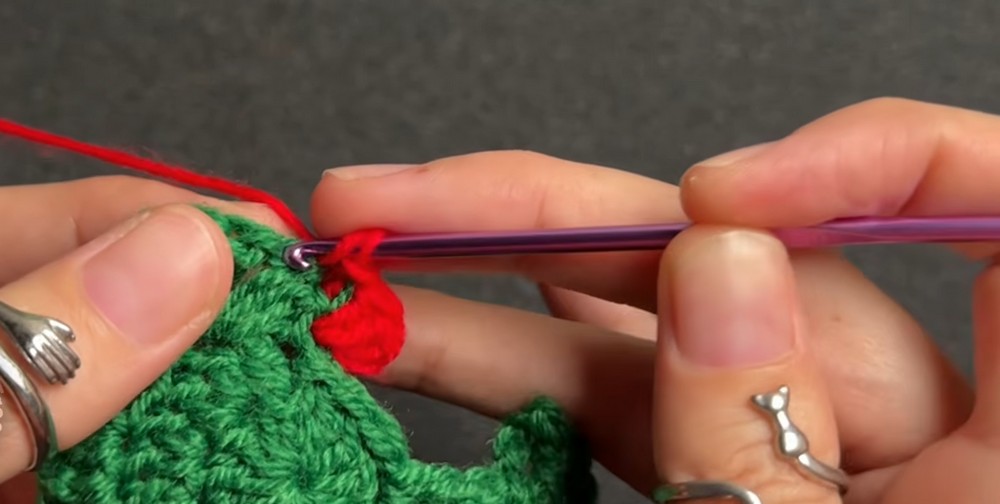
Attach the red yarn to the top section of the head.
First Comb Segment: Ch 2, work 2 dc in the same stitch, then sl st in the next stitch.
Second Comb Segment: Work 3 dc in the same stitch, then sl st in the next stitch.
Third Comb Segment: Work 3 dc in the same stitch, then sl st in the next stitch; fasten off the red yarn.
The three raised sections create the rooster’s comb. Because each section is worked into a small area before moving on with a slip stitch, the red yarn naturally forms the scalloped outline.
Beak & Wattle – Yellow Yarn
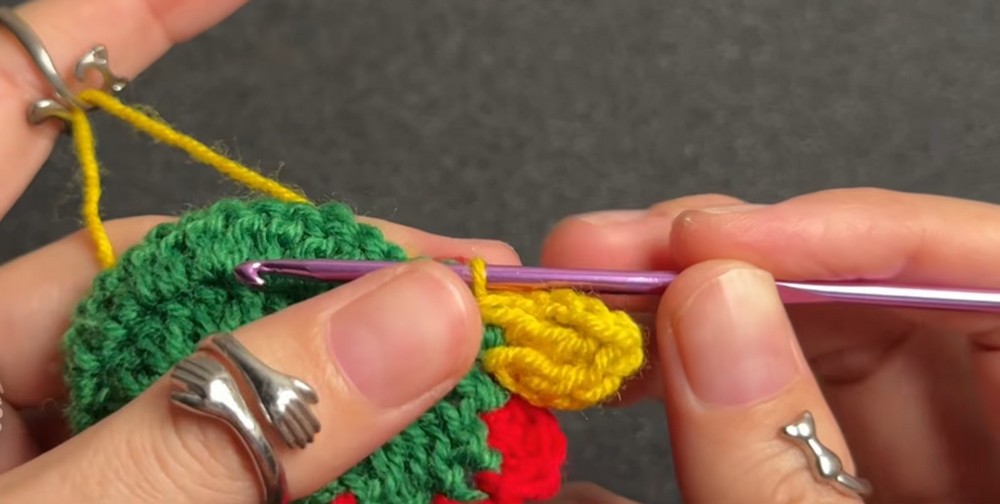
Attach the yellow yarn to the front face area.
Beak & Top Wattle: Ch 2, work 1 dc in the same stitch, 1 tr, 1 ch, picot (3 ch), then sl st in the same stitch.
Lower Beak Details: Work 3 ch, 1 dc in the same stitch, 2 dc in the next stitch, 1 dc, 3 ch, then sl st in the same stitch; fasten off the yellow yarn.
Face Placement Note
The yellow details are small, so their position has a noticeable effect on the finished expression. Before permanently securing the yarn ends, check that the beak sits at the front of the head and that the lower detail falls naturally beneath it.
Assembly & Finishing
Add the Eyes
Glue or sew one small googly eye onto each side of the head, positioning the eyes just above the beak.
If the ornament may be handled by very young children, embroidered eyes made with black floss are a better alternative to loose googly eyes.
Make the Hanging Loop
Create a twisted or braided cord using green and red yarn strands. Attach the cord firmly to the back or neck area of the rooster so the ornament can hang securely from a Christmas tree.
When attaching the loop, make sure the yarn is secured through a strong part of the body rather than only catching a loose edge. This helps the ornament hang with its front facing outward.
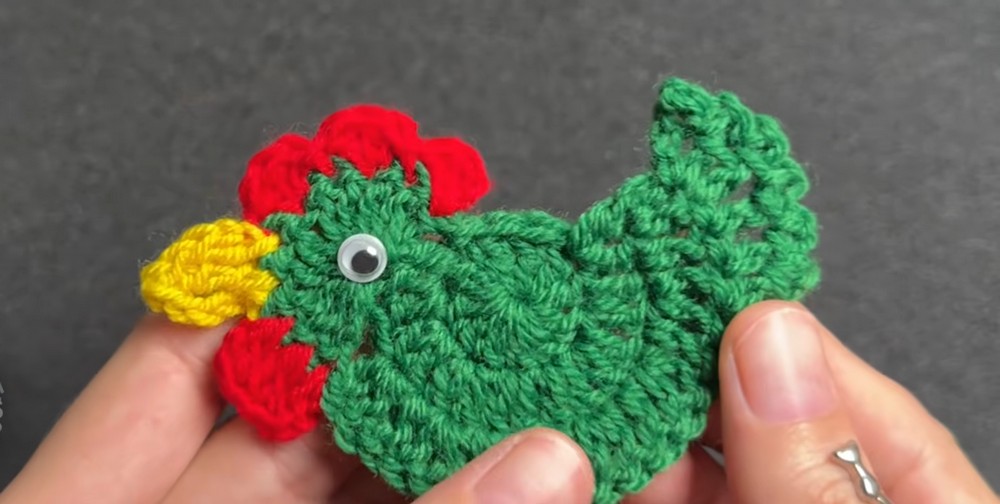
Finishing Check
Before placing the rooster on the tree, check these small details:
- The comb has three distinct red sections.
- The yellow beak and wattle are positioned at the front of the head.
- Both eyes sit at a similar height.
- The hanging loop is firmly attached.
- All yarn ends are securely woven in or fastened.
- The body still lies in its intended shape without a loose or distorted edge.
Ways to Customize Your Crochet Rooster
The basic color combination gives the ornament a classic rooster appearance, but the same pattern can be personalized with different shades.
- Try darker or lighter green for the body.
- Use orange instead of yellow for a warmer beak.
- Change the red comb to another bright contrasting shade.
- Embroider the eyes for a stitched finish.
- Make several roosters with different color combinations for a playful Christmas tree collection.
Care & Storage
Because this is a small decorative ornament, store it flat or in a box where the comb and facial details will not be crushed. If the yarn becomes dusty, gently clean the surface rather than pulling at the small decorative stitches.
With its bright colors and recognizable shape, this crochet rooster works especially well as a handmade Christmas tree decoration, a small seasonal gift, or part of a collection of handmade animal ornaments.