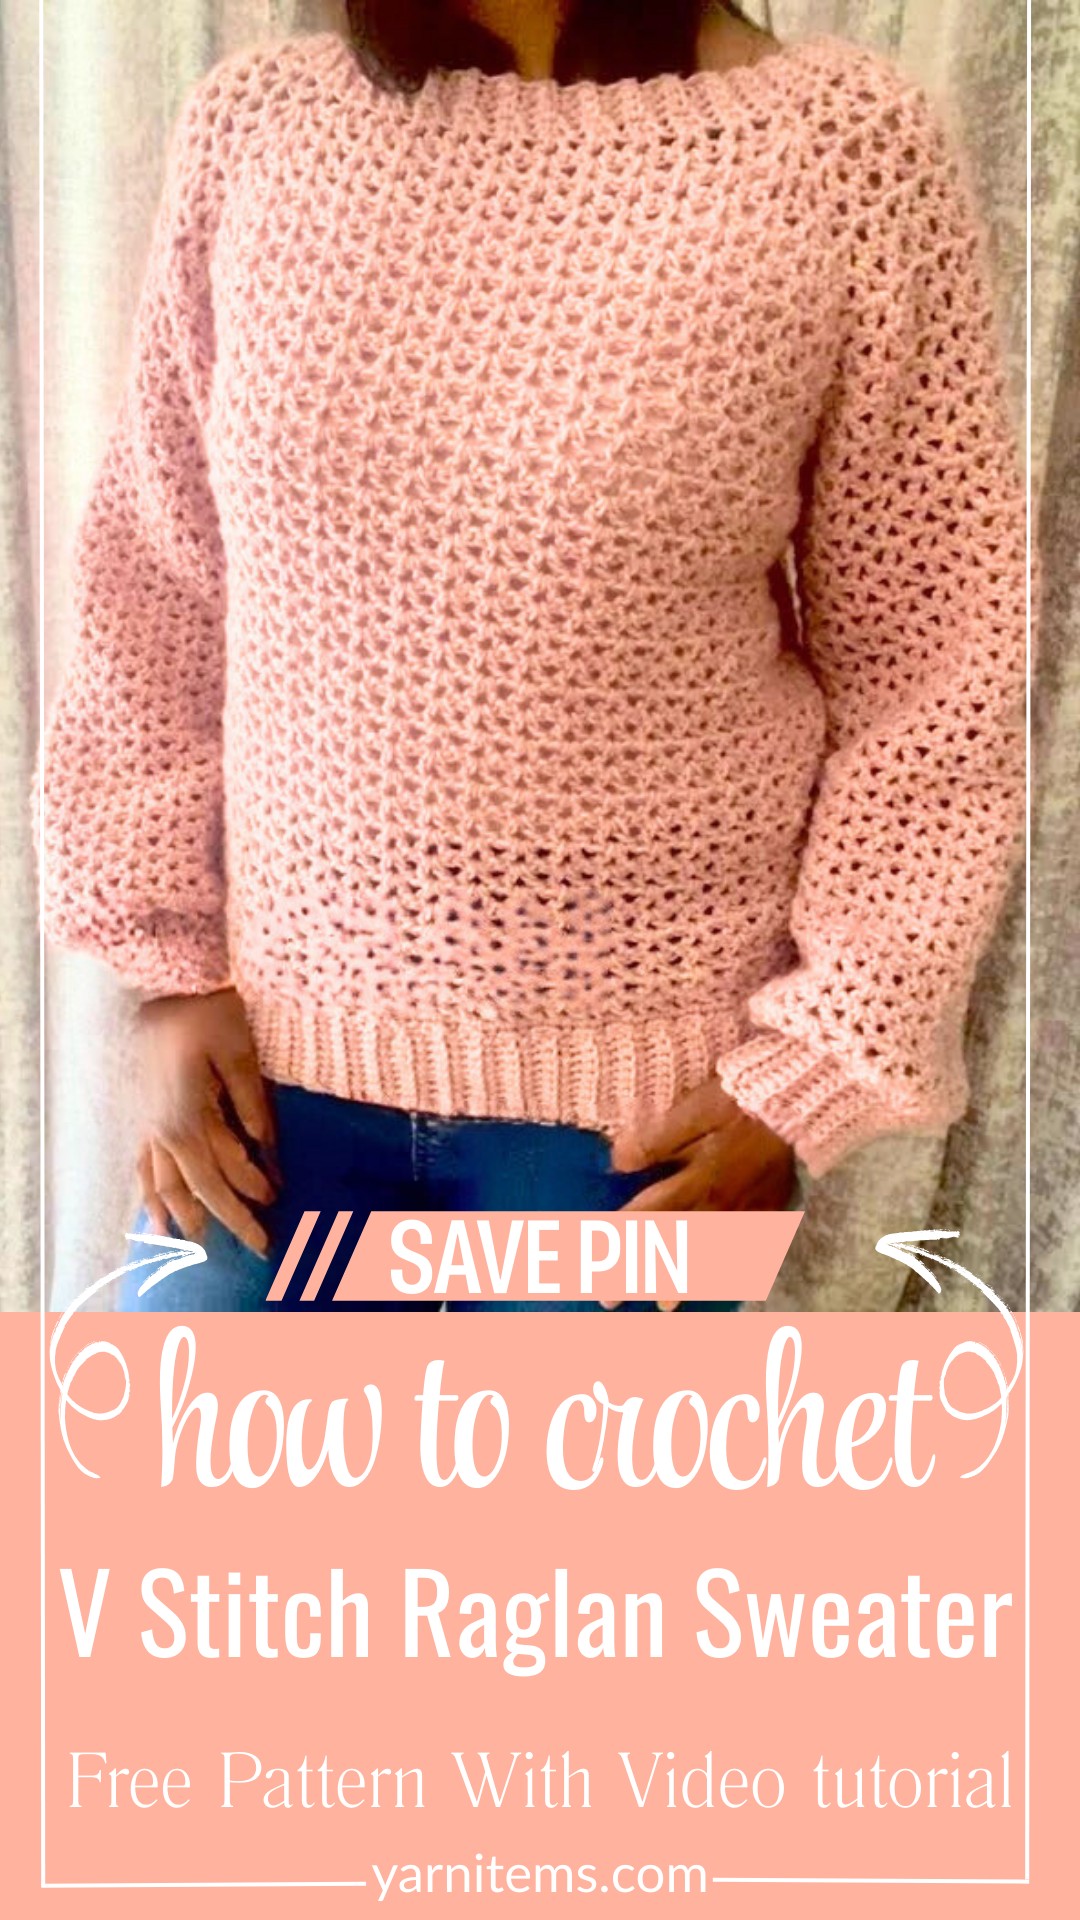
The Crochet V-Stitch Raglan is a versatile and customizable sweater or top worked seamlessly from the neckline down, featuring an elegant and airy design created with the V-stitch.

The Crochet V Stitch Raglan Sweater is a beautiful and cozy design that’s perfect for all seasons. Designed with an airy V stitch, this sweater is lightweight, stylish, and comfortable for everyday wear. If you’re making it for yourself, a loved one, or someone of any size, from children to adults, it’s a versatile piece that offers warmth without being too heavy.
Crochet a V Stitch Raglan Sweater Pattern
What makes this V-stitch raglan sweater pattern special is its simplicity and adaptability. Starting at the neckline with a neat ribbing, the sweater is worked top-down, so you can perfectly adjust the length of the body and sleeves as you go.
Credit JKD Handmade
Key Features and Construction Steps:
- Top-down construction: Begins with ribbed neckline worked in rows, then transitions into rounds for seamless assembly.
- Simple yet striking stitch: The V-stitch (double crochet, chain, double crochet) forms the main texture of the piece.
- Versatile design: Pattern can be adjusted for both sweaters (full length and sleeves) or lightweight tops.
- Raglan shaping: Defined corners allow for precise separation of sleeves, body front, and back.
- Finishing touches: Ribbed edges at the hem, neckline, and sleeves add a polished, fitted look.
- Customizable yarn and hook sizes: Options for different weights and fibers to suit the desired fit and drape.
This Pattern starts with a ribbed neckline worked entirely in single crochet rows, using the smaller of two hooks for a tight, stretchy finish. The ribbing is then joined seamlessly to create a circular starting point for the raglan yoke. Using the V-stitch in a repeating sequence, you’ll work the yoke in rounds, increasing at four marked “corners” to create the distinct shape. Alternate rounds feature different V-stitch corner types to promote even growth across the yoke. This clever raglan shaping is the key to achieving the perfect fit for the neckline and shoulders.

Once the appropriate yoke depth is reached, separation occurs to form the armholes. Sleeves are completed later by working directly into these armhole spaces, maintaining a seamless design throughout. The front and back body sections are joined and worked down in continuous rounds of V-stitch until the desired length is achieved. The result is a lightweight and beautifully textured fabric, perfect for layering or standalone wear.

The sleeves are constructed directly onto the armhole spaces using the same V-stitch pattern as the body. For a more tailored or casual look, you can easily customize the sleeve and body length. To polish the garment, ribbing is added at the hems and cuffs using single crochet worked in back loops only, completing the look with a snug, stretchy detail.

One of the greatest features of this design is its flexibility. You can turn it into a cozy sweater by using worsted-weight yarn and extended sleeves, or create a breezy summer top with cotton yarn and short ribbed sleeves. The designer offers suggestions for different yarn weights, making it suitable for all seasons and sizes.

Video Tutorial
Step-by-Step Pattern
Materials
- Yarn:
- Category 3 light worsted yarn (double knit, 100% acrylic).
- Options for customization: 4-ply, cotton yarn, or worsted weights.
- Hooks:
- Smaller hook for ribbing, based on the yarn label recommendation (e.g., 4 mm).
- Larger hook for the body, 2 sizes bigger than the recommended hook (e.g., 6 mm).
- Tools:
- Stitch markers.
- Measuring tape.
- Pair of scissors.
- Yarn or wool needle.
- Yardage:
- About 500 grams for the sweater.
- Approximately 250 grams for the top variation.

Pattern Instructions
Step 1: Neckline Ribbing
- Form a slip knot with the smaller hook (e.g., 4 mm hook).
- Chain 5.
- Into the second chain from the hook, work a single crochet. Continue single crochet across the row—4 stitches in total.
- Turn your work: Chain 1, and work single crochets into the back loops only (repeat this step for subsequent rows).
- Measure the ribbing unstretched around the head. Adjust the length to match, ensuring the ribbing fits properly.
- Once satisfied with the length, count your rounds (e.g., 72 rounds for adult sizes).
- Slip stitch both ends of the ribbing together to form a circle.
Step 2: Yoke
- Switch to the larger hook (e.g., 6 mm).
- Work single crochets evenly across one edge of the ribbing to form the foundation row of the yoke. The stitch count should match the number of ribbing rounds (e.g., 72 sts).
- Separation for Body and Sleeves: Using your chart, divide stitches into four sections: sleeve, front body, sleeve, back body. Place stitch markers.
Yoke Rounds:
- Round 2:
- Start with a double crochet (chain 2).
- Skip one stitch, then work a V stitch into the next stitch. Repeat until you reach the first marker.
- At each corner (stitch marker), work Corner A (1 V stitch). Replace the marker into the chain space of each corner.
- Round 3:
- Turn. Start with a V stitch in the corner space.
- In the next corner, work Corner B (2 V stitches separated by chain 1). Replace the stitch marker between the two V stitches.
- Continue alternating between Round 2 and Round 3 to form the yoke.
- Stop once the armhole depth matches your desired measurement (e.g., 7–7.5 inches for medium sizes).
Step 3: Body
- Begin working V stitches around, skipping the stitches between the sleeve markers to create armhole spaces.
- Continue working V stitches across the body until your desired length is achieved.
- At the base, work a round of single crochets with stitches evenly spaced along the edge.
Ribbing:
- Swap to the smaller hook (e.g., 4 mm).
- Chain 11 (for adults) or 9 (for children).
- Work single crochets into the second chain from the hook and across.
- Attach ribbing: Slip stitch into the sweater’s edge, skip 2 stitches, and turn.
- Work single crochets into back loops only and continue until the ribbing circles the base of the sweater.
- Seam the edges together using slip stitches or a yarn needle.
Step 4: Sleeves
- Attach yarn at the underarm seam with the larger hook.
- Work V stitches evenly around the armhole space.
- Repeat similar rounds to the body section, turning after each row. Adjust for sleeve length.
- Work ribbing at the cuff (similar to the body ribbing). To tighten further, work the initial round of single crochets into double crochet stitches only, skipping the chain spaces.
- Seam the ribbing edges together.
Decorative Touches
- For a fitted look, work tighter slip stitches for ribbing seams.
- For summer versions, try cotton yarn and shorter sleeves paired with smaller ribbing widths (e.g., chain 5 for ribbing).
- Add decorative buttons or a contrast-colored trim at the neckline for extra flair.
Troubleshooting and Suggestions:
- Ribbing Fit: When creating the ribbed neckline, ensure it fits comfortably over the wearer’s head without stretching excessively. If needed, adjust the number of rows for a more accurate fit.
- Consistent V-Stitches: Make sure your chain spaces in the V-stitches remain uniform to create even, neat fabric. Missing chain spaces at the corners can skew the raglan shaping.
- Check Yoke Depth: Measure the armhole depth before separating for the sleeves to ensure the correct fit. Longer yoke depths can create a looser, more relaxed fit, but make sure it aligns with your overall design goal.
- Ribbing Tips: To achieve a snug but stretchable ribbed edge, use the smaller hook and maintain consistent back-loop-only stitches throughout. For a tighter finish on cuffs, consider alternating between 2 and 3 slip stitches when attaching ribbing to the edge.
- Yarn Options: Explore color changes or variegated yarns to give the sweater a creative twist. Adding a simple edging, such as a picot stitch, to the neckline or hem can introduce an extra layer of elegance.