Easy Crochet Plaid Scarf Pattern Free
Ready to turn straightforward hdc rows into something special? Add a few vertical slip-stitch lines and watch the plaid emerge.
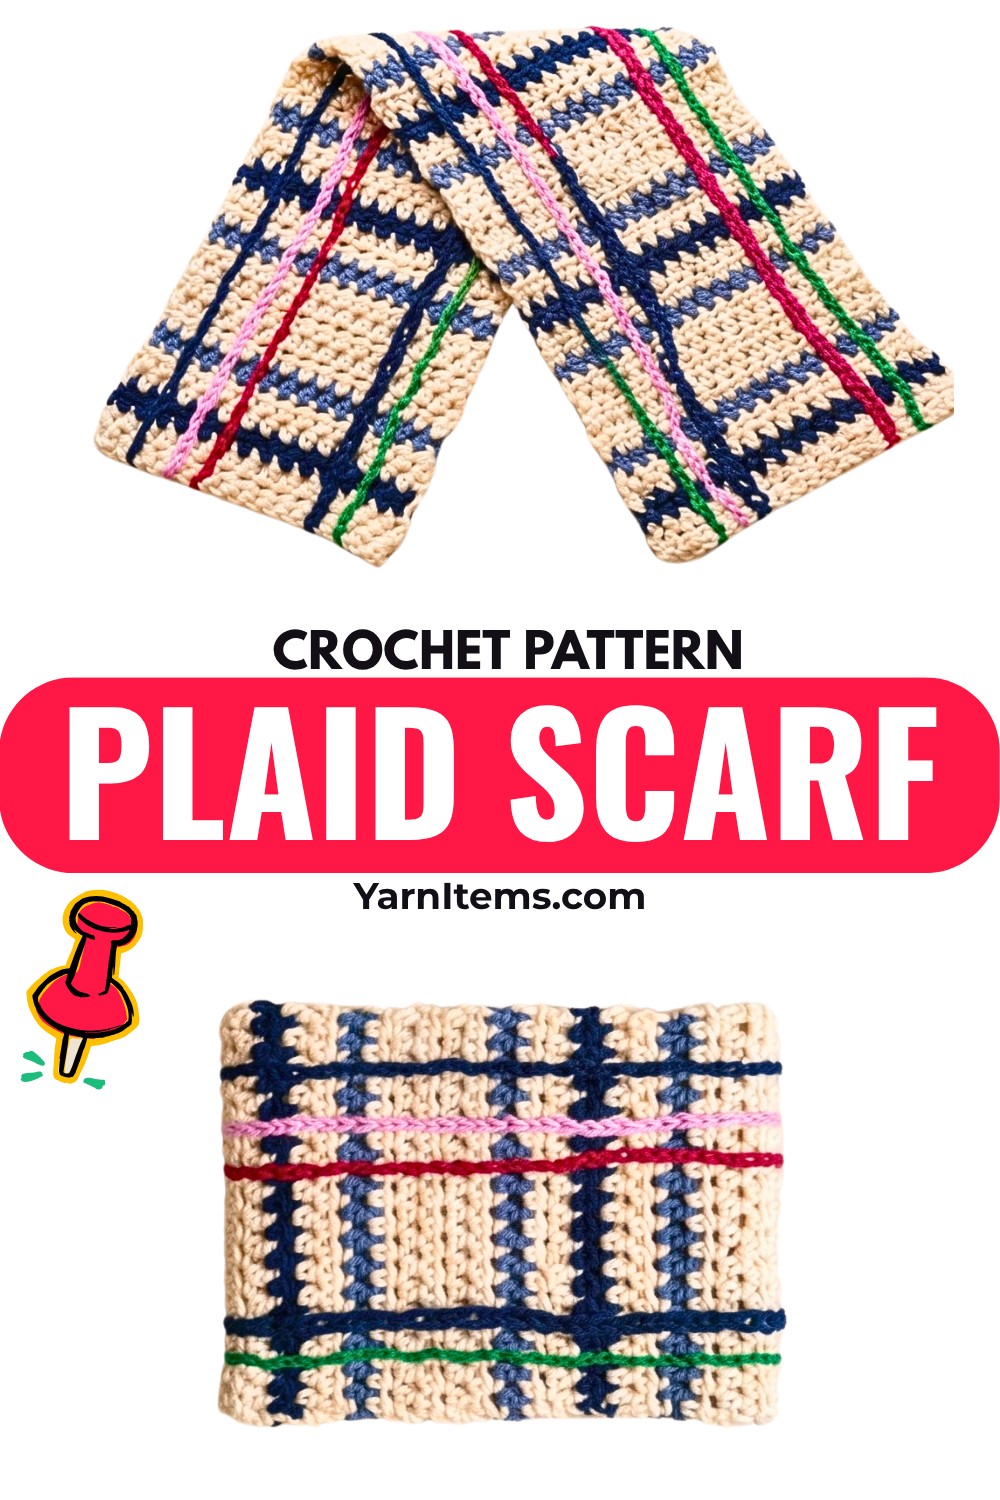
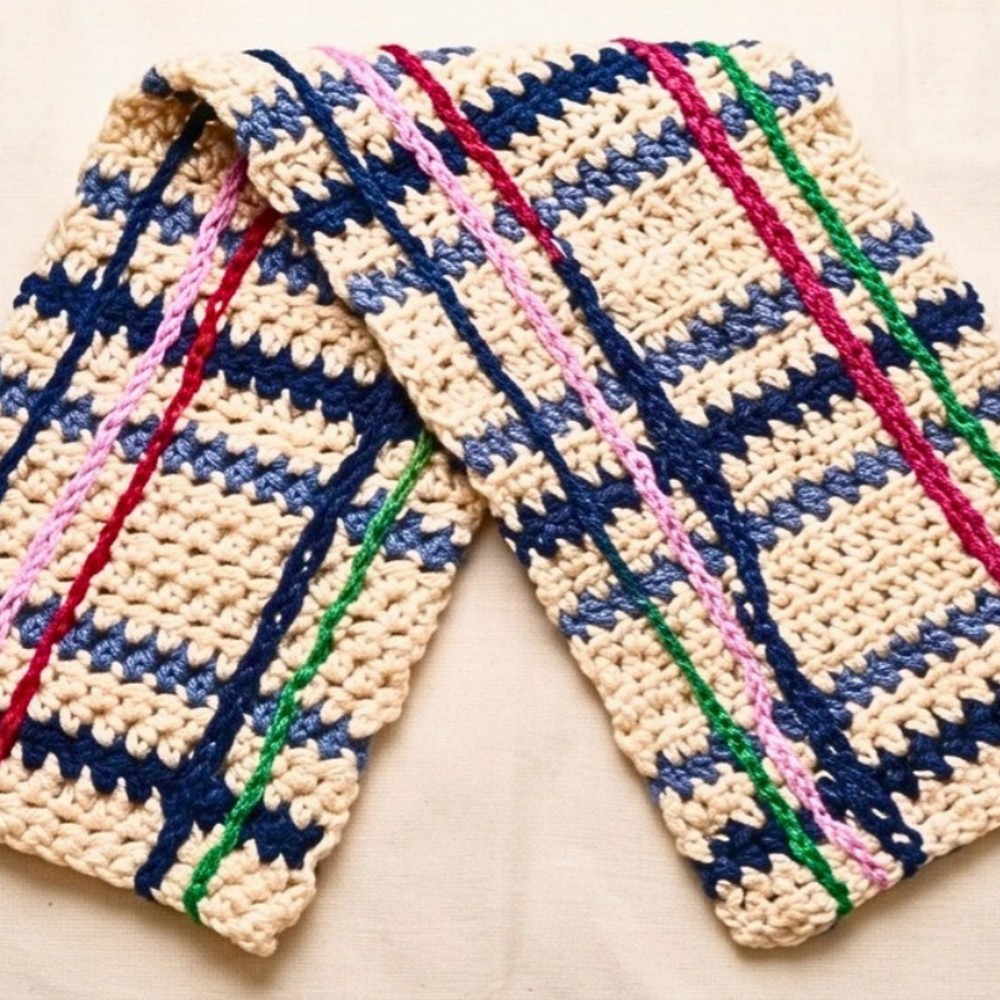
Chunky yarn and half double crochet keep the main scarf straightforward, while the finished plaid effect comes from an extra layer of surface crochet. Horizontal color changes establish the stripes first, then perpendicular slip-stitch lines create the visual grid.
Before starting the crochet plaid lines, you’ll build the scarf with a 15-chain foundation and a repeating 12-row color sequence. The smaller hook used afterward is just as important as the accent yarn because loose surface stitches help preserve the scarf’s flexibility instead of pulling the fabric inward.
Credit eliznuts
Start With the Stripe Structure
The plaid effect is easier to manage when you treat the scarf as two stages: first create the horizontal stripes, then add the perpendicular surface crochet.
For the main scarf, use a 9 mm hook with Weight 6 bulky yarn. The foundation chain of 15 stitches produces a width of approximately 6.5 inches (16–17 cm).
The tutorial scarf measures roughly 62 inches, with 101 rows total. Its stripe arrangement is based on a 12-row sequence repeated approximately 8 times.
Materials and Yarn Setup
Yarn
- Weight 6 bulky yarn:
- Cream, main color – 4 skeins
- Denim Blue, secondary color – 2 skeins
- Weight 4 medium/worsted acrylic yarn:
- Navy – 1 skein, doubled for the scarf stripes
- Assorted scrap acrylic yarns for the surface crochet plaid lines
Hooks and Notions
- 9 mm crochet hook
- 5.5–6 mm crochet hook
- Scissors
- Yarn needle
- Stitch markers
Abbreviations
- ch: Chain
- hdc: Half double crochet
- sl st: Slip stitch
- st(s): Stitch(es)
- yo: Yarn over
- BLO: Back loop only
- inc: Increase
- sc: Single crochet
Build the Main Scarf Pattern
Work the main body with the 9 mm hook and Cream Weight 6 yarn.
Foundation Row: Make a slip knot and chain 15
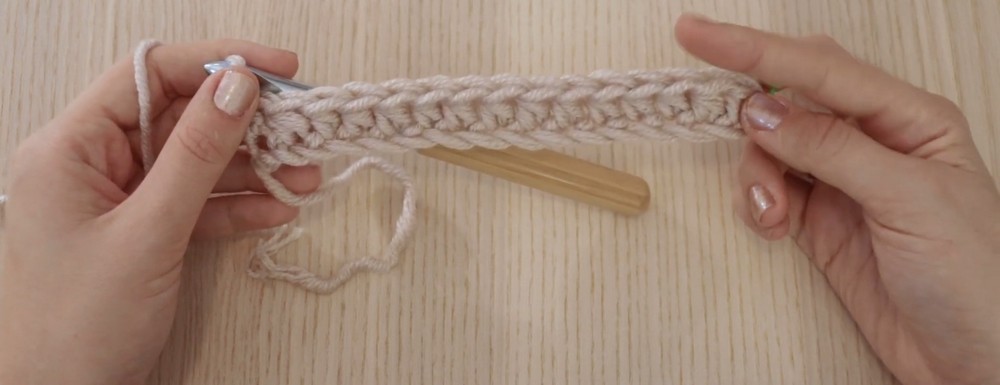
Row 1: Ch 1 (does not count as a stitch), then working into the second chain from the hook, work 15 hdc across; place a stitch marker in the final stitch to identify the row end
Row 2: Ch 1, turn, and work 15 hdc across; on the 15th and final stitch, pull up a loop so 3 loops are on the hook, drop the Cream yarn, and pull the doubled Navy yarn through all 3 loops to complete the stitch and change color. Keep the Color Change at the Edge
Changing color during the final step of the last stitch keeps the transition at the row edge rather than creating an extra stitch or an uneven stripe.
This is also where the unused Cream yarn can be carried. Instead of cutting it after every color change, carry it along the back and trap it inside later hdc stitches where instructed.
Work the 12-Row Color Sequence
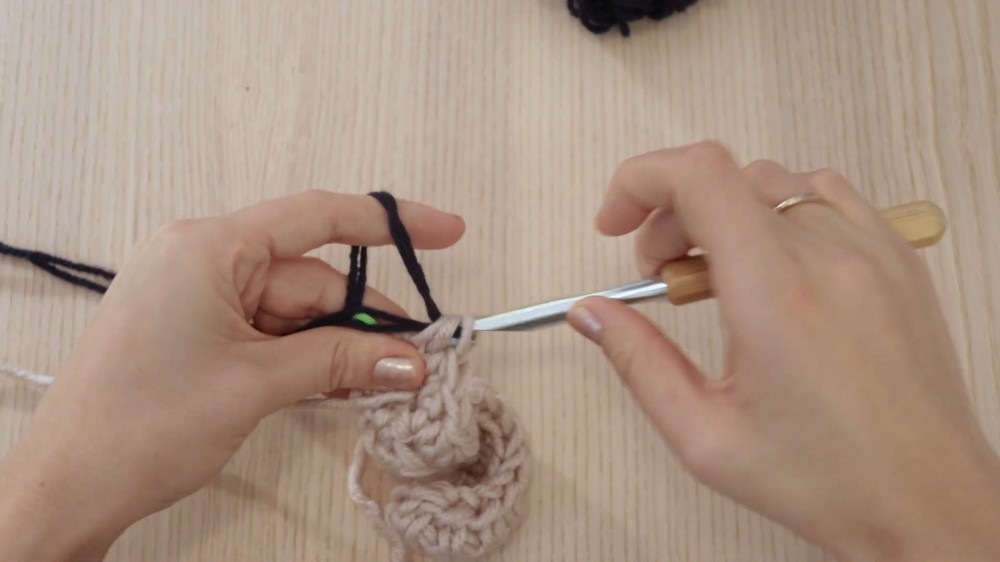
Row 3: Ch 1, turn, carry the Cream yarn across the back of the work by trapping it inside the stitches, and work 15 hdc in doubled Navy; on the final stitch, pull the carried Cream yarn through the remaining loops to change back to Cream, then cut the Navy yarn.
Rows 4–5: Ch 1, turn, and work 2 rows of 15 hdc in Cream.
Row 6: On the final stitch of Row 5, change to Denim Blue; ch 1, turn, carry the Cream yarn across the back, and work 15 hdc in Denim Blue; change back to Cream on the final stitch and cut the blue yarn.
Rows 7–11: Ch 1, turn, and work 5 rows of 15 hdc in Cream.
Row 12: On the final stitch of Row 11, change to Denim Blue; ch 1, turn, carry the Cream yarn, and work 15 hdc in Denim Blue; change back to Cream on the final stitch and cut the blue yarn.
At this point, Rows 1–12 form the core repeating sequence.
Check the Stripe Rhythm
After completing the first 12 rows, look at the scarf before repeating. You should be able to see the horizontal stripe arrangement clearly. Checking here is useful because any missed color change will continue through the repeated sections.
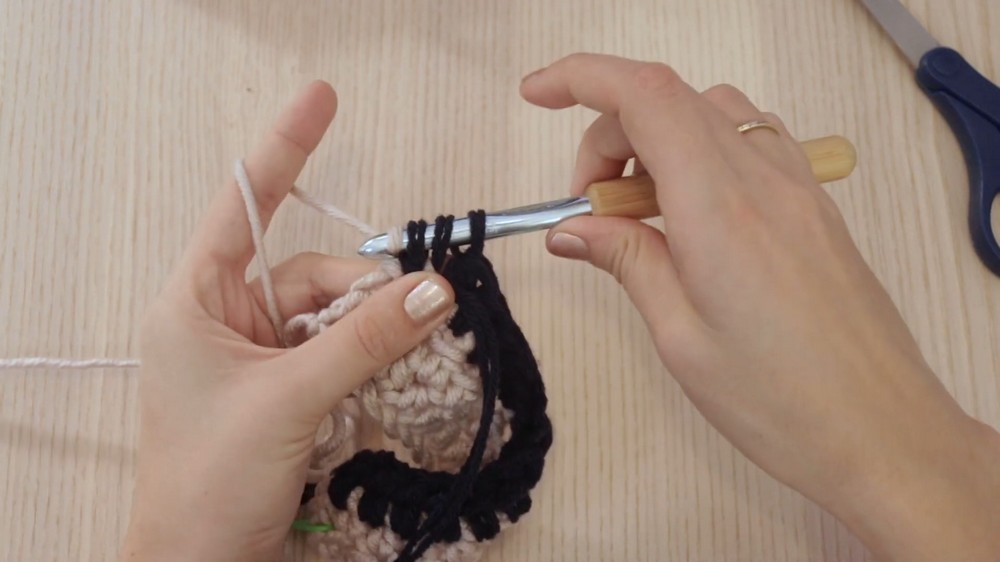
Repeat the 12-row sequence 8 times, or continue until the scarf reaches your preferred length. The tutorial finishes at 101 rows, approximately 62 inches, to match the starting sequence.
Weave in the remaining yarn tails with a yarn needle.
Turn the Stripes Into Plaid
The horizontal stripes create only half of the plaid appearance. The vertical surface crochet lines are what cross those stripes and form the grid.
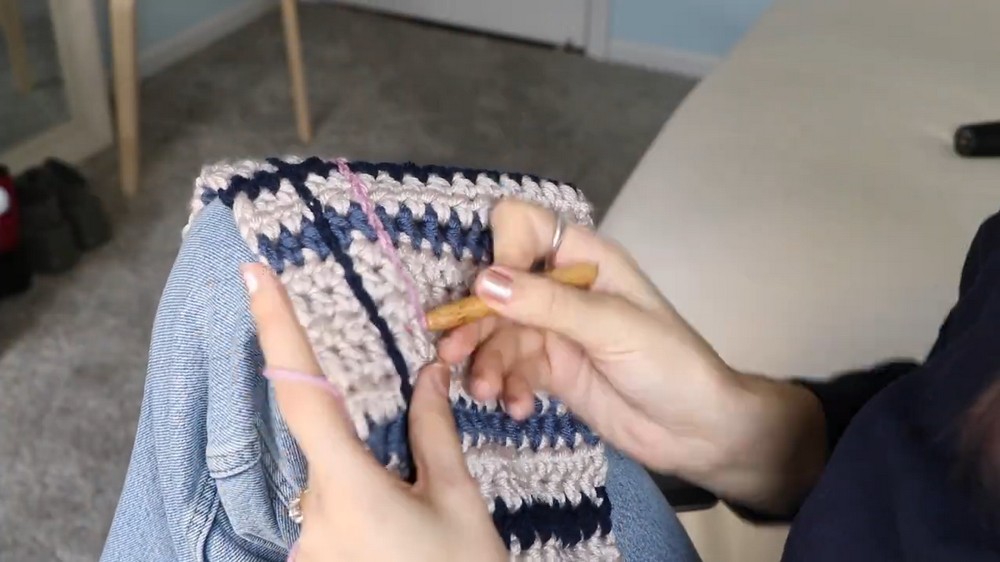
Switch to a 5.5-6 mm hook for this stage. The smaller hook helps keep the surface stitches loose enough that they do not cinch the scarf fabric.
Choose an accent yarn such as one of your assorted scrap acrylic colors.
Place the First Surface Line
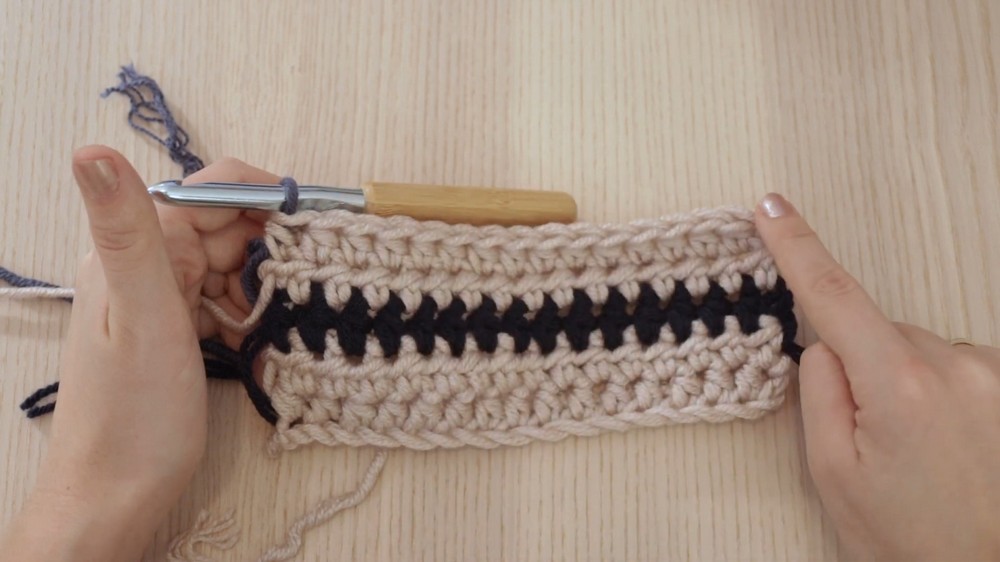
Make a slip knot with the accent yarn and place it on your smaller hook.
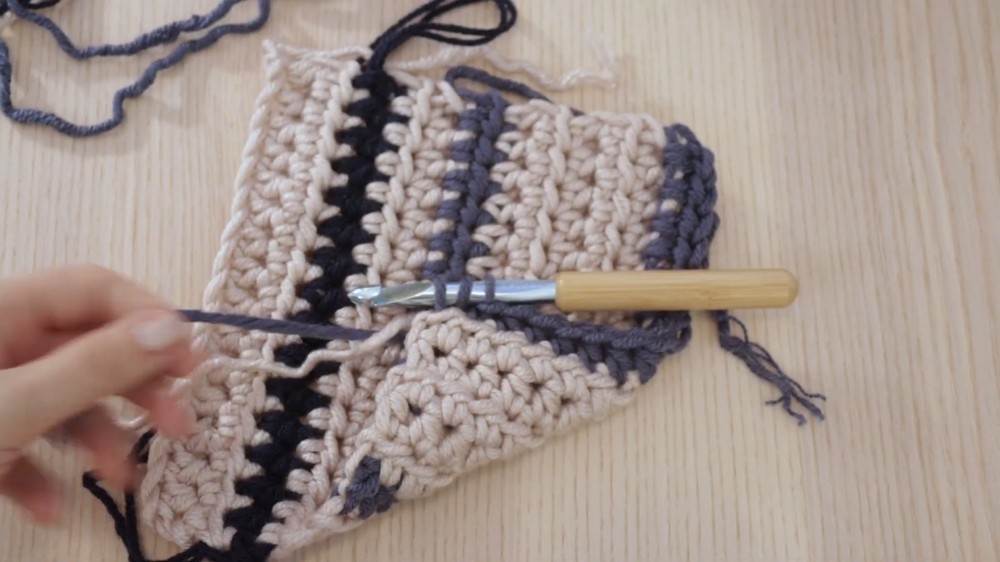
Insert the hook into a stitch along the edge/last row of the scarf. Yarn over and pull up a loop, then pull that first loop through the second loop on the hook to create the first slip stitch. Keep this starting stitch relatively snug so the line is anchored securely.
Work the Vertical Slip Stitches
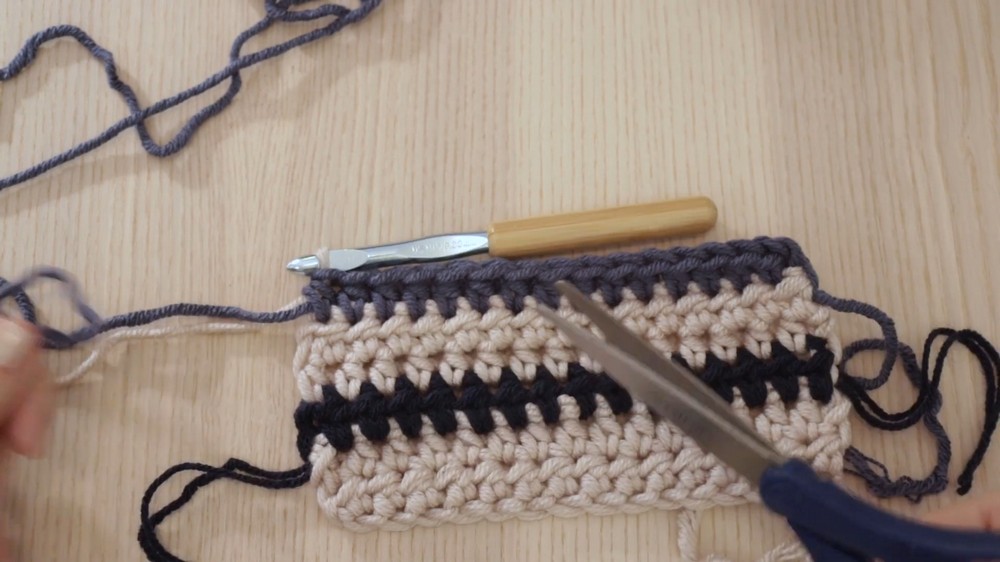
Move vertically along the scarf, following the natural gaps and stitch centers so the line stays straight.
Surface Crochet Line: Insert the hook into the next gap or stitch center, yarn over, pull up a loop, then pull that loop directly through the loop already on the hook to make a slip stitch; continue vertically while keeping each loop slightly loose and stretchy.
The most important detail here is tension. Surface crochet should sit on top of the scarf rather than pulling the fabric together. If the line begins making the scarf narrower or causing ripples, loosen the slip stitches.
Continue adding parallel vertical lines across the scarf, spacing them evenly across its width. The tutorial uses approximately 4–5 vertical lines total.
Let the Scarf Guide Your Placement
There is no need to force the surface stitches into a rigid measurement when the natural stitch gaps already provide a useful path. Concentrate on keeping each line visually straight and the spacing reasonably even.
Because these lines run perpendicular to the horizontal color bands, they create the crossed appearance that makes the stripes read as plaid.
Fasten Off Each Plaid Line
When a vertical line reaches the end, ch 1, cut the yarn, and pull tight to fasten off. Hide the remaining ends neatly.
Repeat with your chosen accent colors until all planned vertical lines have been added.
Final Tension Check
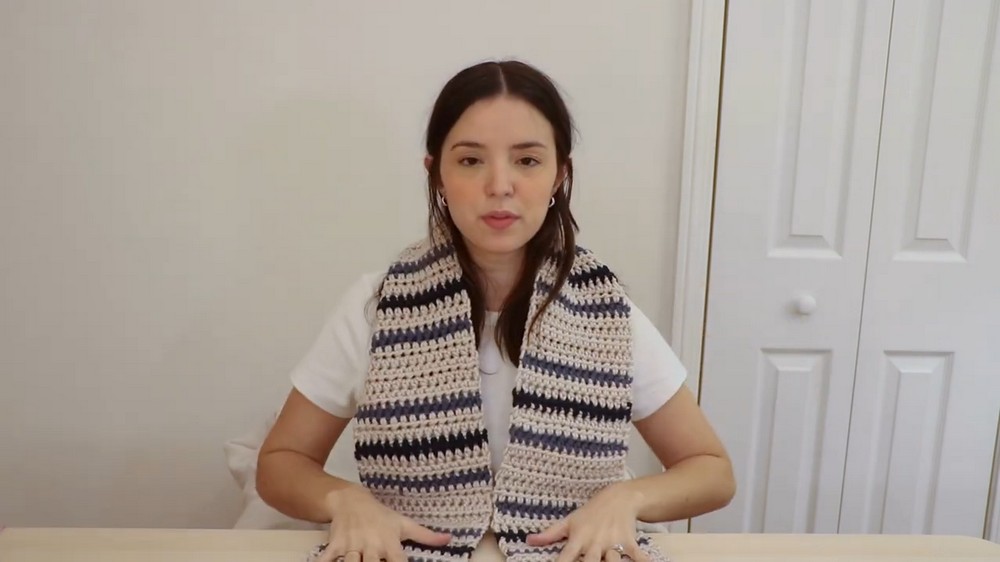
Lay the completed scarf flat and look across the plaid grid.
The horizontal stripes should remain relaxed, while the surface crochet lines should sit visibly on top without puckering the fabric. If the vertical lines are noticeably tighter than the scarf itself, that difference in tension is likely to affect the drape.
Keeping the surface stitches slightly loose is what allows the finished scarf to retain its soft movement while still showing the plaid pattern clearly.