Crochet Frog Amigurumi Pattern & Tutorial
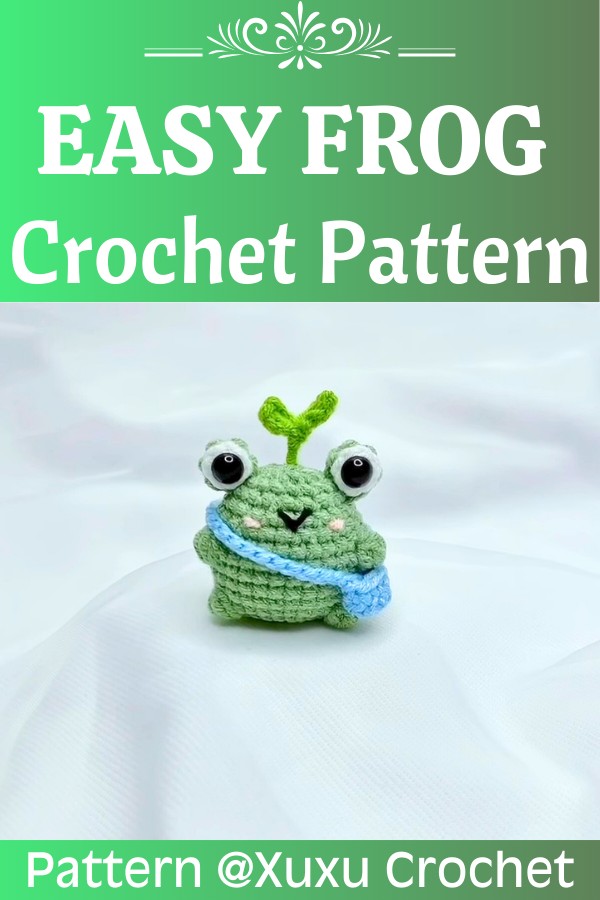
This crochet frog tutorial guides you through shaping, stuffing, facial details, leafy head sprout, and mini bag while keeping each crochet step clear and manageable.
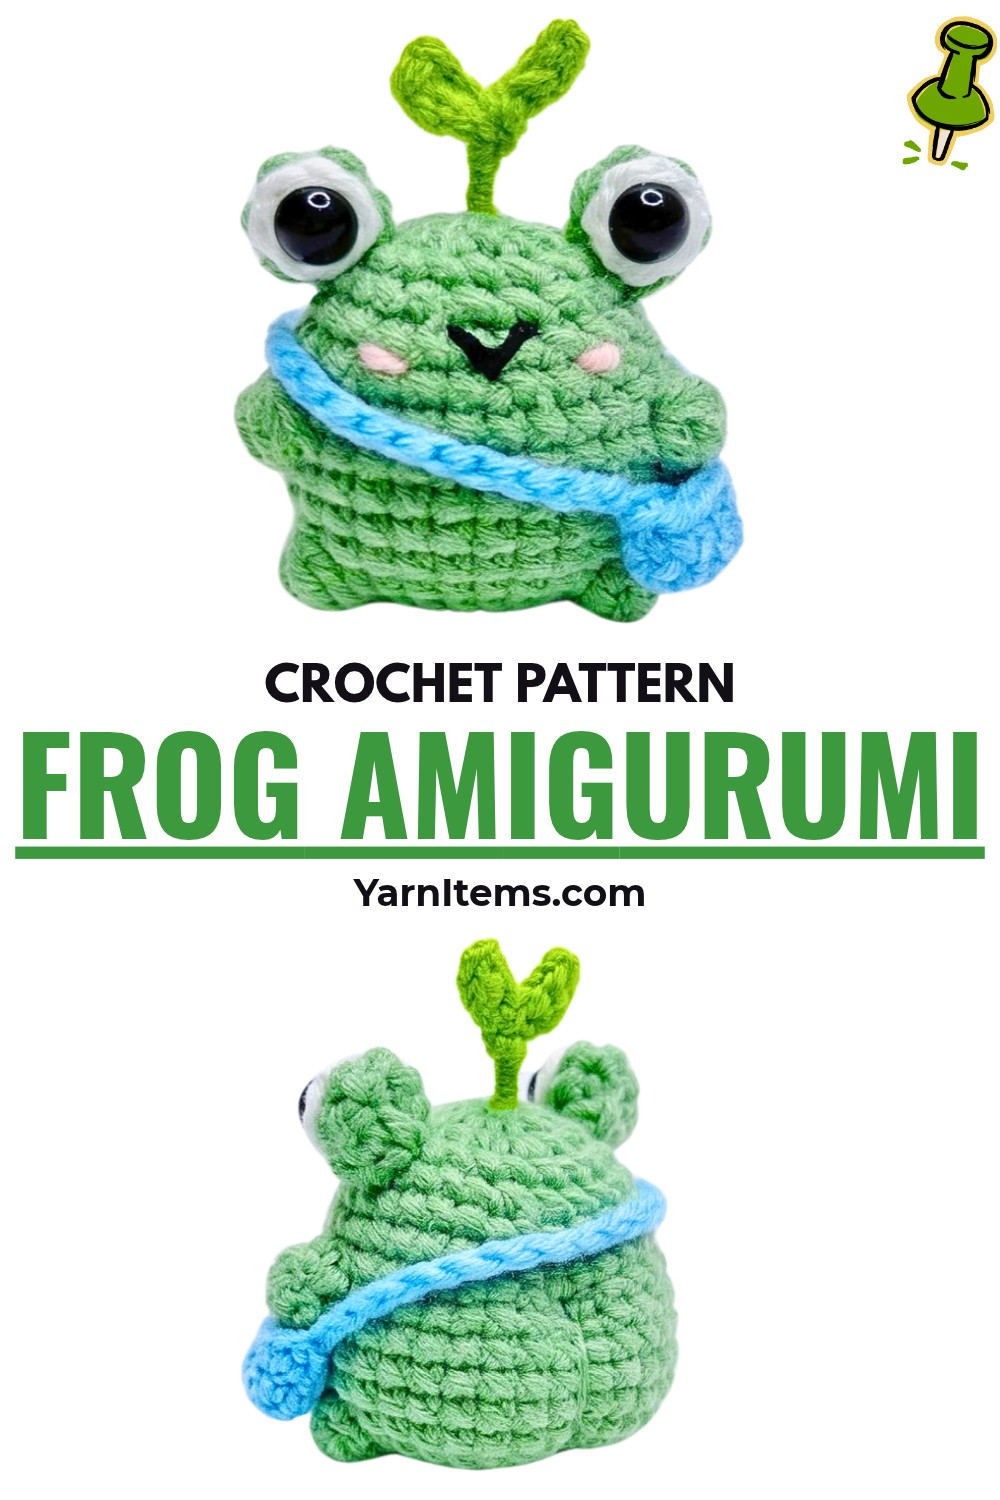
Cute frog details can feel tricky in crochet when shaping, stuffing, and tiny accessories all come together. This crochet guide breaks construction into clear stages so you can follow each part with confidence.
Once crochet begins, you’ll build body shape first, then add eyes, facial features, sprout, and crossbody bag. This crochet frog tutorial also shows where each detail belongs and how final assembly brings everything together. Let’s get started.
Credit Xuxu Crochet
Materials & Tools
- Yarn: Milk Cotton yarn, 50 g balls, in:
- Mint Green – main body
- Lime Green – head sprout/leaves
- White & Black – eyes
- Pink – cheeks
- Blue or Turquoise – mini crossbody bag
- Crochet Hook: 2.5 mm
- Safety Eyes / Beads: 2 black 8 mm eyes
- Craft Wire: 0.4 mm gauge, approximately 5 cm for head sprout
- Polyfill Fiber: For stuffing
- Tapestry Needle: For sewing and shaping
- Stitch Markers
- Scissors
Finished Size & Customization
This frog is approximately palm-sized, with a plump bottom shape and tiny handmade shoulder bag.
For color variations, try pastel pink, lavender, or bright yellow yarn to create different frog designs. If you scale up yarn weight, adjust the bag strap length from its original 30 foundation chains so it fits your larger plushie.
Pattern Abbreviations
- ch: Chain stitch
- sc: Single crochet
- hdc: Half double crochet
- inc: Single crochet increase – 2 single crochets worked into one stitch
- dec: Single crochet decrease – invisible decrease or worked across front loops of 2 consecutive stitches
- bobble: 4-incomplete-dc cluster worked into one stitch to create a textured projection
- sl st: Slip stitch
- st(s): Stitch(es)

Step-by-Step Crochet Instructions
Step 1: Shape Frog Body With Mint Green Yarn
Start with mint green yarn and build body from bottom upward using continuous spiral rounds.
Round 1: Make a magic ring, ch 1, and work 9 sc into ring. Pull yarn tail firmly to close center. Place your stitch marker so first stitch remains easy to identify.
Round 2: Work an inc in every stitch around for 18 stitches.
Round 3: Repeat (1 sc, 1 inc, 1 sc) around for 24 stitches.
Round 4: Repeat (3 sc, 1 inc) around for 30 stitches.
At this point, check that your circle is expanding evenly without pulling tightly at its center. Even increases here help establish frog’s rounded body shape.
Step 2: Add First Layer of Body Texture
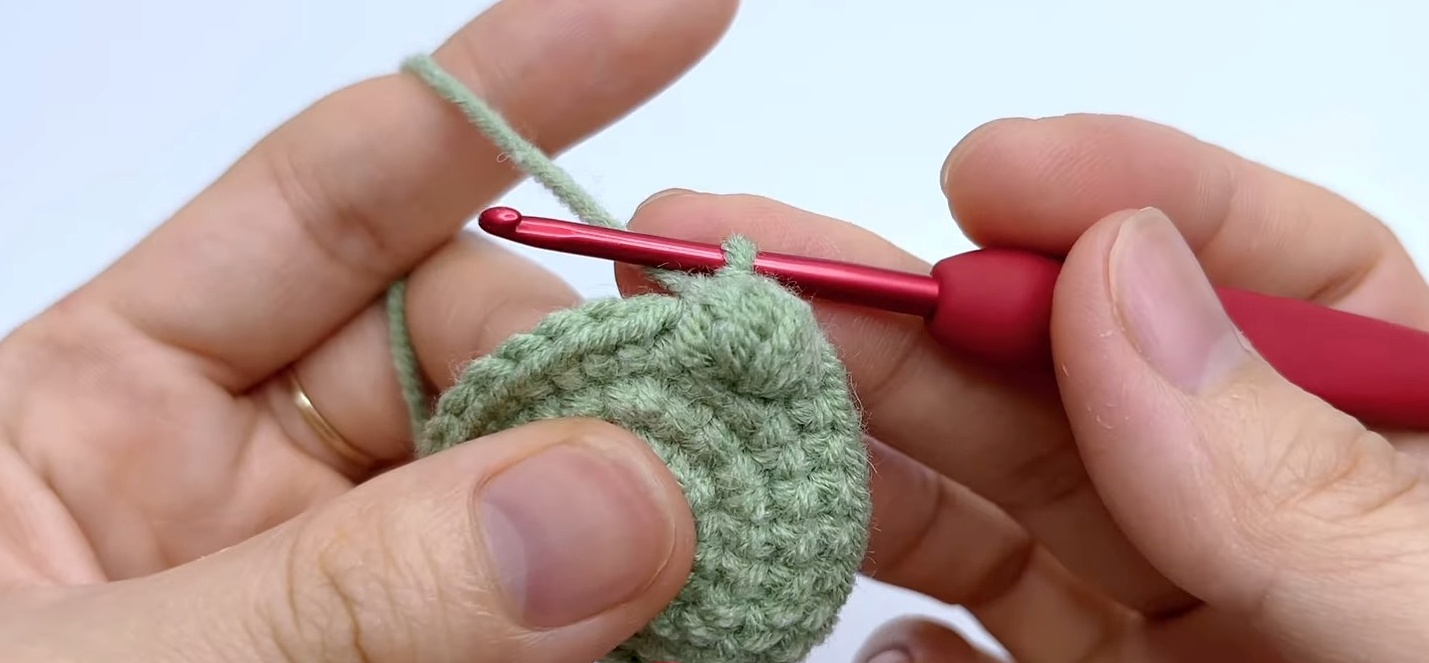
Round 5 creates first pair of raised bobble details.
Work 10 sc, 1 bobble stitch, 8 sc, 1 bobble stitch, 10 sc for 30 stitches.
Keep both bobbles positioned evenly around body. These raised stitches will become part of frog’s textured surface rather than changing overall stitch count.
Step 3: Build Straight Body Height
Work Rounds 6-8 with 1 sc in every stitch around, keeping 30 stitches in each round.
These three rounds add height without increasing or decreasing. Continue using spiral rounds and keep stitch marker moving as you work.
Step 4: Place Second Pair of Bobbles
For Round 9, work 9 sc, 1 bobble stitch, 10 sc, 1 bobble stitch, 9 sc for 30 stitches.
Spacing differs slightly from first textured round, creating another pair of raised details while keeping body circumference unchanged.
Step 5: Begin Body Shaping With Decreases
Work Round 10: 1 sc in every stitch around for 30 stitches.
Then work Round 11: repeat (3 sc, 1 dec) around for 24 stitches.
Follow with Round 12: 1 sc in every stitch around for 24 stitches.
These decreases begin narrowing upper body area. Check that your stitches remain even as circumference reduces.
Step 6: Continue Closing Body
For Round 13, repeat (1 sc, 1 dec, 1 sc) around for 18 stitches.
Work Round 14: 1 sc in every stitch around for 18 stitches.
Pause after Round 14, remove stitch marker, and firmly stuff body with polyfill fiber. Add stuffing gradually and shape it from inside so body feels full while retaining its rounded form.
Step 7: Close and Shape Plump Bottom
For Round 15, work 9 consecutive single crochet decreases.
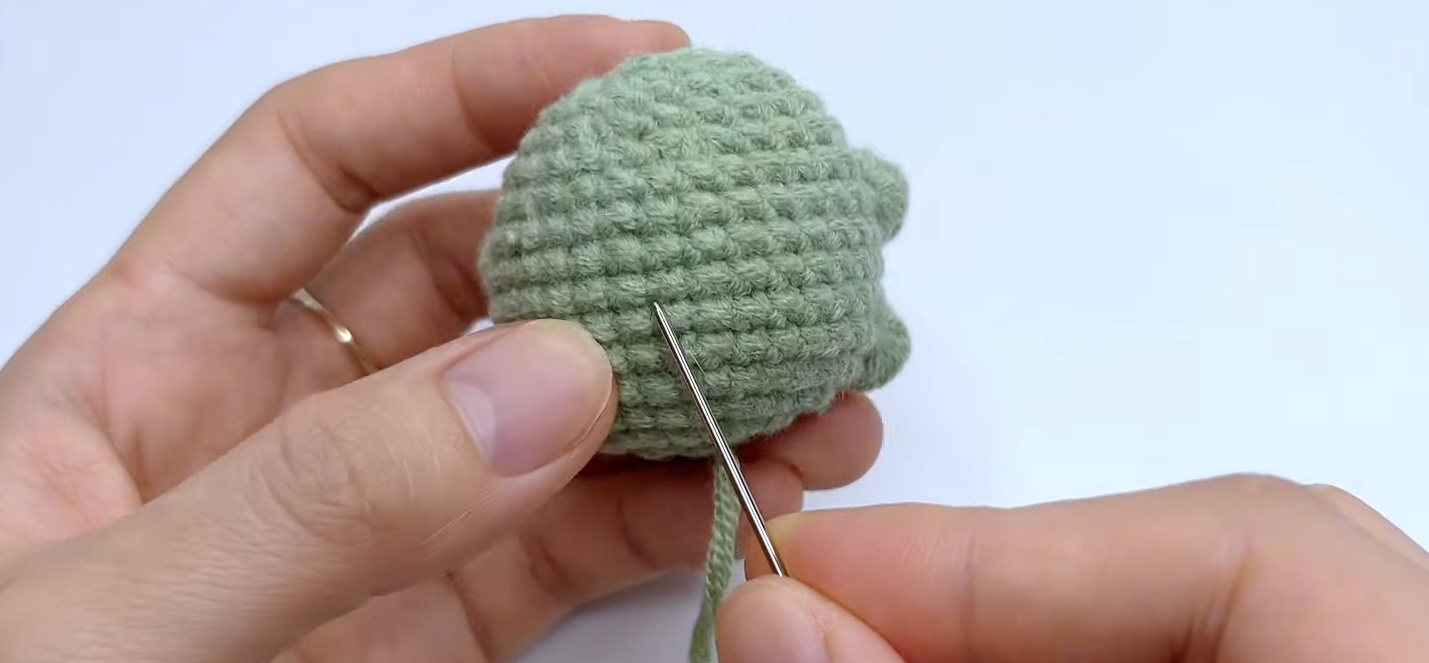
Fasten off while leaving long yarn tail. Thread tail onto tapestry needle and weave through front loops of final round. Pull tightly to close opening.
Next, insert same long yarn tail directly downward from top closing point through body center toward first magic ring. Pull firmly to indent lower back and create frog’s characteristic plump bottom contour. Anchor securely and hide remaining tail.
Check silhouette before moving on. Body should now have rounded volume with visible lower indentation.
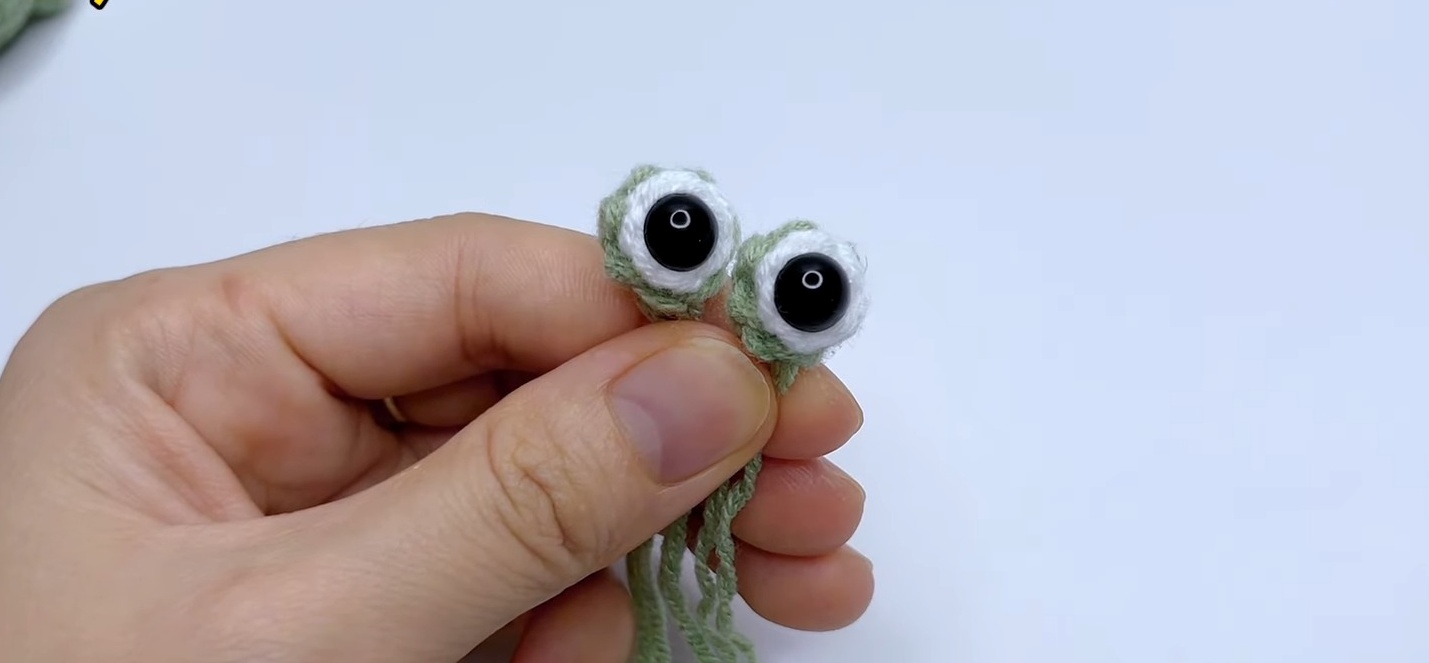
Step 8: Crochet Mint Green Eye Bases
Make 2 mint green eye bases.
For each eye, make magic ring, ch 1, and work 6 sc into ring. Pull ring closed.
Join with sl st into first stitch, ch 1, then work 1 sc in each stitch around for 6 stitches. Finish with sl st, fasten off, and pull tail through to back.
Keeping both eye bases identical will make final placement easier.
Step 9: Add White Eyes and Black Pupils
Make 2 white circles using a magic ring, ch 1, and 6 sc. Pull closed and fasten off.
Place each black 8 mm safety eye through center of white circle, or secure black eye detail with craft glue. Then glue each white circle onto front of corresponding mint green eye base.
Allow glued details to secure before sewing eyes onto body.
Step 10: Create Lime Green Head Sprout
Make 2 lime green leaves.
Start each leaf with slip knot and ch 4. Working down chain, skip first chain, then work 1 sc in second chain, 1 hdc in third chain, and 1 sl st in final chain.
Fasten off while leaving yarn tails available for joining.
Take approximately 5 cm of 0.4 mm craft wire and place it alongside both leaves. Wrap excess yarn tightly around wire stem so leaves stay secured together.
The wrapped section should form one compact stem ready for insertion into frog’s head.
Step 11: Crochet Mini Crossbody Bag
Use blue or turquoise yarn.
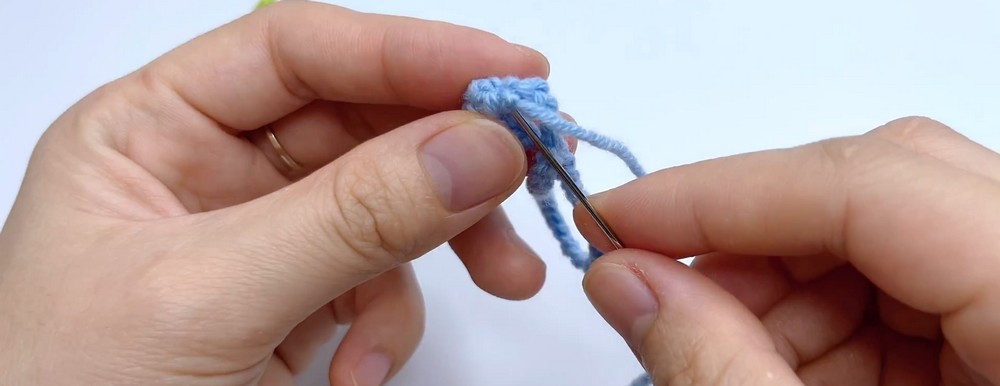
For bag base, chain 4. Skip first chain from hook, work 1 sc in each of next 2 chains, then work 3 sc into final end chain.
Continue along opposite side of foundation chain with 1 sc in next chain and 2 sc into final base chain.
For Round 2, join with sl st to first stitch, ch 1, and work 1 sc in every stitch around for 8 stitches. Join with sl st.
For strap, chain 30 stitches. Test strap length across frog’s body before securing it. Anchor opposite end to other side of bag with sl st, then fasten off and weave in ends.
This fit check is useful because strap position should sit comfortably across frog rather than hanging too loosely.
Step 12: Attach Eyes and Complete Face
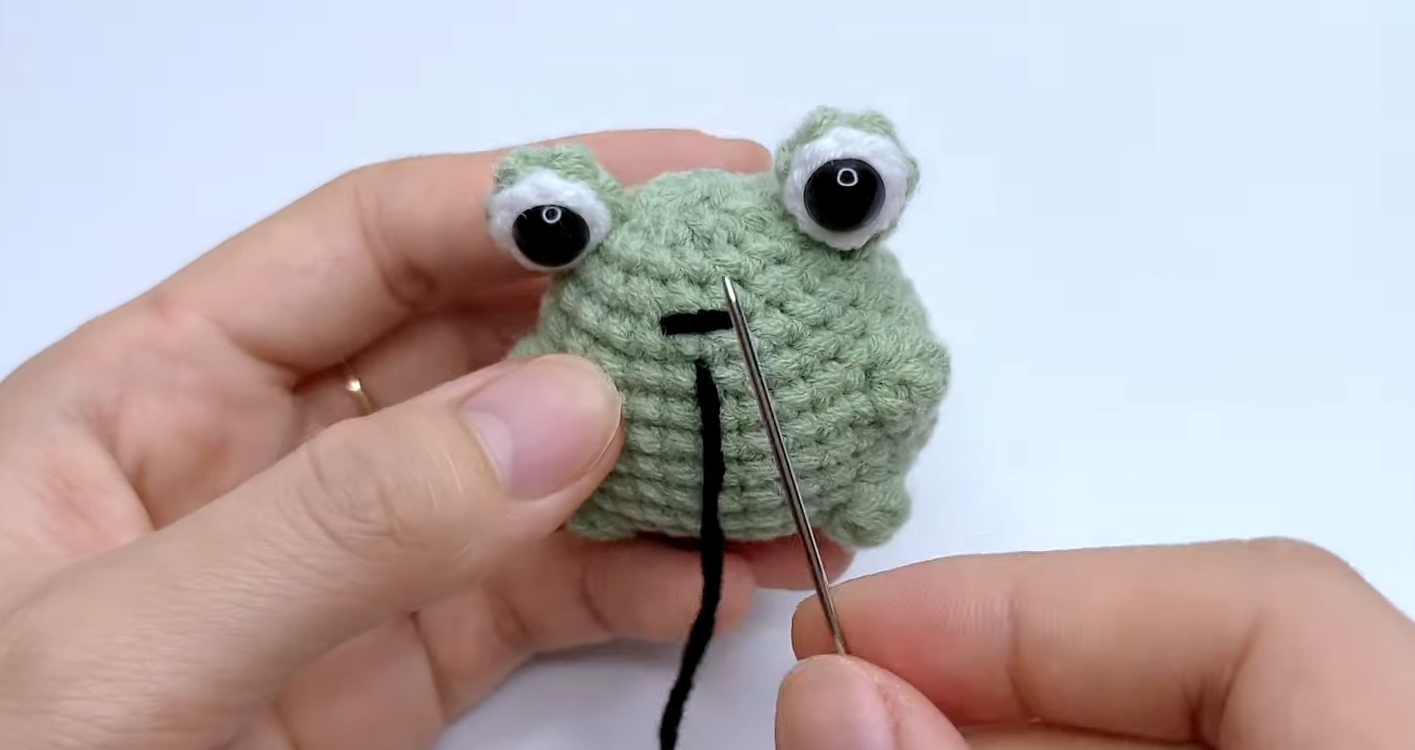
Position completed eyes symmetrically on upper head area, approximately across Rows 12–14.
Sew each eye securely using matching mint green yarn. Check spacing from front before making final stitches so both eyes sit at similar height.
Using black embroidery thread or yarn, stitch small smiling mouth centered below eyes.
Add tiny oval pink embroidered cheeks on both outer sides of smile. Keep cheeks balanced but slightly playful for finished facial expression.
Step 13: Attach Head Sprout and Crossbody Bag
Push wire-stemmed lime green leaf sprout directly into top center of frog’s head.
Guide wire carefully into body so sprout sits upright and centered. Make sure exposed wire does not extend beyond intended attachment area.
Finally, slip blue crossbody bag strap over frog’s shoulder so bag rests neatly across chest.
Adjust strap position gently until bag sits naturally and completes frog’s finished look.
Your crochet frog amigurumi is now complete, with textured body, expressive face, leafy head detail, rounded bottom contour, and tiny handmade bag ready to finish its character.