How to Crochet a Winter Beanie Hat Step-by-Step Tutorial
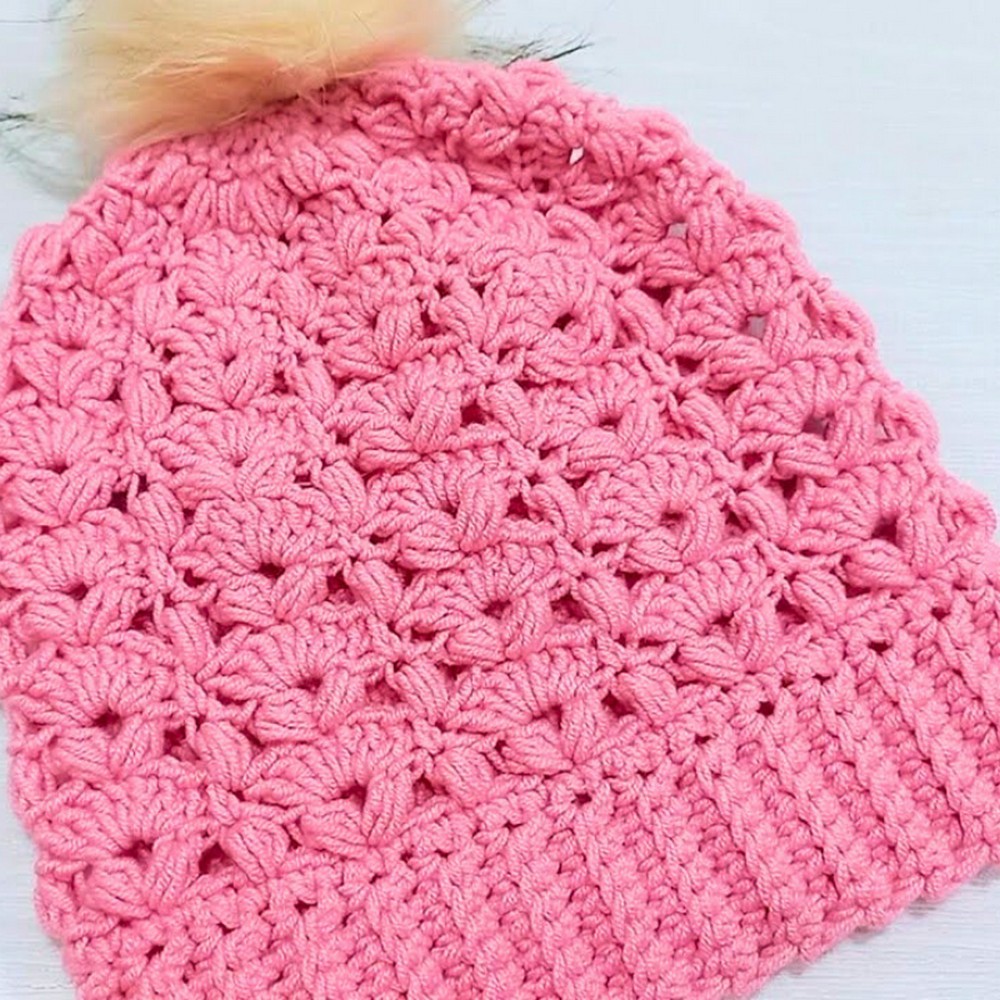
A crochet winter beanie is the kind of handmade piece that blends everyday comfort with timeless style.
Its soft texture, snug fit, and clean design make it easy to wear with everything from casual jackets to cozy sweaters. Whether made for a child or an adult, this beanie brings warmth without sacrificing a neat, polished look.
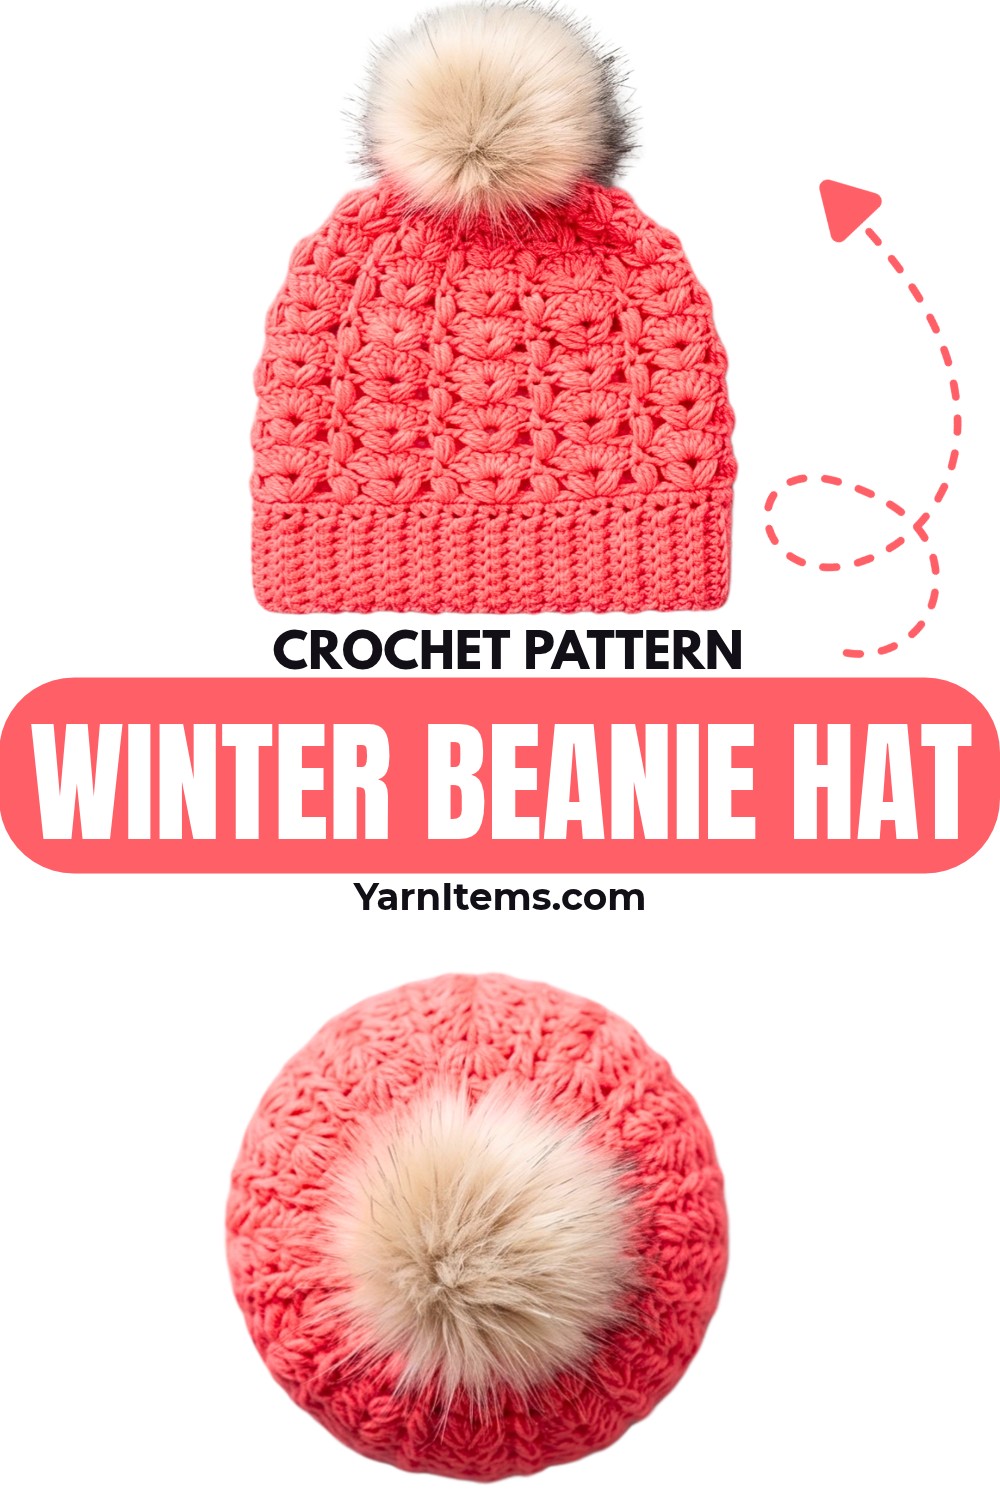
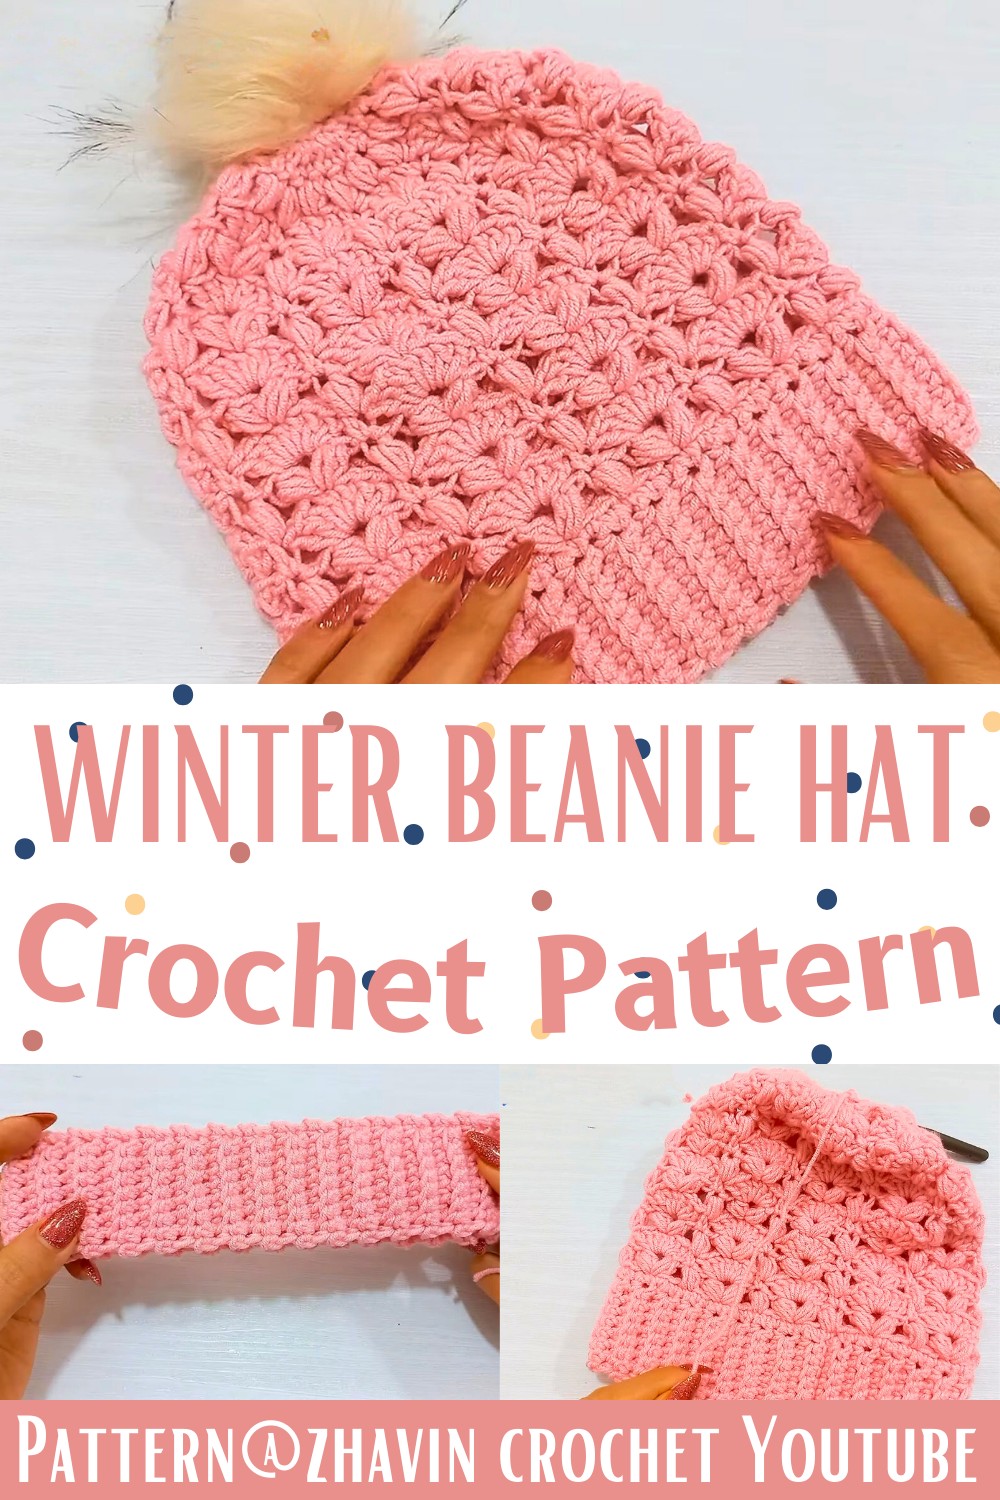
This crochet beanie comes together with easy, repeating stitches that create a comfortable shape and a smooth finish. You can personalize the crochet hat piece with your favorite yarn colors or add a fluffy pom-pom for extra charm. Perfect for daily outings, relaxing at home, or thoughtful handmade gifts, it offers lasting comfort throughout the chilly season.
Credit zhavin crochet
Materials & Tools Needed
- Yarn: Worsted weight yarn (choose your preferred color).
- Hook:
- 4.5 mm crochet hook (for the brim).
- Keep the same hook size for the body.
- Tapestry needle: For weaving tails and closing the hat’s top.
- Optional: Pom-pom maker (for an additional decorative pom on top).
Finished Size & Customization Ideas
- The tutorial creates the hat in child size. To adjust the pattern for other sizes:
- For larger hats, increase the number of rows in the ribbed brim (in multiples of 6).
- Adjust the overall height of the body by repeating the puff-and-shell stitch pattern more times.
- Add a pom-pom or leave the top plain.
Pattern Note
- Construction: The hat is created in two sections:
- A ribbed brim (worked in rows and then joined).
- The body (worked around the brim in continuous rounds).
- The puff-and-shell stitch alternates rounds: puff stitches form texture, while shell stitches add a lacy flair.
- Stitches and rows are repeated, keeping the process simple.
Pattern Abbreviations & Terminology
The pattern uses US crochet terms:
- Ch: Chain
- SC: Single crochet
- DC: Double crochet
- Puff stitch: (Yarn over, insert hook, pull up a loop) repeated 3 times, yarn over, pull through all loops.
- Sl st: Slip stitch
- Skipping stitches: Instructions will say how many stitches to skip.
Tips Before You Start
- Check gauge: For a comfortable fit, ensure the ribbed brim easily stretches to the desired size.
- Adjust stitch counts carefully: Ensure the brim rows are in multiples of 6 to maintain the pattern repeat.
- Keep tension consistent for uniform texture and size.
Step-by-Step Detailed Crochet Instructions
Step 1: The Ribbed Brim
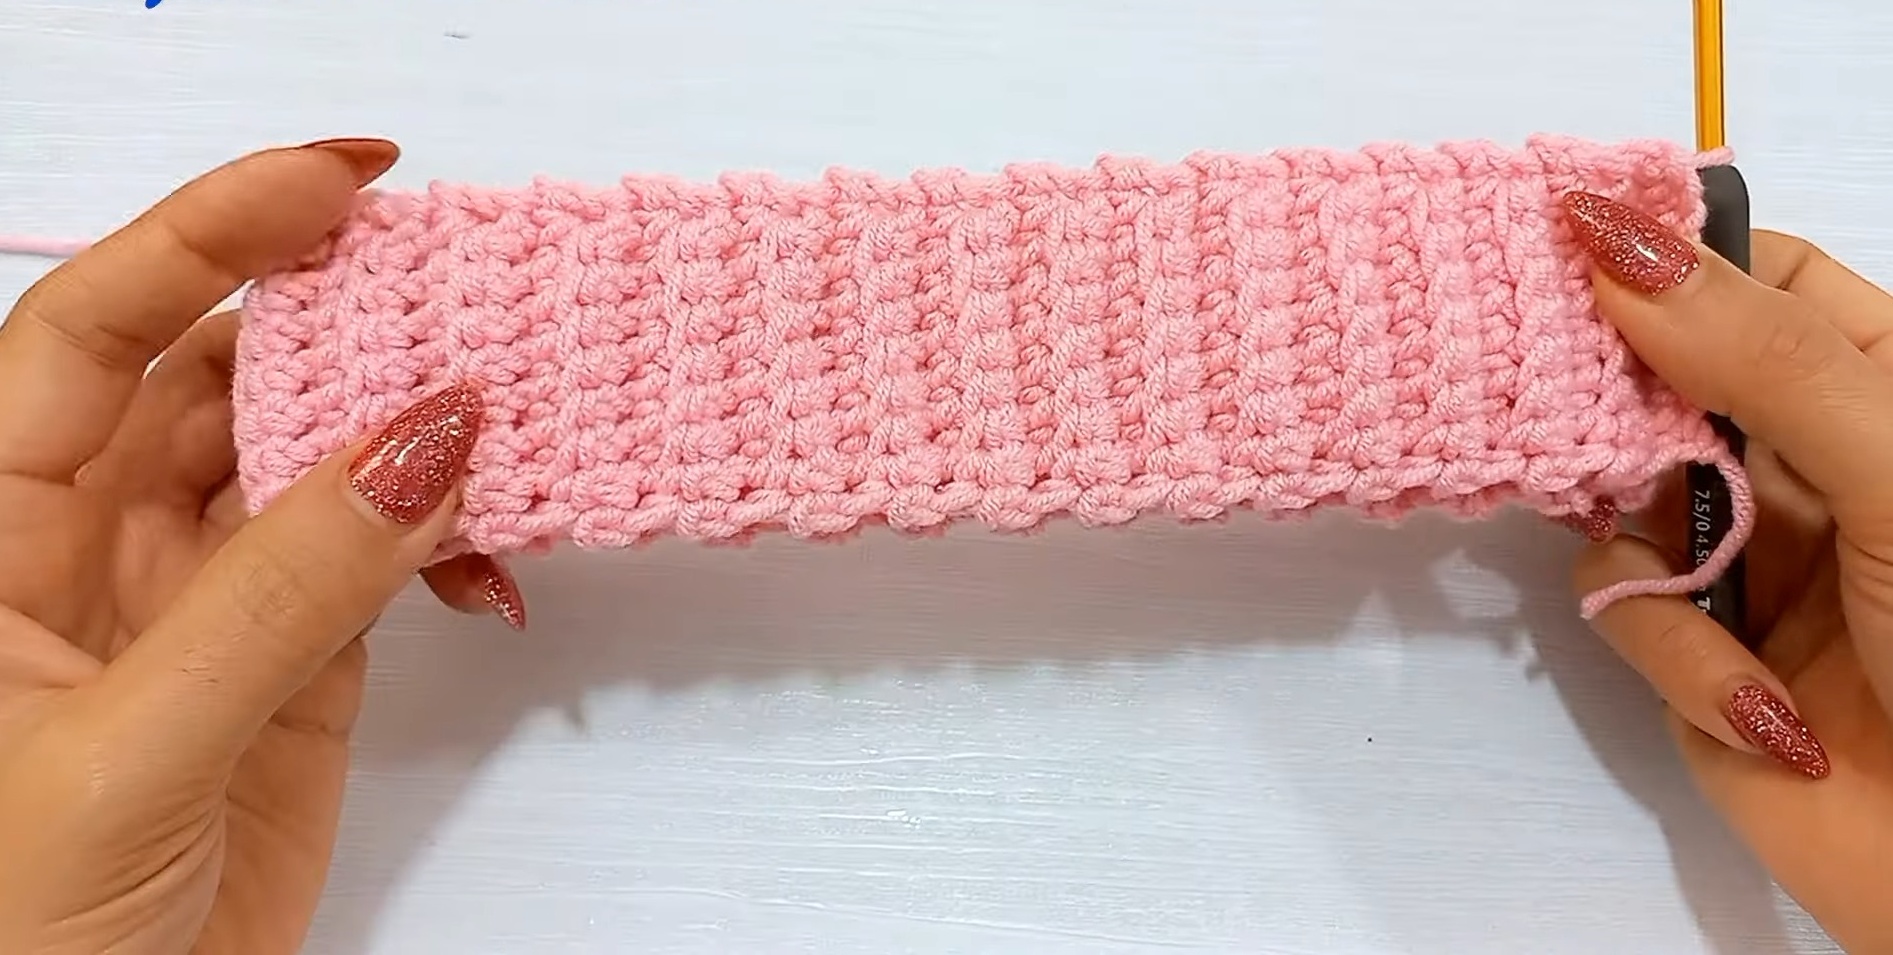
- Start: Make a slip knot and then crochet 9 chains (Ch 9). Adjust the number of chains if you want a taller or shorter brim.
- Row 1: Skip the first chain and make 1 SC in the second chain from the hook. Continue making 1 SC in each chain across. You now have 8 stitches.
- Row 2 Onward:
- Ch 1, turn.
- Make 1 SC under both loops of the first stitch.
- For the middle stitches, make 1 SC in the back loop only.
- Make 1 SC under both loops of the last stitch to ensure a neat edge.
- Repeat Row 2 until the brim fits the desired circumference of the head. Remember to ensure the total number of rows is a multiple of 6 (e.g., 60 rows for this hat).
- Join Brim Ends:
- Fold the brim so the starting edge (Row 1) and the last row align.
- Sl st across to join the two edges, working through the front loop of Row 1 and both loops of the last row to create a seamless join.
- Turn the joined brim inside out so the join is hidden on the inside.
Step 2: The Body of the Hat
Round 1: Base of the Body
- Ch 1, make 1 SC into the same stitch as the join.
- Work 60 SC evenly around the edge of the brim (1 SC for each row of the brim).
- Sl st to the first SC to close the round.
Round 2: Puff Stitch
- Ch 1, make 1 puff stitch into the same stitch:
- [Yarn over, insert hook into stitch, pull up a loop] (repeat 3 times), yarn over, pull through all 7 loops, Ch 1.
- Skip 2 stitches, then in the next stitch make:
- (Puff stitch, Ch 2, Puff stitch) in the same stitch.
- Ch 1, skip the next 2 stitches, and make 1 puff stitch in the next stitch.
- Repeat the sequence until the end, alternating single puff stitches and paired puff stitches.
- Sl st to the first puff stitch to join.
Round 3: Shell Stitch
- Ch 1, make 1 SC into the same stitch.
- Skip the next Ch 1 space and puff stitch, then into the Ch 2 space (between 2 puff stitches of the previous round), make:
- 7 DC (shell stitch).
- Skip the next puff stitch and Ch 1 space. Make 1 SC into the puff stitch after that.
- Repeat the sequence: 7 DC into each Ch 2 space, followed by 1 SC into the puff stitches between puff pairs.
- Sl st to the first SC to close the round.
Round 4: Return to Puff Stitches
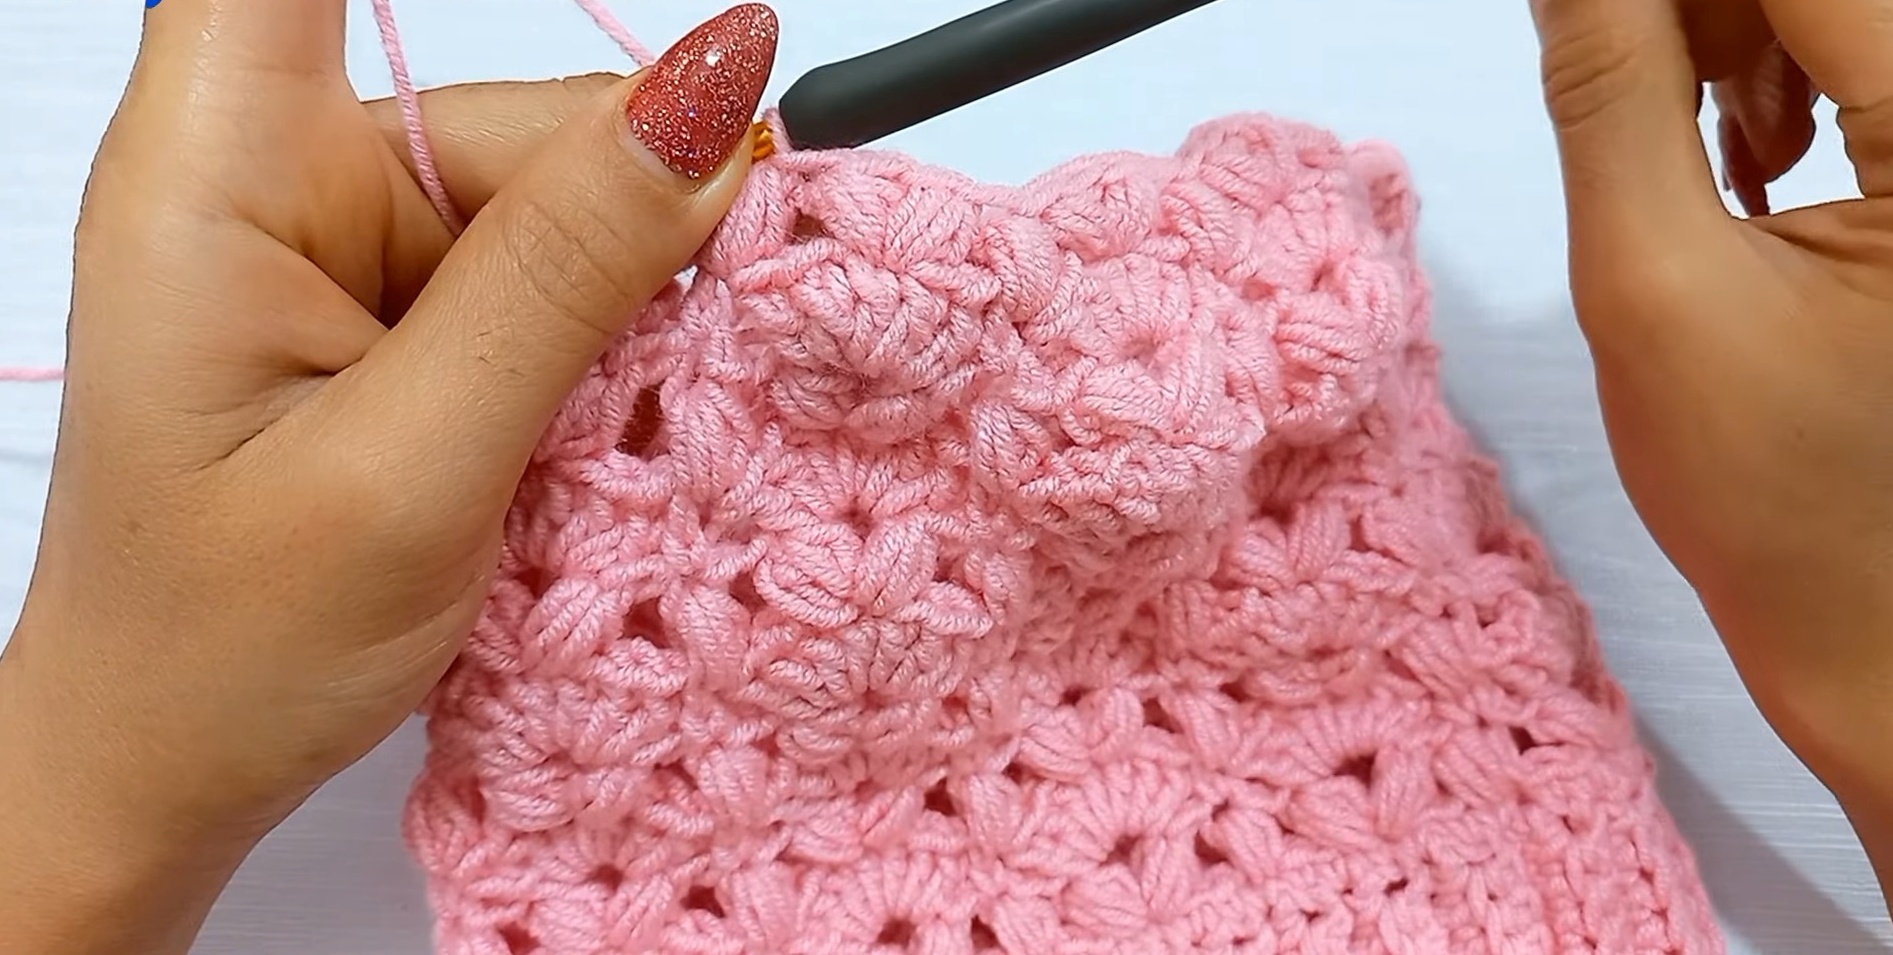
- Ch 1, make 1 puff stitch into the same stitch.
- Skip 3 DC of the shell. Into the 4th DC (middle stitch of the shell), make:
- (Puff stitch, Ch 2, Puff stitch).
- Skip the remaining 3 DC of the shell and the SC. Into the next SC, make:
- 1 puff stitch.
- Repeat until the round is finished. Sl st to the first puff stitch.
Repeating the Pattern
- Repeat Rounds 3 and 4 (shell stitch and puff stitch rounds) to build the body of the hat.
- Continue until the hat reaches the desired height, approximately 7-8 inches for a child or 9-10 inches for an adult, including the brim.
Step 3: Decreasing for the Crown
- Reduce the shell stitch to 5 DC in each Ch 2 space instead of 7 DC.
- For puff stitches, stop placing chains between stitches to close the gap between the puffs.
- Continue reducing in this manner until there is a small hole (5-6 puff stitches total at the top).
Step 4: Closing the Top
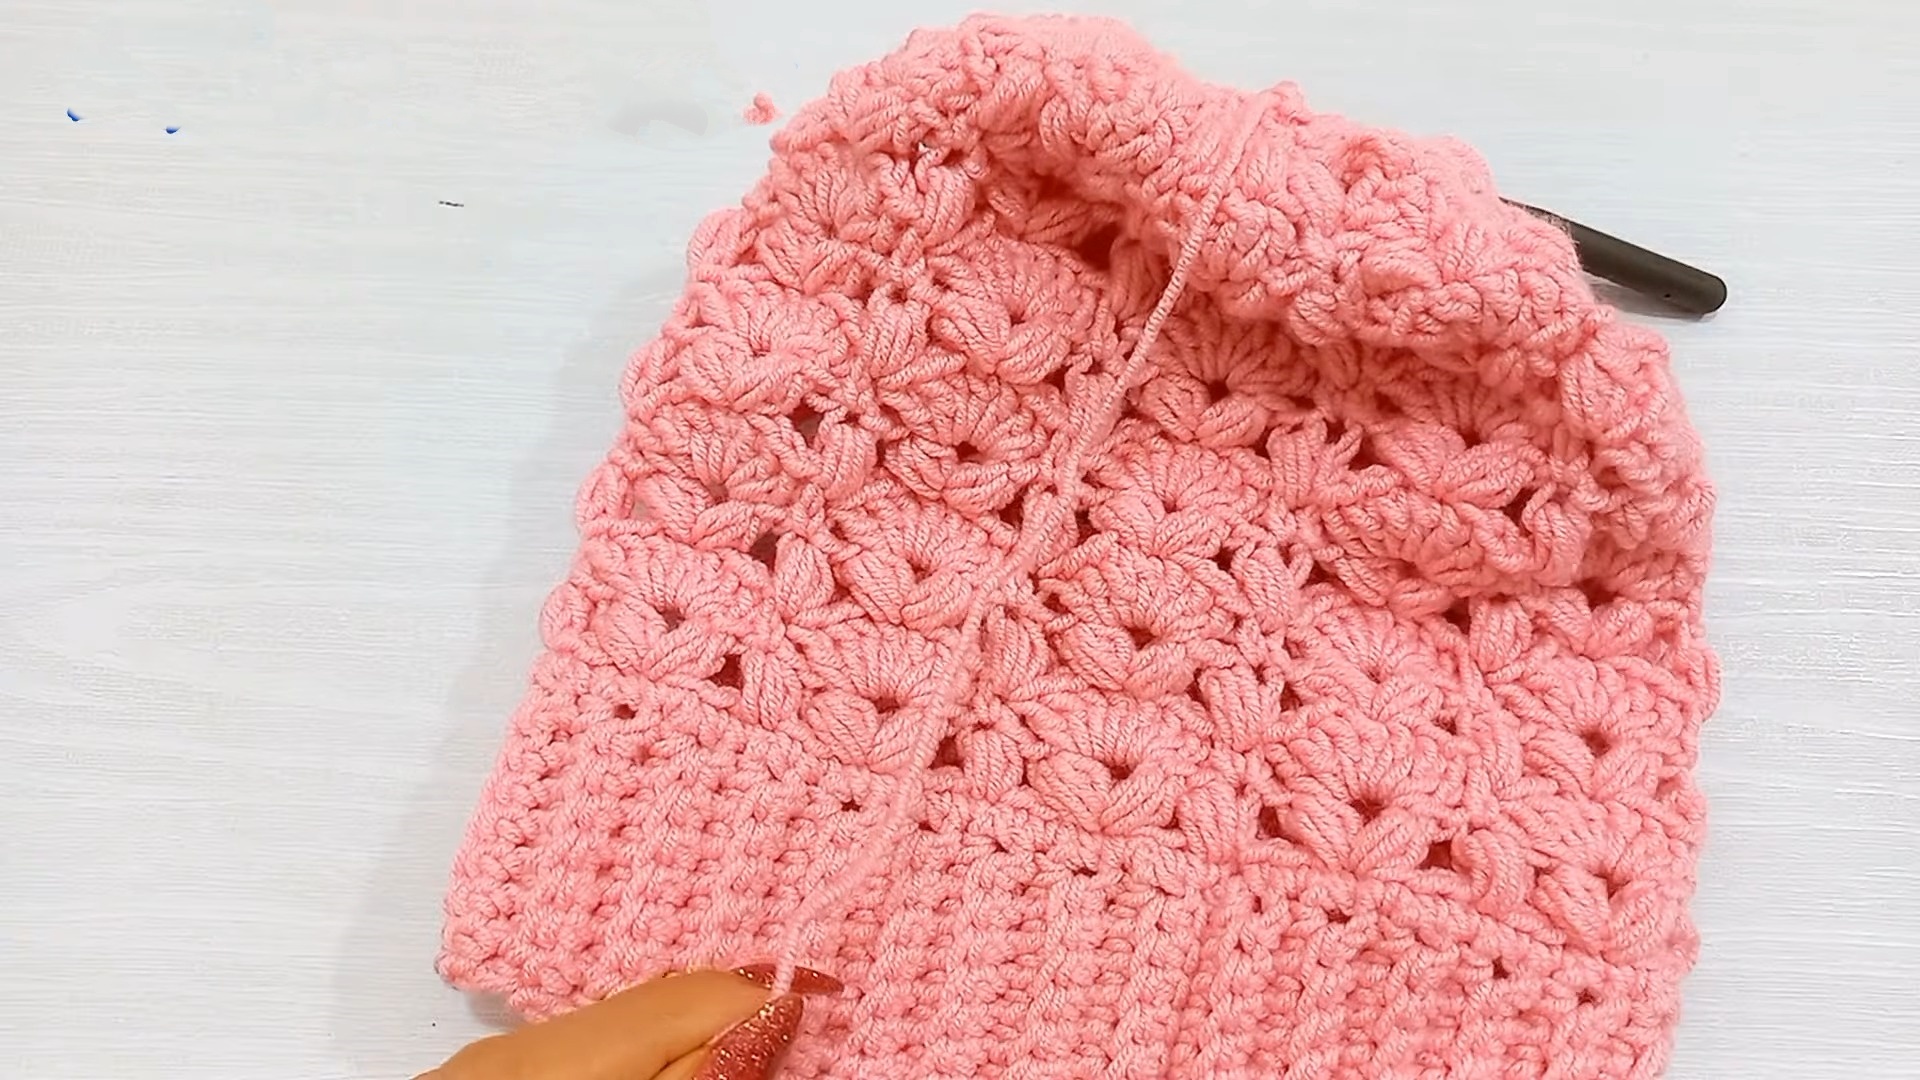
- Once the stitches have been decreased to form a small hole, thread a tapestry needle with the yarn tail.
- Weave the yarn through the remaining stitches.
- Pull tight to close the hole, and secure with a knot.
- Weave in all loose ends.
Final Assembly
- Optionally, attach a pom-pom to the top of the hat for a playful, finished look.
- Ensure all ends are securely tucked away for a professional result.
Conclusion
Congratulations! You’ve completed your puff-and-shell stitch winter beanie hat. Customize it further by experimenting with different colors, adding decorative elements, or making multiple hats in various sizes.
Be proud of your creation and stay cozy this winter!