Crochet Granny Square Vest Design Step-By-Step
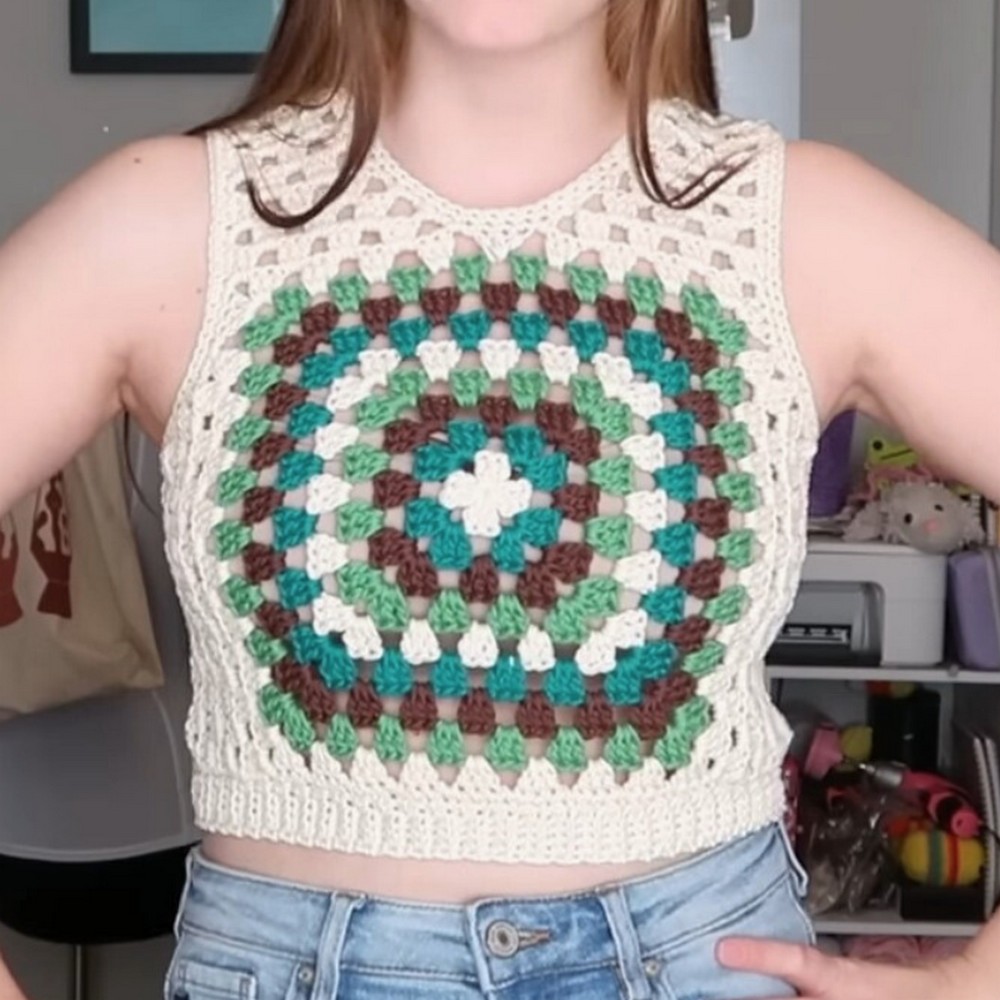
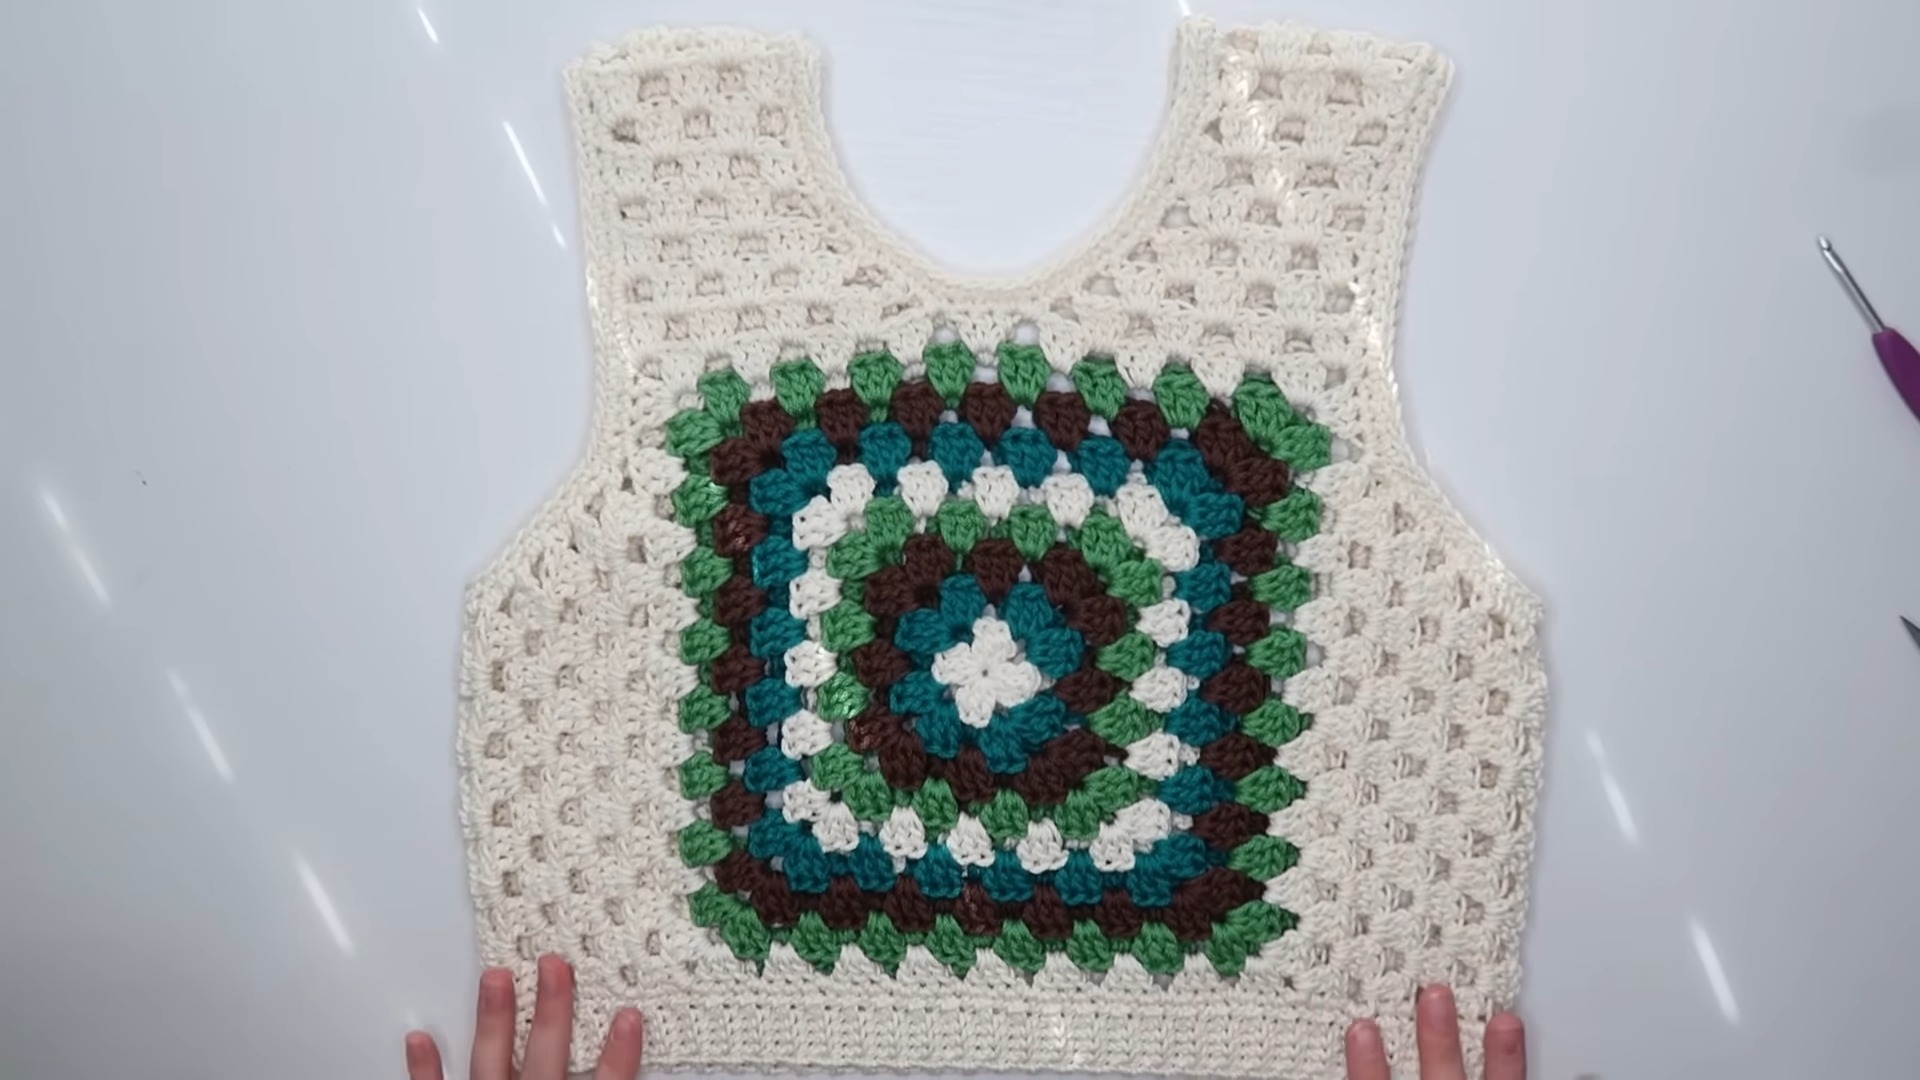
A timeless design never goes out of style, and this vest proves why. The Crochet Granny Square Vest blends classic granny squares with a modern silhouette, creating a piece that feels both fashionable and comfortable.
Its colorful texture adds character to any outfit, making it an easy choice for every season. Whether paired with a simple shirt or layered over your favorite top, this handmade crochet item brings effortless charm to your wardrobe.
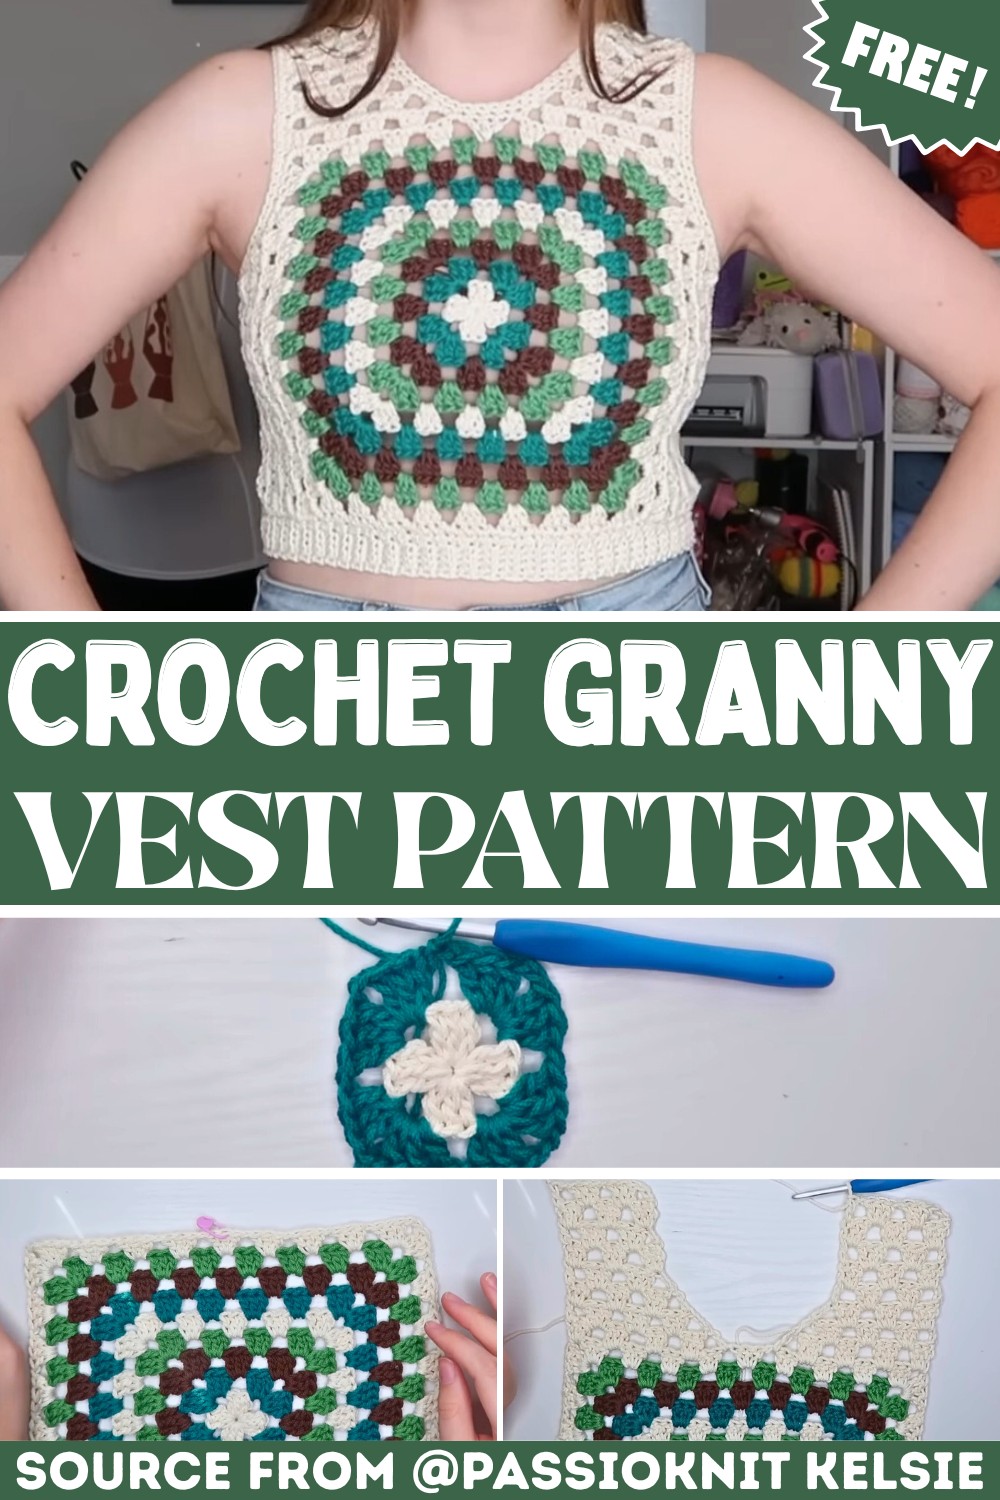
Colorful crochet granny squares come together to create something truly eye-catching. This vest is shaped to provide a comfortable fit while allowing endless color combinations to match your personal style.
Each section builds gradually, making the piece enjoyable for both beginners and experienced crocheters alike. The finished item is lightweight, versatile, and perfect for adding a handmade touch to everyday outfits.
Materials & Tools Needed
- Yarn: 4-weight (medium) cotton yarn. Tutorial uses Caron All Day Cotton, but any sturdy, breathable cotton yarn will work.
- Multicolored yarn is used in the tutorial (cream, turquoise, brown, and green), but you can use as many or as few colors as you prefer.
- Crochet Hooks: 5 mm and 4 mm
- 5 mm (main)
- 4 mm (for bottom ribbing)
- Additional Supplies:
- Scissors
- Tapestry needle
- Stitch markers
- Measuring tape
Finished Size & Customization Ideas
- Sizing: This vest is made to fit your body measurements. The squares are made large enough to span from armpit to armpit. There are no pre-set sizes (e.g., XS to XL); the process is tailored to your body by holding it up against yourself or referring to personal measurements.
- Customization Ideas:
- Adjust granny square size for a tighter or looser fit.
- Customize the length of straps based on neckline preferences.
- Experiment with different color patterns (solid, stripes, or alternating colors).
Pattern Notes
- Skill Level: Beginner-friendly, though familiarity with basic stitches and granny-square construction is helpful.
- Construction:
- The vest is made in multiple pieces:
- Two large granny squares (front and back).
- Shoulder straps.
- Side panels for shaping the armholes.
- The pieces are joined with whip stitching.
- The edges are finished with single crochet borders (around the neckline and armholes).
- Ribbing is added at the bottom using single crochet.
- The vest is made in multiple pieces:
- Measurements: Measure your armpit-to-armpit width to determine the square size.
Pattern Abbreviations & Terminology
(All patterns are written using US Terminology.)
- ch: Chain
- sl st: Slip Stitch
- sc: Single Crochet
- dc: Double Crochet
- sp: Space
- st: Stitch
- YO: Yarn Over
- BLO: Back Loop Only
Tips Before You Start
- Use Cotton Yarn: Cotton works best due to its breathable and sturdy qualities for tops.
- Test Your Hook: Make sure your tension is consistent by practicing granny squares before starting.
- Customize as You Go: Hold your granny square up to your body often to check the fit.
- Use Stitch Markers: Mark important areas such as center clusters for accurate placement of straps and decreases.
- Weave in Ends as You Go: This saves time and keeps the work neat.
Step-by-Step Detailed Crochet Instructions
Granny Squares
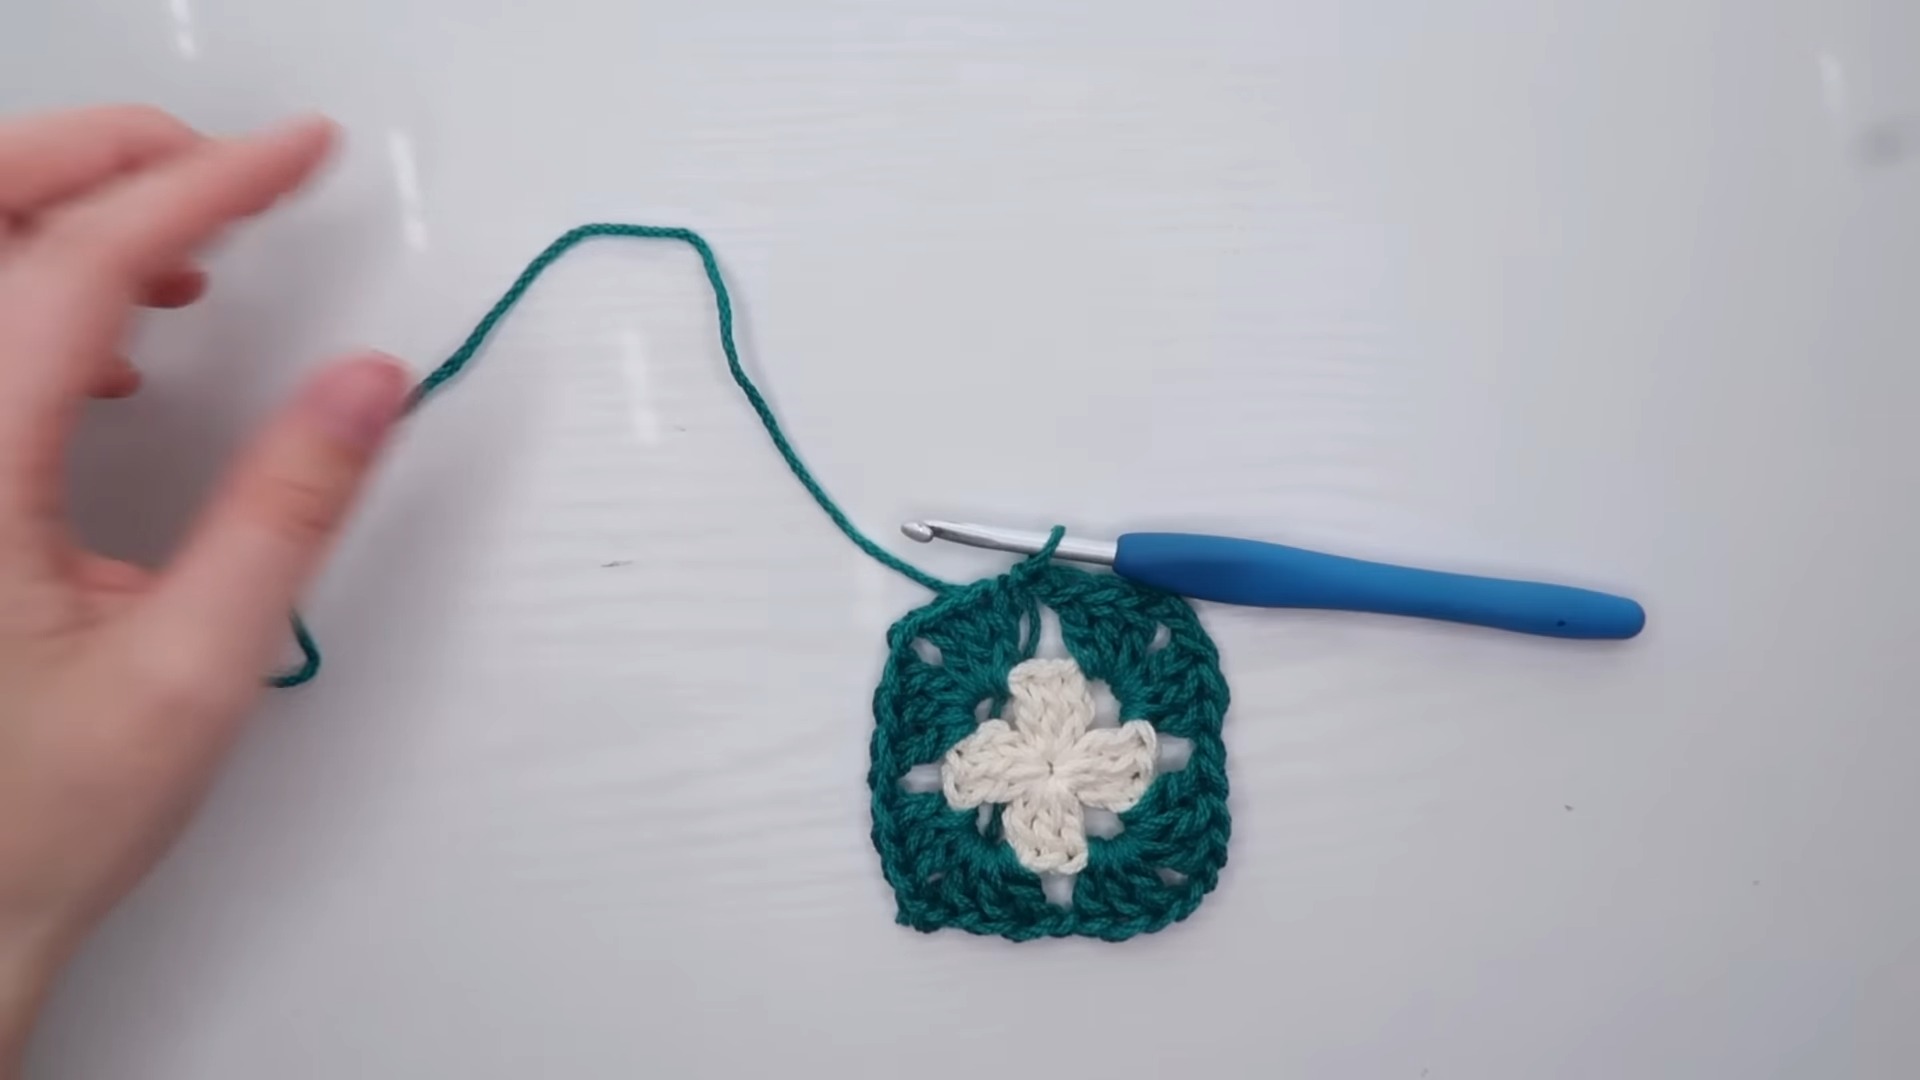
- Start with a Magic Circle
- Wrap the yarn as shown in the tutorial and secure it with a single crochet.
- Round 1: Create the First Square Base
- Stacked Single Crochet: Begin with 1 single crochet followed by stacking another single crochet into the front loop of the first one (this counts as 1 dc).
- Add 2 more double crochets → This creates your first 3-dc cluster.
- Chain 2 → This forms the corner.
- Repeat for three more clusters of 3-dc, separated by chain-2 spaces.
- At the end of the round, chain 2 and slip stitch in the top of the initial stacked single crochet → You’ll have a square with 4 sides and 4 corners.
- Round 2 (and Beyond): Expand the Granny Square
- Join a new color or continue with the same yarn.
- Corners: In each chain-2 space (corner), (3 dc, chain 2, 3 dc).
- Sides: For each chain-1 space along the side, add a cluster (3 dc).
- Chain 1 between clusters on the sides.
- Slip stitch at the end of the round to join.
- Add Rows Until the Desired Size:
- Repeat the pattern of clusters in corners and sides, chaining in between.
How to Measure:
- Place the square over your chest. It should stretch comfortably from armpit to armpit.
Tip: If making the vest for someone else, ask for their armpit-to-armpit measurement.
- Make Two Identical Squares (front and back).
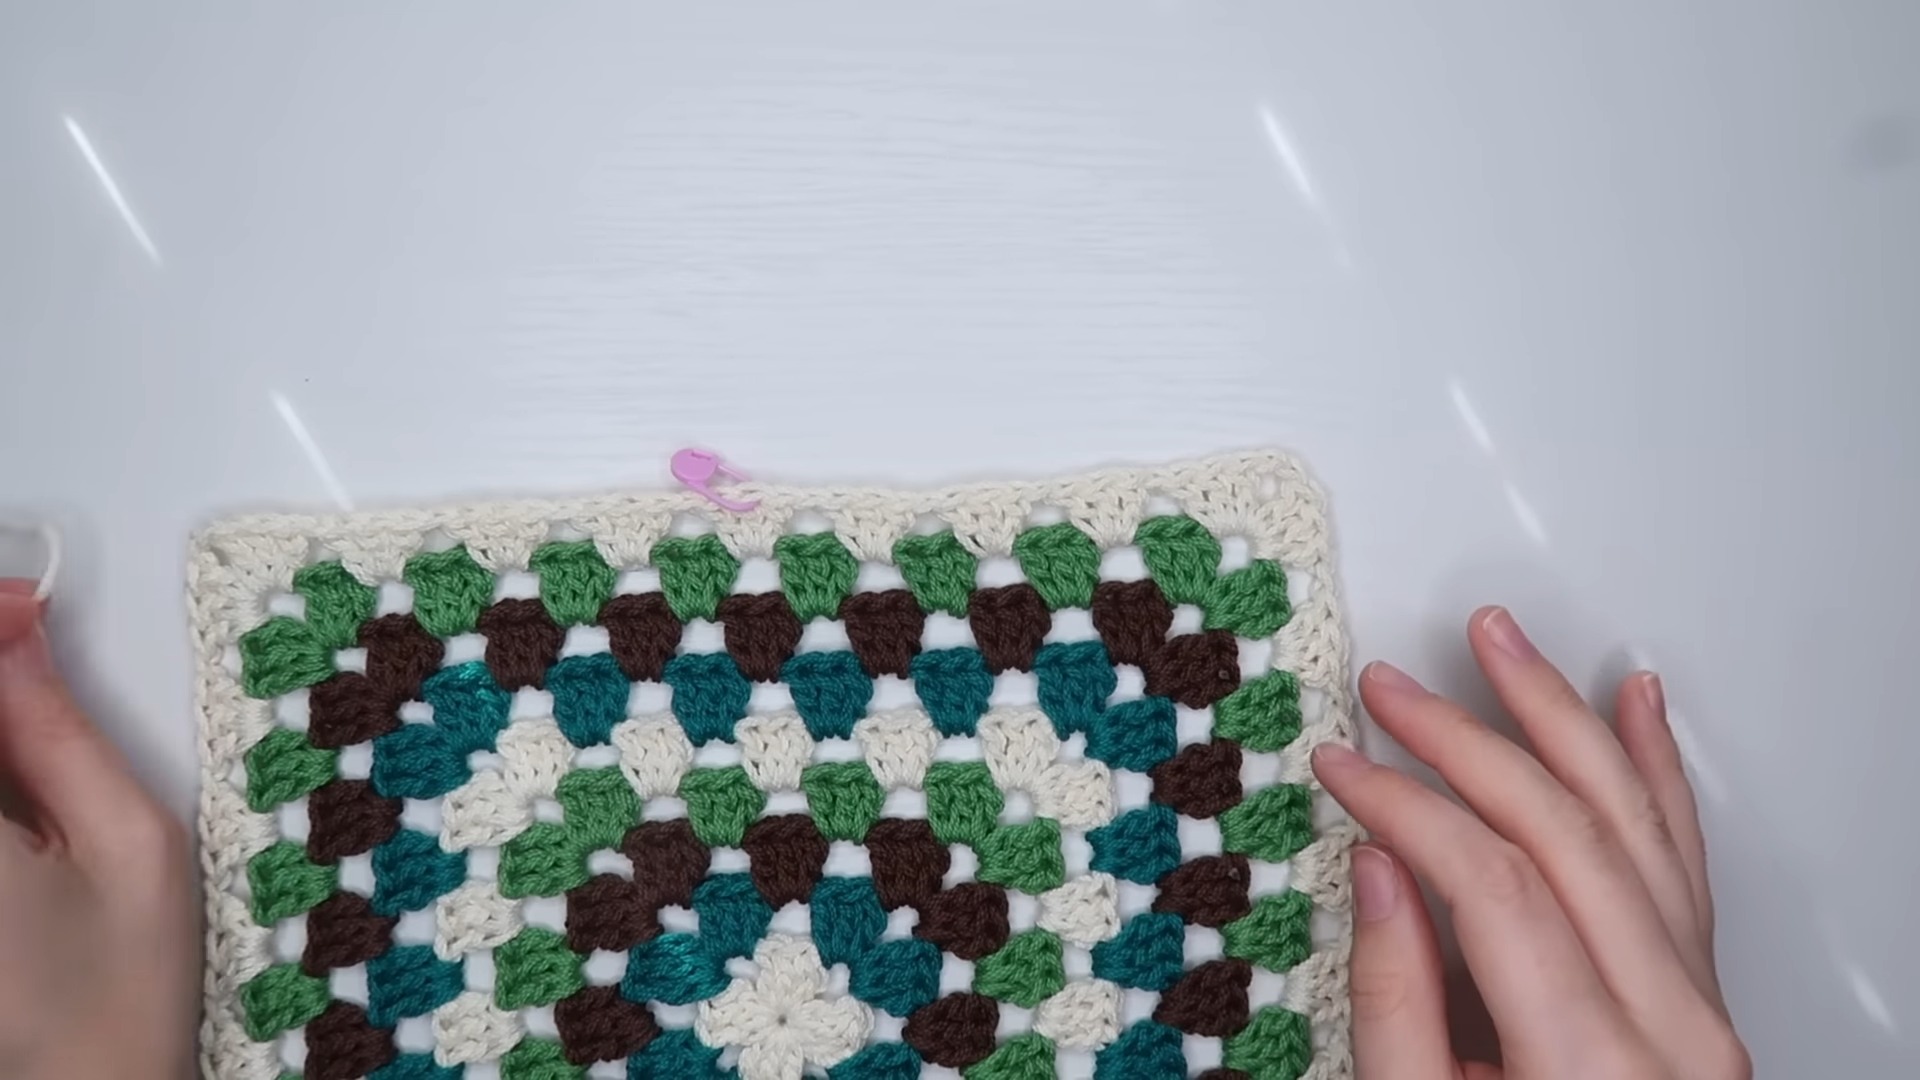
Shoulder Straps
- Mark the Center:
- Locate the middle cluster of the square to create even shoulder straps.
- Use stitch markers to mark the center.
- Count equal clusters on both sides, leaving one cluster for the neckline. (For even-numbered rows: split two clusters for the center.)
- Start the Strap:
- Attach yarn at the corner of the square and crochet in the direction of the center.
- Work granny stitch clusters across the row and decrease for the neckline as you approach the center.
- Neckline Decrease:
- When approaching the center, stop one space before the stitch marker.
- Replace the last cluster with a single double crochet in the center space.
- Turn and Continue Rows:
- Work back and forth on the straps, alternating flat rows and decreases where necessary.
- Continue creating even straps until they reach the midpoint of the shoulder.
- Repeat for the Second Strap (on the opposite side of the square).
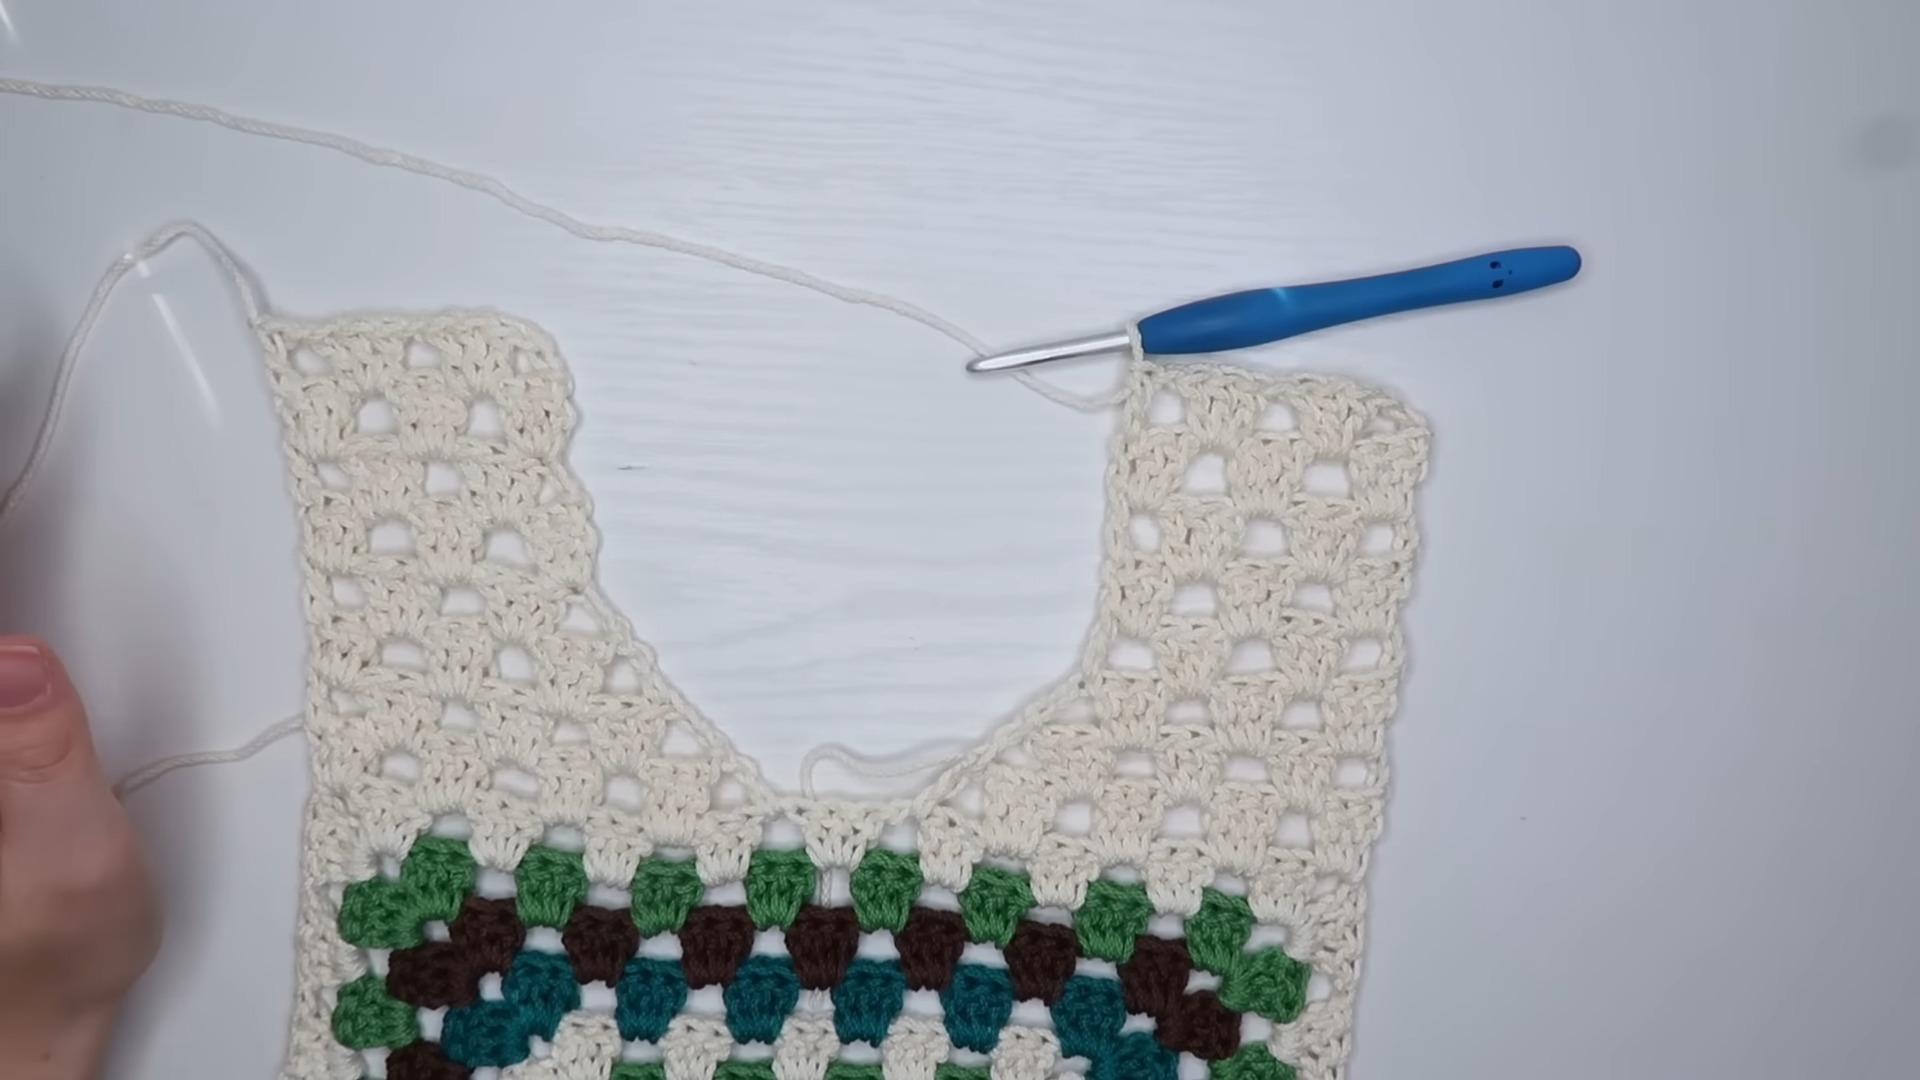
Side Panels
- Mark Your Starting Point:
- Place stitch markers around the side of the square (approximately under your arms) where the side panels will begin.
- Crochet Side Extensions:
- Attach yarn at the bottom edge of the marker.
- Work granny stitch rows with decreases along the top edge. This creates a slant that shapes the armhole and curves naturally under the armpit.
- Join Front to Back:
- Once both side panels are complete, attach the front and back panels with a whip stitch.
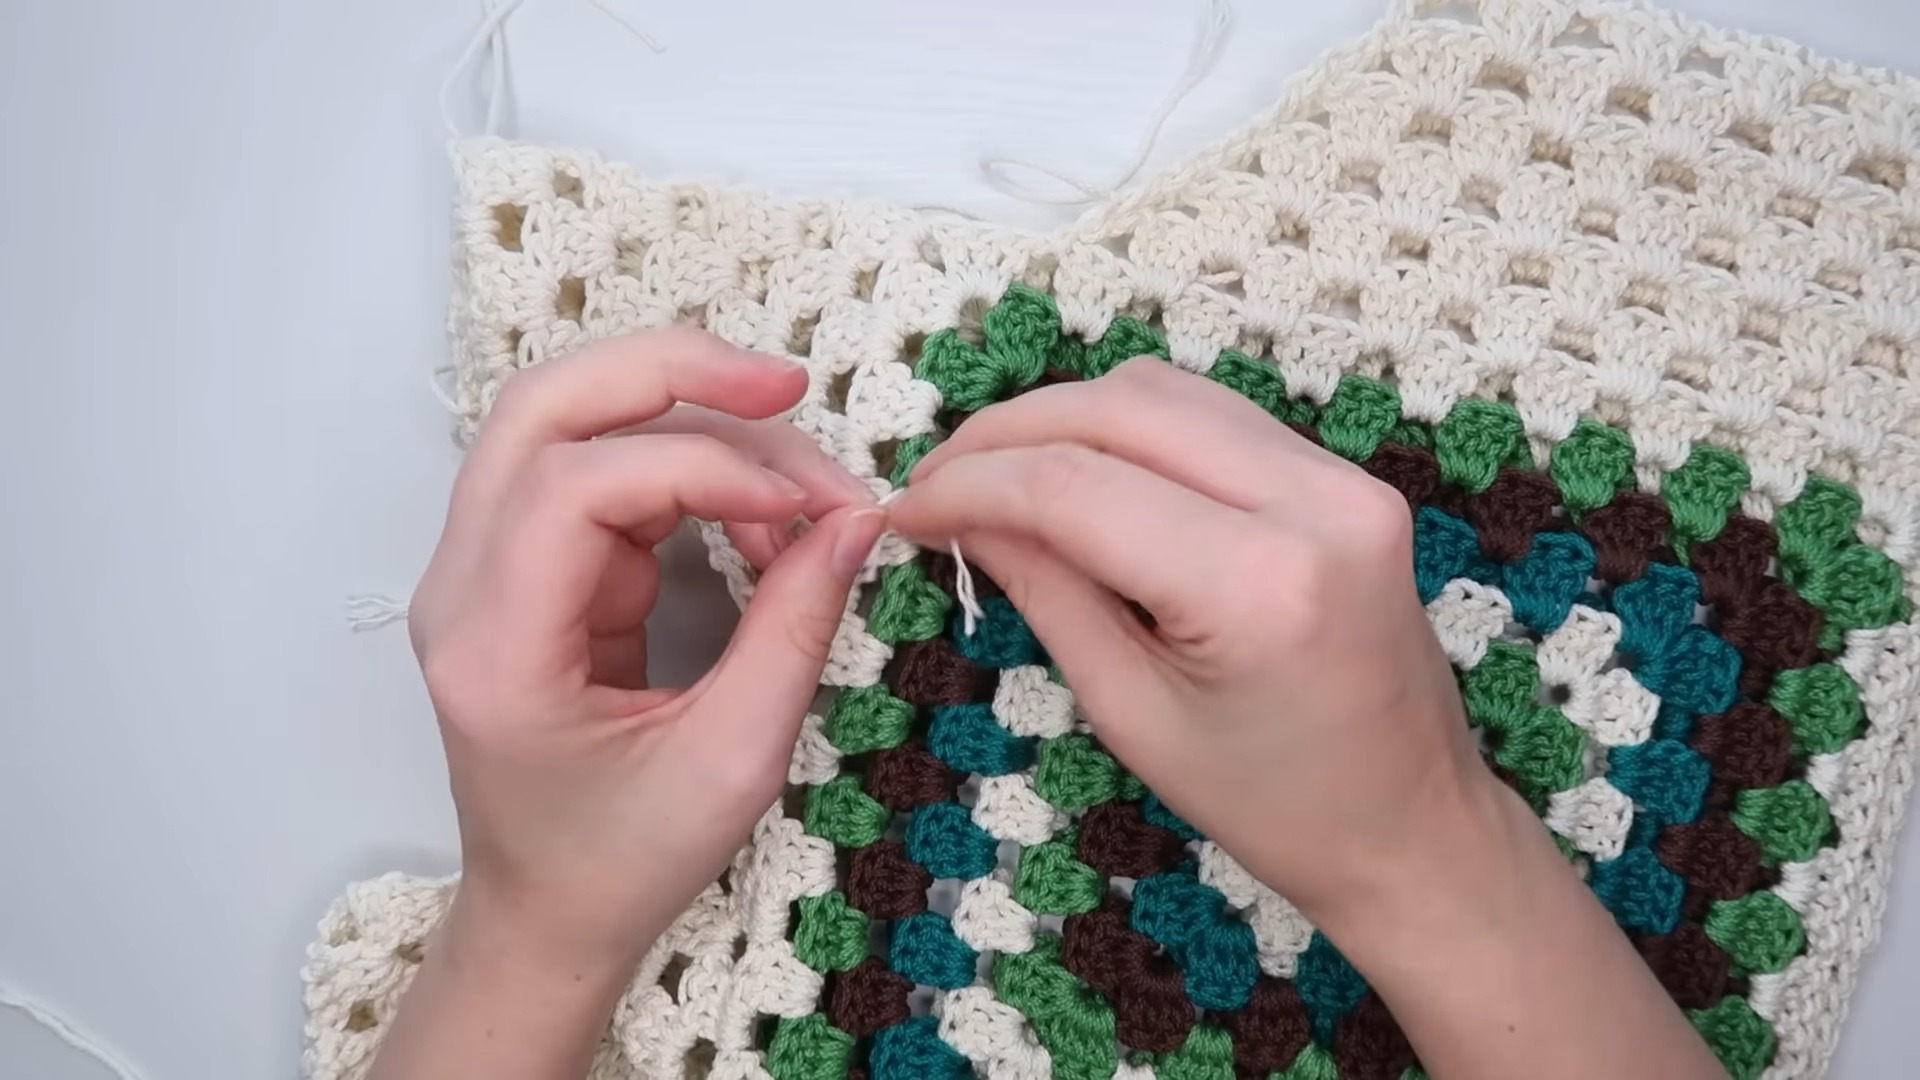
Ribbing
- Add Base Row Around the Bottom:
- Using the 5 mm hook, crochet 1 row of single crochet across the entire bottom edge of the vest.
- Switch to the 4 mm Hook:
- Crochet ribbing using single crochets through the back loop only (BLO).
- Work the ribbing vertically (up and down) along the edge, attaching each row to the vest base with a slip stitch.
- Continue working ribbing until it encircles the bottom.
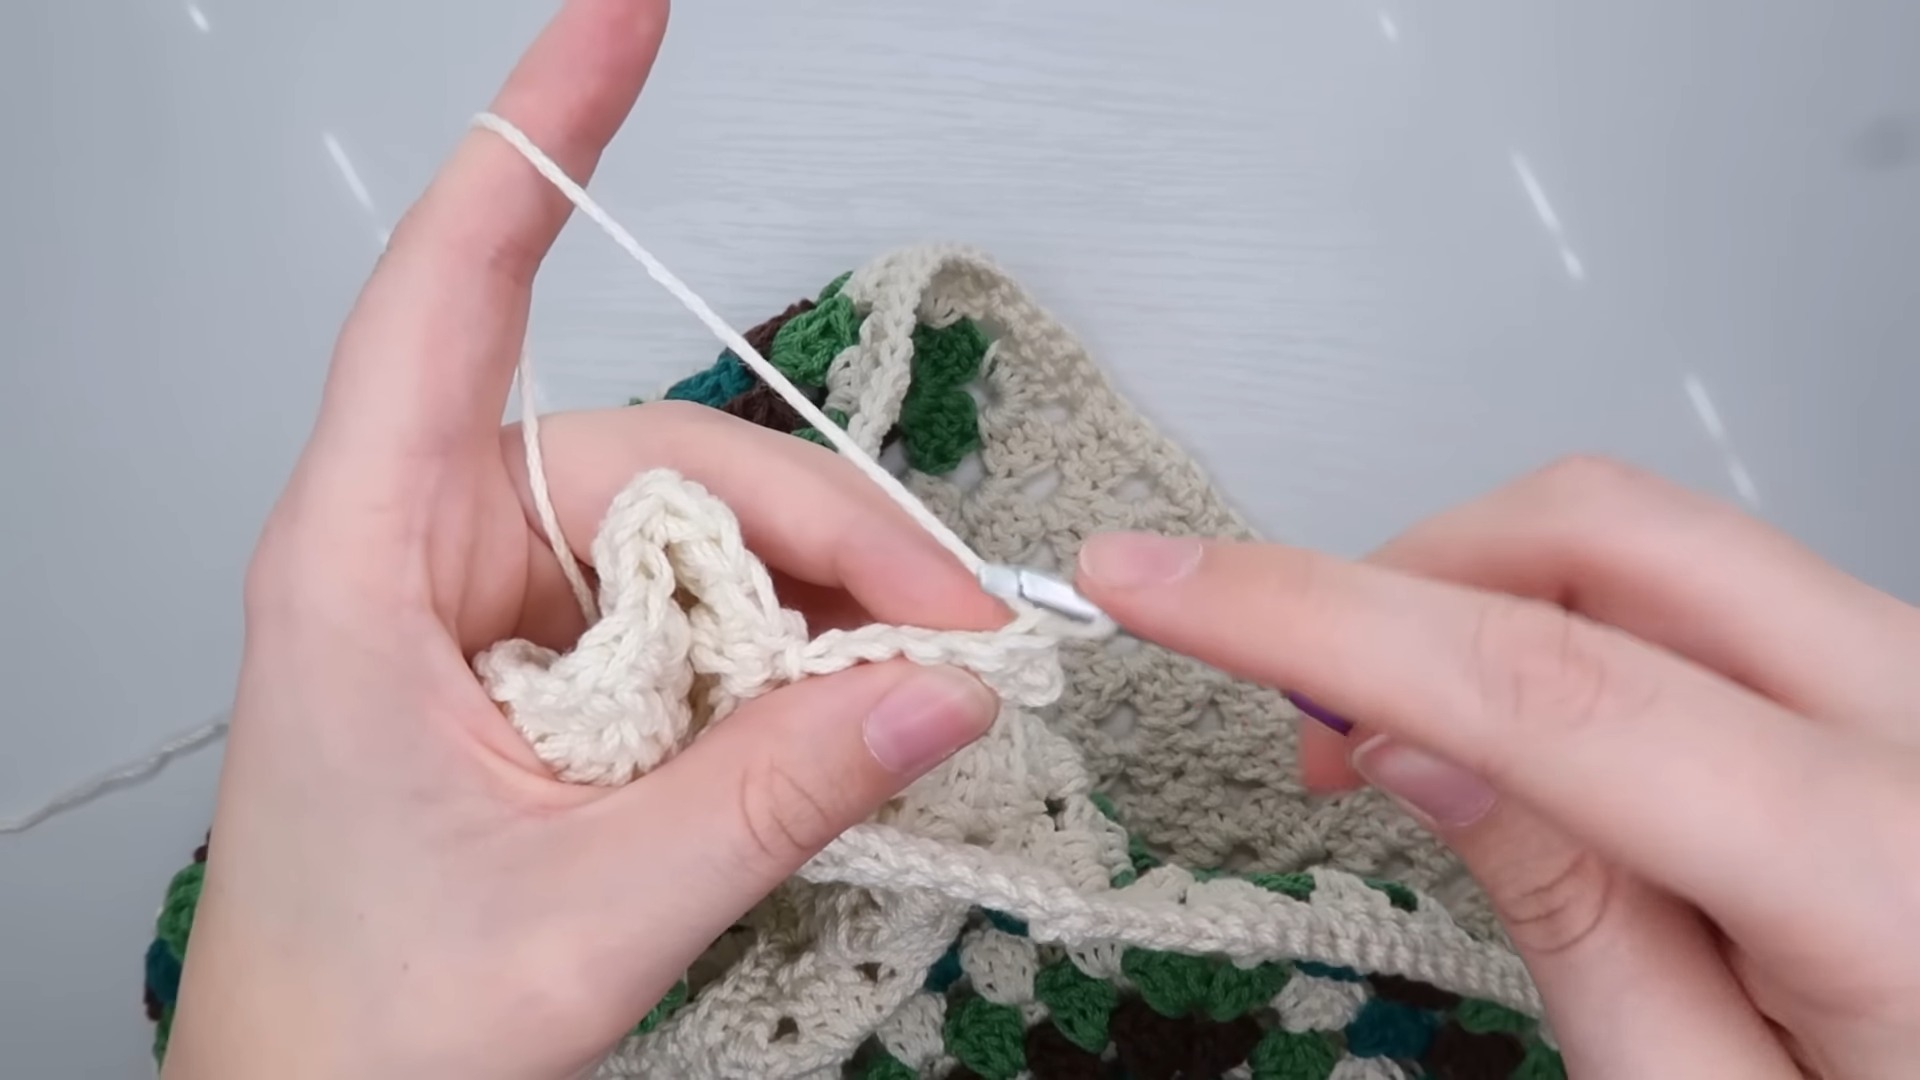
Final Assembly
- Join Shoulder Seams:
- Fold the two squares together (right sides touching).
- Whip stitch across the shoulder straps to join them.
- Sew the Sides:
- Seam the sides using a whip stitch or slip stitch, leaving armholes open.
- Finishing Touches:
- Add single crochet borders around the armholes and the neckline (2 rows).
- Weave in all ends.
Conclusion
This simple yet stylish granny square vest is a lightweight, breathable accessory for any wardrobe. Its customizable sizing and color choices make it perfect for all body types. By taking it step-by-step, even a beginner can achieve a beautiful handmade piece. Enjoy your crochet journey!