Crochet Granny Square Crop Vest Pattern
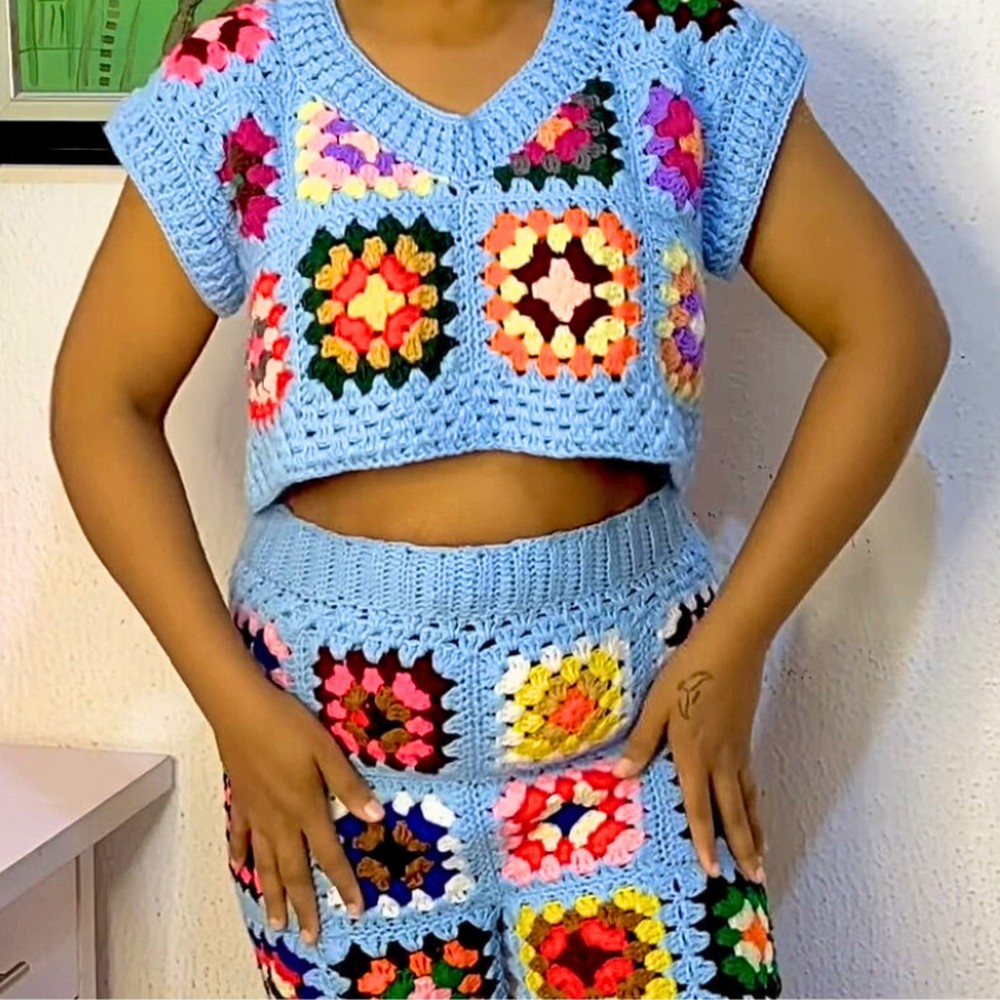
A burst of colorful granny squares instantly transforms this crop vest into a standout wardrobe piece. Every section blends classic crochet charm with a fresh, modern style that feels light, comfortable, and easy to wear.
The balanced design makes it suitable for casual outings, cozy afternoons, or layering over your favorite outfits. Its cheerful appearance proves that a simple handmade crochet piece can look both fashionable and timeless.

Bright colors and easy construction make this vest enjoyable for crocheters of different skill levels. Using basic yarn, a crochet hook, and classic granny squares, each section comes together in a smooth and satisfying way.
The flexible color layout allows every item to reflect a unique personality while keeping the overall style neat and eye-catching. Whether you’re creating one for yourself or as a thoughtful gift, this crochet vest is a beautiful addition to any handmade collection.
Materials & Tools Needed
- Yarn: Acrylic 2-ply yarn (holding two strands together for 4-ply thickness). Scrap yarns of various colors.
- Base color: Blue.
- Hook Size: 4mm crochet hook.
- Accessories:
- Stitch markers.
- Scissors.
- Measuring tape.
- Tapestry needle (for weaving ends).
- Optional Tools: Yarn winder (to organize scrap yarns).
Finished Size & Customization Ideas
- Finished Bust Measurement: 40 inches (customizable).
- For the tutorial example: 20 inches for the front panel and 20 inches for the back panel.
- Finished Length: 15 inches (customizable).
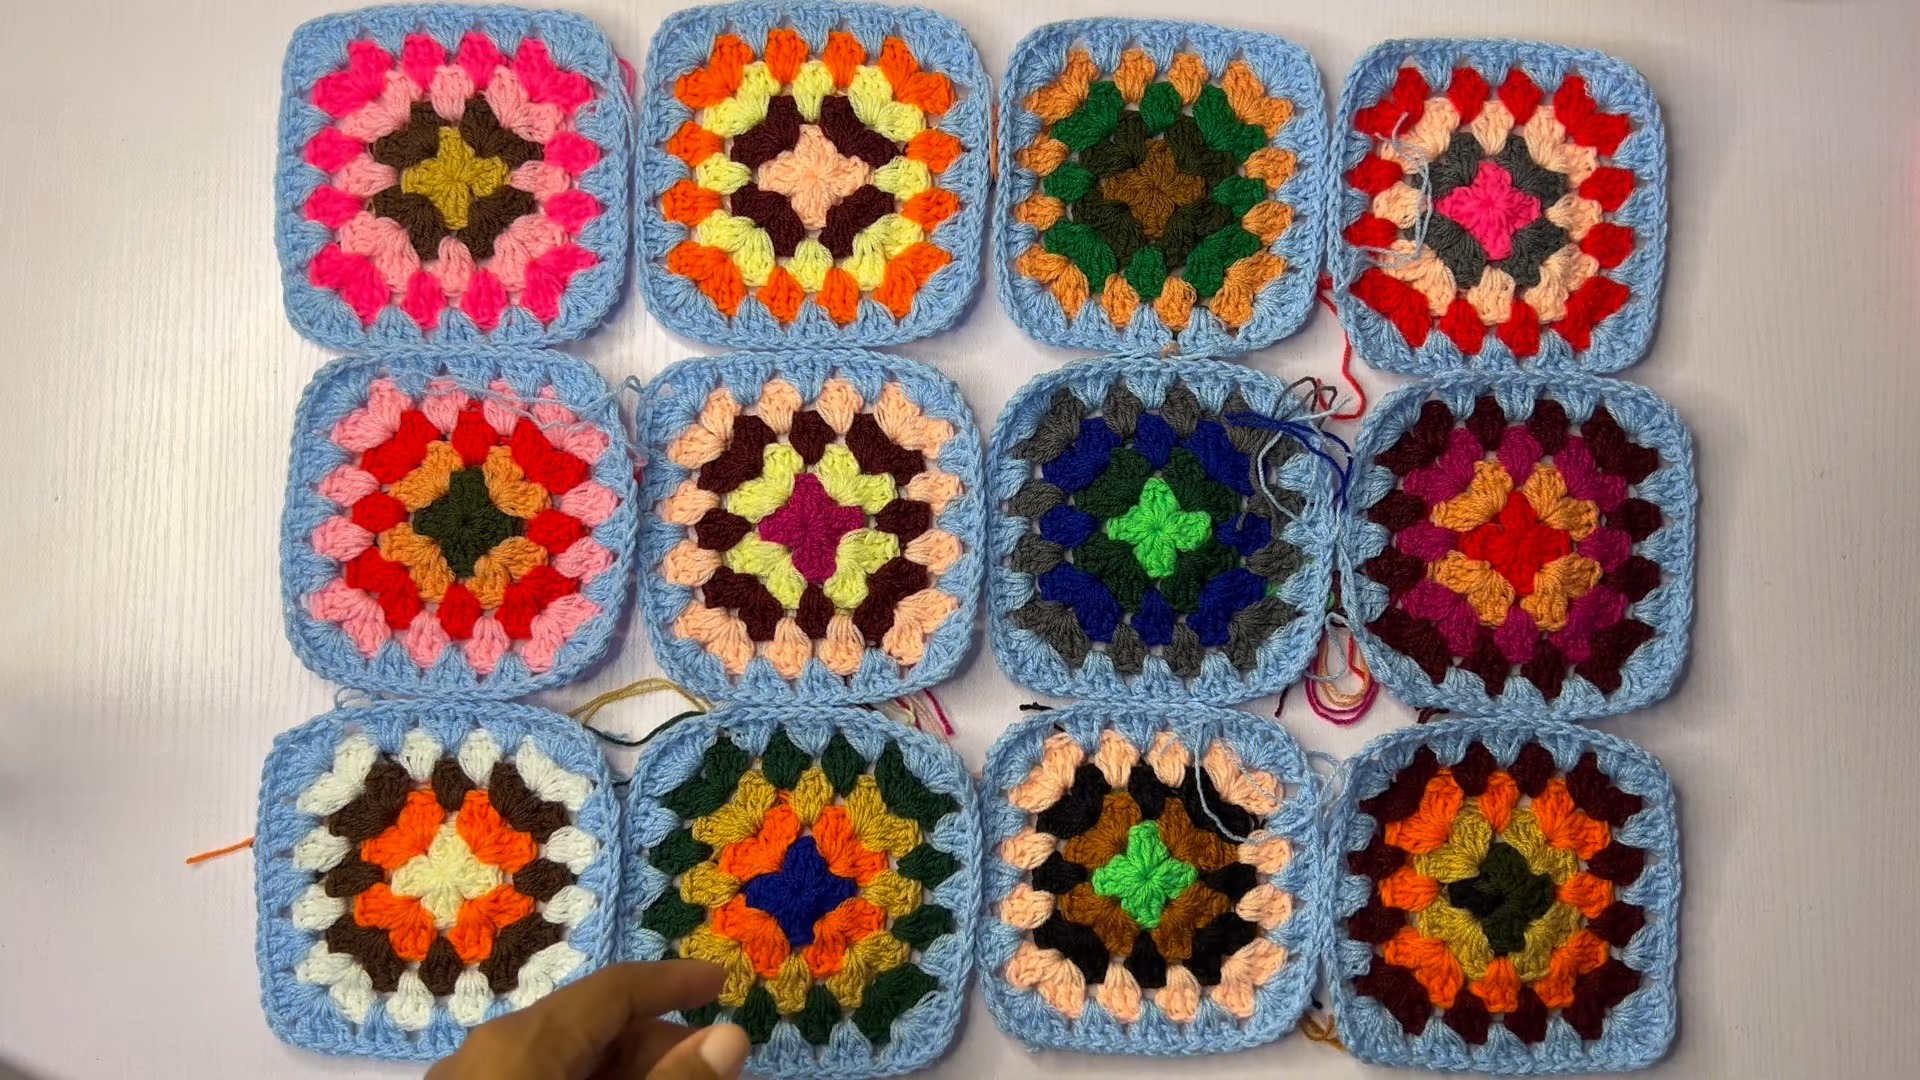
- The example uses a layout of 3 rows x 4 columns of granny squares for the back panel.
- Customization Ideas:
- Add more granny squares at the bottom for a longer vest.
- Adjust colors for the granny squares based on preference.
- Vary yarn thickness based on desired texture.
Pattern Note
- Granny squares form the base of the vest. Each square has 5 rows unless otherwise stated.
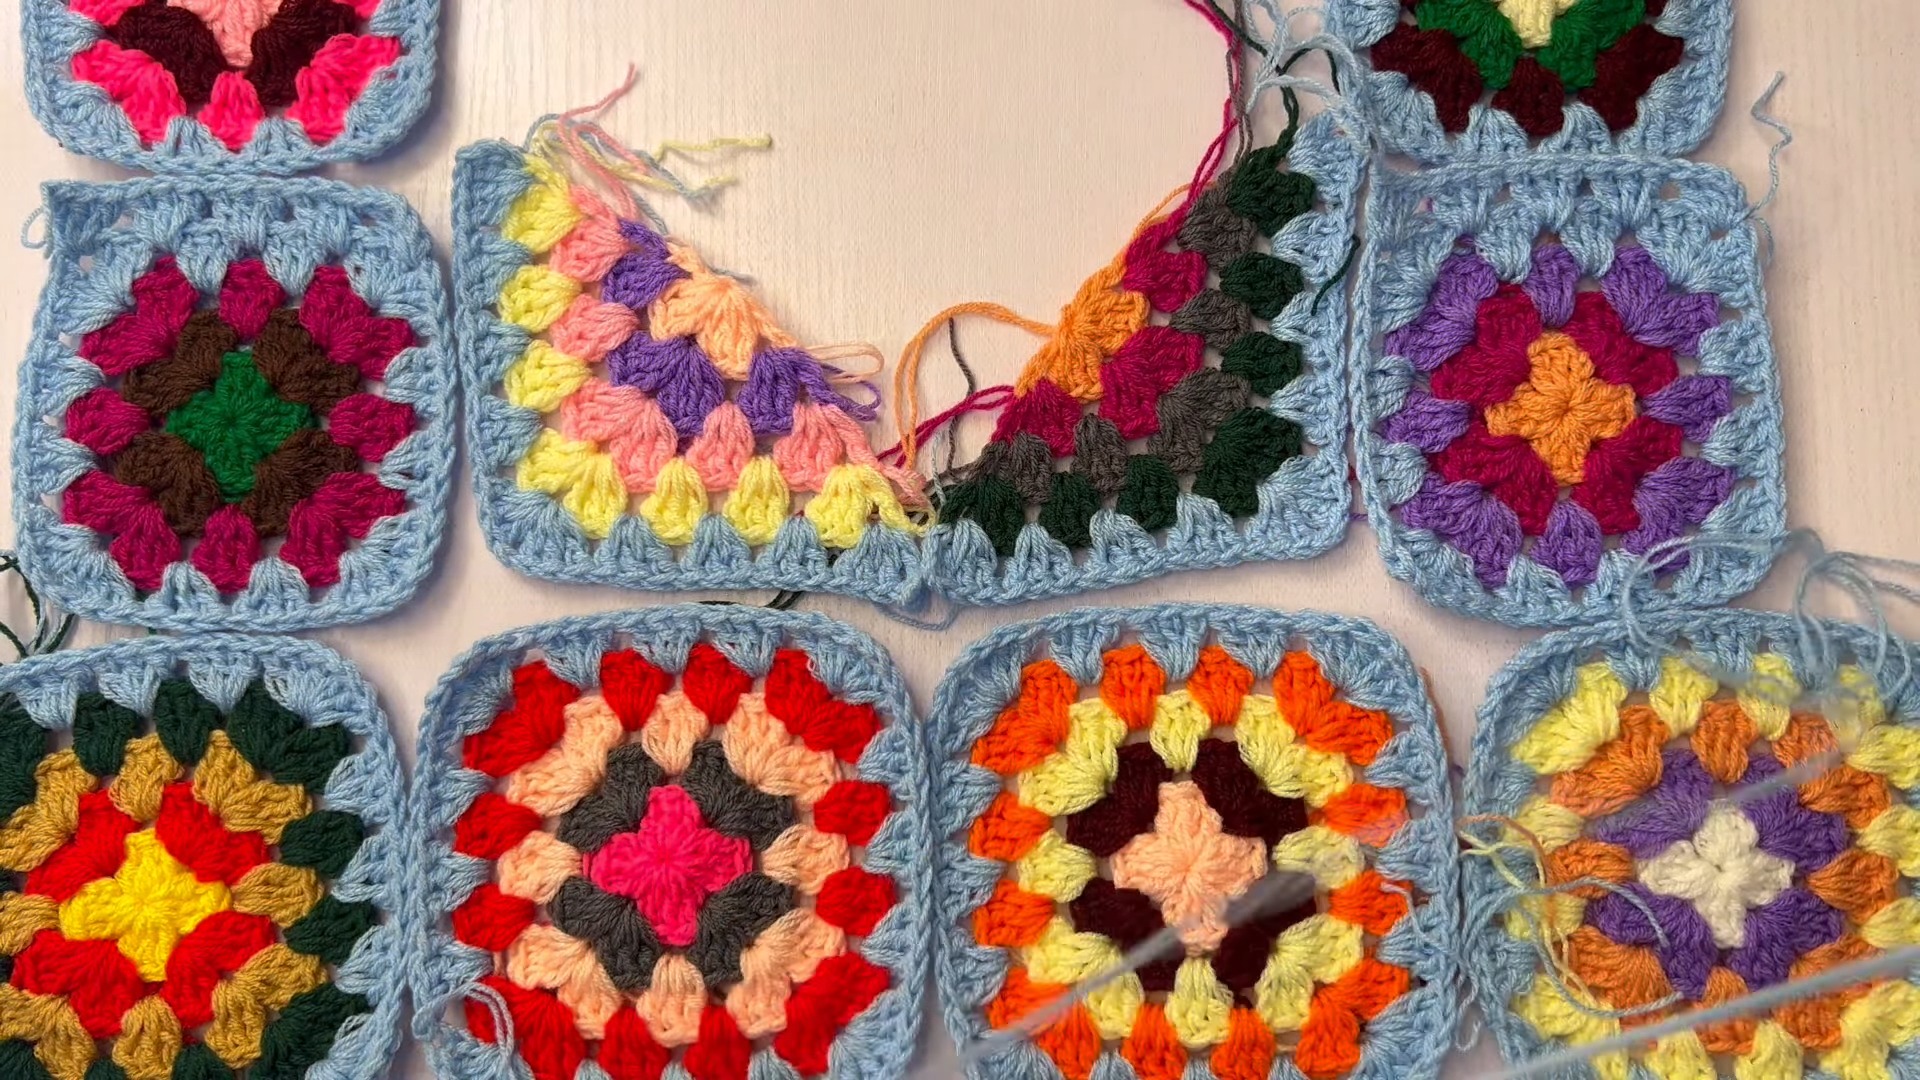
- Front panel requires triangular granny squares for the neckline shaping.
- Joining panels is completed via sewing or crochet slip stitch methods.
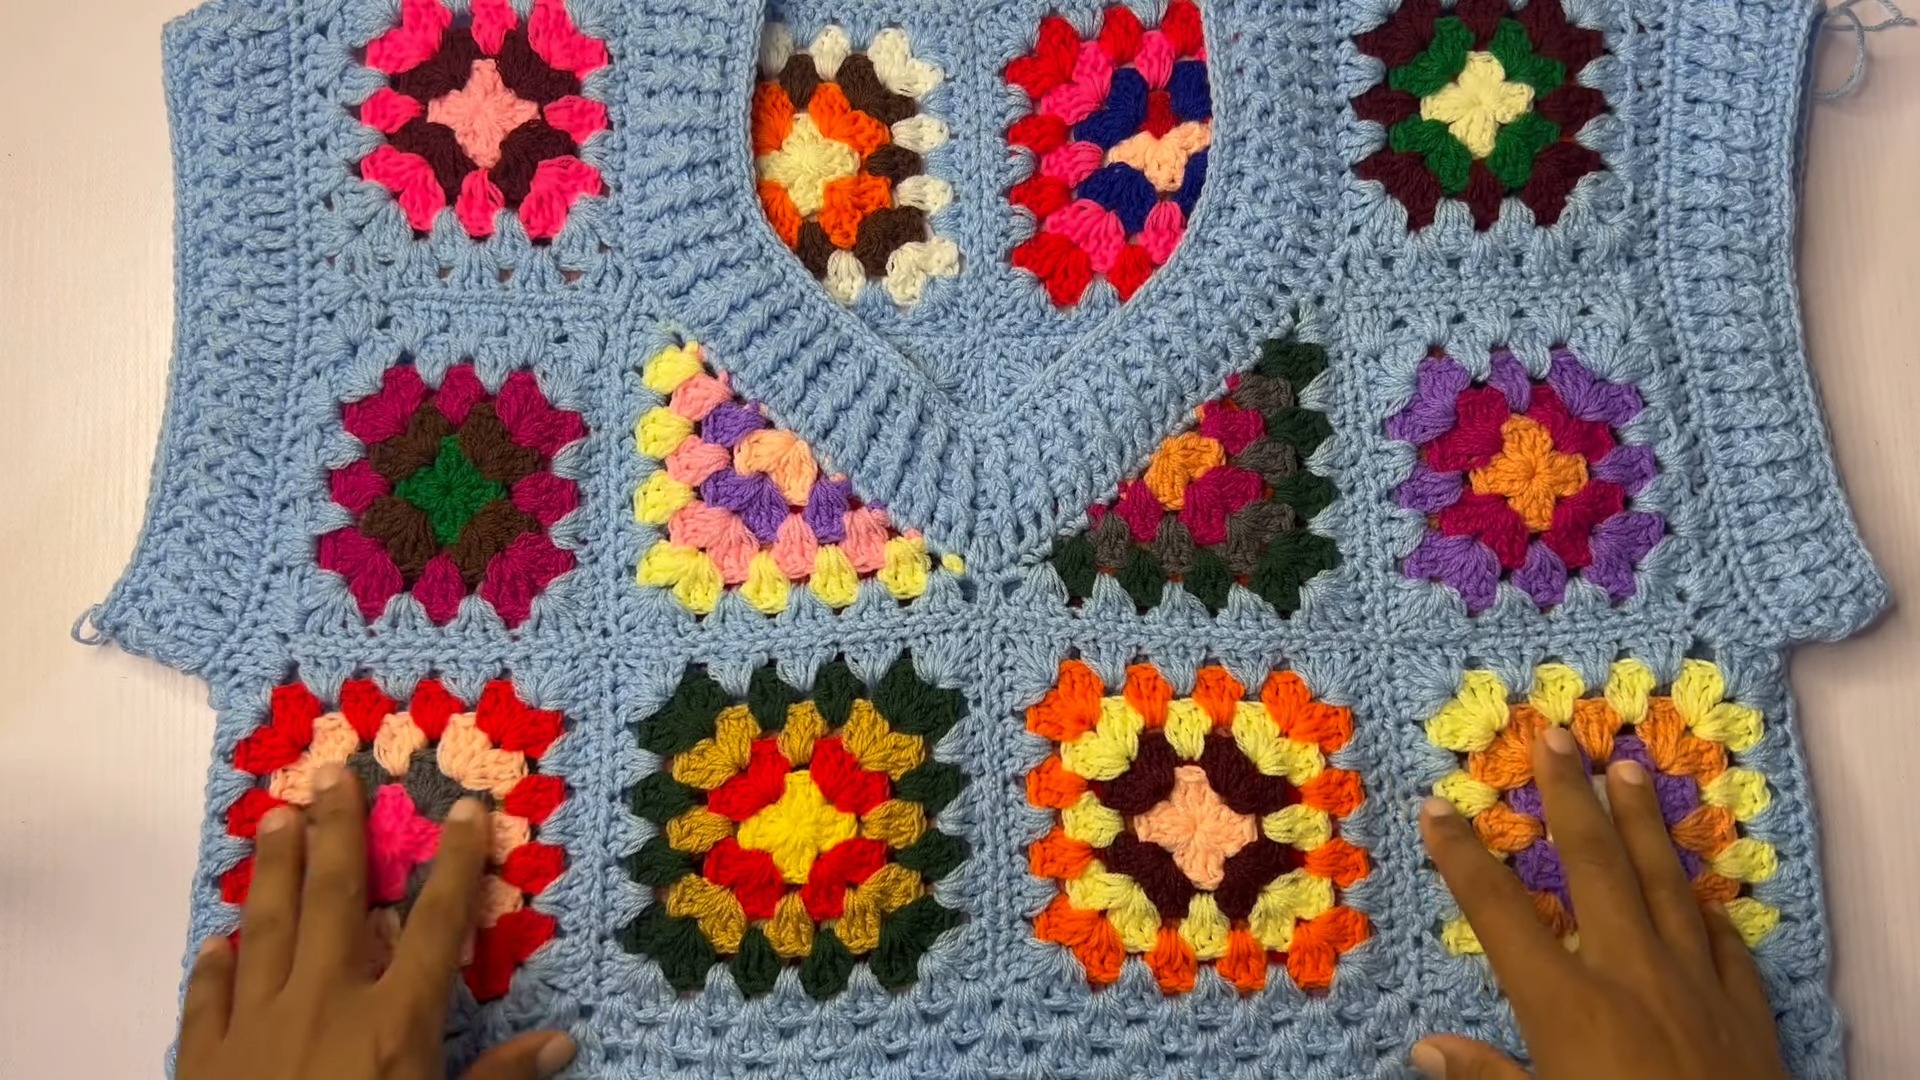
- Finish edges (neck, armholes, and bottom) using rows of single crochet and front post/back post double crochet stitches for clean edging.
Pattern Abbreviations & Terminology
- ch: Chain.
- sl st: Slip Stitch.
- dc: Double Crochet.
- Cluster: A group of 3 double crochets worked together in the same space.
- Magic Ring: A starting technique to create a circular foundation.
- Front Post Double Crochet (FPdc): Double crochet worked around the front of the post of a stitch.
- Back Post Double Crochet (BPdc): Double crochet worked around the back of the post of a stitch.
Tips Before You Start
- Measure Properly: Take accurate bust and length measurements before starting.
- Plan Colors: Lay out your yarn colors and decide on the design before crocheting.
- Arrange Squares: Lay completed granny squares on a flat surface to plan the final layout neatly.
- Check Stitch Counts: Watch stitch counts specifically for joins, decreases, and edging.
- Beginner Note: The granny square is beginner-friendly, but ensure each new row aligns correctly.
Step-by-Step Detailed Crochet Instructions
1. Granny Squares
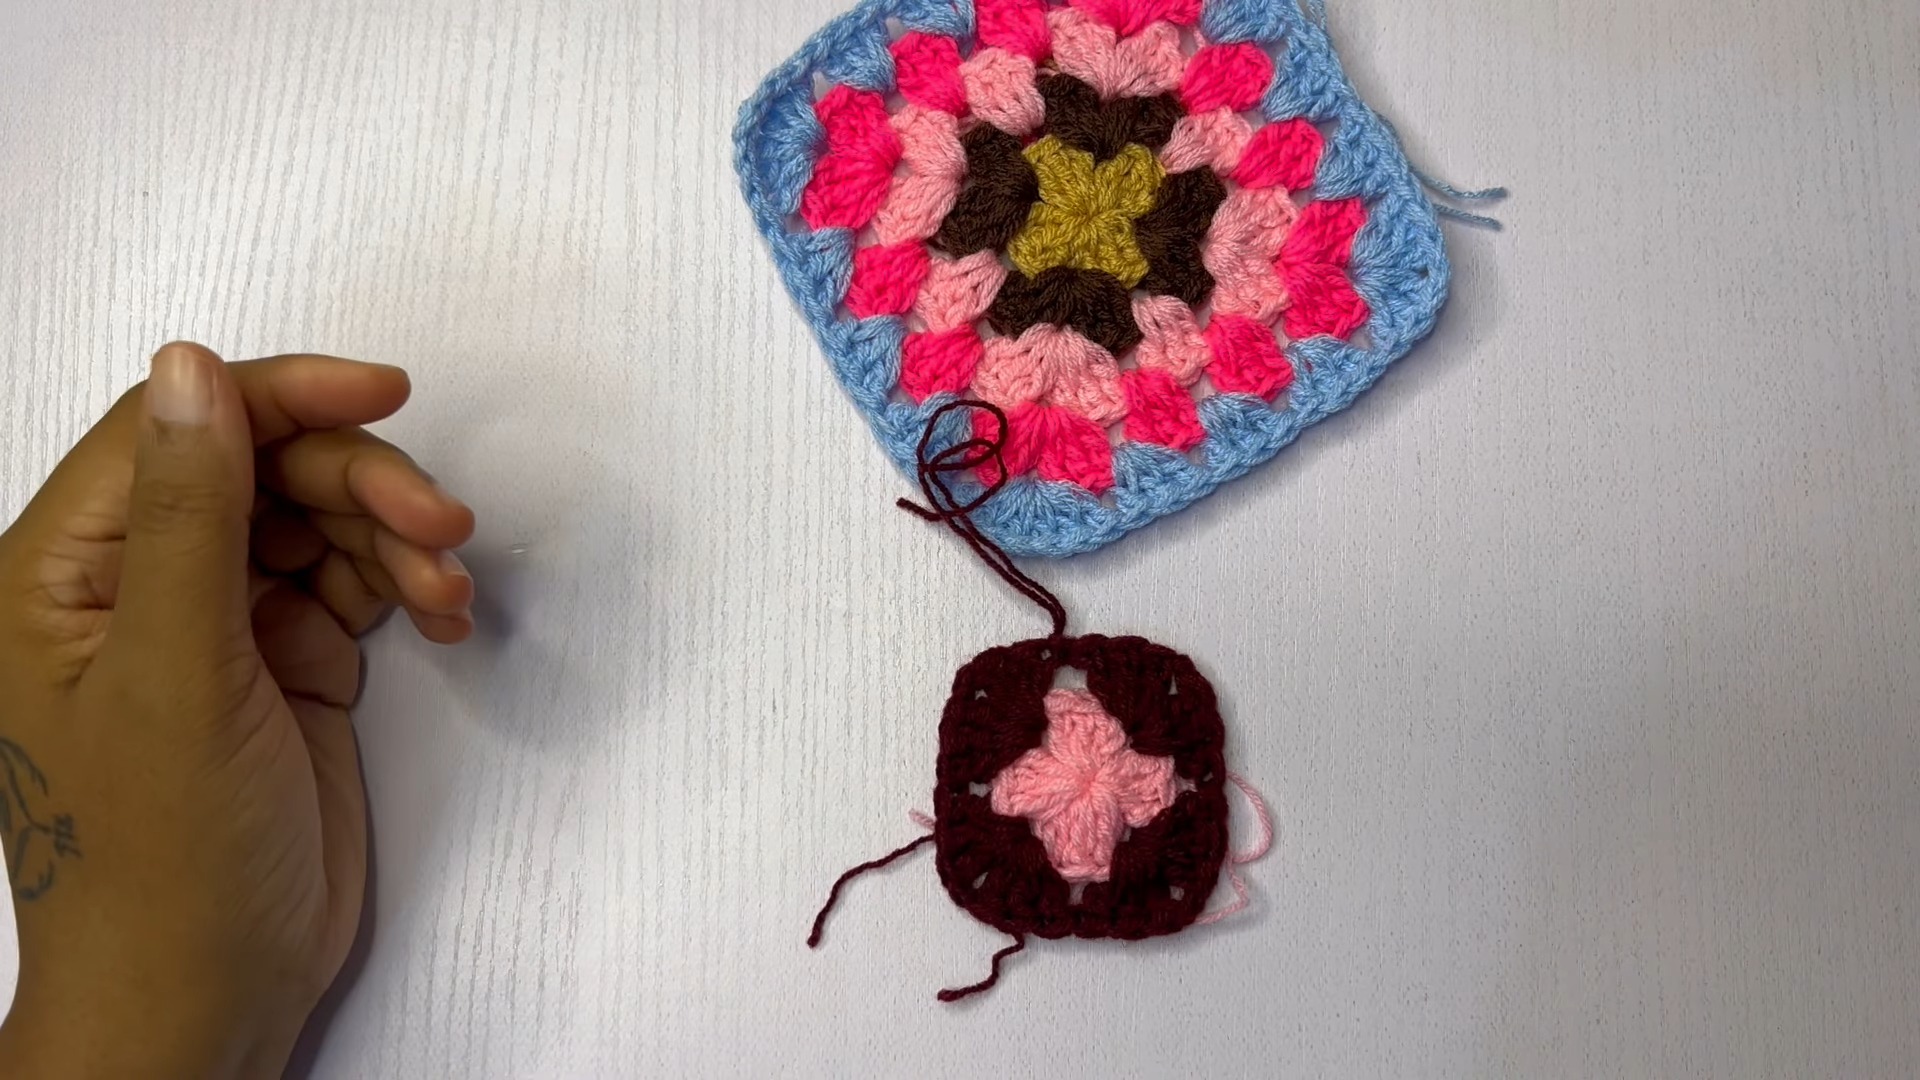
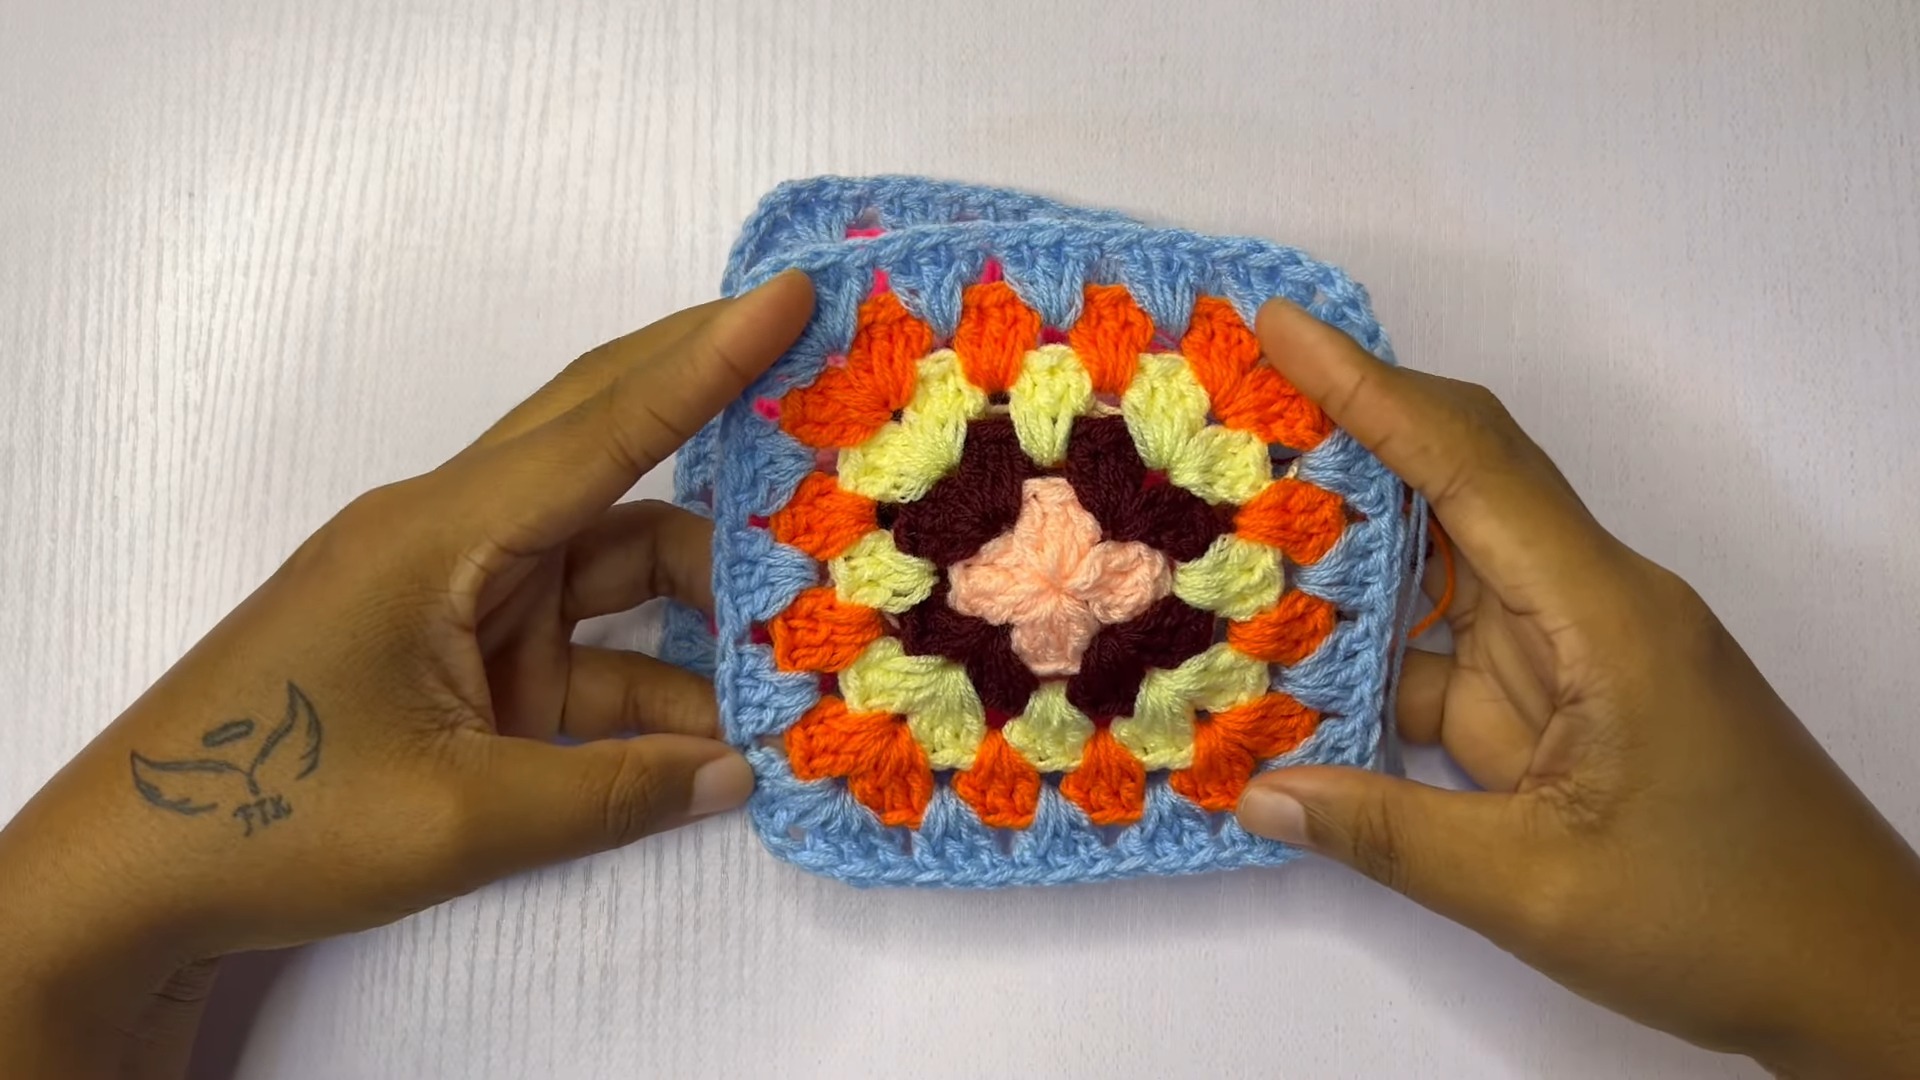
Each granny square has 5 rows, unless specified otherwise.
Row 1:
- Make a magic ring.
- Ch3 (counts as first dc).
- Work 2 dc into the magic ring to form the 1st cluster.
- Ch1, then work another cluster (3 dc) into the ring. Repeat this step until you have 4 clusters separated by Ch1 spaces.
- Ch1, sl st into the top of the initial Ch3 to close the round.
- Fasten off yarn and switch to a new color.
Row 2:
- Attach new yarn to any Ch1 space.
- Ch3 (counts as dc), work 2 dc into the same space to form the first cluster.
- Ch1, work another cluster (3 dc) into the same space – this forms the corner.
- Continue working one cluster into the next Ch1 spaces, forming corners where needed ([3 dc, ch1, 3 dc] in each corner space).
- Fasten off yarn.
Repeat similar steps for Row 3, Row 4, and Row 5, ensuring correct positioning of corners and clusters.
2. Triangular Granny Squares
Used for shaping the neckline for the front panel. Each triangle has 5 rows.
Row 1:
- Begin with a magic ring.
- Ch3 (counts as first dc), work 3 dc, Ch1, and a second cluster (3 dc) into the ring.
- Ch1, finish with 1 dc (this forms the triangular base).
- Close with sl st and cut yarn.
Subsequent Rows:
Continue working regular corners (Cluster, Ch1, Cluster) and sides with single clusters, ending each row with 1 dc in the last stitch.
3. Front Panel & Back Panel Construction
- Back Panel: Crochet and join 12 squares (4 x 3 layout).
- Front Panel:
- Use triangular granny squares for neckline shaping.
- Shorten granny square rows near the armholes (use 4 rows instead of 5 for these).
4. Joining Panels
- Lay pieces flat and arrange them how you want the vest to come together.
- Use a tapestry needle to sew granny squares together.
- Ensure stitches align by joining corners first.
- Pass the needle through corresponding side stitches for a tight join.
- Alternatively, use slip stitches to join. For slip stitching:
- Insert hook into corresponding stitches of two granny squares.
- Slip stitch across edges to join.
5. Edging & Finishing
Neckline:
- Work a row of single crochet evenly around the neckline.
- Work double crochet for the second row.
- Follow with front post/back post double crochet stitches for 2 rows.
- Fasten off yarn securely.
Armholes:
Repeat the same process as the neckline edging.
Bottom Edge:
- Work granny clusters in the first row, with decreases at joined sections.
- Continue with additional rows of clusters or replace with front post/back post double crochet rows for a clean finish.
Final Assembly
- After joining all panels, carefully weave in all ends using a tapestry needle.
- Check fit and alignment.
- Add additional stitches or rows to panels if necessary for lengthening or adjusting ease.
Conclusion
Congratulations! You’ve finished your Granny Square Crop Vest. This unique and customizable vest pairs perfectly with casual or formal bottoms. Remember to experiment with colors and sizing for unique designs. Share your creations proudly, and don’t forget to tag the designer or tutorial creator if sharing online!