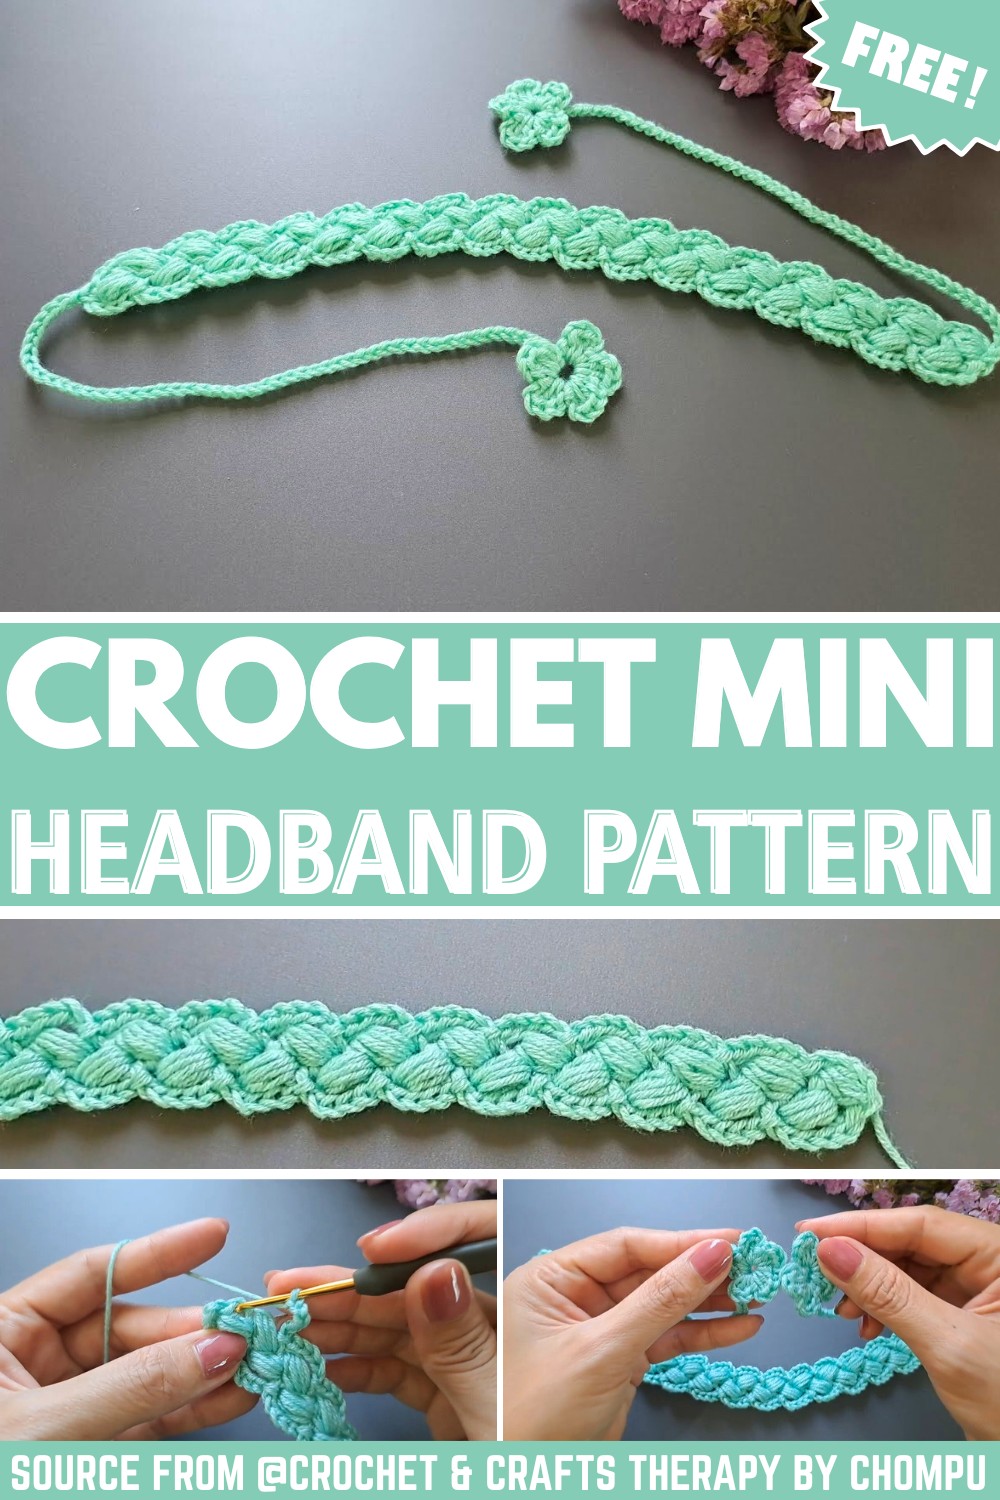
This stylish mini headband is quick to make and perfect for keeping your hair in place while adding a touch of handmade charm to your outfit.

Crochet mini headbands are a delightful addition to your collection of handmade items. Small, simple, and stylish, these headbands make for a cute accessory that you can wear or gift to someone special. If you’re looking for a touch of charm in your hairstyle or a thoughtful present, their versatility makes them stand out.
Crochet Mini Headband for Style and Versatility
What makes this mini headband even better is how easy it is to make. With just basic supplies like yarn and a crochet hook, you can create one in no time, even if you’re new to crocheting. The headband design is simple yet beautiful, and the result is lightweight and comfortable to wear. You can also experiment with colors to match outfits or add a decorative button for an extra touch.
Credit Crochet & Crafts Therapy by Chompu
Key Features
- Customizable size: Start with a foundation chain sized to your head circumference.
- Comfortable base: Single crochet stitches form a sturdy and snug initial round.
- Effortless texture: Half double crochet stitches create a soft and versatile band.
- Elegant finish: Add a decorative edge with a simple slip-stitch pattern or single crochet for a polished look.
- Optional embellishments: Personalize your headband with flowers, buttons, or beads for extra flair.
Construction Overview
This mini headband begins with a straightforward foundation chain, where you customize the length to fit snugly around your head. Joining the chain into a loop requires careful attention to avoid twisting, ensuring a seamless start to your pattern.

The first round sets a sturdy base using single crochet stitches worked evenly into each chain. These stitches allow the headband to comfortably hug your head while providing a smooth platform for further rounds.

The next few rounds build the band with the half double crochet stitch—a popular choice for its balance of density and elasticity. Working multiple rounds of hdc creates a plush texture that’s both durable and soft. You can adjust the number of rounds depending on your preferred band width, making this pattern wonderfully versatile.

Finally, you’ll finish with a decorative round to elevate the design. Whether you opt for a clean single crochet edge or a dainty, lacy slip-stitch pattern, this detail adds interest and professionalism to the piece. After fastening off the yarn, weave in the ends carefully to ensure a clean, tidy result.

For the creative crocheter, embellishments like bows, flowers, buttons, or beads can transform this simple headband into a unique statement accessory.

Video Tutorial
Step-by-Step Pattern
Materials
To get started, gather the following materials:
- Yarn: Worsted-weight yarn (category #4) in your preferred color. Cotton or acrylic yarns work well.
- Crochet Hook: Size 5.5mm (I-9) hook or size necessary to achieve your desired gauge.
- Tapestry Needle: For weaving in ends.
- Scissors: To trim excess yarn.
- Optional Decorations: Buttons, ribbons, or beads for extra embellishment.
Pattern Instructions
Step 1: Create the Foundation Chain
- Using your yarn and 5.5mm hook, chain a length that matches your desired head circumference. For a small headband, 40–50 chains often work well. (Ensure your chain length is divisible by 2 for simplicity.)
- Join the last chain to the first chain with a slip stitch, being careful not to twist the chain.
Step 2: First Round (Base Round)
- Chain 1 (does not count as a stitch).
- Work one single crochet (sc) into each chain around.
- Join with a slip stitch to the first sc.
Step 3: Build the Band
- Chain 1. Work one half double crochet (hdc) into each stitch around.
- Repeat for 3–5 rounds (or as many as you need to achieve your desired width).
- Join with a slip stitch at the end of each round.
Step 4: Final Round (Decorative Edge)
- For the final round, you can add a decorative touch! For example:
- Work a round of single crochet for a clean finish.
- Or alternate slip stitches and chains (sl st, ch 1, sl st) to create a lacy edge.
- Fasten off the yarn and leave a 6-inch tail.
Step 5: Weave in Ends
- Use your tapestry needle to weave the yarn tails securely into the back of your work. Trim any excess yarn.
Optional Embellishments
- Sew on a cute button, flower applique, or bow to one side of the headband for extra flair.
- Add beads to the crocheted stitches as you work for sparkle and texture.
Troubleshooting and Suggestions
Troubleshooting
- Twisting the Foundation Chain: When joining the chain into a loop, double-check that the chain lies flat with no twists before slip-stitching. If your chain accidentally twists, undo the loop and rejoin properly.
- Uneven Stitch Consistency: Aim for uniform tension when working single or half double crochet rounds. If your stitches look uneven, take a moment to adjust your grip or slow down.
Suggestions for Customization
- Color Combinations: Use alternating yarn colors for the rounds or add stripes to give the headband more character.
- Materials Variety: Try cotton for a firm and breathable band or soft acrylic for extra comfort. Bulky or chunky yarns can create a more dramatic effect.
- Edge Creativity: Instead of a slip-stitch decorative edge, add a picot stitch for a fun and playful detail.
- Repurpose the Design: Adapt the pattern into a bracelet or decorative band for jars, vases, or other household items for a whimsical accent.