Crochet Four-Petal Flower Tie Headband – Continuous Floral Pattern
Delicate four-petal crochet flowers form one flowing headband with long tie ends, giving you an easy way to adjust length, color, and styling.
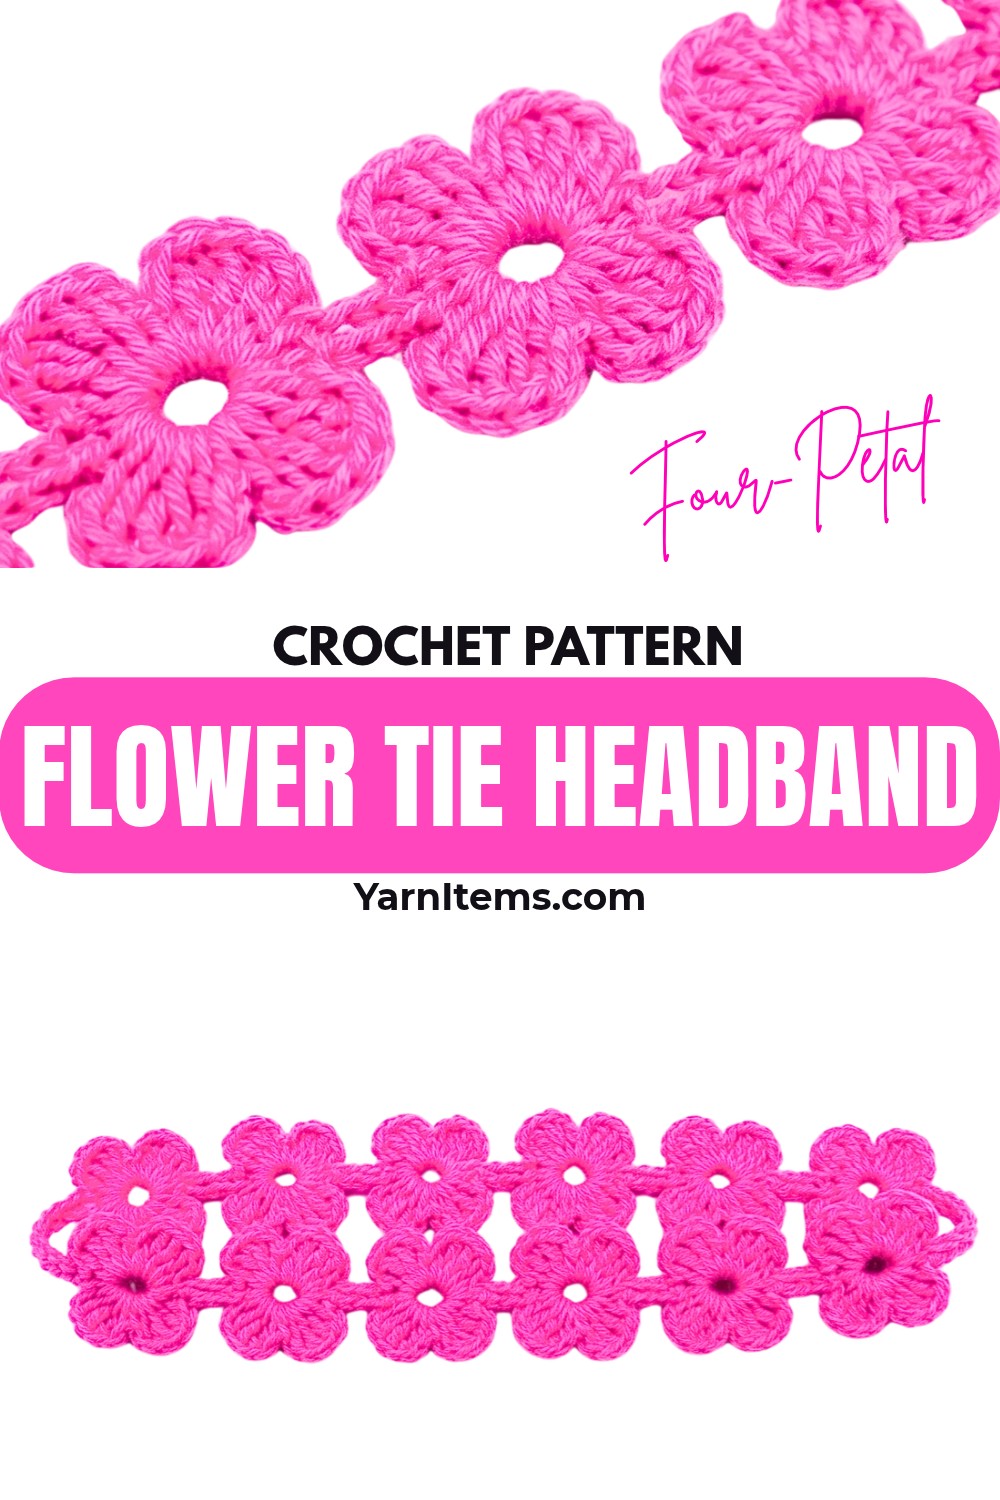
Four-petal flowers give this crochet headband its delicate vintage character, with each blossom linked by short chain stems instead of separate sewn pieces. Long ties extend from both ends, letting you wear it as a crochet headband while keeping its floral strip easy to adapt for different styles.
Working happens in one continuous strand, which keeps each flower connected as you move along the strip. Two petals are made first on every ring, then the remaining petals are added while crocheting back toward the beginning. Once you understand this back-and-forth rhythm, you can change floral length simply by adding or removing repeats.
Credit Leslie Tanael
Materials & Tools
- Yarn: Milk cotton yarn, 4-ply, with solid pink used in the tutorial
- Crochet hook: 3.0 mm
- Scissors
- Yarn needle: For weaving in starting and reattached tails
Finished Size & Customization
Floral strip length is completely adjustable. Add or remove flower repeats to create your preferred headband length, or adapt same floral chain into choker, bracelet, or longer hairpiece.
Each tie measures approximately 50 chains.
For seasonal variations, change yarn colors for holidays or different times of year. Small pearls or beads can be added inside flower centers for extra detail. Gradient or variegated yarn can also produce changing flower colors without introducing separate yarn shades.
Abbreviations
- ch: chain
- sl st: slip stitch
- tr: treble crochet, yarn over twice
- st(s): stitch(es)
- sk: skip

Begin the First Half of Each Flower
This floral strip is worked without cutting yarn between flowers. First, two petals are made on every ring while moving along its length. Remaining petals are completed on the return pass.
Row 1 – Step 1: Make a slip knot, ch 5, then sl st into the 1st ch to form the first ring.
Step 2: Ch 3, work 2 tr into ring, ch 3, sl st into ring, then gently tighten stitches together to form Petal 1.
Step 3: Ch 3, work 2 tr into ring, ch 3, sl st into ring, then tighten; first flower now has 2 petals.
Step 4: Ch 10, sk 4 sts from hook, then sl st into 5th ch to create next ring; remaining 5 chains form connector stem between flower rings.
Step 5: Into new ring, ch 3, work 2 tr into ring, ch 3, sl st into ring for Petal 1; ch 3, work 2 tr into ring, ch 3, sl st into ring for Petal 2.
Step 6: Repeat Steps 4 and 5 continuously until floral portion reaches desired length.

Complete Final Flower Before Turning
When desired length is reached, final ring needs two additional petals before return pass begins. This creates a turning point for the continuous floral strip.
Step 7: Without making another ch-10 connector, work directly into same ring of final flower: ch 3, work 2 tr into hole, ch 3, sl st into hole for Petal 3.
Step 8: Ch 3, work 2 tr into same hole, ch 3, sl st into hole for Petal 4; final flower now has all 4 petals.

Work Back Along Opposite Side
Return pass fills remaining two petals on each earlier flower. Keep connector stems flat while working 5 slip stitches through each stem.
Row 2 – Step 9: Sl st into every ch of connector stem, working 5 sl sts total.
Step 10: Sl st into ring of next incomplete flower; ch 3, work 2 tr into hole, ch 3, sl st into hole for Petal 3; ch 3, work 2 tr into hole, ch 3, sl st into hole for Petal 4.
Step 11: Repeat Step 9 and Step 10 down entire floral chain, working 5 sl sts along each connector stem before completing 2 petals inside next ring.
Step 12: Continue until first flower is reached; sl st into first ring, then work Petal 3 and Petal 4 into hole using same sequence as every other flower. Continuous floral strip is now complete.
Add Adjustable Tie Ends
No sewing is needed to join flowers. Finishing focuses on creating matching ties from opposite ends.
Step 1: Immediately after completing final petal of first flower, ch 50 directly from stitch on hook; cut yarn, fasten off, and pull loop tight to form first tie.
Step 2: Attach fresh yarn with sl st to ring of final flower on opposite end; ch 50, cut yarn, fasten off, and pull tight to create matching second tie.
Step 3: Thread starting tail and re-attachment tail onto yarn needle, then weave each tail into dense treble crochet stitches along back of flowers. Trim excess yarn once tails are secure.
Keeping Flower Shapes Even
While working each ring, keep both petals positioned inside ring opening rather than pulling them too tightly toward connector stem. Consistent tension helps flowers retain similar size and keeps floral chain lying flat.
During return pass, count 5 slip stitches along every connector stem before moving into next ring. This small check keeps flowers aligned and prevents uneven spacing from developing across finished strip.

Styling & Length Options
Use original repeat count for headband length, or experiment with shorter and longer floral chains for different accessories. Fewer rings create compact pieces, while additional repeats extend floral coverage. Since ties are added separately at both ends, floral length and tying length can be adjusted independently.