Crochet Christmas Coaster For Festive Holiday Décor
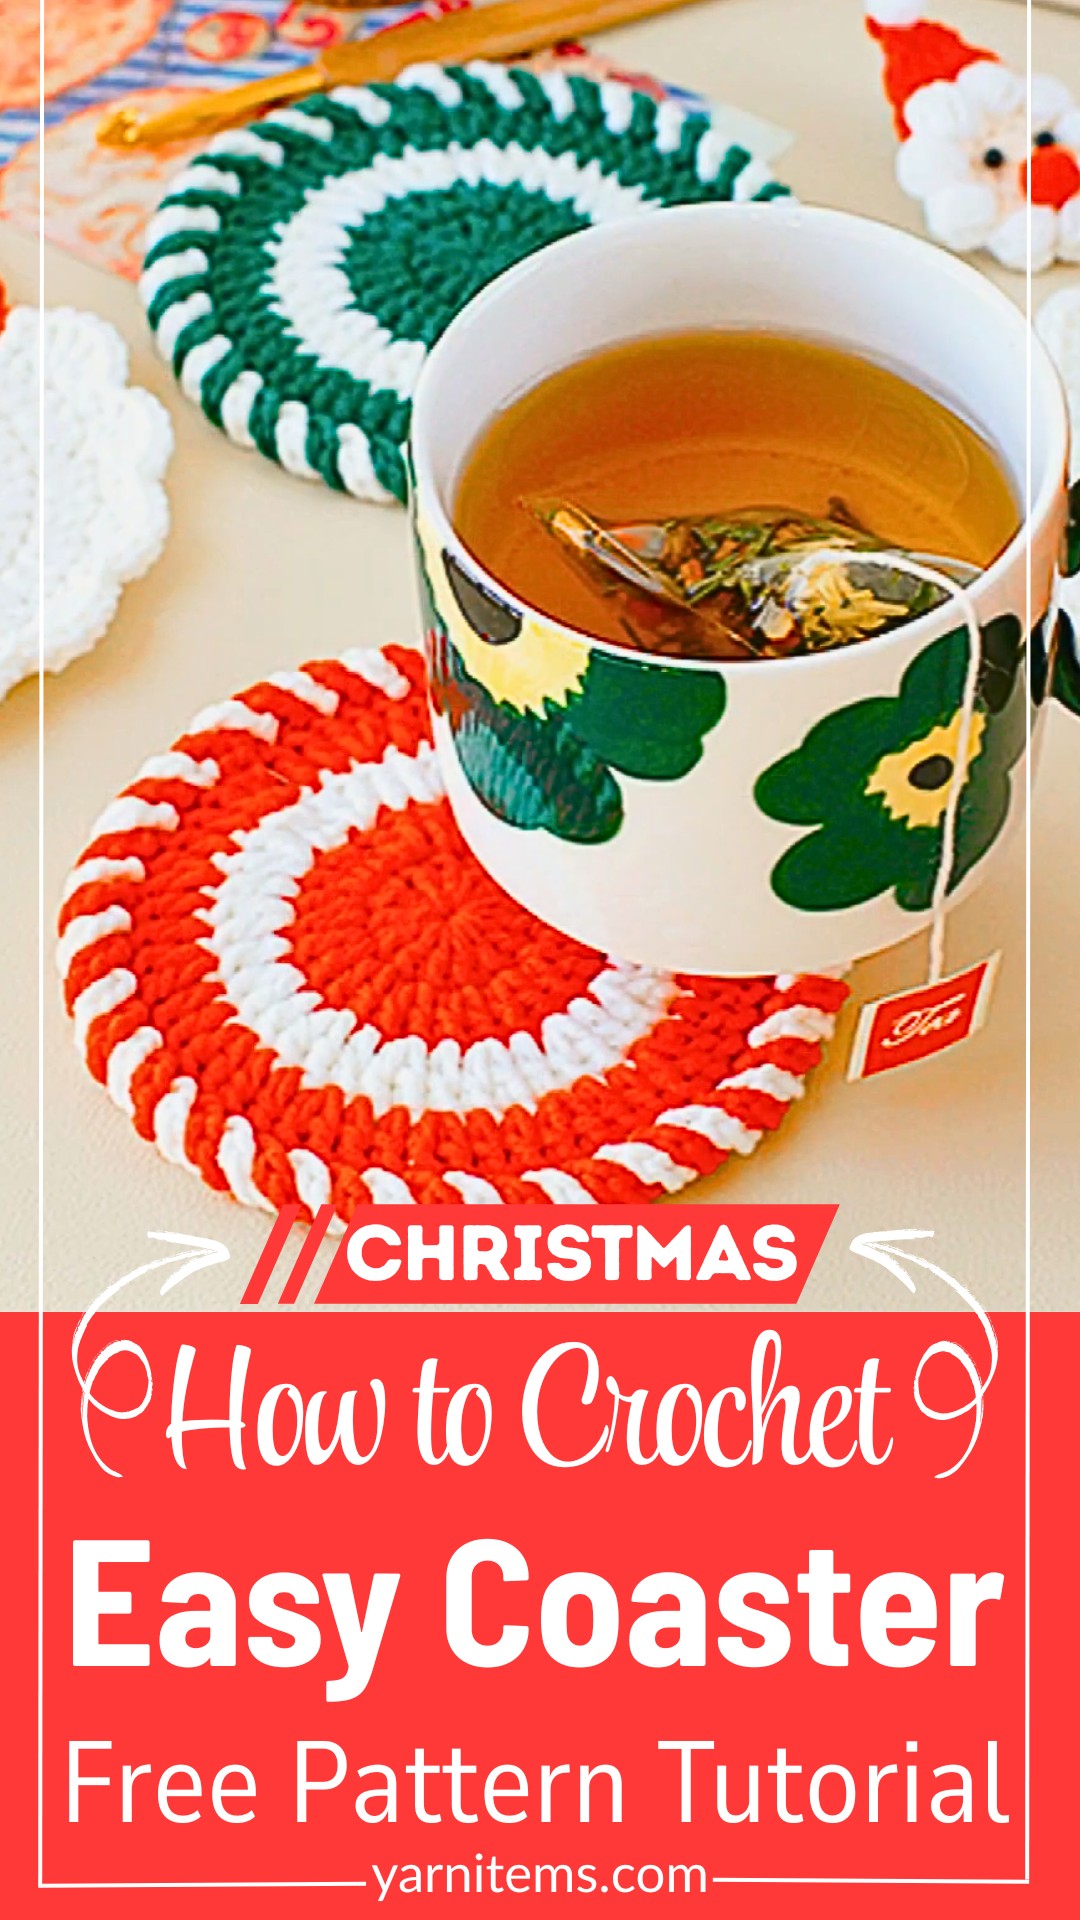
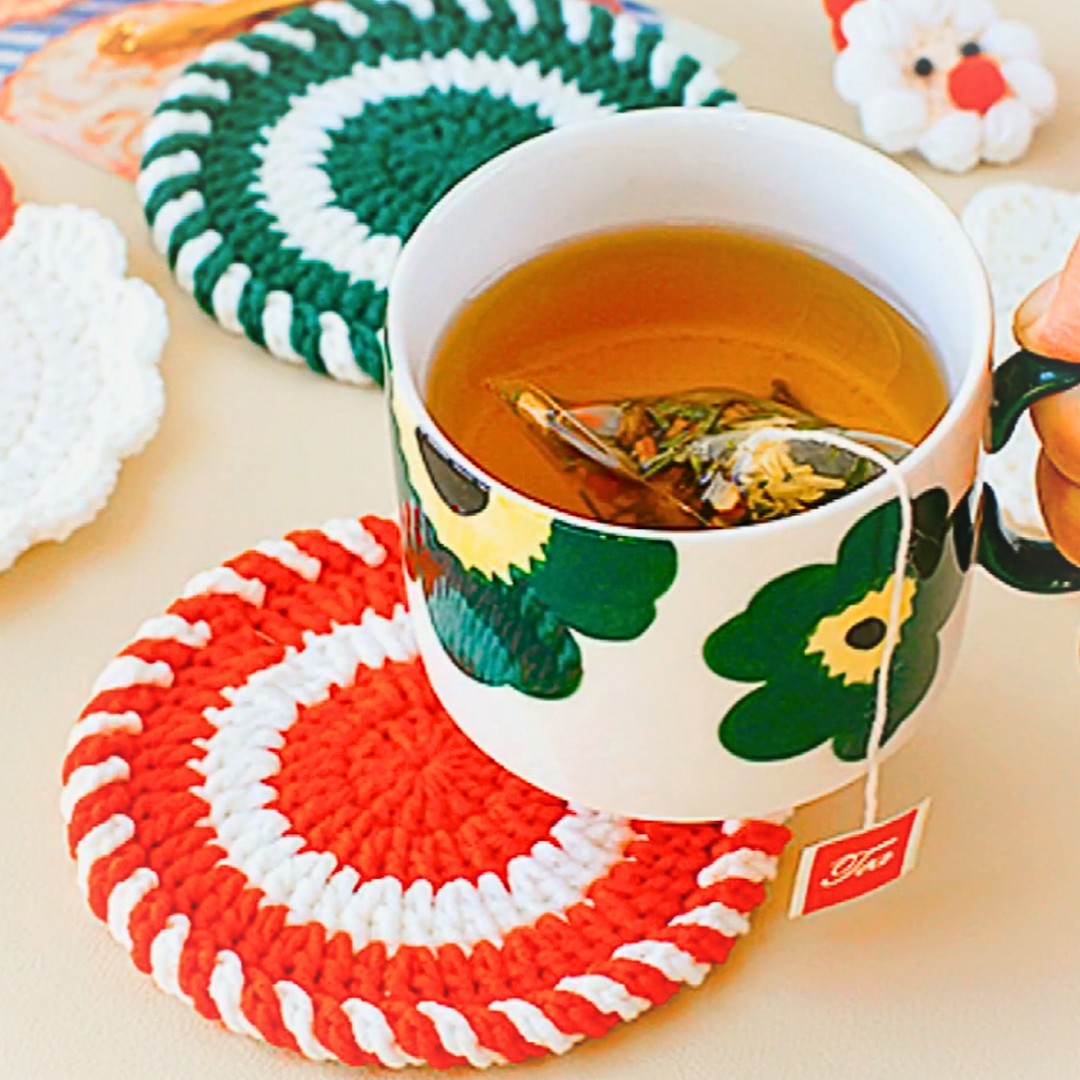
A crochet Christmas table feels even more inviting with handmade touches. And this crochet coaster adds festive charm most simply.
It brings color beneath every mug while helping protect your table from heat, moisture, and everyday marks. Small enough to finish in little time, it’s a cheerful crochet piece that instantly adds a holiday feel to your décor.
Crochet Christmas Coaster Pattern
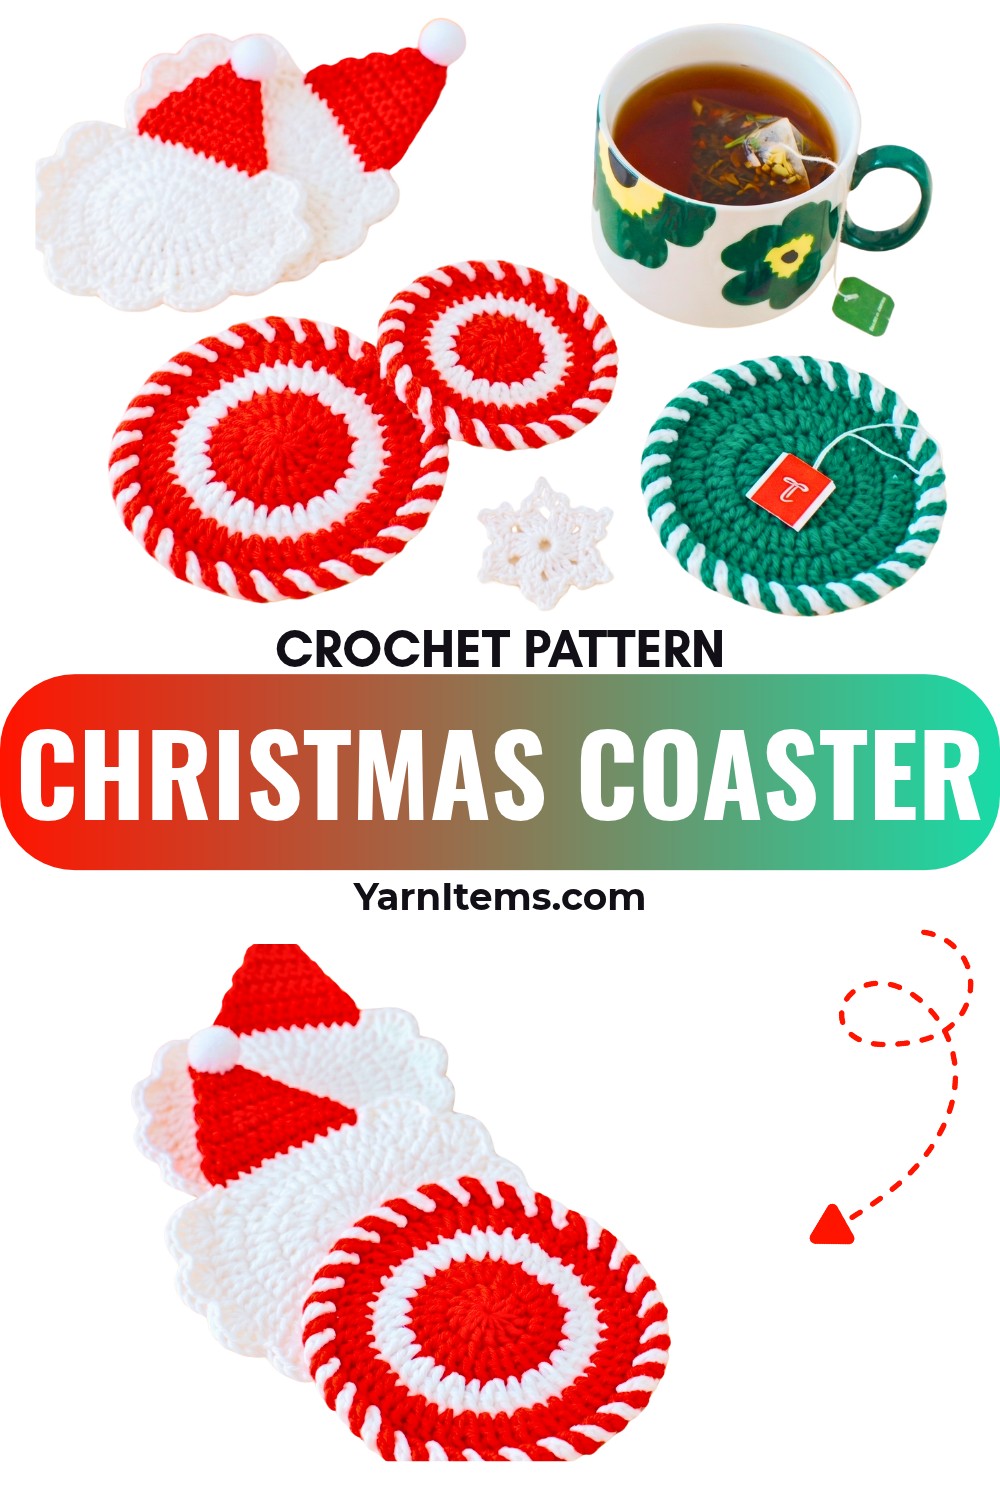
This crochet pattern walks you through each step to create a coaster that’s both decorative and practical. Try classic Christmas shades or mix your favorite festive colors to match your holiday style. Keep scrolling to see how this simple design comes together and crochet a set that’s ready for cozy winter drinks, family dinners, or thoughtful handmade gifts.
Credit Let’s crochet
Materials & Tools Needed
- Yarn: Soft cotton yarn (~2 mm diameter, Sport or DK weight).
- Suggested colors: Green & White or Red & White for festive holiday themes.
- Crochet Hook: 3.0 mm.
- Notions:
- 2 Stitch markers
- Yarn needle (darning needle)
- Scissors.
Pattern Abbreviations & Terminology
This pattern uses US standard crochet terminology:
- MR: Magic Ring (Magic Loop)
- ch: Chain
- st / sts: Stitch / Stitches
- sl st: Slip stitch
- dc: Double crochet
- dc2-inc: Double crochet increase (2 double crochet stitches worked into the same stitch)
Step-by-Step Crochet Instructions
1. The Coaster Body
Round 1: 14 Stitches
- Using your first color (e.g., Green), make a Magic Ring.
- Chain 3 (counts as the first dc). Add a stitch marker into the 3rd chain for reference.
- Work 13 dc into the ring’s center.
- Pull the tail of the Magic Ring tight to close the center hole.
- Join with a sl st into the marked 3rd chain.
Total Stitches: 14

Round 2: 28 Stitches
- Chain 3 (counts as first dc), and place your marker in the 3rd chain.
- Work 1 dc into the starting stitch (dc2-inc completes the increase).
- Work dc2-inc (2 dc into each stitch) in every remaining stitch around.
- On the 28th (final) stitch, change yarn colors as follows:
- Drop the green yarn.
- Loop the second color (White) onto your hook and pull it through the last 2 loops to change colors seamlessly.
- Join the round with a sl st into the first marked stitch using White yarn.
Total Stitches: 28
Round 3: 42 Stitches
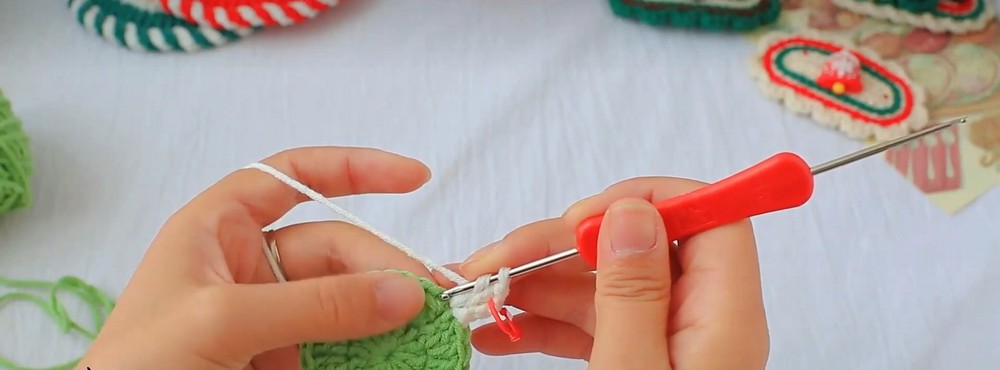
- Chain 3 with White yarn (counts as first dc). Place your marker in the 3rd chain.
- Work a dc2-inc in the next stitch.
- Repeat the pattern (1 dc, dc2-inc) all around the circle.
- On the last stitch, change yarn colors back to Green.
- Join with a sl st into the marked stitch using Green yarn.
Total Stitches: 42
Round 4: 56 Stitches
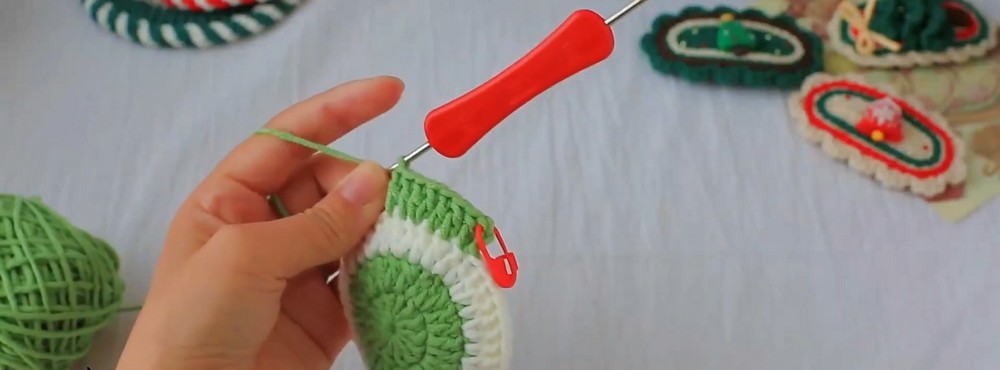
- With Green yarn, Chain 3 (counts as first dc). Place your marker in the 3rd chain.
- Work 1 dc into the next stitch.
- Work dc2-inc into the third stitch.
- Repeat the pattern (1 dc in next 2 sts, dc2-inc) all the way around.
- Join with a sl st into the marked stitch. Do NOT cut either yarn strand yet!
Total Stitches: 56
2. The Twisted Candy-Cane Border Technique
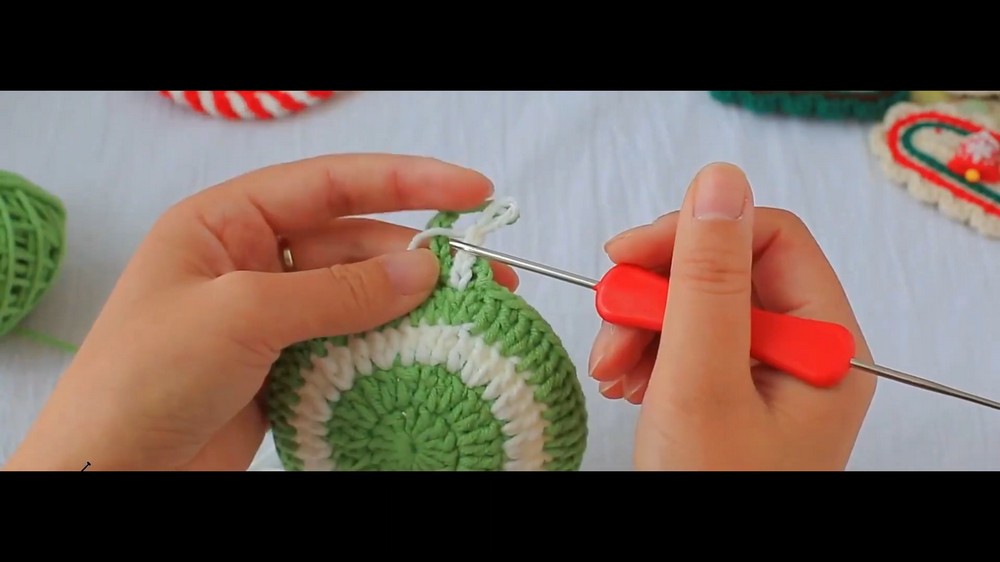
This edge alternates loops from both active yarn strands.
Setup
- With Green yarn active on your hook, ch 4. Pull the loop tall and safely remove your hook.
- Switch to White yarn:
- Insert your hook into the next empty stitch.
- Pull up a loop of White yarn and ch 4. Pull this loop tall and remove your hook.
Now, you have two loose ch-4 columns (one Green, one White) from adjacent stitches.
Alternating Process
- Green Strand:
- Insert hook into Green loop.
- Pass the Green strand in front of the White strand.
- Skip the stitch where the White column is rooted, and insert your hook into the next empty stitch.
- Yarn over, sl st, then ch 4. Pull the loop tall and remove your hook.
- White Strand:
- Insert hook into the white loop.
- Pass it in front of the Green strand.
- Insert hook into the next empty stitch.
- Yarn over, sl st, then ch 4. Pull the loop tall and remove your hook.
- Repeat the alternating steps for Green and White strands all the way around the coaster edge (56 stitches).
3. Finishing Techniques
- For the last two stitches:
- Work your final slip stitches into the bases of the very first chains created.
- Cut both yarn strands, leaving small tails.
- Pull the tails through their remaining loops, thread onto a darning needle, and weave neatly into the back side of the border.

Finished Size
- Approx. 4-inch (10 cm) round coaster, perfect for mugs or glasses.
Customization Ideas
- Santa Claus Design
- Use purely white yarn for the flat circle.
- Skip the candy-cane border and instead work a shell stitch border (5 dc into one stitch, sl st into next).
- Around half the circle to mimic Santa’s beard.
- Attach a separately crocheted red triangle hat.