Twisted Crochet Headband Pattern – Ribbed HDC Design
Here’s a chunky crochet headband that folds into a stylish front twist, with a stretchy ribbed texture and easy sizing for a comfortable fit.
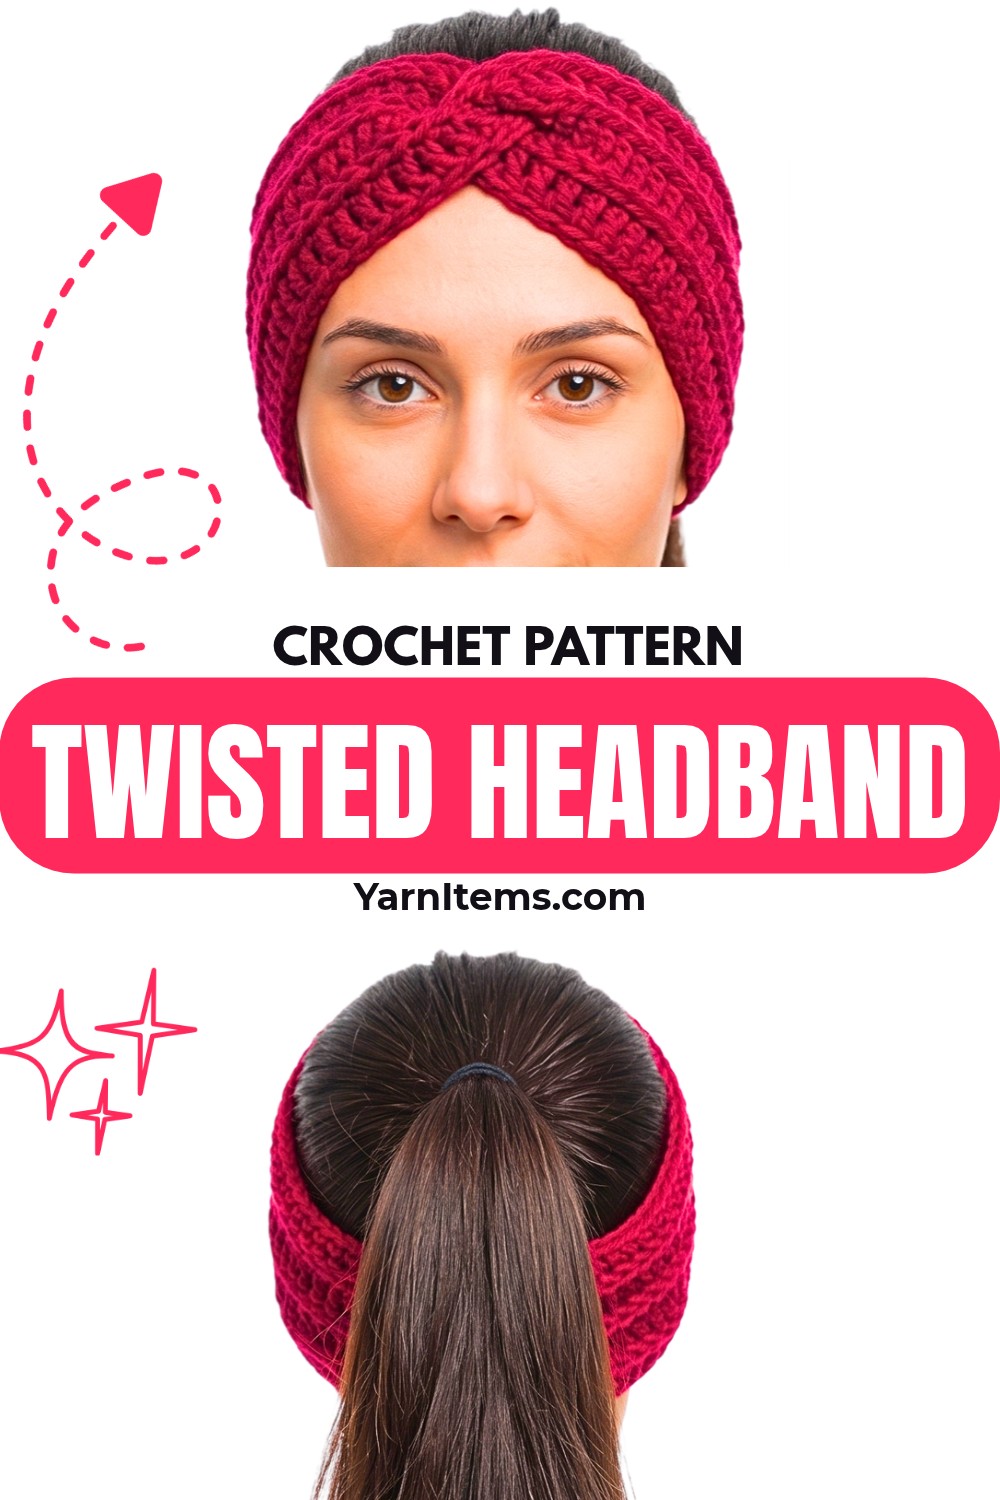
Front twists can make a simple crochet band look much more detailed than the stitches actually are. Thick yarn and half double crochet give this headband a cozy ribbed texture, while the clever folded finish creates the eye-catching twist at the front.
Working the crochet band is straightforward, with a foundation chain followed by rows of HDC worked through the back loop only. The sample uses 60 stitches and seven rows, but both the starting chain and row count can be adjusted, so you can shape the band around your own measurements before sewing the folded ends together.
Credit madebymara
Materials & Tools Needed
- Yarn: Any yarn can be used; the tutorial uses acrylic bulky weight yarn (Size 5)
- Crochet Hook: 6.0 mm crochet hook
- Scissors: For cutting the yarn
- Yarn Needle: For sewing the folded ends together and weaving in tails
Finished Size & Customization
The sample begins with a chain of 60, which measures approximately 45 cm. After completing 7 rows, the crocheted panel measures about 7.5 cm wide and stretches to approximately 50 cm long.
You can adjust the fit before you begin:
- For the head circumference: Change the number of starting chains. Measure the chain without pulling it overly loose because the finished ribbed fabric will stretch.
- For the headband width: Add or remove rows. The sample uses 7 rows for approximately 7.5 cm of width.
- For a snug fit: Keep the starting measurement reasonably close to the desired circumference rather than making the chain excessively loose.
The starting chain controls the length around your head, while the number of rows controls how wide the finished band will be.
Pattern Abbreviations
- CH – Chain
- HDC – Half Double Crochet
- BLO – Back Loop Only
- ST(s) – Stitch(es)
- SK – Skip

Before You Start
This headband has two important parts: the ribbed crochet panel and the folded seam that creates the twist. The crocheting itself uses a simple repeat, so keeping your stitch count accurate is more important than trying to work quickly.
For the sample, the foundation chain is 60 stitches, followed by 2 extra chains for the turning chain, making 62 chains altogether. Row 1 produces 60 HDC stitches. From Row 2 onward, each HDC is worked into the BLO, which forms the ridges that give the fabric its stretch and texture.
When you reach the assembly stage, the way the two ends are folded matters. Take a moment to line up all four layers before sewing so the finished twist sits neatly instead of becoming uneven.
Step-by-Step Crochet Pattern
Foundation Chain
Make a slip knot and CH 60, or chain the number needed for your desired head circumference. Then add 2 extra chains for the turning chain, giving you 62 chains in total for the sample.
Turn the foundation chain so the back bumps face you; SK the first 2 chains, work 1 HDC into the third back bump from the hook, then continue with 1 HDC in every back bump across; 60 HDC.
Working into the back bumps keeps the lower edge neat and helps prevent it from becoming unnecessarily stretched. Count your stitches at the end of the row before turning.
Row 2: CH 2 and turn, ignore the 2 turning chains, work 1 HDC in the BLO of the first true stitch, then continue with 1 HDC in the BLO of every stitch across; 60 HDC.

The BLO placement is what changes the look of the fabric. Instead of inserting the hook under both loops of the stitch, use only the loop farther away from you. You should begin seeing a raised ridge forming across the row.
Rows 3-7: Repeat Row 2, working CH 2, turning, then 1 HDC in the BLO of every stitch across; 60 HDC per row.
For the sample, seven total rows create a width of approximately 7.5 cm. If you want a wider headband, continue adding rows until the panel reaches your preferred width.
Before finishing, stretch the panel gently and check its length around your head. This is the easiest point to make a sizing adjustment before the ends are sewn together.

Finishing the Crochet Panel
Once the panel reaches your desired width, CH 1, cut the yarn leaving a very long tail for sewing, and pull the tail completely through the loop on your hook to secure the end.
Do not make the tail too short. It will be used to sew the folded layers together, so leaving plenty of yarn now saves you from having to add another piece later.
Creating the Front Twist
Lay the crocheted panel flat with your chosen back side facing you. Bring the two short ends together, then fold each end in half so both ends form a C shape.
Slide the two folded ends into one another so they interlock and sandwich the layers together. At this point, you should see four distinct layers lined up along the top edge.
Pause before sewing and check the alignment from both sides. The layers should sit evenly, and the panel should not be twisted anywhere except for the intentional folded overlap that creates the front detail.

Sewing the Four Layers Together
Thread the long yarn tail onto your yarn needle. Sew back and forth across the top edge, making sure every pass goes through all four layers.
There is no required sewing stitch for this seam, but the layers need to stay together securely. When you reach either corner, sew through that area a couple of extra times—twice is ideal—to reinforce the edge.
Then sew back across the joined edge in the opposite direction. This second pass adds extra security and helps keep the folded twist firmly in place.

Weaving In the Ends
After the seam is secure, weave the remaining yarn tail back and forth through the nearby stitches on the back side of the band. When weaving back in the opposite direction, skip the very last stitch before changing direction to help lock the yarn in place.
Trim the excess once the tail is securely hidden. Then weave in the original starting tail from the slip knot in the same manner and cut away the excess yarn.
Finally, turn the headband right side out. The folded layers will reveal the completed front twist, while the sewn area stays neatly hidden inside.