How to Crochet a Heart Chain Border – Easy Heart Edging
Tiny pastel crochet hearts link together into a sweet decorative chain that can finish blankets, scarves, table runners, and more.
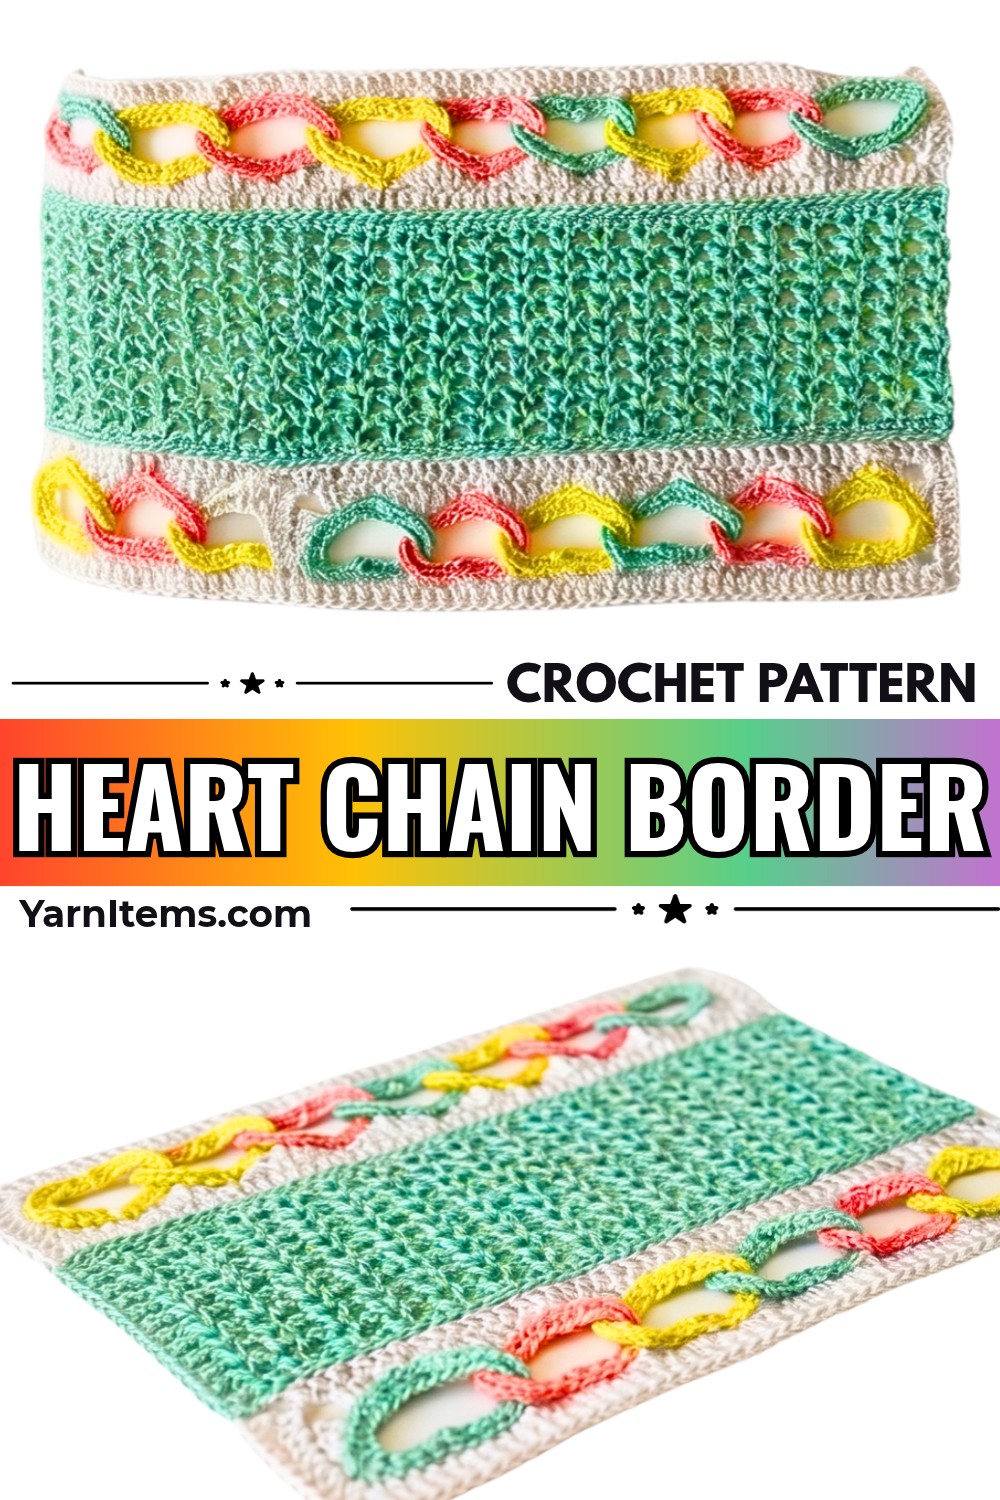
Little crochet hearts add a lovely handmade detail to an ordinary edge, turning a simple blanket or scarf into something more decorative. Their linked crochet design creates a continuous heart-shaped trim, while the pastel colors make it easy to coordinate the edging with different items.
You will learn how to crochet each heart, connect the hearts into a chain, and work a shaped border along the linked strip. The instructions also explain how to plan the crochet heart count, manage the corners, and attach the finished edging neatly to your chosen item.
Credit Hook & Loop Crochet Tutorials
Materials & Tools Needed
- Yarn: 100% cotton yarn in pastel colors for the individual hearts, plus a base color for joining and working the border.
- Crochet Hook: 2 mm crochet hook.
- Scissors: For cutting the yarn.
- Tapestry Needle: For weaving in the yarn tails.
Choose colors that complement the item you are decorating. You can use a different pastel shade for each heart or repeat the same colors to create a coordinated border.
Finished Size & Customization Ideas
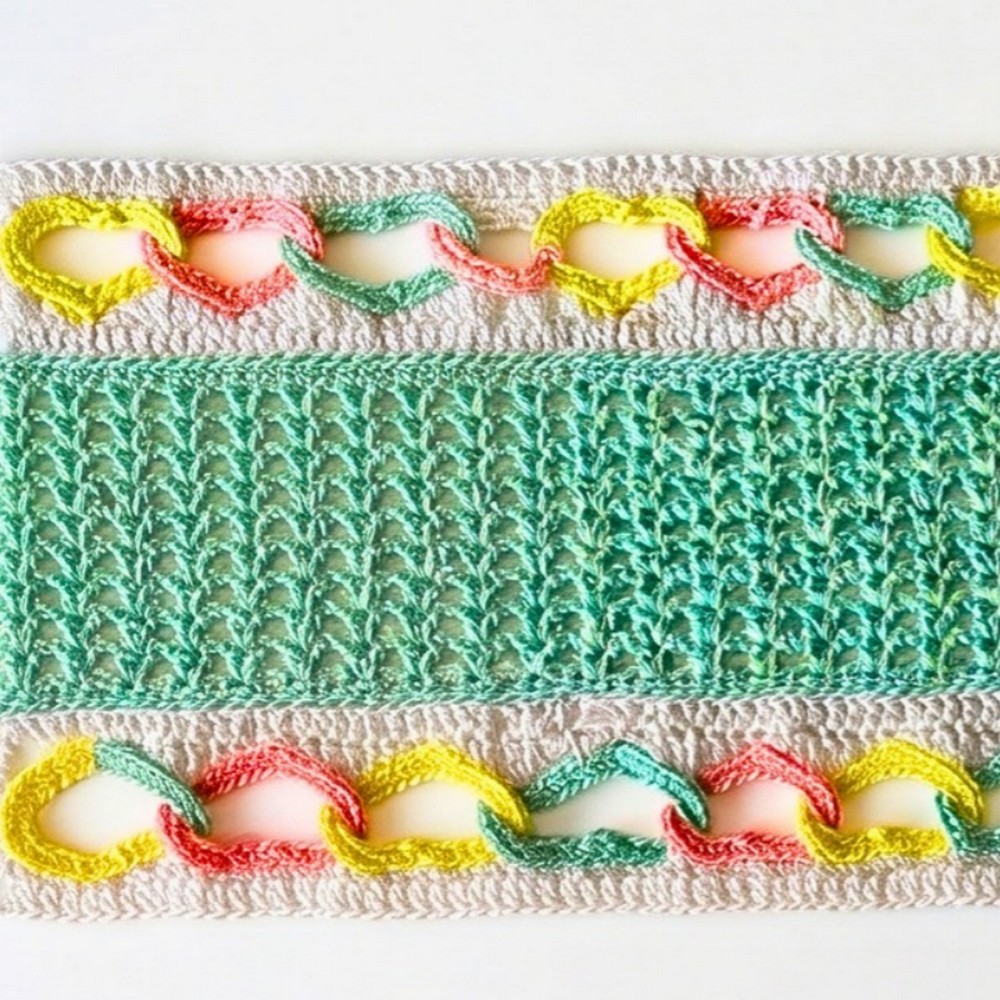
The finished length depends on how many hearts you crochet and how you arrange the linked strip. Make as many individual hearts as needed to cover the width or perimeter of your chosen item.
There are several ways to use the heart chain:
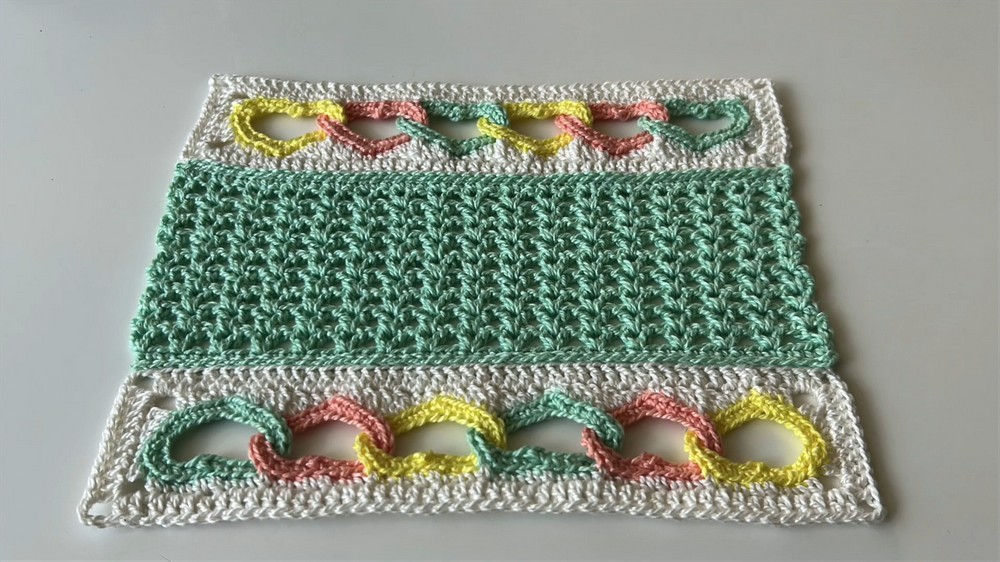
- Single-Sided Chain: Link the hearts in one continuous direction to create a simple decorative edge.
- Two-Sided Arrangement: Add linked hearts along both sides, depending on the layout of your item.
- Decorative Edge: Use the heart chain on its own as an embellishment.
- Full Border: Continue beyond the heart chain and work a larger border using a stitch pattern of your choice, such as V-stitches.
Pattern Abbreviations & Terminology
- ch: Chain stitch
- sl st: Slip stitch
- sc: Single crochet
- hdc: Half double crochet
- dc: Double crochet
- tr: Treble crochet
- sc2tog: Single crochet 2 stitches together (decrease)
- dc2tog: Double crochet 2 stitches together (decrease)
- blo: Back loop only
Before You Begin
The edging is made in three main stages. First, crochet the individual hearts using the foundation chain and shaping stitches. Next, link each new heart to the previous one before closing its starting loop. Finally, use the base color to work the shaped border along the connected hearts.
Keep the 2 mm hook and cotton yarn consistent throughout the work. This helps the individual hearts maintain a similar size and makes the linked strip easier to arrange.
Part 1: Making the Individual Hearts
Each heart begins with a chain of 20 stitches. A small Picot loop is added near the beginning, and the remaining stitches are shaped into the heart.
Foundation – Round 1
- Make a slip knot with your chosen heart color.
- Chain 20.
This foundation chain forms the starting length for the heart. Keep the chains even so the following shaping stitches can be worked neatly.
Make the Picot Loop
- Chain 2 extra.
- Rotate the foundation chain.
- Work a sl st into the second stitch from your hook to form the Picot.
- Chain 3.
- Work a sl st into the first chain stitch to close the loop.
The Picot creates a small decorative loop at the beginning of the heart. It is important to complete this detail before shaping the body because the following round works around the foundation chain.
Body Shaping – Round 2
Work the following sequence along the foundation chain:
- Ch 1.
- Work 2 sc into the next stitch.
- Work 1 sc into each of the next 6 stitches.
- Work 3 sc into the next stitch to form the point.
- Work 1 sc into each of the next 6 stitches.
- Continue down the side with the following sequence: 2 sc, 1 sc, 2 sc, 1 sc, 1 sc.
- Skip the Picot.
- Work 1 sc, then 1 sc.
- Work 2 sc into the final stitch.
The increases and decreases in the supplied sequence shape the outline of the heart. The group of 3 sc creates the pointed end, while the remaining stitches form the sides and upper part.
Fastening Off
- Work a sl st into the very first sc to join.
- Chain 1.
- Pull up the yarn.
- Cut the yarn.
- Use a tapestry needle to weave in the yarn ends.
Complete the first heart before starting the next one. Check that the Picot loop is open and that the heart shape is easy to recognize.
Part 2: Linking the Hearts
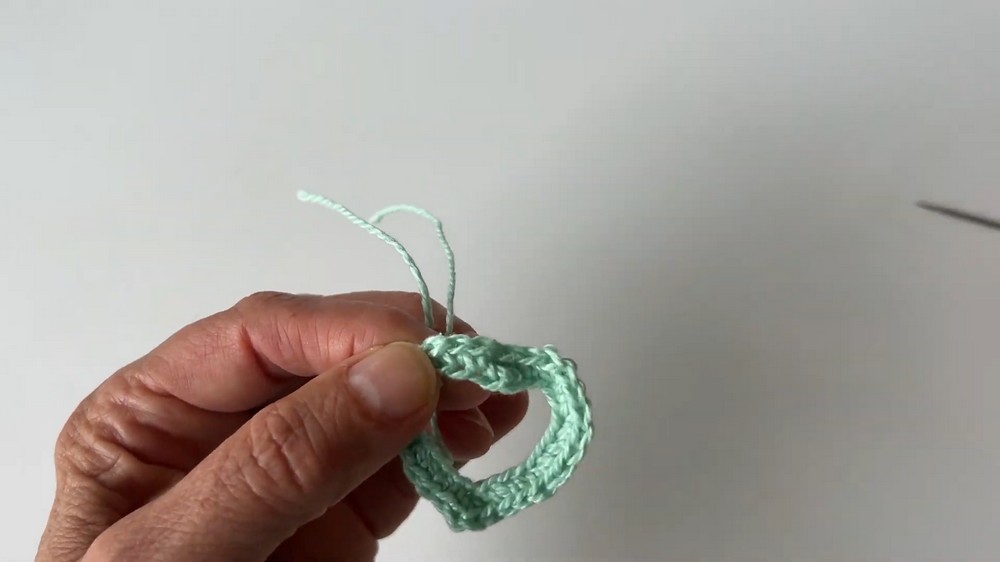
The hearts are connected as you crochet them. Instead of making every heart separately and joining them afterward, the foundation chain of each new heart passes through the previous heart before the loop is closed.
Start the Next Heart
- Make a slip knot with the yarn for the next heart.
- Chain 20.
- Chain 2 extra.
- Work a sl st into the second stitch from the hook to form the Picot.
- Chain 3.
At this point, the new heart has its foundation chain and Picot loop, but the ring has not yet been closed.
Interlock the Hearts
- Take the foundation chain of the new heart.
- Pass it through the previously completed heart, following the linking method shown in the tutorial.
- Make sure the previous heart is positioned correctly before closing the new loop.
- Work a sl st into the first chain stitch to secure the link.
Why link before closing the loop: The new heart must pass through the previous heart while its starting section is still open. Closing the loop first would prevent the same interlocking method from being used.
Complete the New Heart
- After securing the link, repeat the Round 2 heart-shaping instructions.
- Join with a sl st into the first sc.
- Ch 1, pull up the yarn, and cut.
- Weave in the yarn ends.
Repeat these steps for every heart needed to reach the desired length.

Part 3: Working the Border
Once the heart chain is complete, turn it upside down to begin the border. Use the base color yarn so the border creates a consistent finish around the linked hearts.
Foundation Setup
- Turn the linked heart strip upside down.
- Make a slip knot with the base color yarn.
- Work a sl st into the first of the 3 sc stitches at the heart point.
This starting position anchors the border at the pointed section of the heart. From here, the first round shapes the spaces around the linked motifs.
Round 1 – Shaping and Joining
- Ch 1.
- From this point onward, work exclusively in BLO.
- Begin with the sequence: 1 sc2tog, 1 hdc, 1 dc2tog.
- Find the center stitch of the 3 sc at the heart point.
- Count back 5 stitches from that center stitch.
- Work 1 tr into each side as specified in the tutorial.
- Continue along the sides using the designated stitch combinations:
- 1 dc2tog, 1 hdc, 1 sc
- 1 sc2tog
- 1 hdc, 1 dc2tog
- The specified anchoring treble stitches
- Continue following the stitch combinations along the linked hearts until reaching the corner transitions.
Corner Transitions
Use the corner combination that matches the shape and position shown in the tutorial:
- Work 1 dc in each of the next 2 stitches, ch 3, then 1 dc in each of the next 2 stitches.
- Alternatively, work 1 hdc, ch 3, and 1 hdc into the designated corner space.
- Continue around the border using the specified combinations.
- Close the round with a sl st into the top of the initial sc2tog.
Why BLO is used: Working into the back loop only creates a distinct ridge and helps define the surface of the border. Keep the hook in the back loop throughout this round so the texture remains consistent.
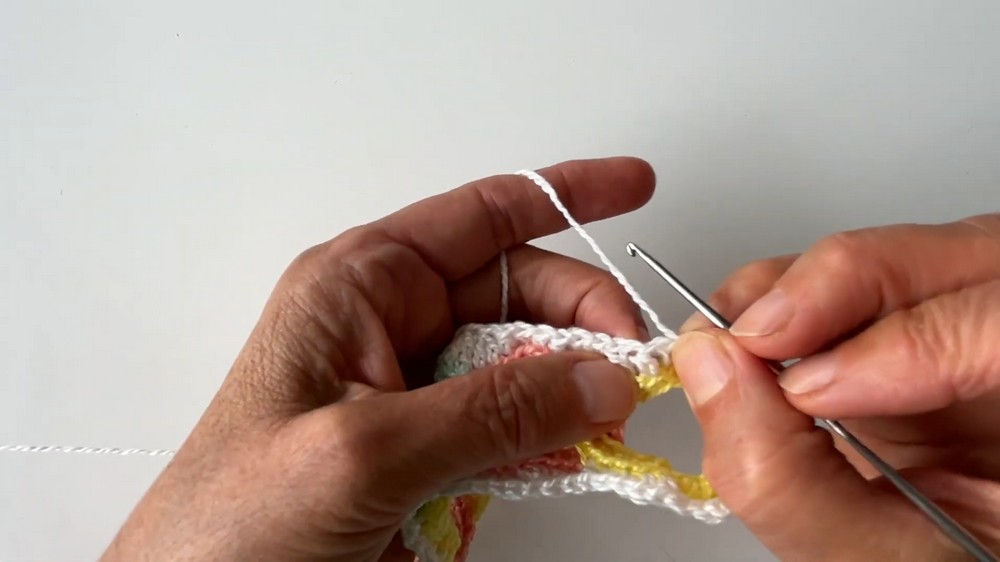
Round 2 – Expanding the Border
- Ch 2.
- Work 1 dc into the next stitch.
- Continue working 1 dc into each stitch until you reach a corner.
- In each corner space, work 2 dc, ch 3, and 2 dc.
- Continue with 1 dc in each stitch around the remaining perimeter.
- Repeat the same corner treatment at each corner.
- Complete the round around the border.
This round adds height and width to the shaped first round. The corner chains provide room for the border to turn without pulling tightly at the corners.
Plan the Heart Border Before Joining
Before attaching the finished strip to a blanket, scarf, or table runner, arrange it along the edge where it will be used. This small planning step helps prevent the chain from being too short, too long, or awkwardly positioned.
- Measure the Intended Edge: Check the width or perimeter that needs the heart trim.
- Arrange the Hearts: Lay the linked strip along the edge without stretching it.
- Check the Length: Add more hearts if the strip does not cover the intended section. If it is longer than needed, reconsider the number of hearts before attaching the border.
- Decide the Direction: Choose whether the hearts will face along one side or whether you want a two-sided arrangement.
- Check the Corners: If the strip is part of a full perimeter, identify where the border needs to turn and make sure the corner sections can sit flat.
- Choose the Joining Approach: Decide how the completed border strip will meet the main fabric before sewing or crocheting it into place.
Why this check is useful: The heart chain is decorative and has its own shape. Checking its length and direction first helps you position the hearts evenly and avoid pulling the edging out of shape during assembly.
Assembly
After completing the heart chain and its two border rounds, attach it to the main item.
Arrange the Pieces
- Lay out the completed border strips.
- Place them alongside the main fabric or project panels, such as a baby blanket or custom fabric sample.
- Match the edges as shown in the tutorial.
- Check that the heart chain follows the intended direction and that the corners are positioned correctly.
Join the Border
- Use a standard joining technique similar to the method used for joining granny squares.
- Attach the border to the main item along the matching edges.
- Continue joining until all intended sides are secured.
- Keep the edging evenly positioned as you work so the hearts do not bunch together or stretch out of shape.
Final Finishing
- Complete the join around the full intended perimeter.
- Fasten off securely.
- Use a tapestry needle to weave in all remaining yarn tails.
- Check the finished edge and make sure the linked hearts and border lie neatly against the main item.
Finishing Checks
Before using or displaying the finished item, check these details:
- Heart Shapes: Each heart should be recognizable, with its Picot loop and pointed section clearly formed.
- Links: Check that the hearts are interlocked securely and face the intended direction.
- Border Texture: Make sure the first round has been worked in BLO as instructed.
- Corners: Check that the corner spaces are not pulled too tightly and that the border lies flat.
- Yarn Ends: Weave in all loose tails securely.
The completed heart chain can be used as a decorative edge on blankets, scarves, table runners, and other handmade items. Its pastel motifs provide a delicate finish, while the base-color border helps connect the hearts into one continuous trim.