Crochet Duck Amigurumi Pattern – Step-by-Step Guide
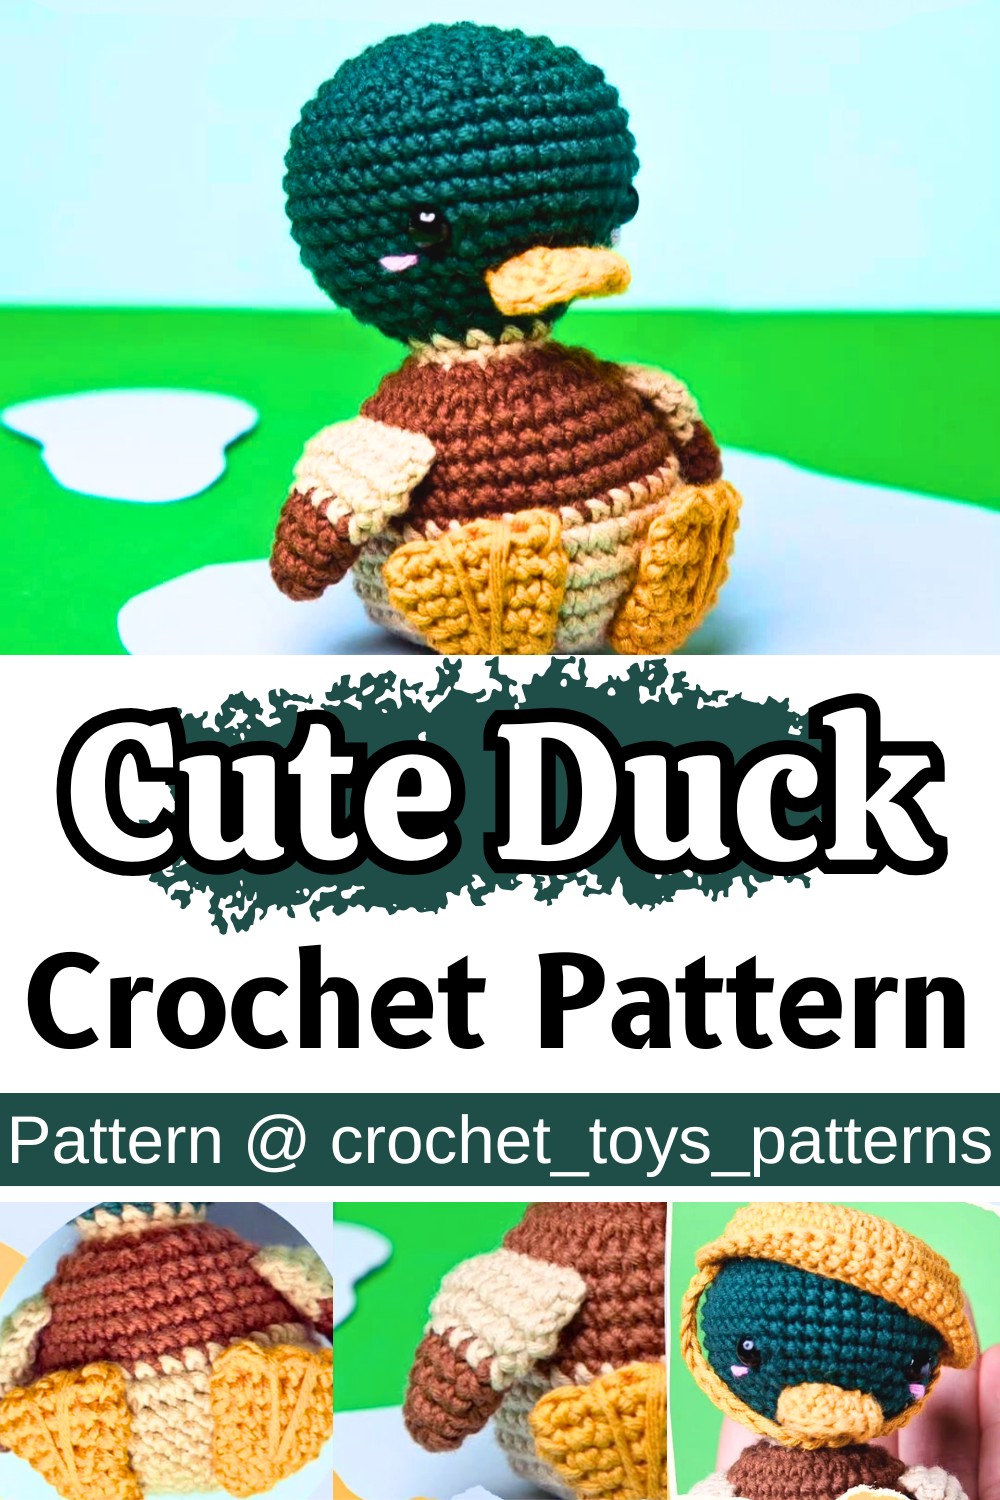
The Crochet Duck Amigurumi Pattern offers a lovable design with a round body and cheerful details like the adorable yellow beak and plump wings. Crocheters of all skill levels can follow its clear instructions to craft a toy perfect for gifting or home décor. The option to experiment with alternative yarn colors, such as pastels or bold hues, makes each creation unique and personalized.
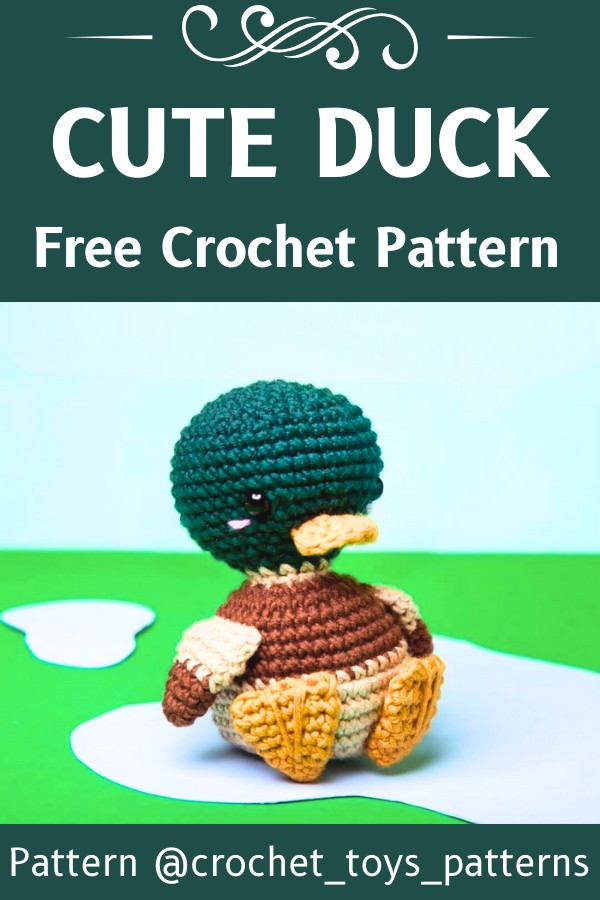
Adding tiny accessories like a rain hat or rosy blush cheeks can elevate your duck’s charm. Use lightweight yarn for a soft texture and consider incorporating safety eyes for an expressive look. This project provides a creative way to improve your crocheting techniques, like mastering invisible decreases or creating well-shaped wings and feet, for a professionally finished piece.
Credit crochet_toys_patterns
Step-by-Step Pattern
Abbreviations
- MR-Magic Ring
- CH – Chain
- DC – Double crochet (UK)
- FLO -Front loops only
- BLO – Back Loops Only
- INC – Increase
- INV DEC – Invisible Decrease
- SL ST – Slip stitch
- FO -Fasten Off

Pattern Instructions
Invisible Decrease (INV DEC):
Insert your hook into the front loops ONLY of the next 2 stitches. Yarn over, pull through both loops, then yarn over again and pull through the 2 loops on the hook.
Invisible Decrease (INV DEC):
Change to your new yarn colour in the previous stitch’s last ‘yarn over’.
For example (working in DC stitches):
- Insert hook into the stitch before your colour change
- Yarn over
- Pull through (2 loops on hook)
- Yarn over with new colour
- Pull through both loops on hook
- Continue to work on the next stitch in the new colour
you will need:
8/4 (Lightweight) Yarn in:
- – Dark Green
- – Yellow
- – Brown
- – Beige
- – Optional – Scraps for blush
2.5 mm hook (or hook size according to yarn label)
Toy Stuffing of your choice
(Suggested) 6 mm Safety Eyes
Stitch Marker
Large-eyed needle
Scissors

Head and Body
Worked in one piece, in the round starting at the top of the head.
In green yarn:
- 1: 6 dc in MR (6)
- 2: Increase in each stitch (12)
- 3: [1 dc, inv inc] x 6 (18)
- 4: 1 dc, inv inc, [2 dc, inv inc] x 5, 1 dc (24)
- 5: [3 dc, inv inc] x 6 (30)
- 6: 2 dc, inv inc, [4 dc, inv inc] x 5, 2 dc (36)
- 7: [5 dc, inv inc] x 6 (42)
- 8 – 12: Dc in each st to end (42)
- 13: [5 dc, inv dec] x 6 (36)
- 14: 2 dc, inv dec [4 dc, inv dec] x 5, 2 dc (30)
Add safety eyes between rows 11 and 12, approximately 10 stitches apart. Add some toy stuffing. Optional: Sew a ‘blush’ line onto your duck’s cheeks under each eye.
- 15: [3 dc, inv dec] x 6 (24)
- 16: 1 dc, inv dec, [2 dc, inv dec] x 5, 1 dc. Change to beige yarn in last st. (18) In beige yarn:
- 17: [1 dc, inv dec] x 6 (12)
- 18: Dc in each st (12) Head and Body (continued)
- 19: Dc in each st. Change to brown in last st. (12)
In brown yarn:
- 20: Inc in each st (24)
- 21: [1 dc, inv inc] x 12 (36)
- 22 – 24: Dc in each st. Change to beige in last st of rnd 24 (36)
In beige yarn:
- 25: 7 dc, inv inc, 20 dc, inv inc, 7 dc (38)
- 26: Inv inc, 17 dc, 2 inv inc, 17 dc, inv inc (42)
- 27: [Inv inc, dc] x 4, 30 dc, [inv inc, dc] x 2 (48)
- 28-29: Dc in each st (48)
- 30: [2 dc, inv dec] x 12 (36)
- Top-up stuffing. Continue adding stuffing as you go.
- 31: [1 dc, inv dec] x 12 (24)
- 32: [1 dc, inv dec] x 8 (16)
- 33: [Inv dec] x 8 (8)
Sl st in next st and FO with long tail. Sew remaining stitches closed.
Beak
In yellow yarn:
- 1: Ch 5, dc in 2nd ch from hook and next 2 st. 2 dc in last ch.
Do not turn, continue working around the opposite side of the chain as follows:
1 dc in next 3 st, 2 dc in last ch. (10)
Continuing in the round:
- 2: 2 dc, inc, 4 dc, inc, 2 dc (12)
- 3: Press the work flat along the original chain. Work a dc in each stitch and it’s opposite stitch together, along the top of the work (through both the stitch on the side facing you, and the adjacent stitch on the other side of the flattened work).
Fasten off with a long tail for sewing later.
Feet (make 2)
- In yellow yarn:
- 1: 5 dc in MR (5)
- 2: [1 dc, inc] x 2, 1 dc (7)
- 3: 2 dc, [1 dc, inc] x 2, 1 dc (9)
- 4: Dc in each st (9)
- 5: 2 dc, inc, dc 3, inc, dc 2 (11)
- 6: 1 dc, [2 dc, inc] x 3, 1 dc (14)
- 7: Dc in each st (14)
- 8: Press the work flat. Work a dc in the next stitch and it’s opposite stitch along the top of the work (through both the stitch on the side facing you, and the adjacent stitch on the other side of the flattened work). Work a sl st in the next stitch (across both sides), dc in next 2 sts (across both sides), sl st in the next st (across both sides) and finally, 2 dc in the last st (across both sides).
FO with a long tail amount of yellow yarn. sew the webbing details using a small

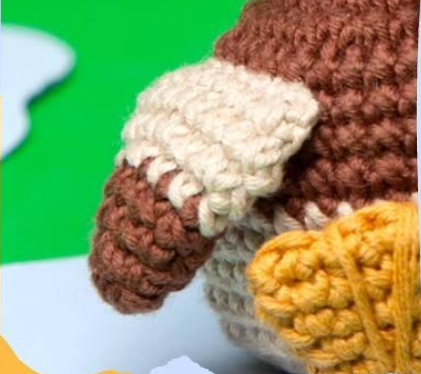
Wings (make 2)
In brown yarn:
- 1: 5 dc in MR (5)
- 2: [1 dc, inc] x 2, 1 dc (7)
- 3: 2 dc, [1 dc, inc] x 2, 1 dc (9)
- 4: DC in each st. Change to beige in last st (9)
In beige yarn:
- 5: 2 dc, inc, dc 3, inc, dc 2 (11)
- 6: [1 dc, inc] x 5, 1 dc (16)
- 7: Dc in each st (16)
- 8: Press the work flat. Work a dc in each stitch and it’s opposite stitch together, along the top of the work (through both the stitch on the side facing you, and the adjacent stitch on the other side of the flattened work) Work 2 dc in the last st.
FO with a long tail for sewing later
Rain Hat
In yellow yarn:
- 1: 9 dc in MR (9)
- 2: Inc in each st (18)
- 3: [1 dc, inc] x 9 (27)
- 4: [2 dc, inc] x 9 (36)
- 5: [3 dc, inc] x 9 (45)
- 6-8: Dc in each st (45)
- 9: In BLO, dc in each st (45)
- 10: Dc in each st (45)
- 11: Dc in each st (45)
Sl st in next st and FO. Weave in ends.
Hat strap (optional): Make a chain in yellow yarn and sew an end to each side of the hat.