
Graceful Crochet Tulip in a Pot Pattern Tutorial
Transform your home with the timeless elegance of a handmade crochet tulip in a pot. This charming Pattern brings the vibrant spirit of spring indoors, with delicately curved petals and a colorful, cheerful design. Perfect for gifting or personal decor, it offers crocheters of all levels a chance to create an enduring piece of artistry that never fades.
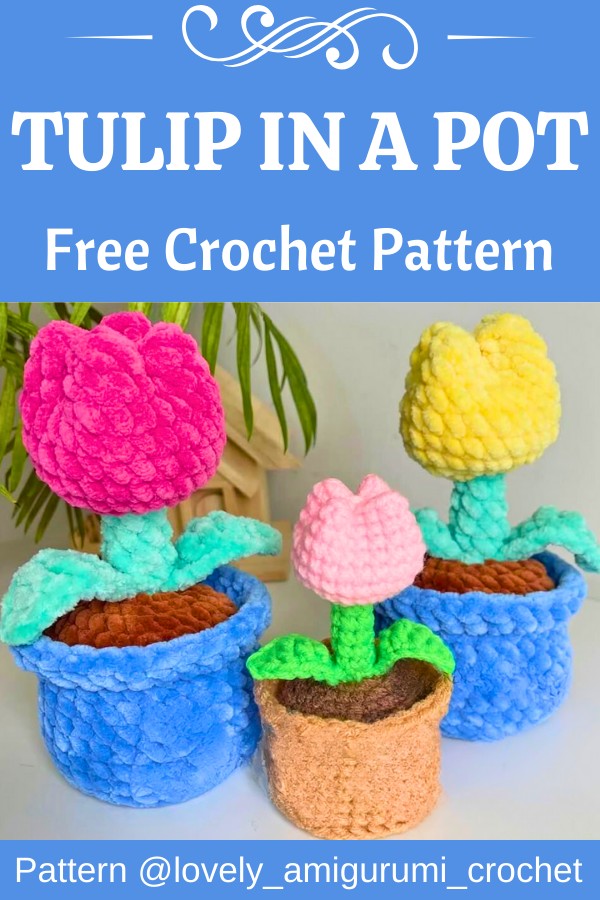
This Pattern shines with its innovative use of plush yarns to create striking textures for the petals and a sturdy, detailed pot that holds them. The tutorial also incorporates clever back-loop and front-loop stitches for added dimension, giving your tulip a realistic flair. Whether for gifting or home décor, its adaptable design ensures a finished piece that impresses every time.
Credit lovely_amigurumi_crochet
Step By Step Pattern
Size:
The finished product’s size depends on the thickness of the yarn used. When using a 5 mm crochet hook and Plush yarn, the finished pot will be about 16.5cm (6.5 in) long. The diameter of the pot is 7cm (2.7 in).
Materials
- Plush Yarn: Chenille Home SlimTM Solid Yarn by Loops & Threads – brown ,Sweet SnugglesTM Lite Yarn by Loops & Threads – pink, blue, green
- Needle
- Hook #5
- Stuffing
- Stitch markers
- Scissors
- Cardboard (bottom of the pot) or plastic
Abbreviations
- MR – magic ring sc-single crochet inc – increase
- dec – decrease
- hdc-half double crochet
- dc-double crochet
- tr-treble crochet ch-chain stitch (…)XN-repeat N times
- sl st – slip stitch
- FO-finish off/fasten off
- BLO-back loop only
- FLO-front loop only
- Not necessary (as an option)
- BPSC-back post single crochet

Pattern Instructions
Pot
blue yarn

- 1R-6sc in MR
- 2R-6inc (12sc)
- 3R- (1sc; 1inc)x6 (18sc)
- 4R -(2sc; 1inc)x6 (24sc)
- 5R– (3sc; 1inc)x6 (30sc)
- 6R-BLO 30sc (or you can use BPSC) (30sc)
- 7-12-R 30sc (6rounds)
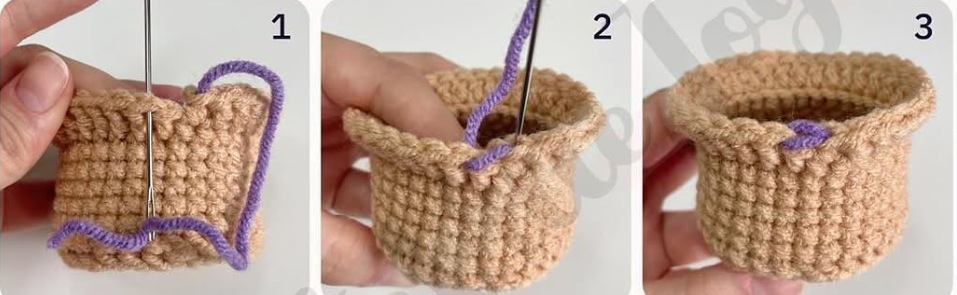
- 13R-FLO 29dc; 1sc; close the row (photo 1,2,3); FO
Cut a 6 cm (2.3 in) circle from cardboard, place at the bottom of the pot, and fill with stuffing.

Soil
brown yarn

- 1R-6sc in MR
- 2R-6-inc (12sc)
- 3R- (1sc; 1inc)x6 (18sc)
- 4R –(2sc; 1inc)x6 (24sc)
- 5R- (3sc; 1inc)x6 (30sc) sl st
Leave a long tail to sew the part to the pot
Let’s take the pot. In the 13th row, we find BLO. Sew the soil into the pot.

Leaves x2
green yarn
- We make 8 ch, from the second ch from the hook: hdc; dc; 3tr; dc; hdc
- Pull out the thread, leave a tail to sew the part to the stem

Stem – Bud
green yarn,pink yarn
- 1R-6sc in MR (start with green yarn)
- 2-6R-6sc (5 rounds) in the last sc we cha
- nge the color to pink
- 7R-6inc (in this row 1inc = 3sc) (18sc)

- 8R (2sc; 1inc)x6 (24sc)
- 9-14R-24sc (6 rounds) sl st.
Leave the tail about 15-20 cm
Add filler to the stem, add a little filler to the bud.
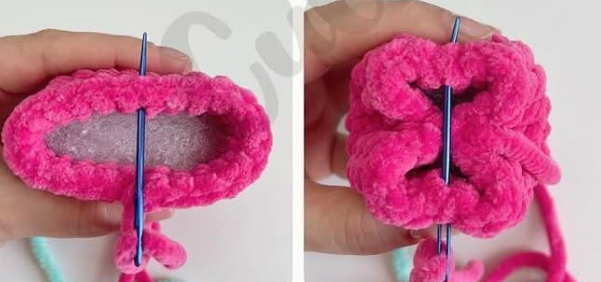
Connect the sides crosswise.
Sew leaves to the stem. Sew the stem to the pot.
Below are some colorful creations from this pattern.


