Learn to Crochet an Adorable Frock for 2 to 3-Year-Olds
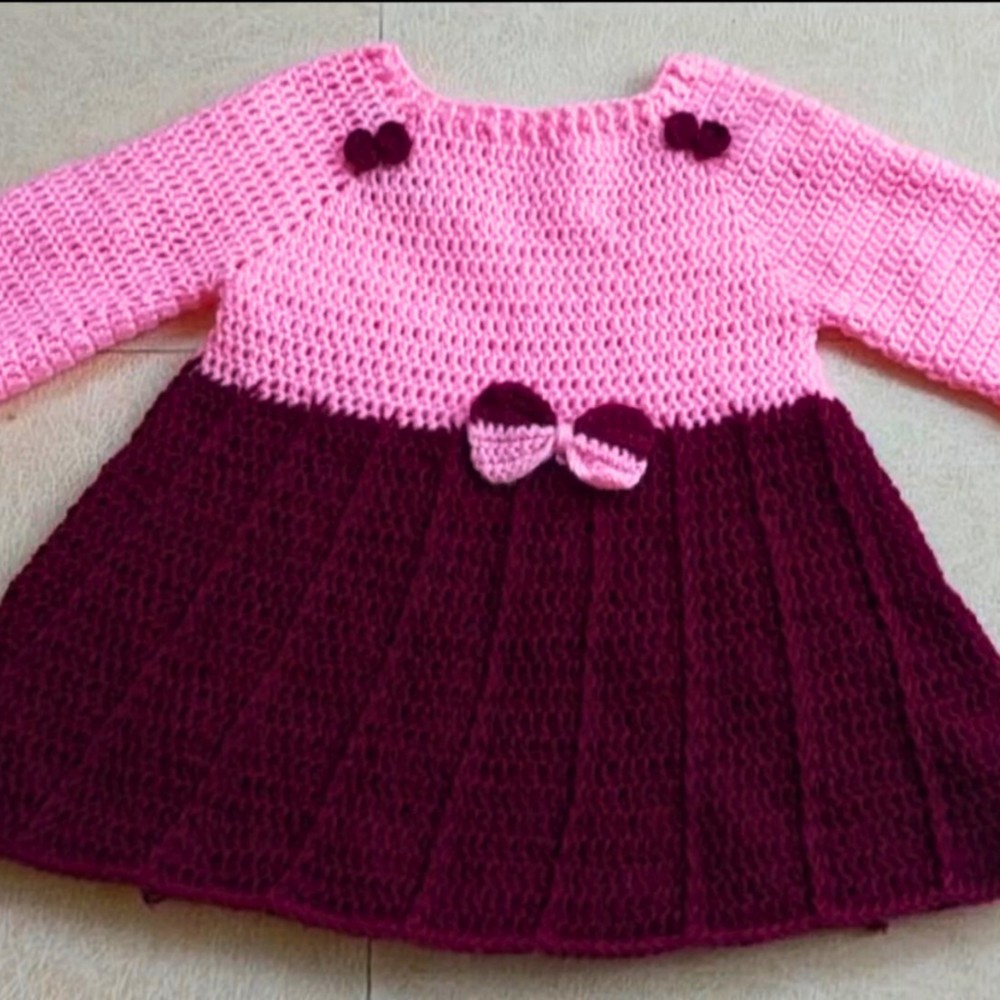
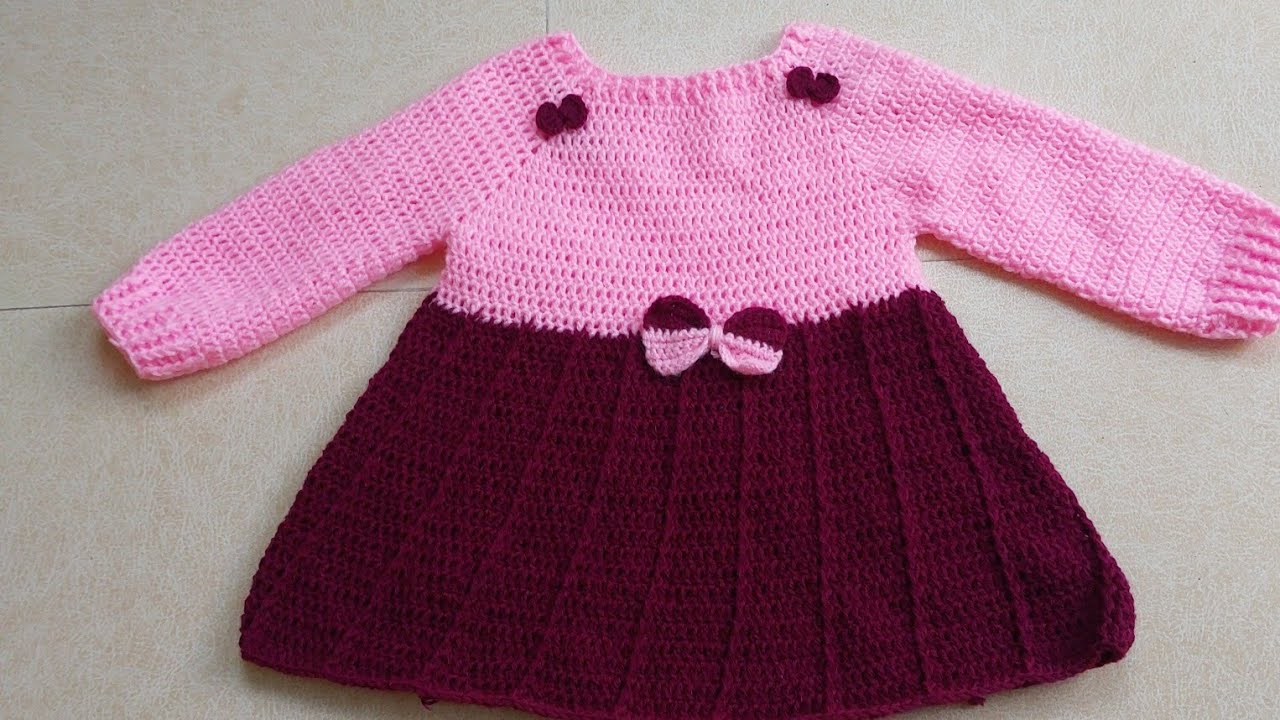
This crochet frock for 2 to 3-year-olds is a gorgeous, handmade piece sure to make your little one sparkle.
Designed for comfort and flair, it features intricate patterns and soft baby-safe yarn. It’s ideal for special occasions or everyday wear, combining elegance with functionality.

This frock is perfect for birthdays, family gatherings, or casual outings, blending charm with practicality.
The sturdy Vardhman Baby Soft Yarn ensures it’s durable and comfy for toddlers, while the intricate crochet pattern gives it a unique and stylish appeal. With proper care, it’s long-lasting and keeps its form beautifully.
Step By Step Pattern
Materials
- Yarn: Vardhman Baby Soft Yarn (lightweight, soft, and ideal for toddler garments). Approximately VLG 80.
- Crochet Hook: 3.50 mm hook.
- Optional Tools:
- Stitch markers (to keep track of increases).
- Scissors.
- Tapestry needle (to weave in loose ends).
- Decorative Accessories:
- Matching yarn or thread for bows.
- Buttons for closures (optional).
Stitch Guide
Before starting, familiarize yourself with these basic stitches:
- Chain Stitch (ch): Create a foundation chain by wrapping the yarn over the hook and pulling it through the loop already on the hook.
- Single Crochet (sc): Insert the hook into the stitch, yarn over, pull up a loop, yarn over, and pull through both loops.
- Double Crochet (dc): Yarn over, insert the hook into the stitch, yarn over, pull up a loop (3 loops on the hook), yarn over and pull through 2 loops, yarn over and pull through the final 2 loops.
- Slip Stitch (sl st): Insert the hook into the stitch, yarn over, and pull the loop through the stitch and the loop on the hook.
- Front Post Stitch (fps): A post stitch worked around the front of a stitch from the previous row.
- Back Post Stitch (bps): Similar to the front post stitch, but worked around the back of the stitch from the previous row.
Notes
- Gauge: It’s important to create a small gauge swatch to ensure your frock fits a 2-3-year-old child. Adjust your tension or hook size if needed.
- Customization:
- Adjust the length by adding or removing rows in the skirt body.
- Change yarn colors for a striped look or to highlight bows and other details.
- Seamless Construction: This pattern works in a continuous manner, so no seams are present.
Pattern Instructions
Foundation Steps
- Begin with a foundation chain:
- Create a chain with the number of stitches mentioned in the pattern. This will act as the neckline.
- Join with Slip Stitch:
- After completing your foundation chain, join it into a circle with a slip stitch to form the neckline. Ensure the chain is not twisted.

Yoke (Rows 1-11)
- Row 1:
- Create 4 chains (V-space).
- Work 1 single crochet (sc) in the first chain space to mark your corner.
- Continue by making chain stitches along the neckline:
- Work 1 single crochet at the corners and spaces indicated in the pattern instructions.
- Join the row with a slip stitch.
- Rows 2-11:
- Start each row with a turning chain.
- Work single crochets (sc) and V-stitches in each row as instructed:
- The pattern alternates between chain spaces and single crochets with increases at the yoke corners.
- Repeat until the yoke reaches 11 total rows.

Skirt (Rows 12-32)
- Start the Body:
- In Row 12, transition to double crochet (dc).
- Use front post and back post stitches sparingly to mark increases, creating shaping for the toddler’s body.
- Increase Rows:
- Repeat the pattern, adding increases evenly in every 6th row for a flared skirt.
- Continue until you’ve reached Row 32.
- Final Rows of the Skirt:
- Add 8 rows without increases to create the bottom hem.
- Finish the edge with decorative slip stitches or scalloped edges for a polished look.

Sleeves (Rows 1-17)
- Attach Yarn to Armhole:
- Create sleeves by attaching yarn to the middle of the armhole.
- Work in rounds.
- Rows 1-16:
- Single crochets are worked in each stitch, following the shaping instructions in the pattern.
- Make 2 stitches together at the ends of the first row to shape the sleeve head.
- Row 17:
- Use decreases (2 stitches together) every 4th or 5th stitch during this row to taper the sleeve.

Decorative Touches
- Neckline Edges:
- Join yarn at the neckline and work a row of single crochets.
- At the corners, work 2 stitches together for neat shaping.
- Bow Details:
- Create two types of bows for decorating:
- The first bow is made with slip knots and chain loops.
- The second style is a simple single crochet rectangle worked in 5 alternating rows with 2 colors.
- Attach bows to the body or the neckline with yarn or a tapestry needle.
- Create two types of bows for decorating:

Final Tips
- Weave in loose ends with a tapestry needle after finishing each section.
- If you’d like closures for the back, sew in buttons and crochet button loops along the yoke’s opening.
- Lightly steam block the dress to smooth out the stitches without altering the shape.
Pattern Question
Question: Can the pattern be customized for a different size, like for a baby or older child?
Answer: Yes, the pattern can be adjusted by increasing or decreasing the starting chain length and rows. Make sure to measure and adjust sleeve and body lengths accordingly.
Conclusion
Crocheting this frock is a rewarding experience, offering both beauty and utility. It’s a delightful project to create something special for a child, blending craftsmanship with love. Whether you’re an experienced crocheter or a beginner, this frock will be a cherished piece and worth every stitch.