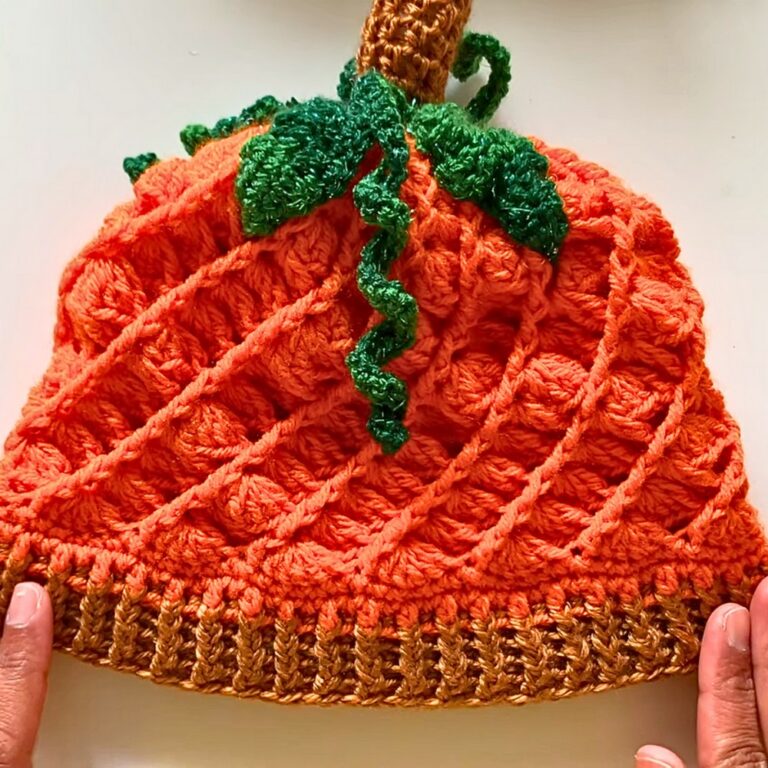
The Crochet Pumpkin Bucket Hat is a playful and festive hat that blends the charm of fall with practical coziness—perfect for Halloween, autumn outings, or adding a touch of whimsy to your wardrobe.

This pumpkin bucket hat is a fun and festive piece that’s perfect for autumn or Halloween. It’s both wearable and playful, a creative way to bring a seasonal twist to your outfit. If you plan to use a hat as part of a costume, gift it to someone special, or enjoy the joy of making something unique, this crochet hat adds a touch of pumpkin flair.
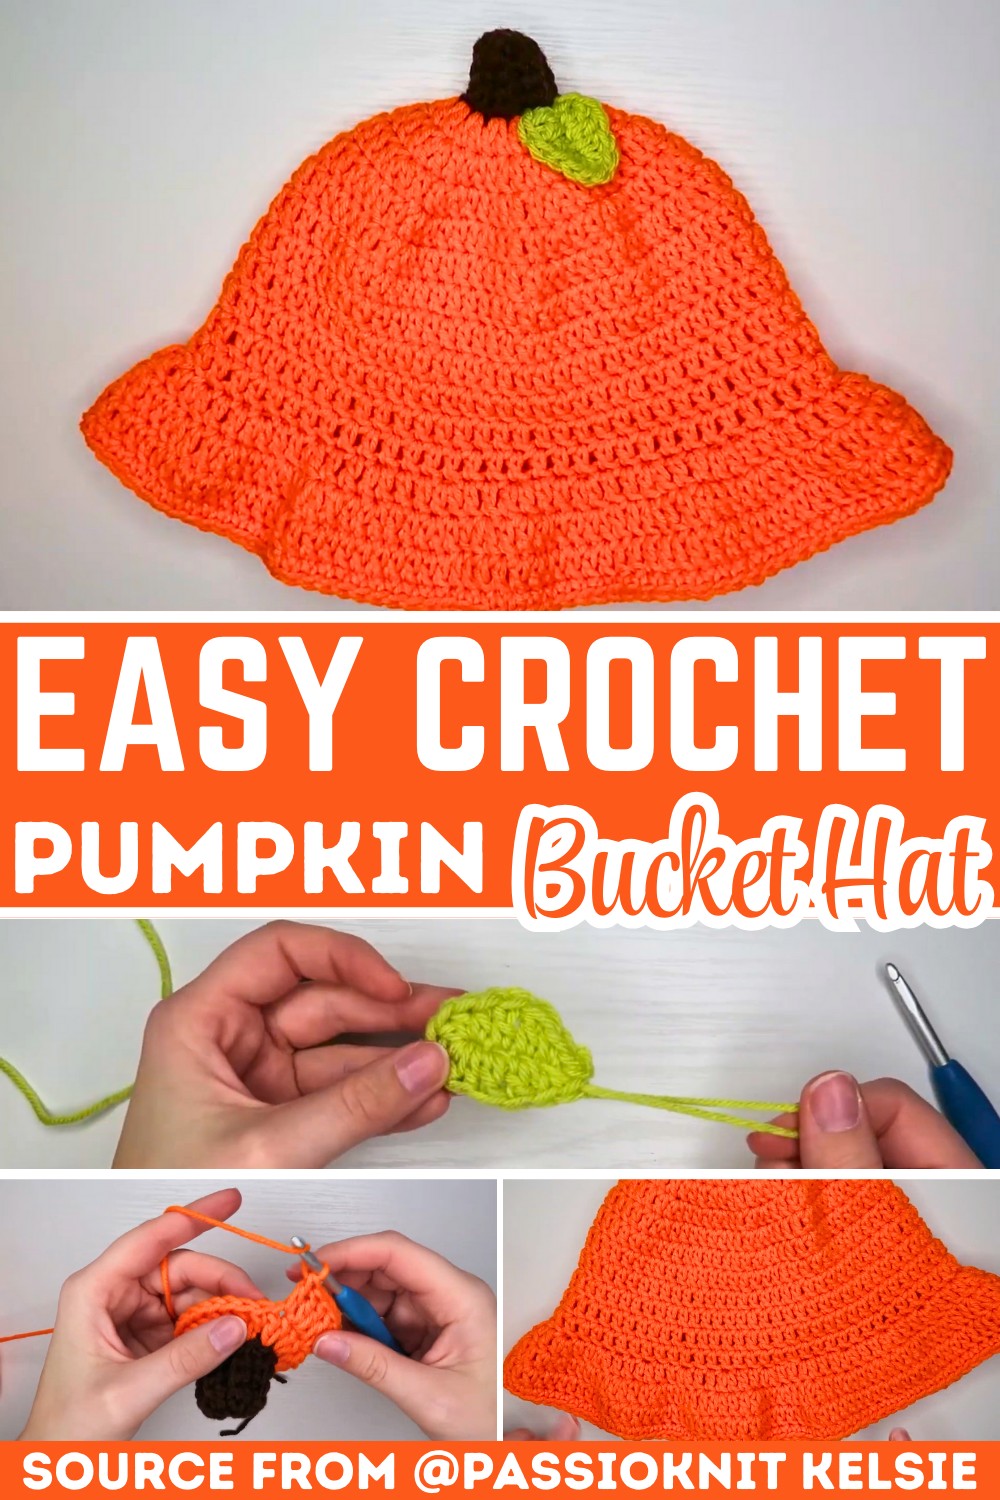
Simple & Free Crochet Pumpkin Bucket Hat
You’ll be working with warm autumn tones, orange for the pumpkin, brown for the stem, and green for the leaf. With simple techniques like working in rounds and creating classic shapes, the steps feel approachable for beginners yet engaging for more seasoned crocheters. The brim adds a playful design, making the crochet hat functional while serving as a charming accessory for chilly days or fun events.
Credit PassioKnit Kelsie
Key Features and Construction Summary
- Materials: Use worsted-weight yarn in orange, brown, and green to create the pumpkin body, stem, and leaf. A 5-mm crochet hook, scissors, and a yarn needle are essential tools.
- Stem Creation: Made first in a textured ribbing design using single crochet in back loops only, with slip stitches to shape and close the stem.
- Pumpkin Body: The body is worked in the round, starting from the stem, with increasing rounds of double crochet to shape it into a bucket hat.
- Brim: The brim flares out using front-loop-only increases, followed by rows of regular double crochets for shaping and finish.
- Leaf Embellishment: A small, adorable green leaf is crocheted separately, sewn onto the hat, and optionally tacked down for a polished look.
- Customizable Fit: Hat length can be adjusted for different head sizes, making it versatile for kids and adults alike.
This hat begins with the stem, crocheted separately with brown worsted weight yarn using single crochets worked in ribbing.After completing 12 rows, the stem is shaped by cinching the top closed with slip stitches and seamed together to form a rounded stump. This clever ribbing technique gives the stem a realistic texture that perfectly matches the pumpkin theme.

The pumpkin body is built directly onto the stem by working stitches around its base, seamlessly transitioning to orange yarn. The body is crocheted in the round with rounds of double crochet, starting with evenly spaced increases for shaping. A simple increase formula ensures a smooth, rounded form and allows for easy customization. After reaching the desired diameter, additional rows create the hat’s depth, curving it gently to sit snugly on the head.

The brim is designed to flare outward for that true bucket-hat effect. This is achieved by first working increases in the front loops only—a technique that creates a subtle ridge separating the brim from the body. Additional rounds expand the flare, and a final single-crochet edging gives the brim a neat, clean finish. This simple yet effective approach adds volume and texture without over-complicating the process.

For the finishing touch, the leaf detail is crocheted in green yarn using a short base chain and a mix of stitches (slip stitch, single crochet, double crochet, and half-double crochet). This creates a cute, rounded leaf that complements the hat’s pumpkin charm. The leaf is sewn onto the pumpkin’s stem with a yarn needle, and optional tacking keeps it lying flat against the hat. The result? A delightful autumn accessory full of personality.

Video Tutorial
Step-by-Step Pattern
Materials
To craft your crochet pumpkin bucket hat, gather the following supplies:
- Yarn
- Orange worsted-weight acrylic yarn (for the pumpkin base) – Mainstays 100% Acrylic Yarn (available at Walmart).
- Brown worsted-weight acrylic yarn (for the stem) – Use any brand; remember, some older brands may no longer be sold.
- Green worsted-weight acrylic yarn (for the leaf) – Loops & Threads Impeccable Yarn (from Michaels).
- Hook
- 5 mm (H) crochet hook (Clover Amour Hook recommended).
- Tools
- Scissors.
- Yarn needle (for sewing and finishing).

Pattern Instructions
Follow these step-by-step directions to crochet your pumpkin bucket hat.
1. Create the Stem
- Using brown yarn, make a slip knot and attach it to your hook.
- Chain 6.
- Work 5 sc across the chain.
- Complete 12 rows of single crochet, working back loop only for the middle stitches of each row to create a ribbed texture. Do not chain 1 between rows unless it’s part of your preferred style.
- Cinch the top: Skip one hole, sl st into every other hole across, to bring the edges together.
- Close the stem: Slip stitch the base edges together, going through the corresponding stitches on each side.
- Cut your yarn, leaving 3–5 inches to sew the stem and leaf later.
2. Crochet the Pumpkin Body
- Using orange yarn, attach it to the base of the stem with a slip knot.
- Crochet 24 dc evenly around the stem base, placing 2 stitches into the end of each row from the stem.
- Join the round with a sl st, and tie off your yarn ends.
3. Grow the Crown
- Round 1: Chain 2 (does not count as a stitch). Work 2 dc in the first stitch, then alternate 1 dc in the next stitch and 2 dc in the next. Continue increasing every other stitch. At the end of this round, you should have 36 stitches.
- Round 2: Increase every two stitches: Work 2 dc in the first stitch, 2 regular dc in the next two stitches, and repeat. End with 48 stitches.
- Round 3: Work 3 regular dc between increases, ending the round with 60 stitches.
- Round 4: Increase every 9 stitches for a total of 66 stitches.
- Once the crown reaches about 7 inches across, stop increasing.
4. Create the Hat Length
- Work 6 rows of regular dc without increasing.
- Try on the hat to ensure it reaches the desired length (should stop just above your ears). Adjust by adding or subtracting rows as needed.
5. Shape the Brim
- Slip stitch your previous row together and chain 2.
- Increase every 2 stitches (2 dc, 2 regular dc) while working front loops only.
- Regularly alternate increases and regular stitches until your brim begins flaring outward.
- For further flaring, add additional rows while continuing the same increase pattern. Stop when satisfied.
- Finish the brim with 1 row of single crochets, creating a seamless edge.
6. Make the Leaf
- Using green yarn, make a slip knot and chain 6.
- In the second chain from the hook:
- Sl st into the first stitch.
- Sc into the next.
- Dc into the next two.
- Work 6 hdc into the last chain, curving around to the other side.
- Repeat this pattern down the other side of the chain:
- Dc twice.
- Sc once.
- Sl st into the last.
- Cut your yarn and leave a long tail for sewing the leaf onto the hat.
7. Attach the Leaf to the Stem
- Thread the brown yarn tail through a yarn needle.
- Sew the base of the leaf to the stem, picking stitches evenly from both the leaf and stem.
- Use a green yarn tail to tack down the leaf to the pumpkin body, ensuring it isn’t flapping around.
Finishing Touches
- Use yarn tails to tie off and weave all ends into the interior of the hat. Split thicker yarn strands for secure knots if needed.
- Try on your finished hat and admire your festive creation!
Troubleshooting and Suggestions
Common Issues and Tips
- Even Increases: Double-check stitch counts after each increase round to maintain the shape. A stitch marker at the start of each round can help prevent confusion.
- Working in Rounds: Ensure each new round begins and ends at the right spot to keep the shape symmetrical. Slip stitches should be snug but not overly tight.
- Brim Curling: If your brim doesn’t sit flat, try adding an extra row of increases or blocking your finished hat for better shaping.
- Stem Textures: Using darker or fuzzy yarn for the stem, as in the tutorial, can be harder to see. Consider good lighting or substituting yarn that’s easier to work with.
Creative Modifications
- Color Combos: Swap traditional orange yarn for pastel pumpkin hues or create a “gothic pumpkin” with black or purple!
- Extra Embellishments: Add a twisted vine, embroidered facial features for a jack-o’-lantern look, or an additional leaf for a layered effect.
- Alternate Sizes: For children or babies, reduce the diameter of the hat’s base circle and adjust overall length. This is a perfect pattern for a fun family costume!
- Matching Set: Pair this hat with a matching crochet scarf or mittens for an even cozier autumn vibe.