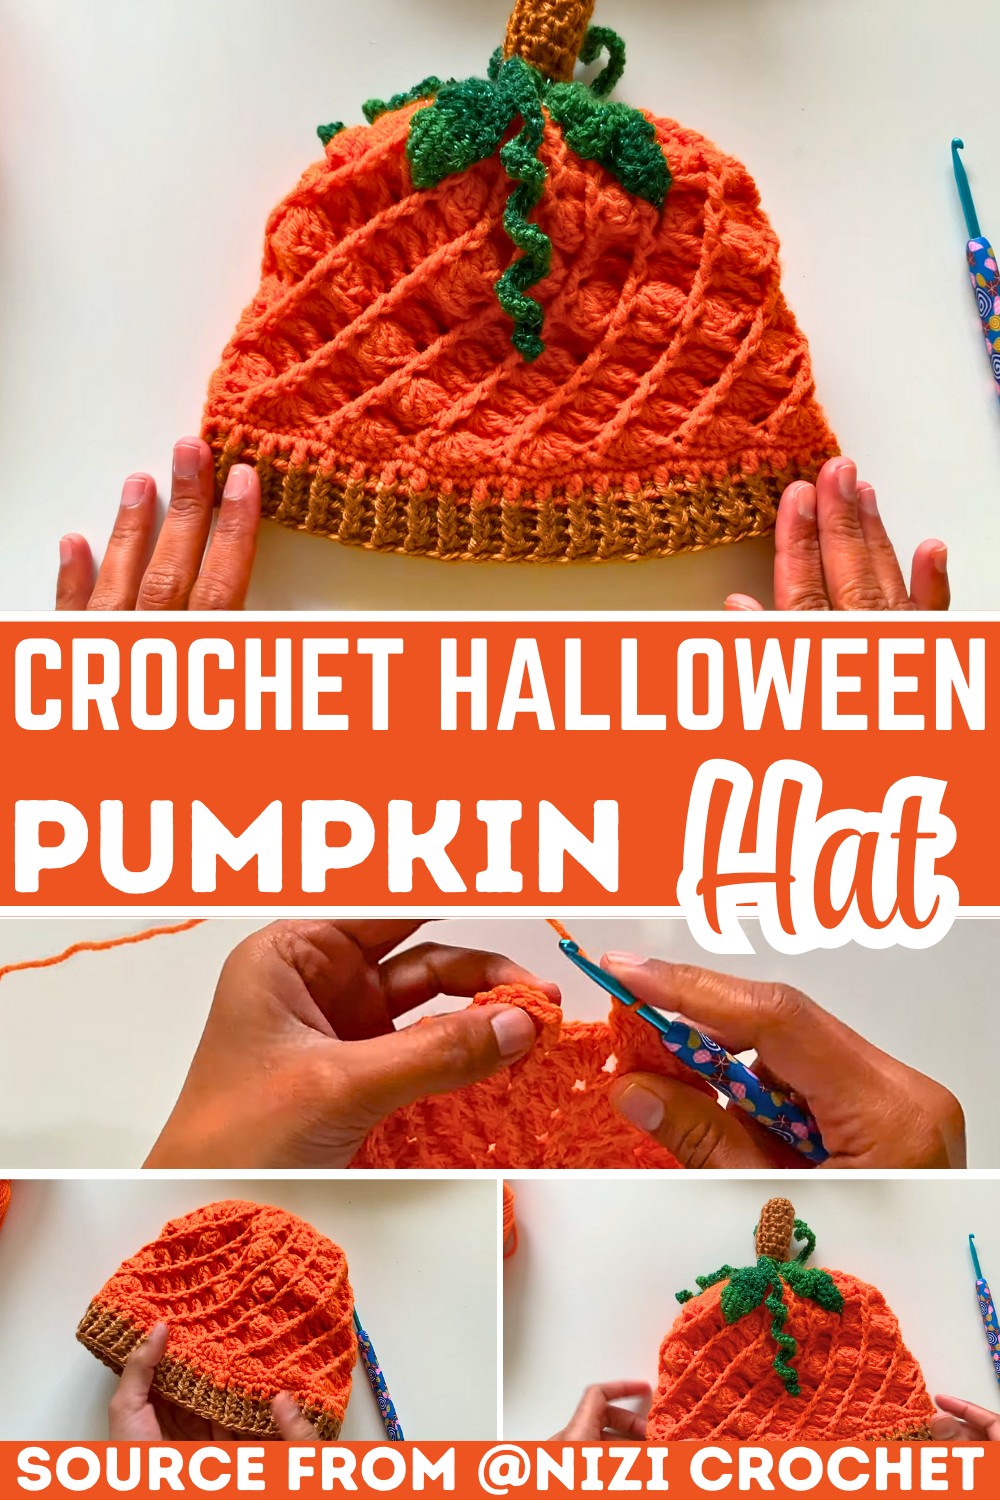
Crochet Halloween Pumpkin Hat Pattern Perfect for All Ages
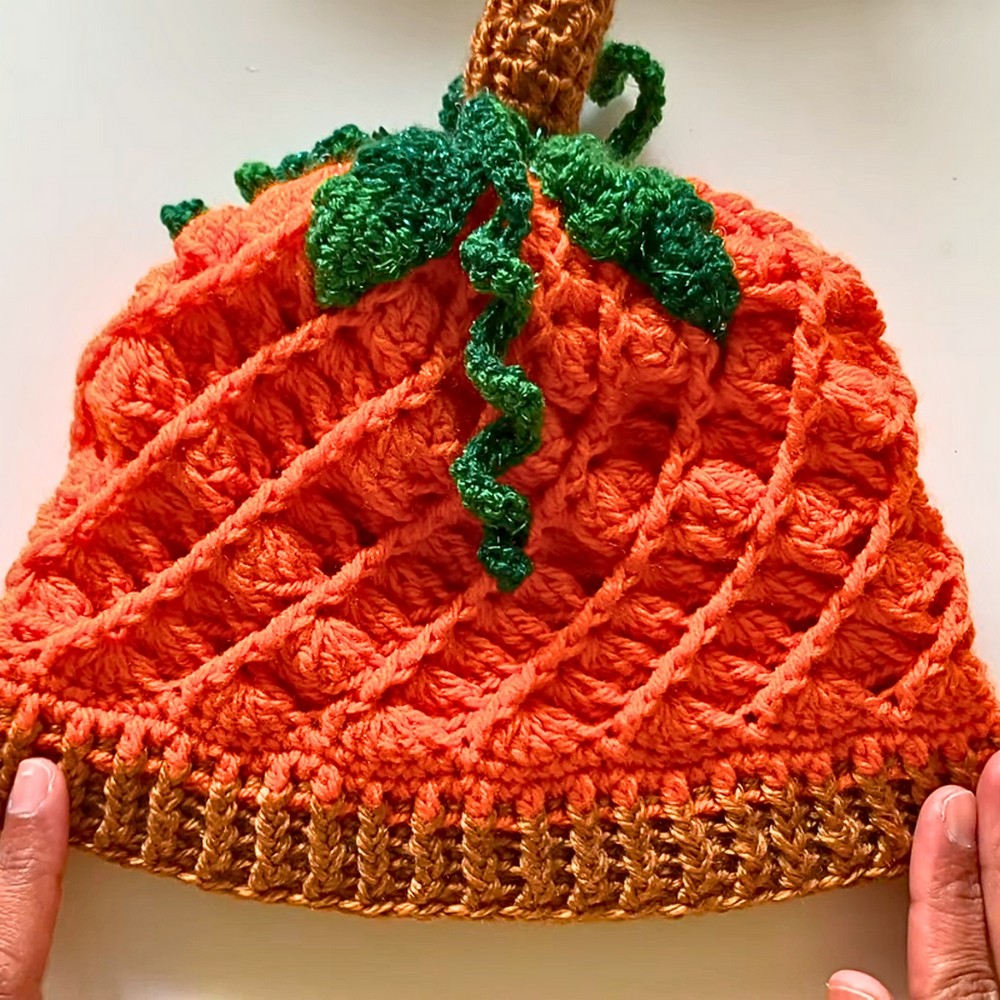
A pumpkin hat is a small detail that can completely transform a Halloween look. This crochet design captures the round shape, bright color, and tiny stem of a real pumpkin while keeping the pattern simple and enjoyable to make.
From a few strands of yarn to a wearable seasonal piece, this handmade crochet hat creates a playful pumpkin-inspired look for costumes or everyday autumn outfits.
Crochet Halloween Pumpkin Hat Pattern
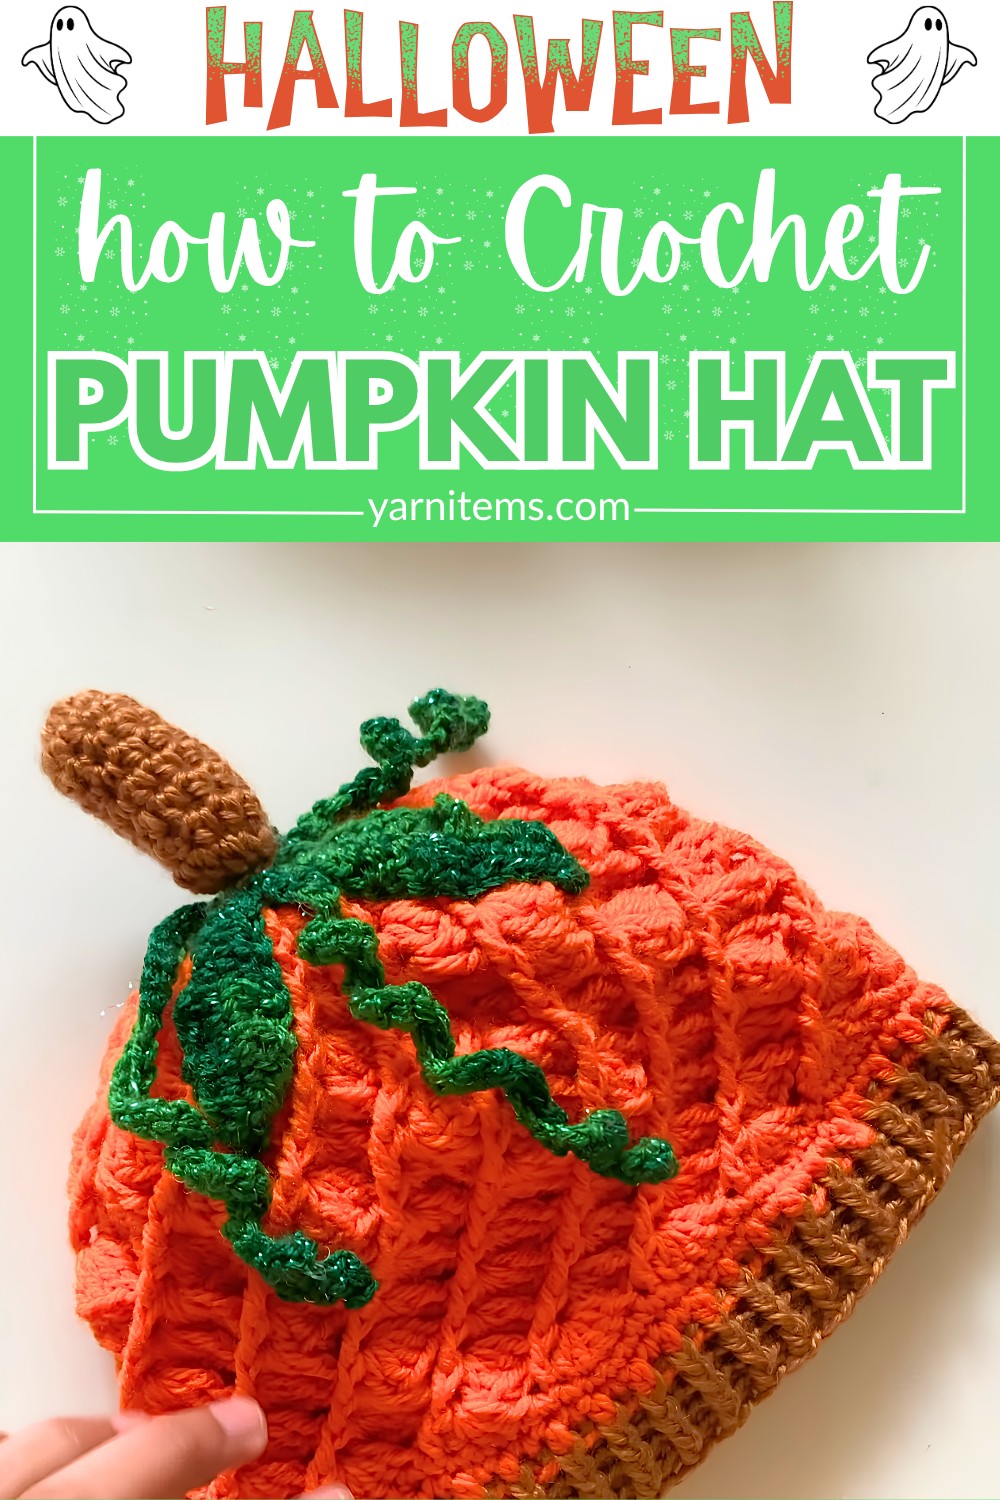
The tutorial shows how each section comes together, from shaping the pumpkin-style body to adding the green stem on top. With simple crochet techniques and a few basic materials, you can turn orange and green yarn into a charming Halloween accessory. Keep reading to follow the crochet steps and see how this pumpkin hat takes shape stitch by stitch.
Credit Nizi Crochet
Materials & Tools Needed
- Yarn:
- 4 Seasons Marvel 8-ply yarn (100g) in Orange (Main Hat Body)
- 8-ply yarn in Brown (Hat Band & Peduncle/Stem)
- 8-ply sparkle/metallic yarn in Green (Leaves & Vines)
- Crochet Hook: 4.0 mm
- Other Tools: Scissors, Yarn Needle, Stitch Markers, Poly-fill Stuffing (for the stem).
Finished Size & Customization
- Finished Size: The pattern creates a toddler/child size, measuring approximately 6 inches from the top crown to the bottom of the hat band when slightly flattened.
- Customization Ideas:
- Hat Body: To make the hat larger or smaller, adjust the number of rows—you can increase or decrease the straight body rows in Part 1.
- Curly Vines: Create longer or shorter vines by increasing or decreasing the starting chain length. Default length in this pattern is 41 chains.
Abbreviations & Terminology (US Terms)
Here’s a list of crochet stitches and techniques for the pattern:
- MR: Magic Ring
- ch: Chain
- st / sts: Stitch / Stitches
- sl st: Slip Stitch
- sc: Single Crochet
- hdc: Half Double Crochet
- dc: Double Crochet
- FPsc: Front Post Single Crochet
- FPdc: Front Post Double Crochet
- FPhdc: Front Post Half Double Crochet
- BPhdc: Back Post Half Double Crochet
- dc2tog: Double Crochet 2 Together (Decrease)
Step-by-Step Detailed Crochet Instructions
This pattern includes five parts: Pumpkin Hat Body, Hat Band, Leaves, Stem, and Curly Vines. Follow the instructions below step by step for a precise result.
Part 1: Main Orange Pumpkin Body
Start top-down, working the hat’s crown with increases, then straight rows for the body.
The Crown & Increases
- Round 1: Create a MR (Magic Ring).
- Chain 2 (these chains do not count as a stitch).
- Work 15 double crochets (dc) into the ring.
- Pull the ring tight.
- Join with a sl st to the first double crochet. (15 stitches)
- Round 2:
- Work 1 FPsc into the same stitch, chain 2 (mock FPdc).
- 1 FPdc around each remaining stitch.
- Join with a sl st to the first chain-2. (15 stitches)
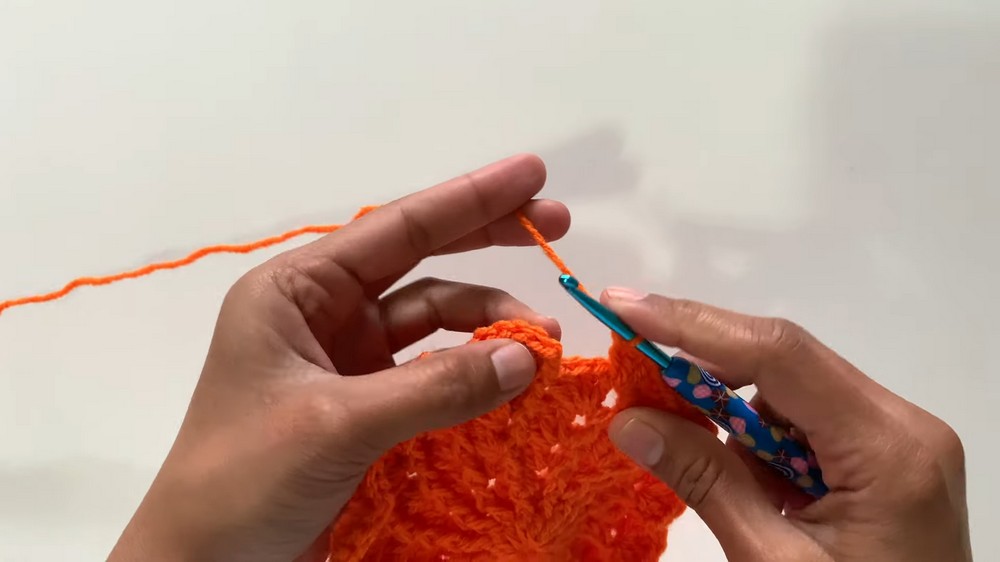
- Round 3:
- Work 1 FPsc into the same stitch, chain 2.
- In the next stitch, work 1 dc, then 1 FPdc into the same stitch.
- Repeat [1 dc, 1 FPdc] into each stitch around.
- Join with a sl st to the top of the chain-2.
- Round 4:
- Work 1 FPsc into the same stitch, chain 2.
- Work dc2tog into the next two stitches.
- 1 FPdc into the next space.
- Repeat [dc2tog, FPdc] around the hat and join as before.
- Round 5:
- Chain 2, 1 FPsc into the same stitch.
- In the next stitch, work 3 dc. Skip the next 2 stitches, and work 1 FPdc into the following stitch.
- Repeat [3 dc, skip 2, FPdc] around the row.
- Join as usual.
- Round 6:
- Chain 2, 1 FPsc into the same stitch.
- Work 4 dc into the next space, skip 3 stitches, and work 1 FPdc into the next stitch.
- Repeat [4 dc, skip 3, FPdc] and join as before.
- Round 7 (No more increases from this point onward):
- Chain 2, 1 FPsc into the same stitch.
- Work 5 dc into the next space. Skip 4 stitches, and work 1 FPdc into the next stitch.
- Repeat [5 dc, skip 4, FPdc] around the hat and join as usual.
The Straight Body Rows
- Rounds 8–24 (or to your desired length): Continue repeating Round 7 until your hat measures just under 6 inches.
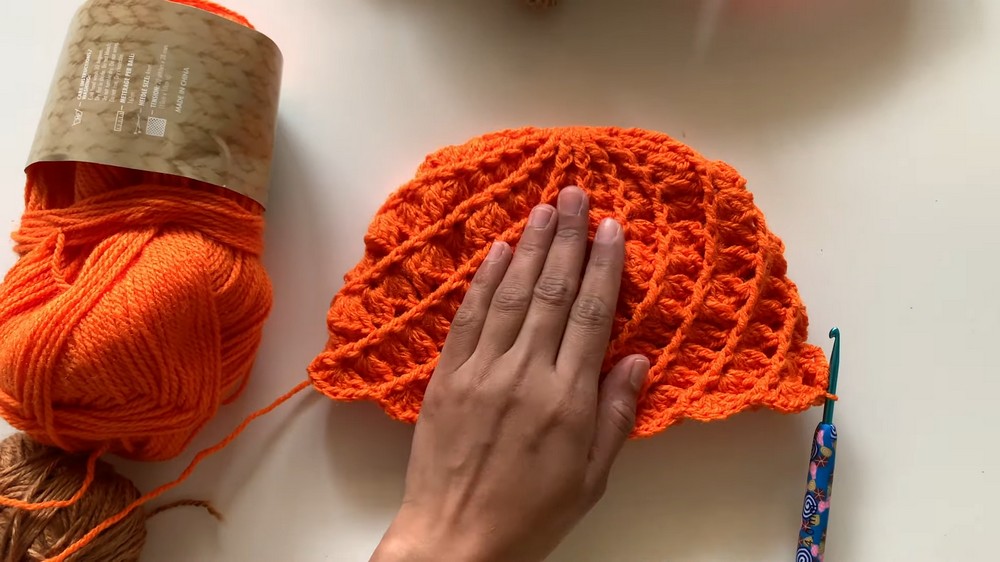
- Round 25: To clean up the top edge:
- Work 1 sc into each stitch around.
- Join with a sl st, cut yarn, and fasten off orange.
Part 2: The Brown Ribbed Hat Band
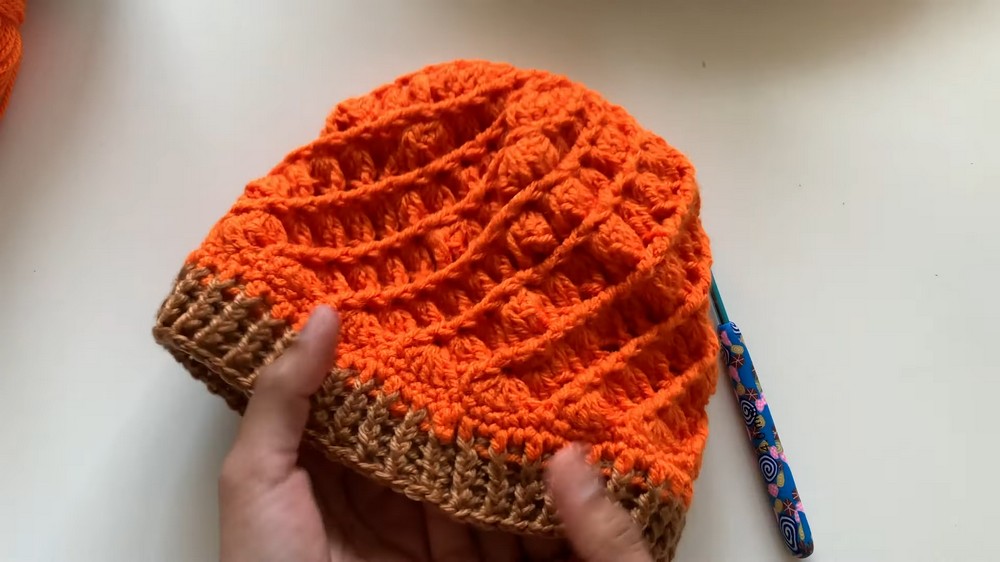
Switch to Brown Yarn to create the ribbed hat band.
- Round 1:
- Join brown yarn with a sl st. Chain 2.
- Work 1 hdc into each stitch around.
- Join with a sl st to the first single crochet.
- Round 2:
- Chain 2. Alternate 1 FPhdc into the next stitch, followed by 1 BPhdc into the following stitch.
- Repeat until the end of the round for a ribbed texture.
- Join with a sl st.
- Rounds 3–8: Repeat Round 2 to extend the ribbing pattern.
- Fasten off, cut the brown yarn, and neatly weave in loose ends with a yarn needle.
Part 3: Green Leaves (Make 3)
Switch to Green Yarn and crochet leaf shapes for decorative details.
- Step 1: Chain 15.
- Step 2: Skip the 1st chain. Work the following stitches:
- 1 sc into each of the next 2 chains.
- 1 hdc into each of the next 2 chains.
- 1 dc into each of the next 2 chains.
- 1 treble crochet into each of the next 2 chains.
- Step 3: Mirror back down:
- 1 dc, 1 hdc, 1 sc, and sl st into the last chain.
- Fasten off, leaving a long sewing tail. Sew all leaves symmetrically to the top crown of the hat.
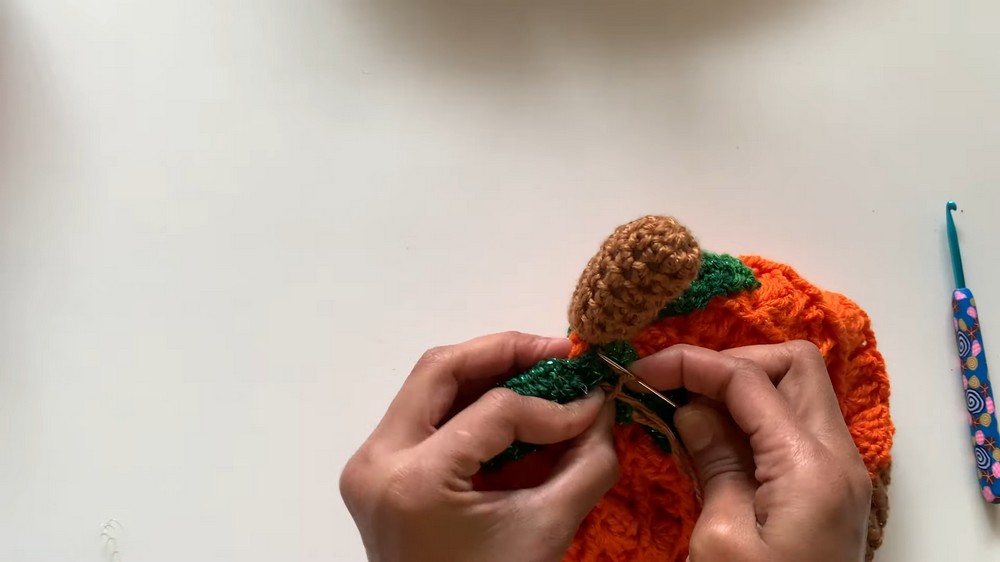
Part 4: Peduncle (Pumpkin Stem)
Switch to Brown Yarn and crochet the pumpkin’s stem.
- Round 1: Create an MR. Work 10 sc into the loop and join with a sl st. (10 stitches)
- Round 2: Chain 1. Work 1 hdc into each stitch around. Join with a sl st. (10 stitches)
- Rounds 3–12: Repeat Round 2 for 9 more rows to elongate the stem.
- Stuff the stem firmly with poly-fill stuffing and sew it to the top crown (covering the leaf joints).
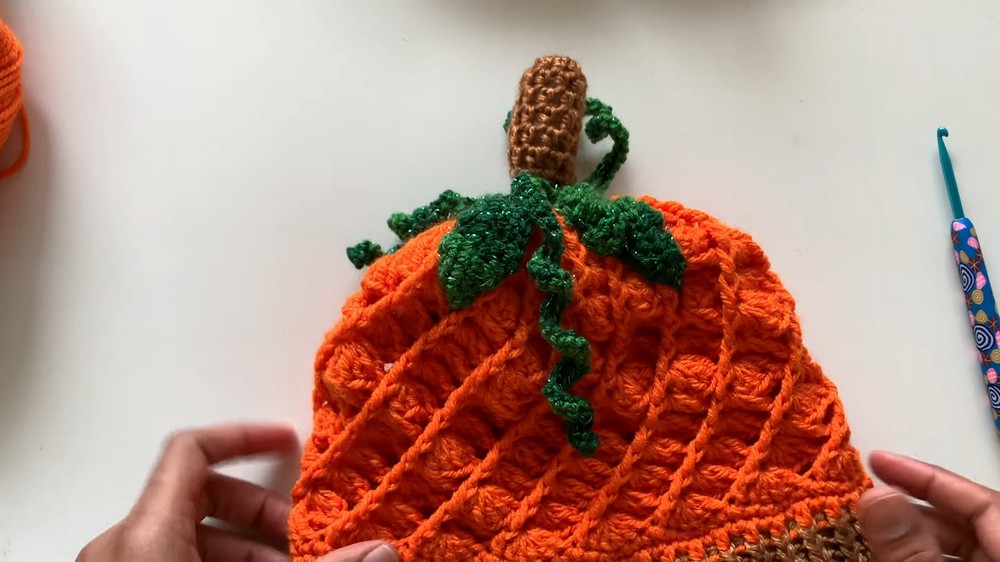
Part 5: Curly Vines (Make 2)
Create playful vines with Green Yarn.
- Chain 41.
- Skip the 1st chain. Work 3 sc into each chain across—forcing the chain to naturally curl into a spiral.
- Fasten off, leaving a sewing tail. Attach the vines to the base of the stem so they drape over the pumpkin hat.