Crochet Lily of the Valley Door Curtain for Elegant Décor
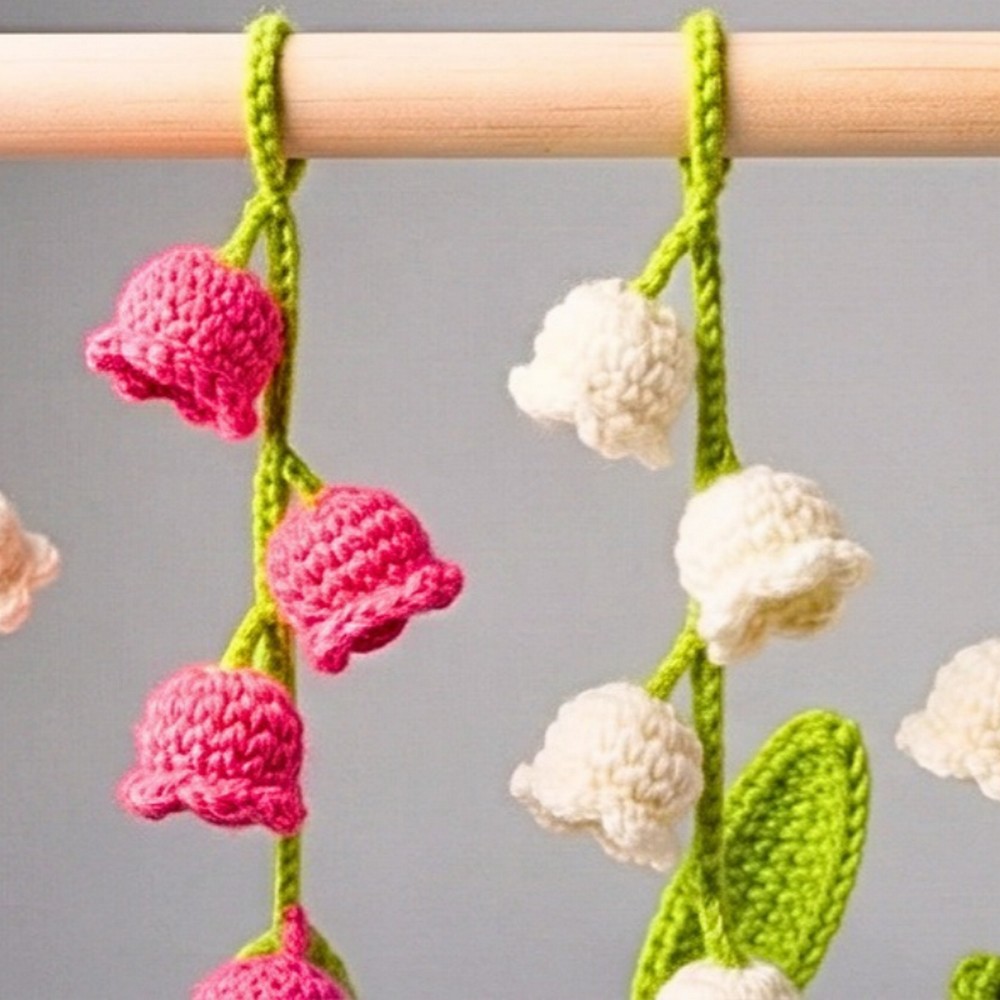
This beautiful crochet Lily of the Valley door curtain is more than home décor; it blends delicate design with everyday function.
Inspired by the graceful shape of Lily of the Valley flowers, its floral patterns bring a soft, nature-inspired charm to doorways, windows, or room dividers. This crochet design adds a peaceful and artistic touch to your space. It creates a cozy, handmade atmosphere that feels truly unique.
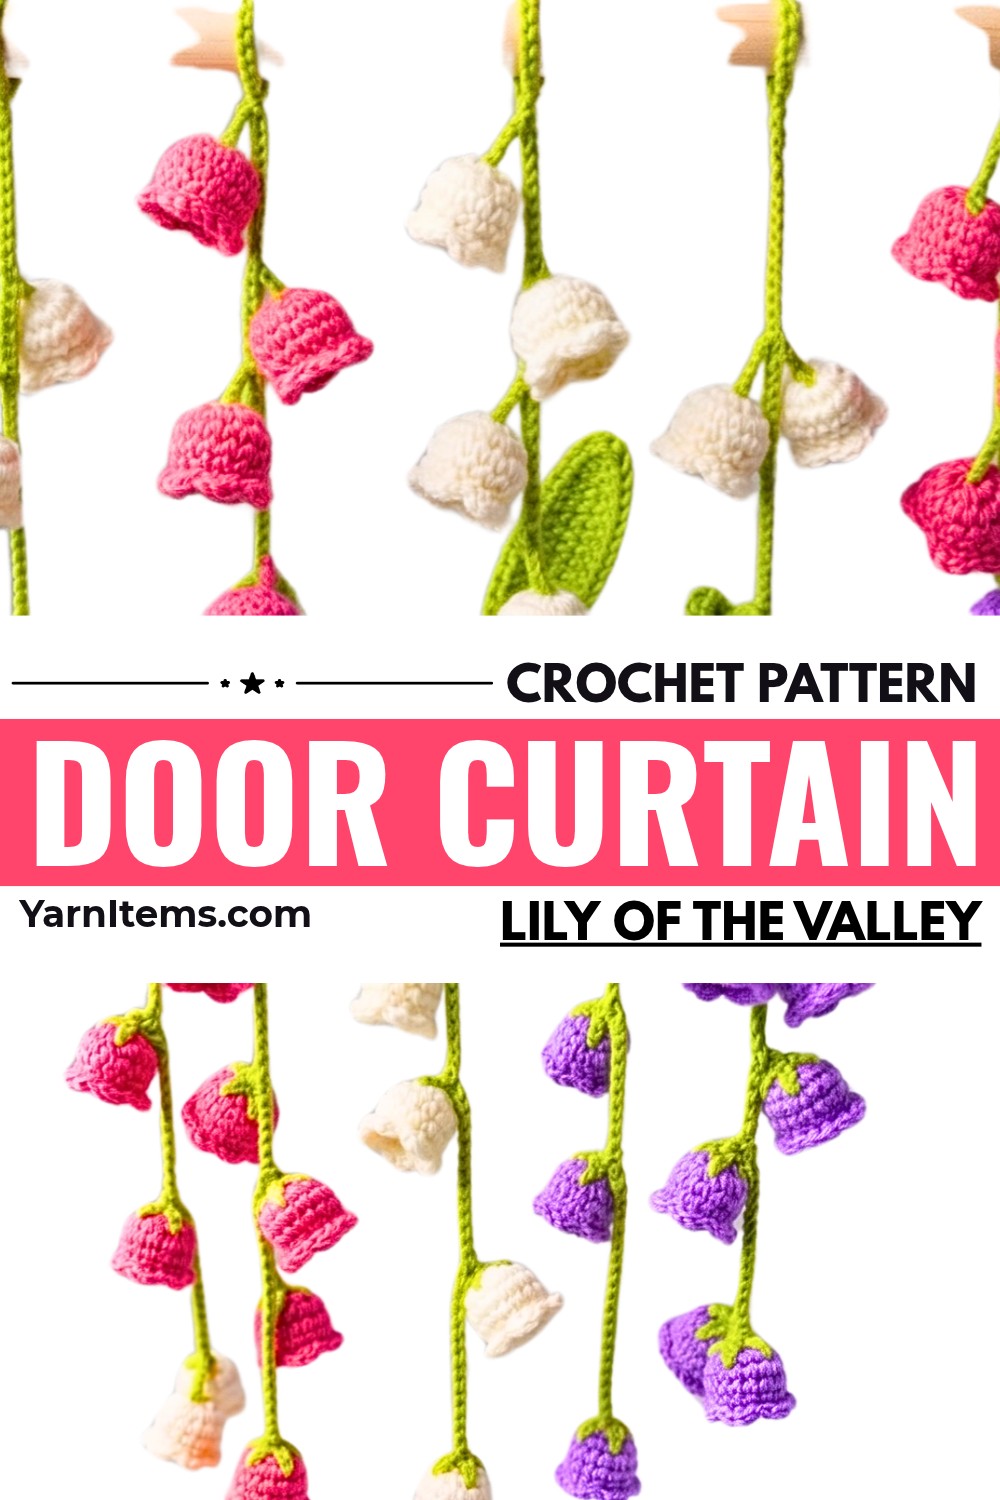
With its detailed floral motifs and lightweight structure, this curtain creates an airy look while adding a subtle layer of privacy and beauty. It is perfect for anyone who loves handmade décor that feels both calming and practical. The most engaging part is seeing how individual crochet stitches are carefully arranged to form flowing floral strands, turning simple yarn into a curtain crochet design that feels like handmade art.
Credit Silva Crochet
Materials & Tools Needed
- Yarn: 5-ply (5 strands) Milk Cotton yarn
- Green: Stems/receptacles
- White, Pink, Purple, Yellow: Flower petals
- Crochet Hook: 3.0 mm
- Tools: Scissors, Yarn needle
- Hardware: Invisible adhesive hooks (for hanging strands)
Finished Size & Customization Ideas
- Height & Width:
- For a standard door, strands measuring 6.5 to 7 feet long work well.
- Space the strands 1.5 to 2 inches apart to ensure full coverage.
- Color Customization:
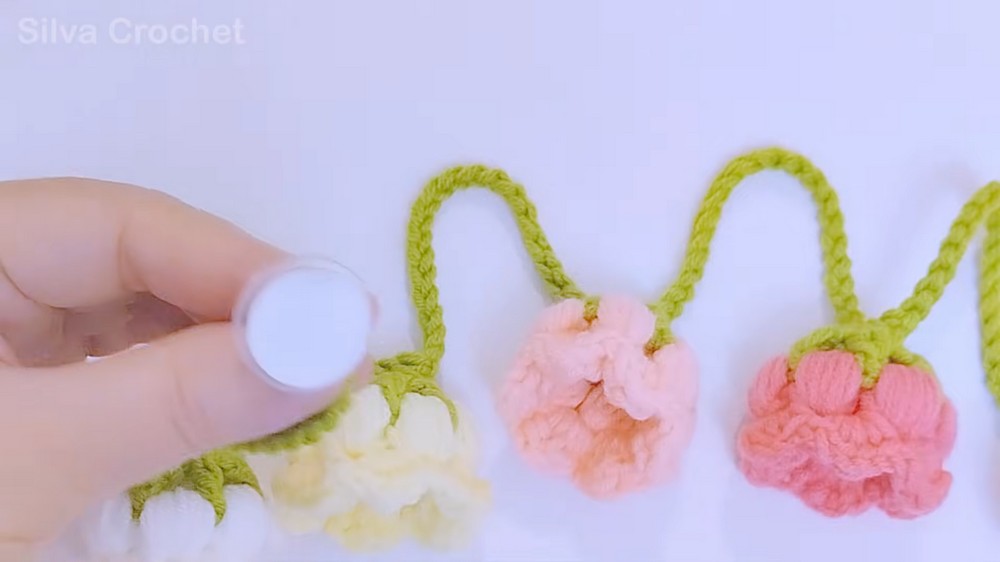
- The tutorial uses pastel ombre/rainbow shades, alternating white, light yellow, blush pink, and lavender flowers.
- Customize colors to match your décor.
- Hanging Method:
- Tie each completed strand to invisible adhesive hooks placed along the top edge of your door frame.
Pattern Abbreviations & Terminology
- ch: chain
- sc: single crochet
- hdc: half double crochet
- dc: double crochet
- sl st: slip stitch
- 6-hdc cluster: Yarn over, insert hook into stitch, pull up a loop (2 loops on hook)… repeat 5 more times in the same spot (6 loops total). Yarn over, pull through all loops.
- MR: Magic Ring
Step-by-Step Instructions
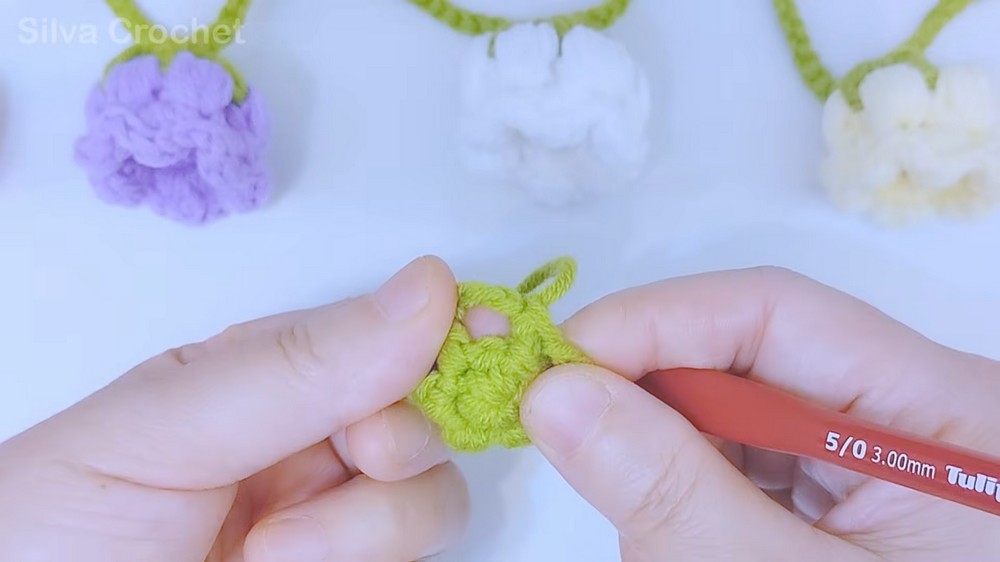
1. The Flower Receptacle (Green Base)
Using green yarn:
- Round 1:
- Create a Magic Ring.
- ch 1, then 6 sc into the ring.
- Pull the tail tightly to close the ring.
- Join with sl st to the first sc. (6 sts)
- Round 2:
- ch 4 (counts as 1 dc + ch 1).
- Into the next stitch, work 1 dc, ch 1.
- Repeat [1 dc, ch 1] into each remaining stitch around.
- Join with sl st into the 4th chain of the initial ch-4.
- Fasten off and weave in ends. (6 dc stitches separated by 6 ch-1 spaces)
2. The Flower Petals
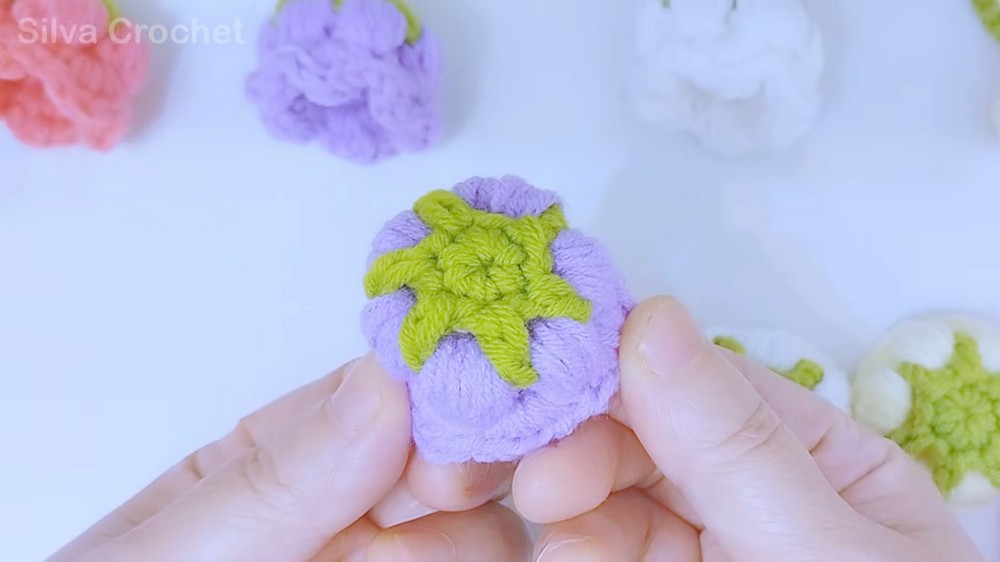
Using chosen petal color (e.g., white, pink, purple, yellow):
- Join yarn into any ch-1 space from Round 2 of the green base.
- Round 3:
- ch 2, work a 6-hdc cluster into the same ch-1 space, ch 1.
- Work [6-hdc cluster, ch 1] into each of the next 5 ch-1 spaces around.
- Join with sl st to the top of the first cluster. (6 petal clusters)
- Round 4:
- In each ch-1 space, work the scalloped shell pattern:
- 1 sc, 1 hdc, 1 dc, 1 hdc, 1 sc.
- Repeat this in all 6 spaces.
- Join with sl st to the first sc.
- Fasten off and weave in ends.
- In each ch-1 space, work the scalloped shell pattern:
3. Assembling Curtain Strands
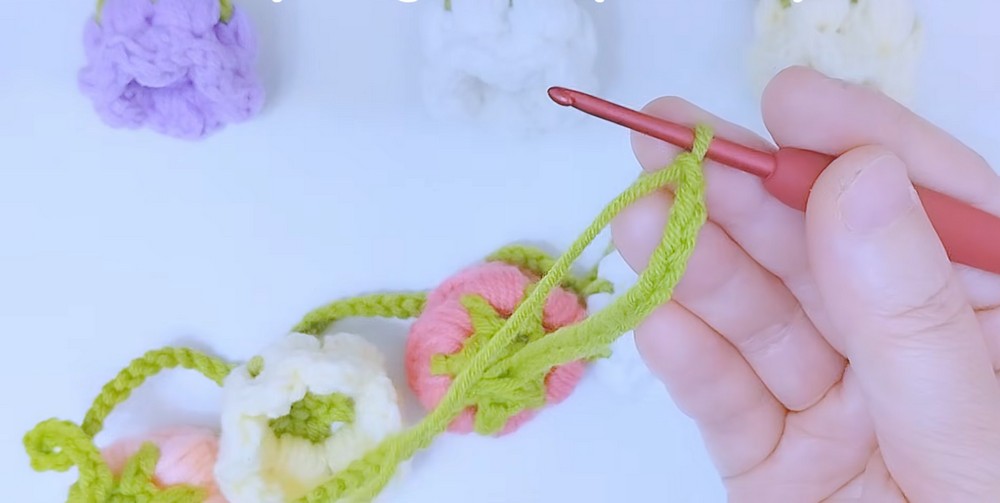
Create hanging strands with multiple flowers:
- Initial Stem:
- Tie green yarn to your hook.
- Work ch 20 (this forms the gap before the first flower).
- First Flower Attachment:
- Take a finished flower.
- Insert hook into the top center of its green receptacle.
- Work 1 sc, ch 1 to attach the flower.
- Securing the Flower:
- Work 1 sc into each of the next 10 loops/stitches across the green receptacle to anchor the flower firmly.
- Next Segment:
- Work ch 20 (to form the stem gap between flowers).
- Repeat for Additional Flowers:
- Pick up the next flower and repeat the attachment sequence:
[1 sc, 1 ch], then 1 sc into the next 10 stitches.
- Pick up the next flower and repeat the attachment sequence:
Continue this pattern until the strand reaches your desired length.
Tips for Hanging & Final Adjustments
- Attach Strands:
Tie or secure the top of each strand to invisible adhesive hooks. Distribute evenly along your door frame. - Spacing Suggestions:
Maintain 1.5 to 2 inches between strands for balanced coverage. - Optional Embellishments:
Add beads or extra greenery between the flowers for a fuller, decorative effect.
Customization Notes
Adjust strand lengths for smaller or wider doorways.
Mix and match colors for seasonal themes or specific room aesthetics.
If desired, create shorter strands for layering in window frames instead of doorways.