Easy Crochet Pumpkin Placemat Doily Pattern For Fall Decor
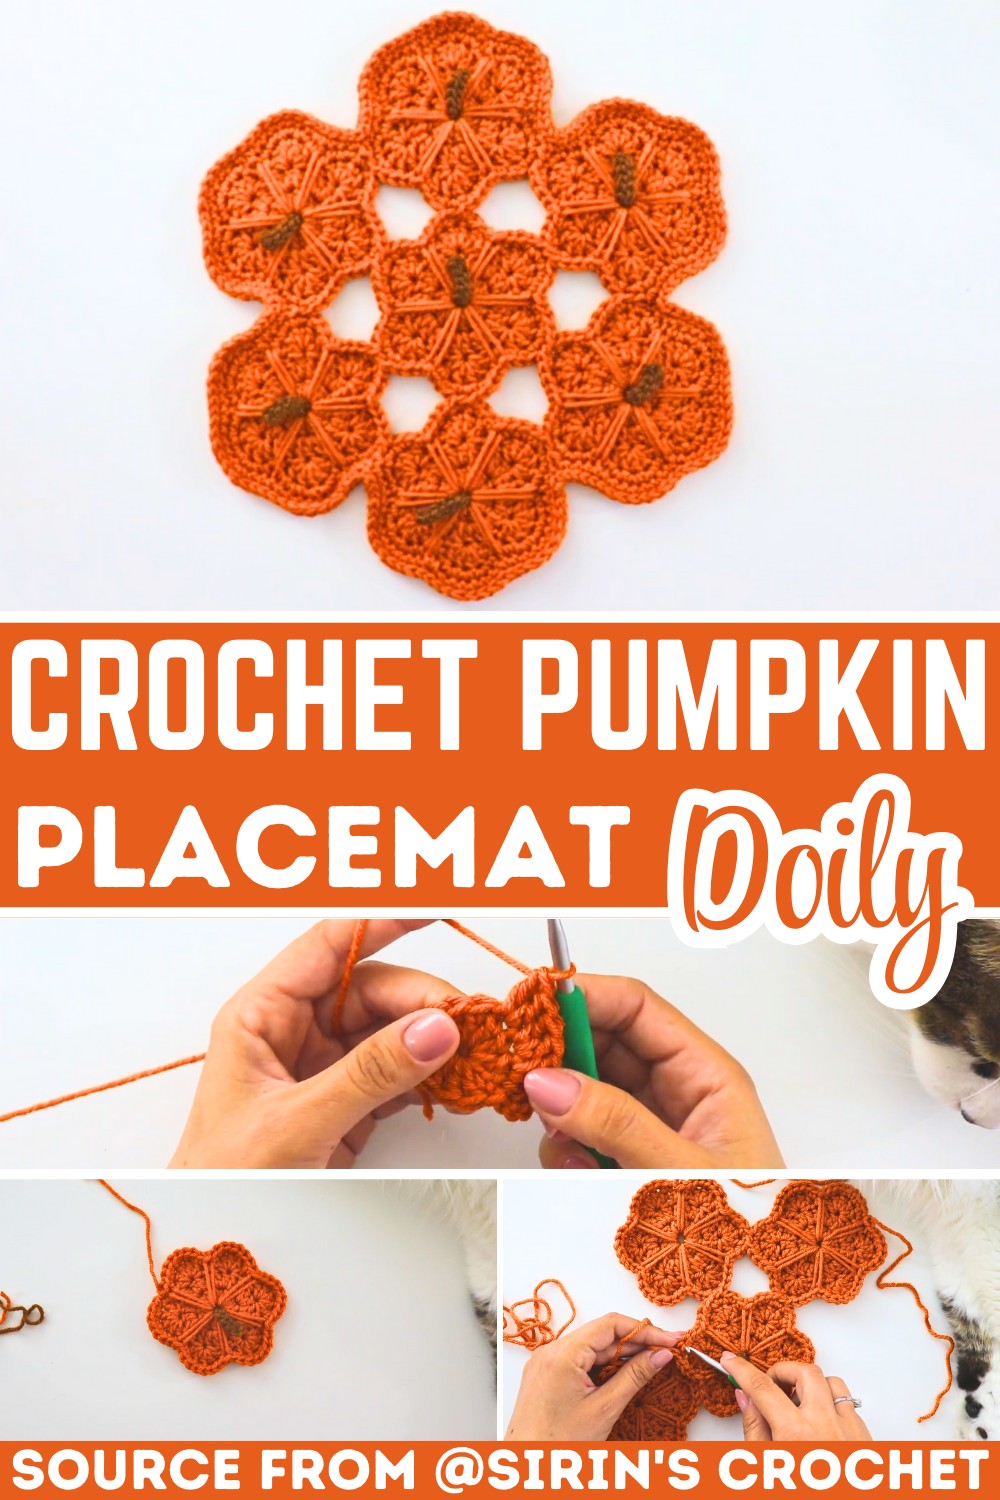
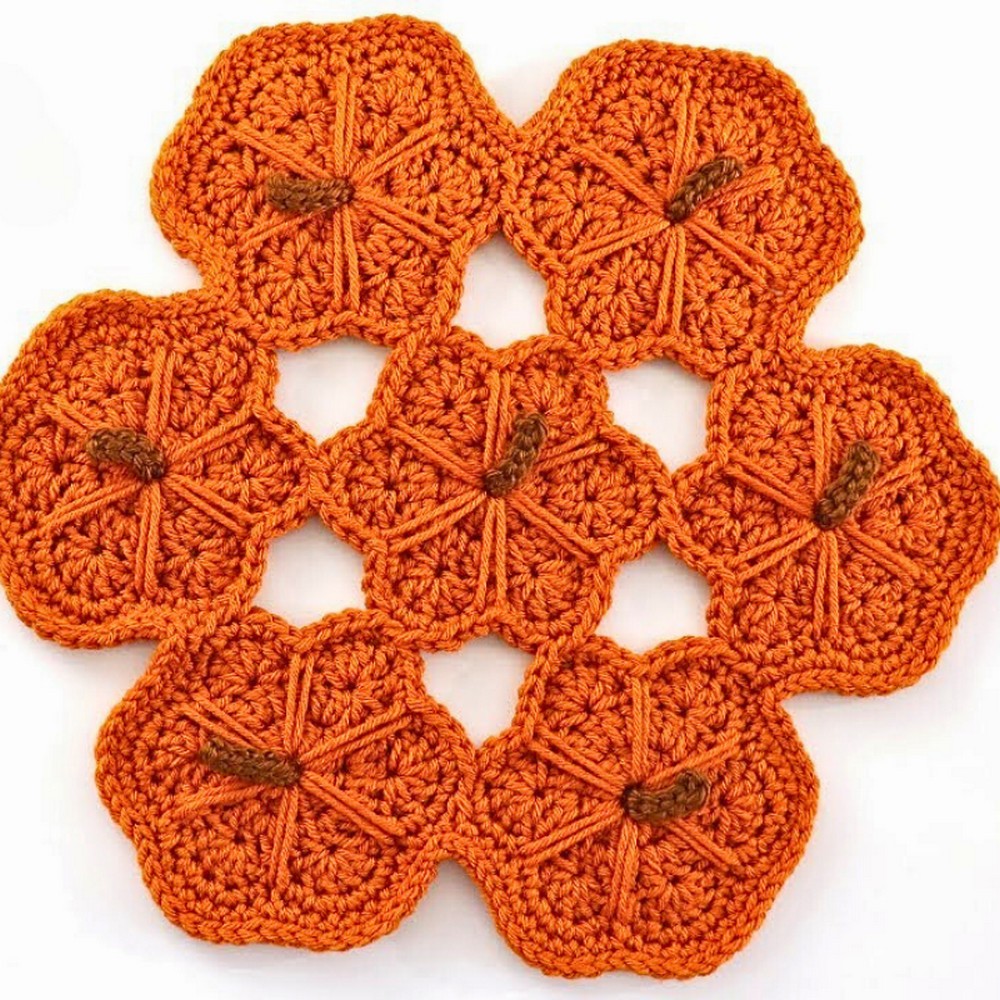
A pumpkin doesn’t have to sit in the center of your table to capture the season. This crochet pumpkin placemat doily transforms a familiar fall shape into a decorative piece.
You’ll enjoy it throughout Halloween, Thanksgiving, and the entire autumn season. Its eye-catching design looks detailed, yet the pattern breaks everything into clear, manageable steps that make it enjoyable to follow. By the time you reach the first round, you’ll see the crochet pumpkin shape suddenly come together.
Crochet Pumpkin Placemat Doily Pattern
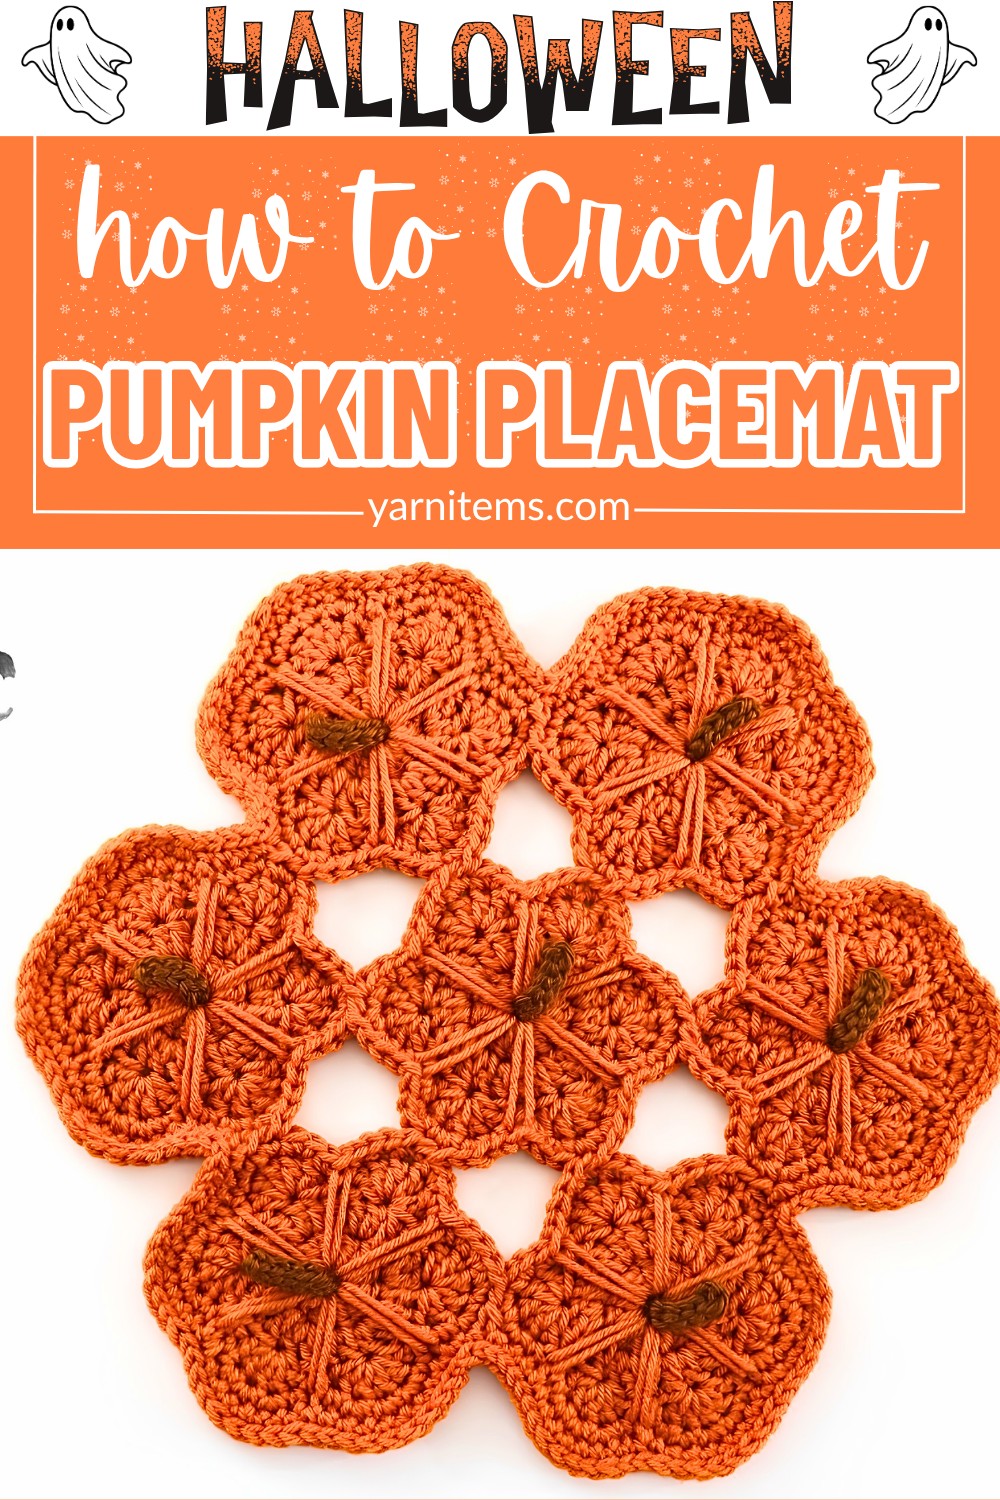
Instead of working a single large circle, you’ll begin by crocheting small pumpkin sections that gradually join to form the finished placemat. The repeating stitches keep the piece relaxing while the connected motifs build a design full of character. With the step-by-step crochet pattern guiding each stage. You’ll soon have a handmade decoration that’s ready to brighten your table, shelf, or favorite seasonal display.
Credit Sirin’s Crochet
Materials & Tools Needed
Yarn:
- Main Body: Orange Category 4 (Medium/Worsted Weight) yarn.
Recommended yarns: Yarn Bee Soft & Sleek or Red Heart Soft for a plush pumpkin body. - Stem: Green or brown worsted weight yarn.
Hook:
- 5.5 mm (US I-9).
Tools:
- Yarn needle (for weaving in ends and securing stems).
- Scissors.
Finished Size & Customization Ideas
- Finished Size: Approximately 12–14 inches across (depending on your tension).
- Customization:
- Work individual motifs as standalone coasters.
- Join multiple motifs linearly to make a festive autumn table runner.
Pattern Abbreviations & Terminology (US Terms)
-
ch: Chain
-
st(s): Stitch(es)
-
sl st: Slip stitch
-
sc: Single crochet
-
dc: Double crochet
-
Long-sc: Long single crochet (Worked by inserting the hook deeply down into the central magic ring space, pulling up a long/loose loop to the height of the current row, and completing a standard single crochet).
Step-by-Step Crochet Instructions
Part 1: The First Pumpkin Motif (Complete)
Note: The very first pumpkin is worked independently through all rounds.
Round 1:
- Begin with a magic ring.
- Ch 3 (counts as 1st dc). Work 11 more dc into the ring (12 dc in total).
- Pull tail gently to close the ring slightly, leaving a small gap at the center (for later Long-sc stitches).
- Sl st into the 3rd ch of starting ch-3 to join.
Round 2:
- Ch 3 (counts as 1st dc). 1 more dc into the same st.
- Work 2 dc into each remaining st around (24 dc in total).
- Sl st into the 3rd ch of starting ch-3 to join.
3 (Create Pumpkin Ridges):
- Sl st into the next stitch.
- Create Ridge:
- Skip 1 st, work 5 dc into the next stitch.
- Anchor Ridge:
- Skip 1 st, sl st into the following st.
- Repeat steps 2–3 around to create 6 ridges.
- Sl st to the base of the starting chain to close.
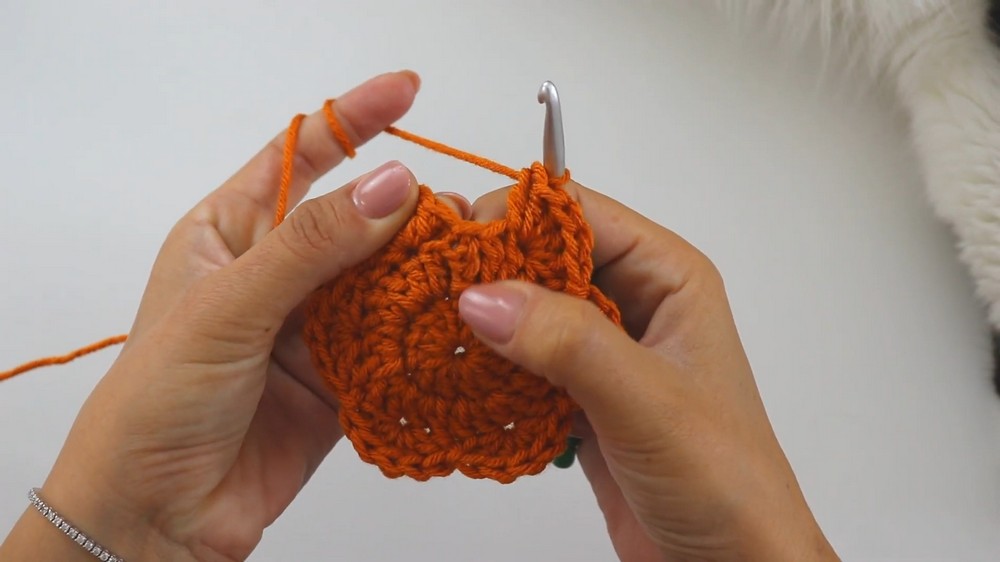
Round 4 (Border & Long-sc Shaping):
- Ch 1. Over each ridge, work:
- 1 sc in the 1st st.
- 2 sc in the 2nd, 3rd, and 4th st.
- 1 sc in the 5th st (8 sc total over each ridge).
- Long-sc Section: Insert your hook into the open central circle (Round 1’s magic ring), pull up a long loop to the current row’s height, complete sc.
- Repeat these steps for all 6 ridges.
- After the last long sc, sl st to the very first sc. Fasten off and weave in ends.
Part 2: The Stems
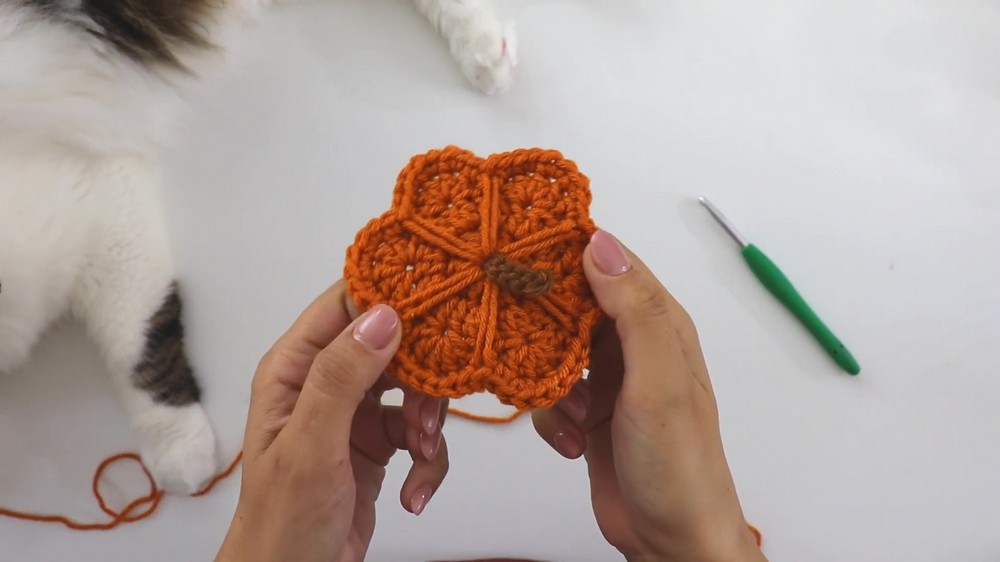
- With stem color, leave a long tail and make a slip knot.
- Ch 6.
- Turn chain over to work into back bumps. Skip the 1st ch; sl st in each of the 5 back bumps.
- Ch 1, fasten off, and leave a tail for sewing later.
- Repeat to make 7 stems.
Part 3: Connecting Pumpkins (Join-As-You-Go)
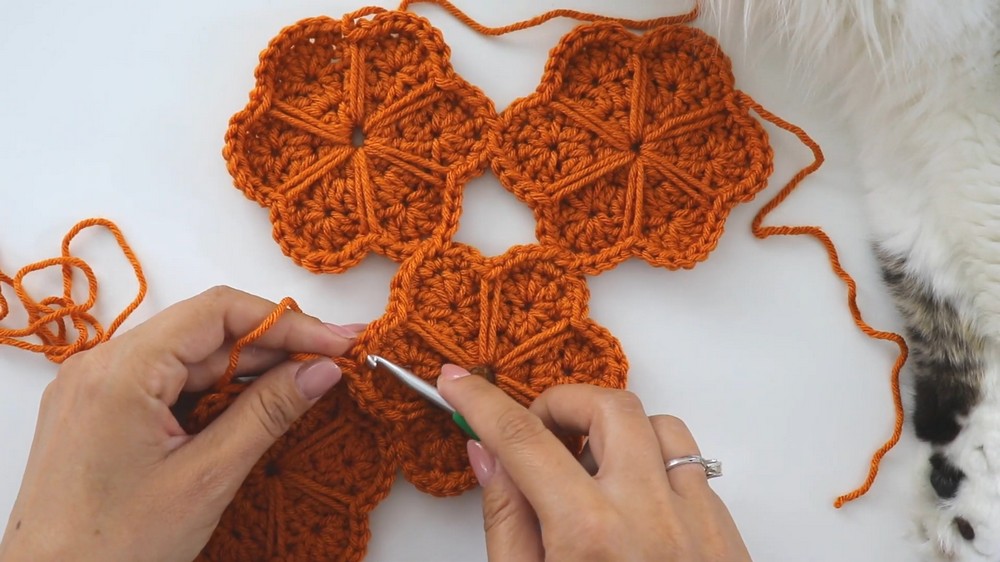
- Work Rounds 1–3 of each pumpkin as before. During Round 4, attach to neighboring motifs using the Join-As-You-Go (JAYGO) method.
Joining Instructions:
- Crochet Round 4 normally until the 4th ridge.
- On the 4th ridge:
- Work 2 sc.
- Drop the active loop, insert the hook into the 5th stitch of the neighboring pumpkin’s ridge.
- Pick up the dropped loop and pull it through.
- Continue the next sc as normal.
- Repeat to join 2 points per ridge where needed.
- Complete Round 4 as normal for the remaining unjoined ridges.
Use the layout below as a joining guide:
[P2] –> [P3]
\ /
[P1] [P4]
\ /
[P6]--[P5]
\ /
[P7] (Central motif joined to all outer pumpkins).
Part 4: Final Perimeter Border
- Attach orange yarn to any outer edge stitch.
- Outer Border Round 1 (Sc):
- Work 1 sc into each st along the perimeter.
- Skip tight joining stitches between connected pumpkin ridges.
- Sl st to the first sc to join.
- Outer Border Round 2 (Sl st):
- Loosely sl st into each sc from the previous round (adds a clean, structural finish).
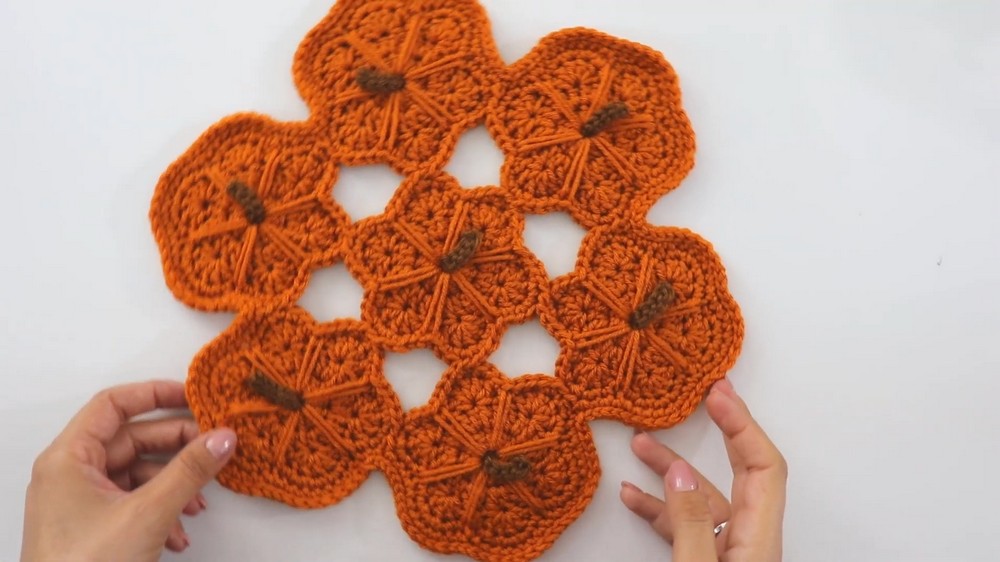
Finishing:
- Sew the 7 stems securely to the center-top of each pumpkin.
- Weave in all tails on the back of your work.