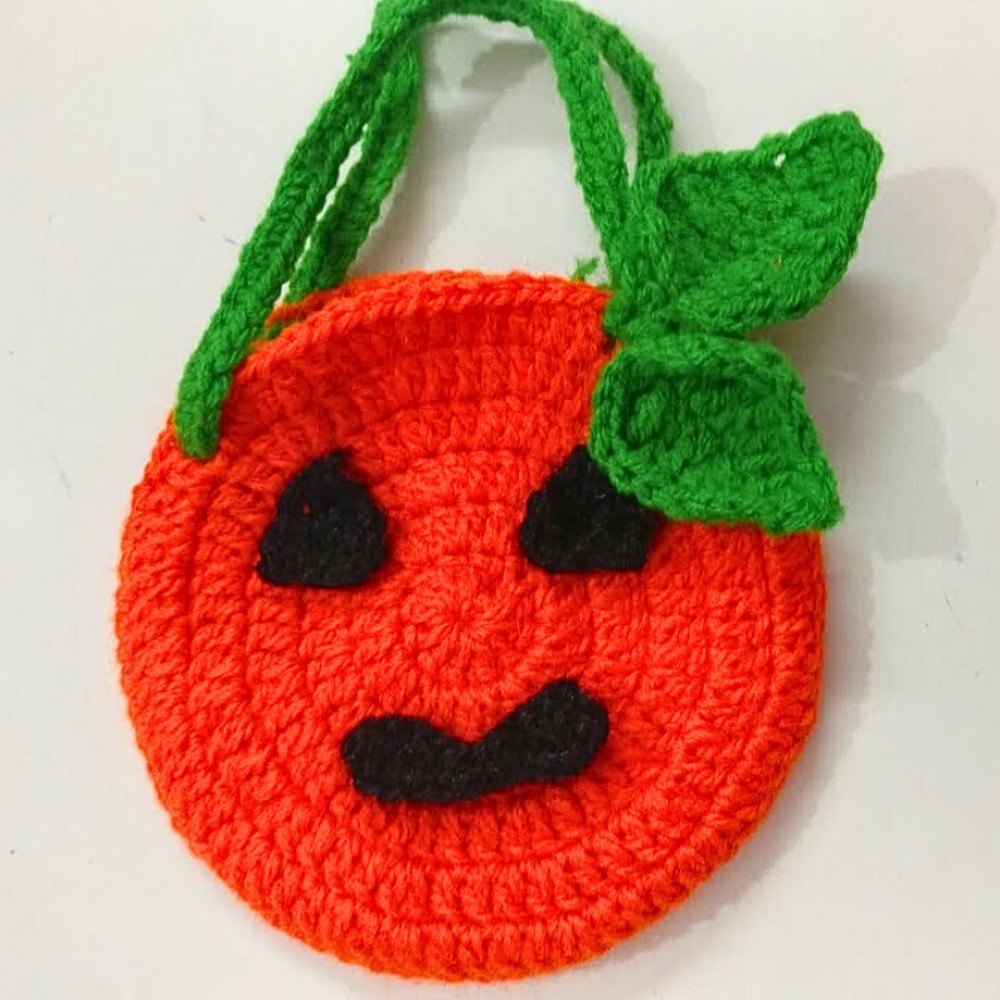
A delightful pumpkin-shaped bag that’s perfect for Halloween season. This beautiful bag stands out with its vibrant pumpkin design, complete with a charming face and leaf accents. It’s perfect for holding candy during trick-or-treating or as festive decor for your fall celebrations.
Crochet Pumpkin Bag Pattern
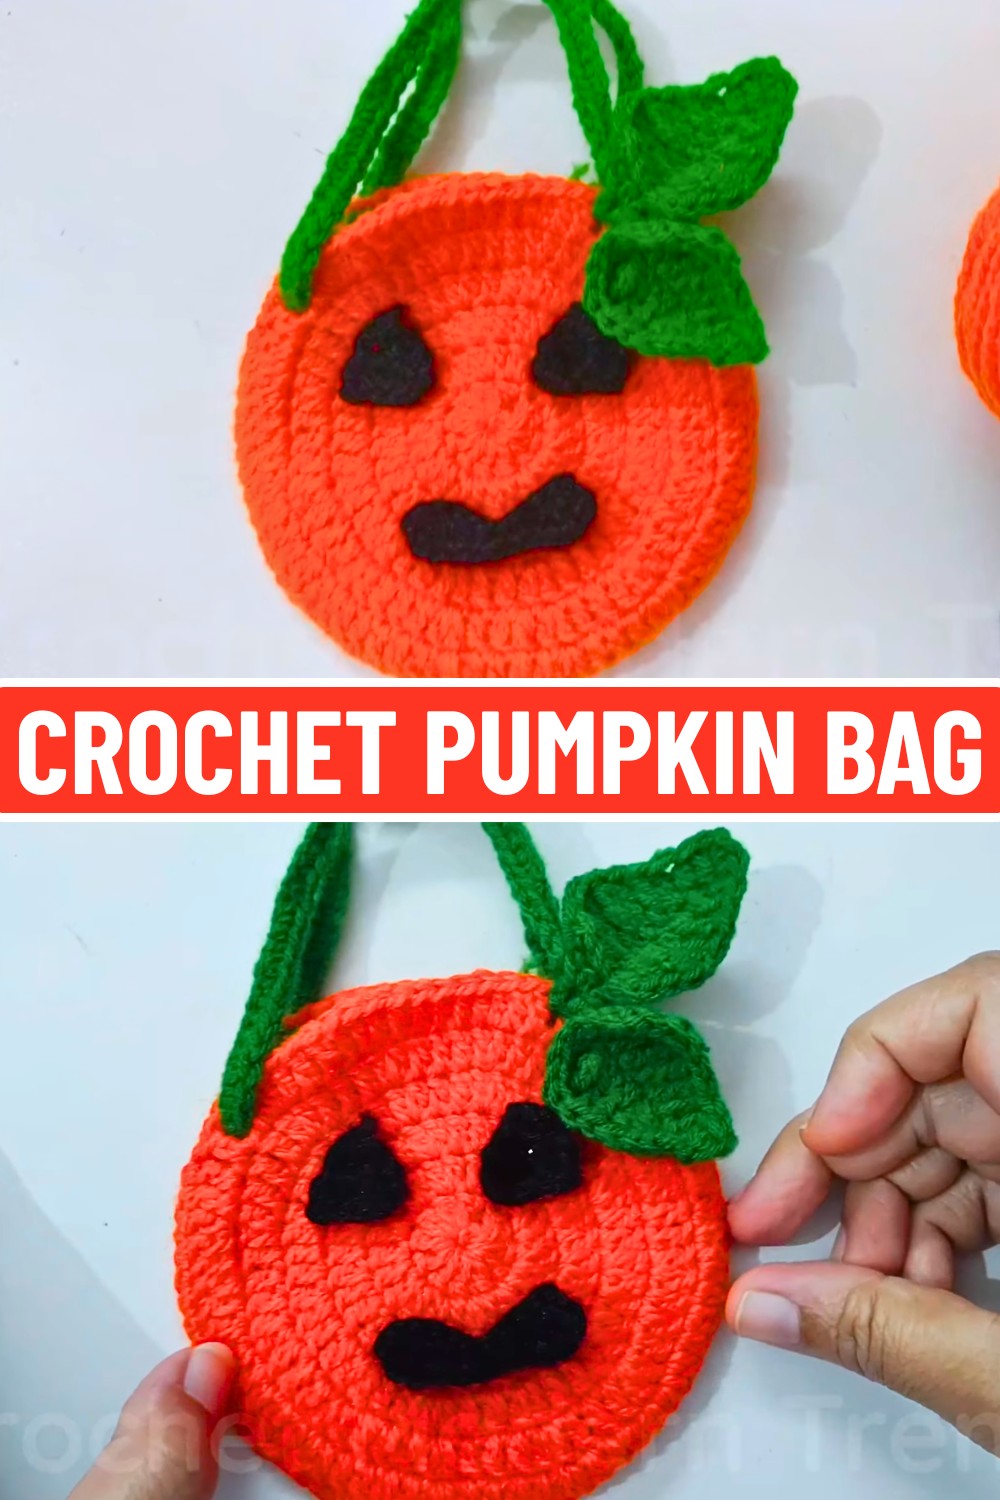
The process involves simple crochet techniques to create a stylish crochet bag. You’ll work with colorful yarns, crochet two round panels for the front and back, and attach a secure handle. Little details like the smiling pumpkin face and leaves make it extra special. With its soft texture and playful design, it’s not only fun to make but useful for kids and grown-ups alike.
Credit Crochet Modern Trends
Materials & Tools Needed
- Yarn Colors:
- Color A: Orange (for the pumpkin body)
- Color B: Green (for the handle and leaves)
- Color C: Black (for eyes and mouth details)
- Crochet Hook: 2.5mm
- Tapestry Needle: For sewing facial elements and finishing details.
- Scissors
Finished Size & Customization Ideas
- Approximate Size: Varies based on yarn weight and tension, but it will roughly be a small pumpkin-shaped bag ideal for treats.
- Customization Ideas:
- Adjust the size by using a larger hook or thicker yarn.
- Experiment with different color combinations for a unique look.
- Add embellishments like sequins or buttons to the pumpkin face.
- Modify the handle length or style for versatility (e.g., a crossbody bag or drawstring pouch).
Pattern Abbreviations & Terminology
- Ch: Chain
- Sl St: Slip Stitch
- DC: Double Crochet
- HDC: Half Double Crochet
- SC: Single Crochet
- TR: Treble Crochet
- DTR: Double Treble Crochet
- Repeat: Instructions are repeated as specified.
- St(s): Stitch(es)
Step-by-Step Detailed Instructions
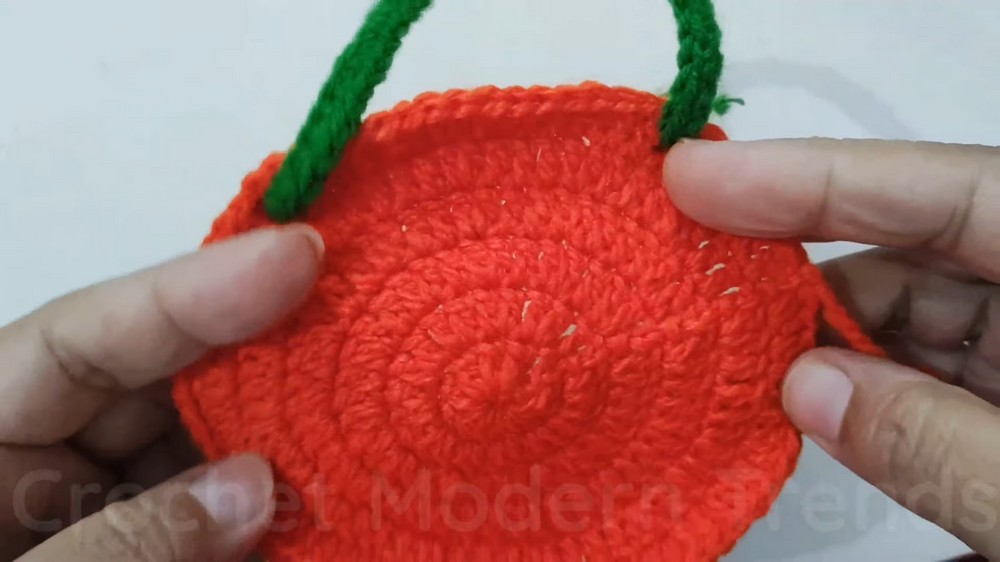
Pumpkin Bag Body (Front and Back Panels)
You will create two identical circular panels for the front and back of the bag.
Round 1: Foundation Circle
- Start by using Color A (orange). Begin with a slip knot, then chain 4.
- Slip stitch into the first chain to form a ring.
- Chain 3 (counts as the first DC).
- In the ring, create 12 DCs (including the initial ch-3).
- Slip stitch into the third chain of the starting ch-3 to join the round.
Total stitches after Round 1: 12 DCs
Round 2: First Increase Round
- Chain 3 (counts as first DC) and DC into the same stitch.
- In the next stitch, make 2 DCs.
- Repeat this pattern (2 DCs in each stitch) around the circle.
- Slip stitch to join to the third chain of the starting ch-3.
Total stitches after Round 2: 24 DCs

Round 3: Second Increase Round
- Chain 3 (counts as first DC).
- In the first stitch, make 1 DC. In the next stitch, make 2 DCs.
- Repeat the pattern: 1 DC in the first stitch, 2 DCs in the next.
- Slip stitch to the third chain to join.
Total stitches after Round 3: 36 DCs
Round 4: Third Increase Round
- Chain 3 (counts as the first DC).
- DC in the next two stitches. In the next stitch, make 2 DCs.
- Repeat the pattern: 1 DC each in the next two stitches, 2 DCs in the next stitch.
- Slip stitch to the third chain to join.
Total stitches after Round 4: 48 DCs
Round 5: Fourth Increase Round
- Chain 3 (counts as the first DC).
- DC in the next three stitches. In the next stitch, make 2 DCs.
- Repeat the pattern: 1 DC each in the next three stitches, 2 DCs in the next stitch.
- Slip stitch to the third chain to join.
Total stitches after Round 5: 60 DCs
- Note: These steps form a circular base. If you’d like a larger bag, continue rounds with evenly spaced increases.
Handles (Cord Straps)
- Using Color B (green), make a slip knot and chain 60.
- Turn and SC into each chain across.
- Fasten off and weave in the ends. Create 2 cords in total for the bag straps.
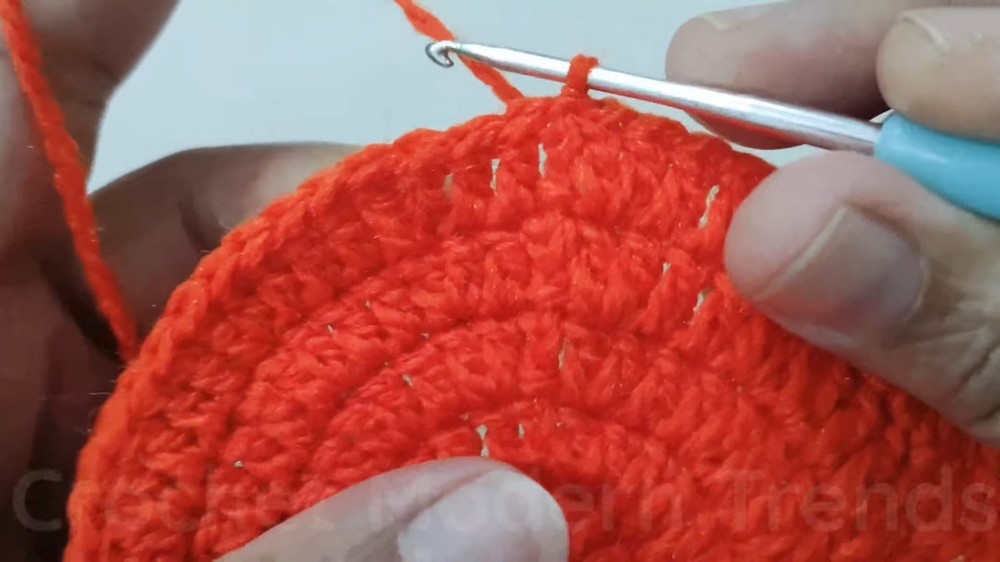
Assembly: Joining Front and Back Panels
- Place the two panels together, with the right sides facing out.
- Using Color A, begin at any stitch, insert the hook through both panels, and slip stitch around the edges to join the pieces.
- Stop when you leave an opening at the top for the bag’s opening.
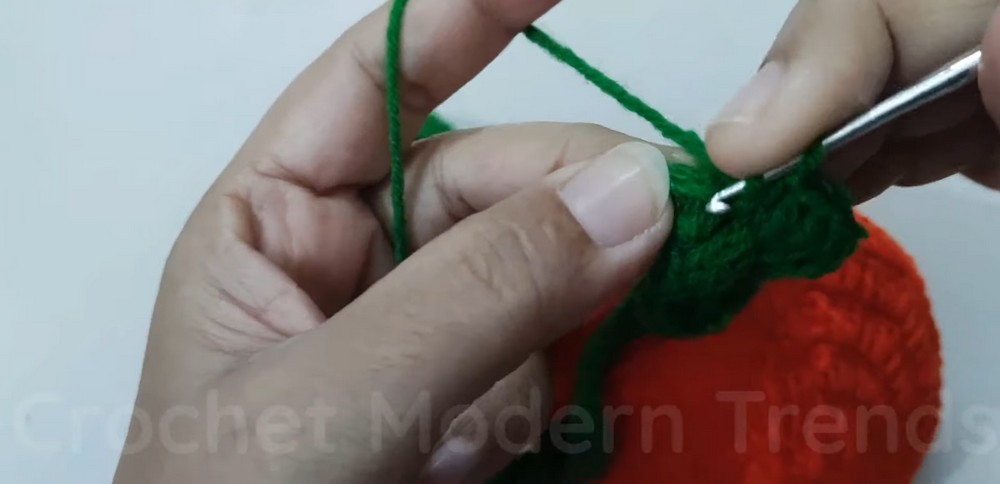
Pumpkin Leaves
- With Color B (green), create a slip knot.
- Chain 10.
- Work the following leaf shaping on the chain:
- HDC into the 2nd chain from the hook.
- HDC into the next chain.
- DC into the next chain.
- TR into the next two chains.
- DTR into the next two chains.
- TR into the next chain.
- DC into the next chain.
- HDC into the last chain.
- Chain 2 and SL ST back into the last chain.
- Fasten off. Repeat for a second leaf.
Pumpkin Face (Eyes and Mouth)
Eyes
- Using Color C (black), create a slip knot.
- Chain 4, slip stitch to form a ring.
- Chain 3 and work 6 DCs into the ring. Slip stitch to the third chain to complete.
- Fasten off and leave a tail for sewing. Repeat for the second eye.
Mouth
- With Color C, make a slip knot.
- Chain 10, then chain an additional 3 (counts as the first DC).
- Work the following into the chain: DC in the next three chains, HDC in the next chain, SC in the next two chains, HDC in the next chain, and DC in the final chains.
- Fasten off and leave a tail for sewing.
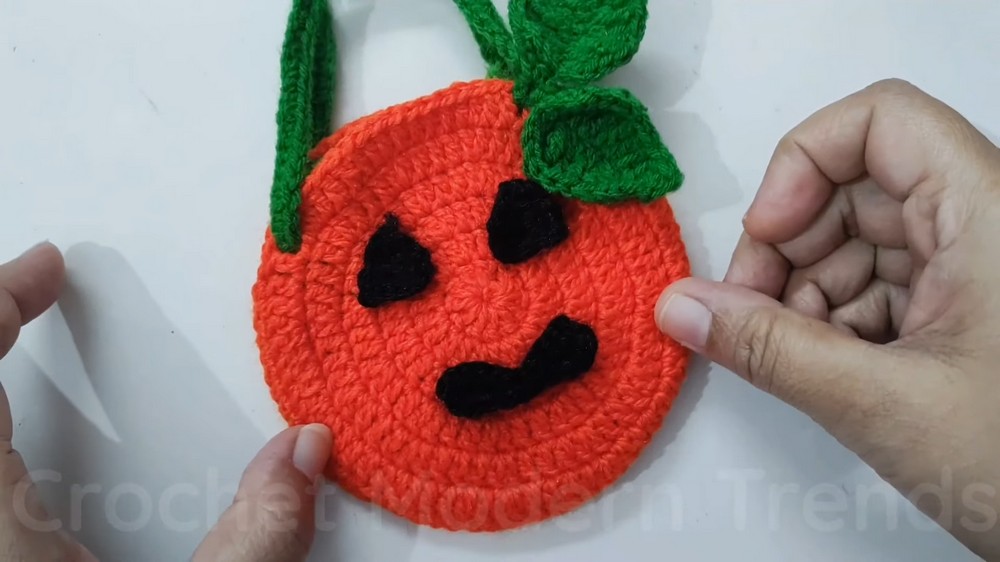
Finishing Touches
- Sew the eyes and mouth to the front panel of the bag using a tapestry needle.
- Attach the leaves to the top edge of the bag for decoration.
- Insert the green cords (handles) into the top edge of the bag. Tie knots to secure them.