Crochet Spiked Sedge Stitch – Perfect for Textured Blankets
The Crochet Spiked Sedge Stitch is a versatile and stunningly textured stitch, perfect for creating reversible designs like blankets, scarves, or any pattern where texture is the star.

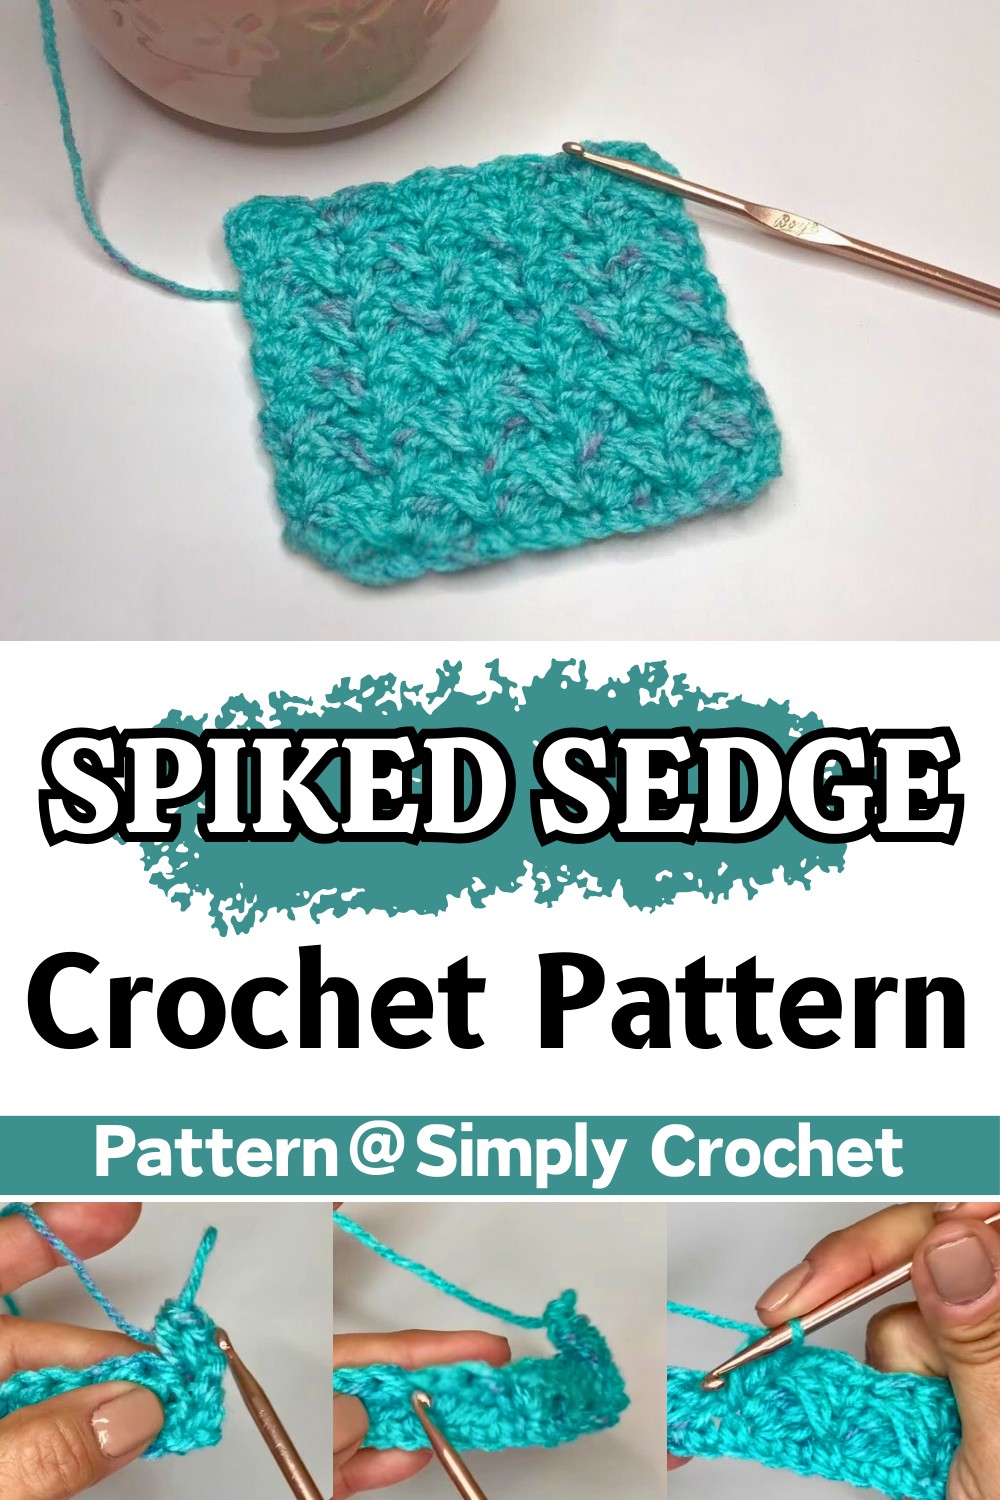
The Spiked Sedge Stitch is a remarkable crochet technique that creates a unique, textured design that’s the same on both sides. This stitch is both functional and beautiful, making it ideal for a variety of designs such as cozy blankets, elegant scarves, or even small decorative items like placemats. Its special “spiked” texture gives it an eye-catching look that stands out.
Crochet Spiked Sedge Stitch
This Stitch Pattern is straightforward to learn, even for beginners. It combines basic stitches like single crochet, half double crochet, and double crochet, layering them creatively to form its signature textured look. The added “spiked” feature creates subtle strands of yarn that extend into the previous row, adding extra depth and interest. If you want a stitch that is fun, versatile, and visually appealing, this is a great choice to try.
Credit Simply Crochet
Key Features and Construction Summary
- Unique “spike” effect: Created by inserting double crochets into stitches one row below, giving the fabric added depth and dimension.
- Reversible design: Identical on both sides, ideal for a design where both sides will be visible.
- Easy and repetitive pattern: Built on a simple repeat involving single, half-double, and double crochets.
- Customizable with any yarn or hook size: Works wonderfully with various weights and colors.
The pattern begins with a foundation chain that is a multiple of three, with two additional chains added to determine the desired width of your design. After the foundation row of single crochets, the true beauty of the spiked sedge stitch starts to emerge as you work through Rows 2 and 3.

Row 2 introduces the basic structure of the pattern stitch: each cluster is made up of a single crochet, a half-double crochet, and a double crochet worked diagonally into the same stitch, followed by skipping two stitches. This repeat creates the base texture of the fabric.
The “spike” effect appears on Row 3. Unlike standard double crochets, these spiked double crochets are intentionally worked into the single crochet of the previous row, a stitch directly below your working row. This unique placement pulls the yarn down and visually “spikes” into the row below, resulting in a textured design that pops off the fabric.

From there, you continue repeating Row 3’s spike stitch clusters across the pattern. The process is rhythmic and satisfying as you see the fabric’s dynamic, clean chevrons develop. The neat edges of the stitch make it beginner-friendly while producing a professional finish.
The final look is not only beautiful but practical. The results are reversible (the spikes show on both sides), which makes this stitch a favorite for two-sided blankets or wearable pieces like scarves. The texture adds visual interest and enhances the tactile experience of the fabric.

Video Tutorial
Step-by-Step Pattern
Materials
To make the Spiked Sedge Stitch, you will need the following materials:
- Yarn: Any yarn can be used, but a medium-weight (worsted) yarn is recommended for beginners.
- Hook Size: Use the hook size recommended on your yarn label (typically H/5mm for worsted-weight yarn).
- Optional Tools: Scissors, a yarn needle for weaving in ends, and stitch markers.

Foundation Steps
- Create a Slip Knot
Begin with a slip knot on your hook. - Chain Foundation
Work a multiple of 3 chains, plus 2 additional chains. For example, if working a small swatch, chain 15 + 2 = 17 chains.
Row 1: Foundation Row
- Step 1: Starting in the second chain from the hook, make 1 single crochet (sc).
- Step 2: Continue to place 1 single crochet in each chain across.
- Step 3: At the end of the row, turn your work and chain 1.
Row 2: Base Pattern
- Step 1: In the very first stitch (at the base), work:
- 1 single crochet (sc)
- 1 half double crochet (hdc)
- 1 double crochet (dc)
- Step 2: Skip the next 2 stitches, and in the next stitch, repeat the same sequence:
- 1 single crochet (sc)
- 1 half double crochet (hdc)
- 1 double crochet (dc)
- Step 3: Repeat Step 2 across the row until 3 stitches remain.
- Step 4: Skip the next 2 stitches and make a single crochet in the last stitch.
- Step 5: Turn your work and chain 1.
Now Row 3: Spiked Stitch Row
This row introduces the spike stitch.
- Step 1: In the first stitch, work:
- 1 single crochet (sc)
- 1 half double crochet (hdc)
- Step 2: Create the spike stitch: Yarn over, insert the hook into the single crochet from the previous row (one row below), yarn over, pull up a loop, and complete a double crochet.
- Step 3: Skip the next 2 stitches and repeat in the next stitch:
- 1 single crochet (sc)
- 1 half double crochet (hdc)
- Spike stitch (double crochet into the single crochet one row below).
- Step 4: Repeat Step 3 across the row until 3 stitches remain.
- Step 5: Skip the next 2 stitches and make a single crochet in the turning chain of the previous row.
- Step 6: Turn your work and chain 1.
Repeat the Pattern
- Repeat Rows 2 and 3 alternately until your desired length is reached.
Decorative Touches
- Finish by making a single crochet border around the edges for a clean look.
Pattern Question:
Question: Can I use different yarn weights and hook sizes for the spiked sedge stitch?
Answer: Yes, the spiked sedge stitch works with any yarn weight or hook size, allowing you to customize the texture and size of your pattern to suit your needs and preferences.
Troubleshooting and Suggestions
Common Issues and Fixes
- Tension Problems: The spike stitches may feel tight or loose depending on how you manage your tension when pulling through the stitch below. Keep your tension consistent to ensure an even appearance.
- Tip: Let your yarn glide smoothly when pulling up a loop in the spike to prevent it from puckering.
- Finding the Right Stitch Below: If you’re unsure where to place the spiked double crochet, gently pull your stitches apart to locate the single crochet stitches from the previous row. They are easy to spot once you get comfortable with the pattern.
- Tip: Practice a few rows on a swatch before starting a larger pattern.
- Consistent Edges: Missing the last stitch at the end of rows is common. Remember to always work a single crochet into the turning chain to maintain clean edges.
Creative Modifications
- Color Play: This stitch looks amazing with stripes or variegated yarns since the spiked stitches enhance color transitions. Try alternating colors every two rows or create a gradient effect for striking results.
- Use for Different patterns: Beyond blankets, think about creating cushion covers, textured cowls, or even an eye-catching handbag.
- Add a Border: Frame your finished piece with a simple single crochet or shell stitch border to complement the stitch pattern.