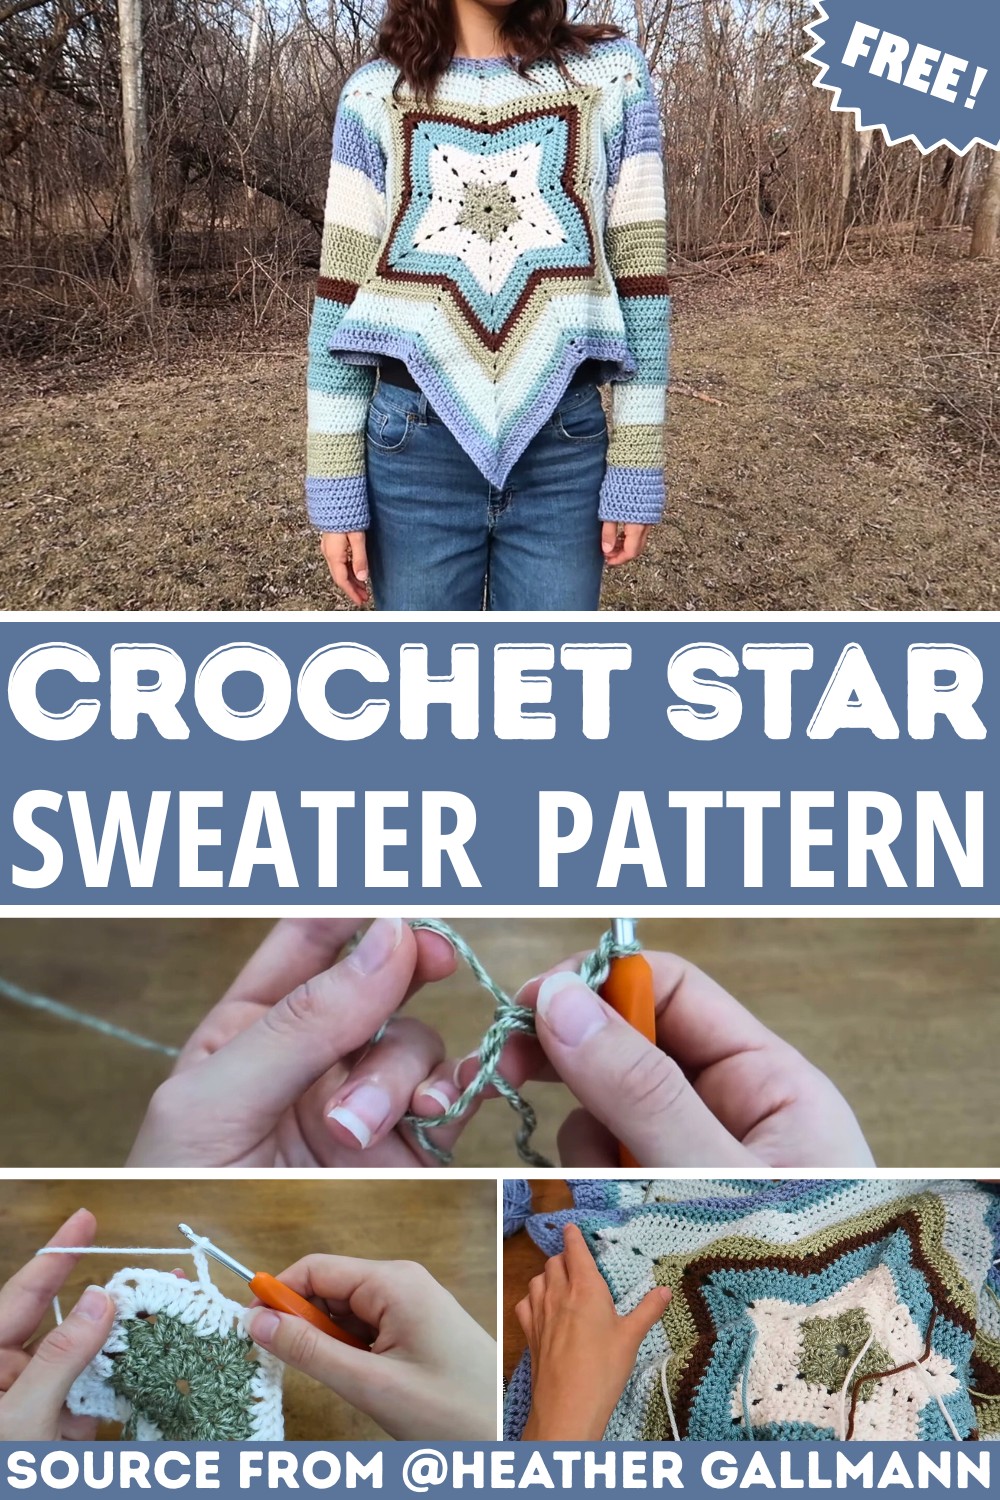
This gorgeous star-styled sweater is the ultimate cozy-meets-creative piece—crochet dazzling celestial points while customizing colors, sizing, and sleeve styles for a perfect fit.

This crochet star sweater isn’t just a piece of clothing; it’s a warm, snug hug in star form. Created using two large star-shaped panels, this sweater is perfect for anyone who loves cozy and unique fashion. It’s special because you can truly make it your own, choose any size, and play with solid colors or bold stripes. If you’re looking for a comfy sweater to wear around the house, a statement piece for a fun day out, or a handmade gift for someone you care about, this design has it all.
Crochet Star Sweater Tutorial
What makes this sweater even better? It’s beginner-friendly. If you know how to double crochet and slip stitch, you’re ready to go. The steps are simple enough for newcomers but still offer room for creativity, as you can mix and match colors however you like. Plus, the process involves joining the stars together and adding cozy sleeves, making it both satisfying and straightforward to complete. Once you’re done, you’ll end up with a sweater that looks adorable, feels great, and fits perfectly, all because you made it yourself.
Credit Calluna Crochet
Key Features and Construction Elements:
- Made from two oversized crochet stars that form the front and back of the sweater.
- Beginner-friendly techniques include magic circles, double crochets, slip stitches, and basic shaping.
- Customizable sizing lets you tailor the sweater to fit perfectly.
- Color versatility allows for solid designs, stripes, or multi-colored stars.
- Sleeves and edges are added after the stars are complete, with clean slip-stitched seams tying it all together.
Overview:
The Crochet Star Sweater begins with making two large, symmetrical five-pointed stars—one for the front panel and one for the back. Each star starts from the center using either a magic circle or a chain-five loop (great for beginners!) and gradually builds outward with repeated rows of points. The key stitch throughout is the double crochet, which creates the structural integrity of the star while also giving it a comfortable drape. Chains are strategically added to shape the star’s points, creating stunning geometry reminiscent of celestial motifs.

Each star grows row by row, with an easy-to-follow increase system: every row adds two double crochet stitches along the edges of the star points. This ensures consistent sizing and symmetrical shaping in every round. You can switch colors as often as you’d like, whether once per star or per row—it’s an excellent stash-busting opportunity! Once both stars are finished, they are aligned, and slip-stitched together along selected edges to form the shoulders, neckline, and sleeves.

The sleeves are created by crocheting in the round around the armhole openings formed by the alignment of the two stars. Using simple double crochets, they are built row by row and can be made as slim or wide as your preference dictates. To ensure a smooth and clean connection between the two stars and their sleeves, the designer uses loose slip stitches, which minimize puckering and maintain flexibility in the seams.

Finally, the sides of the sweater are stitched together, leaving you with a finished piece that is as stunning as it is satisfying to create. Once all ends are woven in, the sweater can be steamed or blocked to ensure the star points and edges lay flat, allowing the unique design to shine.

Video Tutorial
Step-by-Step Pattern
Materials
To recreate the crochet star sweater, you will need:
- Yarn: Weight 4 acrylic yarn in various colors (scrap yarn works well)
- Example Colors: Blue, green, white, brown, or any combination of your choice.
- Hook: 5 mm crochet hook
- Optional Tools:
- Stitch markers or bobby pins for marking sections
- Yarn needle for weaving in loose ends
- Scissors
Pattern Instructions
Follow these detailed steps to crochet your star sweater:
Section 1: Creating a Star Panel
Step 1: Start the Star Foundation
- Begin with a magic circle (or chain 5 and slip stitch into the first chain to form a loop).
- Row 1:
- Chain 2. Place 21 double crochets (Dc) into the circle.
- Pull the tail-end tight to close the circle if using a magic circle.
- Slip stitch into the second chain from the beginning to finish the row.
Step 2: Form the Star Points
- Skip the first stitch (the one you slip stitched into).
- Point Creation:
- In the second stitch, place 1 single crochet (Sc).
- Skip the next stitch.
- In the following stitch:
- Place 3 double crochets.
- Chain 3.
- Place another 3 double crochets into the same stitch (this forms one star point).
- Skip the next stitch and do 1 single crochet in the following stitch.
- Repeat the steps above to create all five star points. Finish with a slip stitch into the first single crochet to complete the round.
Step 3: Repeat for Additional Rows
For each new row:
- Start with a slip stitch into the next stitch, then chain 3 to act as your first double crochet.
- Work double crochets up to the chain 3 section of each star point, increasing the number of double crochets by 2 for every new row.
- Example:
- Row 2 has 2 double crochets before the chain 3 point.
- Row 3 has 4 double crochets, and so on.
- Example:
- In each chain 3 section of the star point:
- Place 3 double crochets – chain 3 – 3 double crochets.
- Continue repeating these steps until the star reaches a size that fits across the front of your body. (Check the alignment using the neckline and underarm guidelines described below.)
Section 2: Assembling the Sweater
Step 1: Size and Align Panels
Make two identical star panels using the instructions above.
- Hold one star across your chest with the points positioned at your shoulders. Ensure the V-shape of the star is evenly centered at the neckline.
- The diagonal lines between star points should fall comfortably under your arms.
- Repeat with the second star panel to ensure they align, then prepare for assembly.
Step 2: Join at the Shoulders
- Place both stars on top of each other, aligning the shoulder points.
- Use stitch markers or bobby pins to mark the area for the neckline. Count stitches to ensure symmetry on both sides.
- Slip stitch both panels together along the shoulder lines, from the neckline down to the top of the star point.
Step 3: Create Sleeves
- Separate the panels and work on the sleeve opening.
- Begin double crocheting around the armhole (created at the star point). Connect the stars at the skipped stitches between the points to make a round opening.
- Continue double crocheting in rounds until the sleeve is your desired length, switching colors occasionally for stripes if desired.
Step 4: Join the Sides
- Repeat the slip stitching process along the sides of the sweater below the armholes to connect the front and back panels.
- Work from the point of the star to the bottom of the sleeve, ensuring all stitches on both panels are properly aligned.
Section 3: Finishing Touches
- Weave in all loose ends using your yarn needle.
- Flip the sweater right-side out so seams are hidden.
- Steam or block the sweater to help the stars lay flat and remove any wrinkles.
- Wear your sweater proudly or share it with a loved one as a handmade gift!
Troubleshooting and Suggestions:
- Magic Circle vs. Chain Loop: If you’re struggling with forming a magic circle, opt for the chain-five loop alternative for similar results. Magic circles can be tricky to master, so don’t stress!
- Keeping even tension: Loose slip stitching for seams is crucial to prevent bunching at the neckline and shoulder areas. Keep your hook size consistent across rows for a polished finish.
- Color changes and weaving in ends: If switching colors often, try joining new yarn at different points of the star to avoid bulky seams in one area.
- Custom modifications: Make a cropped version by shortening the rows or create a longer tunic-style sweater by extending rows before closing the sides. Add playful embellishments like tassels or embroidery to personalize the design.
- Sizing tips: To ensure correct sizing, measure your stars before assembly—each should cover the front or back of your torso comfortably, with the “arms” of the star extending to form the sleeves.