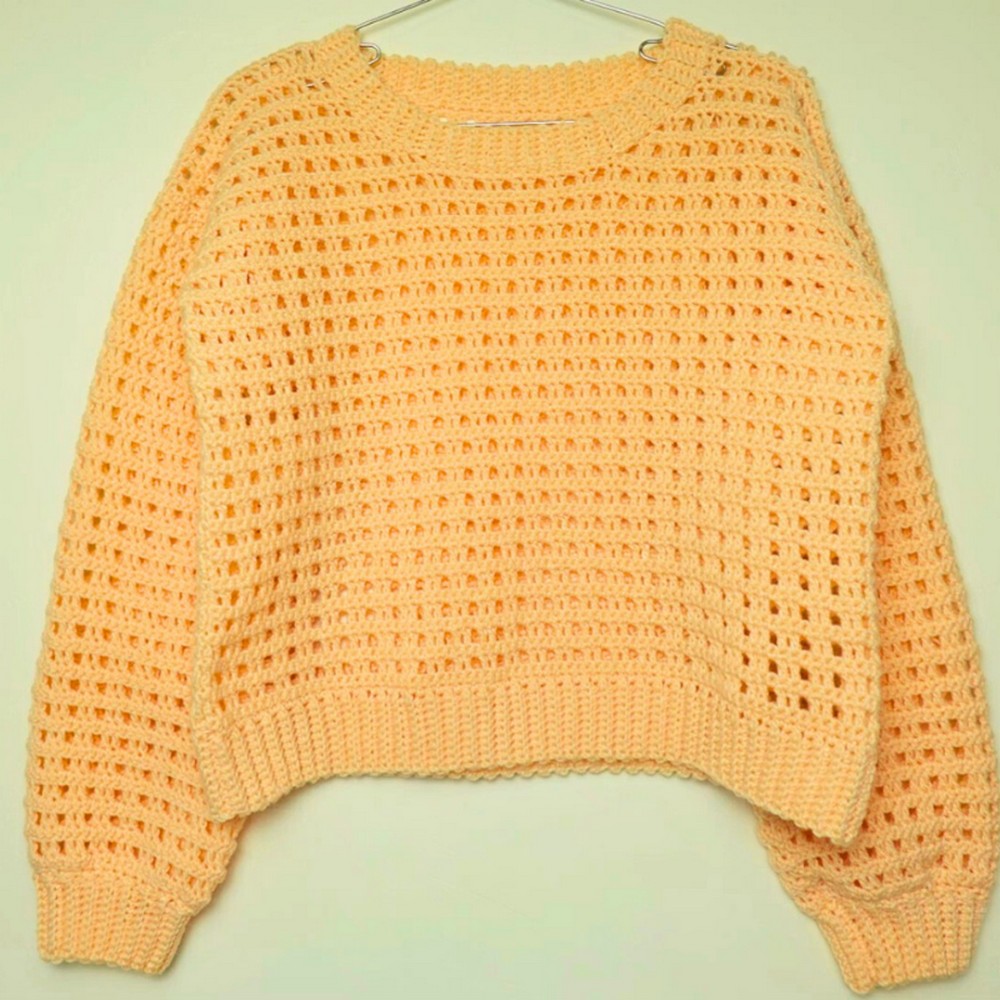
A breezy crochet mesh sweater designed for ultimate versatility, combining comfort and chic style—perfect for layering any season or customizing to suit your unique wardrobe.

A crochet mesh sweater is a beautiful and lightweight piece that’s perfect for layering. It’s fashionable, breathable, and comfortable for various seasons. If you want something cozy to wear on a breezy evening or an outfit that adds a bit of texture to your look, this crochet sweater is versatile and stylish.
Free Crochet a Mesh Sweater
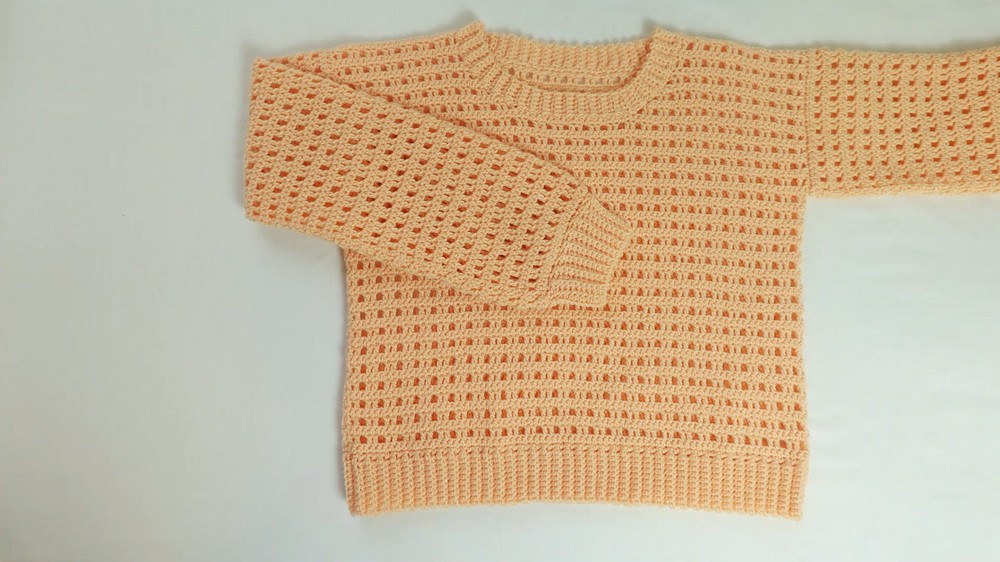
This crochet sweater pattern is made using a simple mesh design, giving it a delicate and airy feel. What makes it special is how you can easily experiment with colors or yarns to create a unique piece that suits your style. The sweater pattern is beginner-friendly and offers a wonderful way to practice basic crochet techniques while creating something wearable.
You can pair this crochet sweater with tank tops, dresses, or your favorite jeans, making it a great piece for casual days or special occasions. It’s a stylish addition to any wardrobe and something you’ll enjoy making and wearing.
Credit Brenda DIY
Key Features and Construction:
- Foundation panels: Start with rectangular mesh-patterned panels for the front and back, ensuring a simple yet eye-catching texture.
- Mesh stitch: Created with repetitive chains and double crochets, making the sweater breezy and stylish.
- Separate sleeves: Crocheted in identical rectangular panels following the same mesh stitch for a cohesive design.
- Easy assembly: Panels are joined via slip stitch or single crochet, leaving neat armhole openings.
- Customizable finishing touches: Options include a polished neckline, tapered edges, or blocking adjustments for professional results.
The pattern begins with the foundation chain, where you determine the width of your sweater panels. The formula of chains in multiples of 4 (+3 for turning) ensures your mesh stitch will align perfectly across rows. After creating your foundation chain, double crochets and chain-3 spaces form the first row of mesh, introducing the light and openwork texture that defines this sweater.

From the second row onward, the mesh stitch rhythm becomes intuitive: chain 4, skip chain spaces, and alternate double crochets with chain sets. The repetition is relaxing yet satisfying, and the design builds quickly. You’ll crochet two identical rectangular panels to serve as the front and back of your sweater. Feel free to experiment with length at this stage—crop it for a casual look or extend it for a cozy oversized style!

Once the body panels are complete, the sleeve panels follow. These are worked in the exact same mesh stitch pattern, with dimensions tailored to your preferred sleeve length and fit. Like the body panels, you’ll need two identical pieces, whether for short, ¾ length, or long sleeves.

The assembly phase brings everything together. The front and back panels are aligned and seamed at the sides using slip stitch or single crochet, leaving space at the top for the neckline and room under the seams for armholes. Similarly, sleeves are attached at the armholes for a seamless finish. Adjustments can be made during this step for comfort or style preferences.

The final touch is all about refinement: weave in loose ends, block your sweater for improved shaping, and add optional borders to the neckline or hem. Simple single crochet edges ensure stability, while scalloped or decorative stitches elevate the look.
Video Tutorial
Materials Needed
- Yarn (appropriate for the hook size)
- Crochet hook (size recommended for your yarn)
- Scissors
- Tapestry needle for weaving in ends
- Stitch markers (optional)
Key Techniques/Patterns
- Chain Stitch (CH)
- Single Crochet (SC)
- Double Crochet (DC)
- Slip Stitch (SL ST)
- Mesh Stitch: combination of chaining and skipping stitches to create an open pattern
Step-by-Step Instructions
Step 1: Starting the Foundation Chain
- Determine the length you want for your sweater and make a foundation chain accordingly.
- Chain a multiple of 4 + 3 for your desired width (for example, 40 + 3 = 43).
Step 2: First Row
- Double crochet (DC) in the 4th chain from the hook.
- Chain 3 (CH 3), skip 3 chains, and DC in the next chain.
- Repeat * until the end of the row.
- Turn your work.
Step 3: Second Row
- Chain 4 (CH 4) to start the row (counts as DC + CH 1).
- *DC in the next DC from the previous row.
- CH 3, skip the chain-3 space, DC in the next DC.*
- Repeat * until the end of the row.
- Chain 1, and DC in the turning chain from the previous row.
Step 4: Repeat Rows
- Repeat the pattern from Row 2 until you reach your desired sweater length.
- Create two identical rectangular panels (one for the front and one for the back).
Step 5: Sleeves
- For each sleeve, chain to match the desired length of the sleeve.
- Repeat the mesh stitch pattern until the sleeve reaches your desired width.
- Make two identical sleeve panels.
Step 6: Assembly
- Lay the front and back panels on top of each other.
- Seam the sides using SL ST or SC, leaving space for the armholes.
- Attach sleeves to the body by seaming along the armholes.
Step 7: Finishing Touches
- Weave in all loose ends using the tapestry needle.
- Block your sweater if necessary to shape it.

Troubleshooting and Suggestions
Tips for Common Issues:
- Mesh Stitch Consistency: Make sure your chain spaces are loose but uniform. An overly tight chain can warp the openwork design.
- Panel Seaming: When joining panels, avoid pulling too tightly to prevent puckering. Work carefully around the armholes for a neat edge.
- Shaping Concerns: Block your panels before assembly if you notice uneven edges or slightly curled corners.
Creative Modifications:
- Yarn Choices: Try lightweight cotton blends for spring/summer or cozy wool for cooler weather. Variegated or speckled yarn creates a stunning gradient effect.
- Color Play: Add stripes to the panels or sleeves for extra flair.
- Hem Detailing: Crochet an elegant scalloped, picot, or ribbed border for a polished touch. You could also add cuffs to the sleeves for contrast!
- Length Changes: Transform your sweater into a tunic or cropped top by adjusting the panel dimensions.