Cozy crochet baby cardigan made from two folded hexagons, worked in simple double crochet, easy to customize for size, color, and edging, so it’s perfect for any little one.

A crochet baby cardigan is not just a piece of clothing; it’s a little bundle of warmth and care. This particular crochet baby cardigan stands out because it’s simple to make, cozy to wear, and perfect for growing babies. If you’re gifting a cardigan or making it for your own baby, it’s a special creation that feels as delightful as it looks.
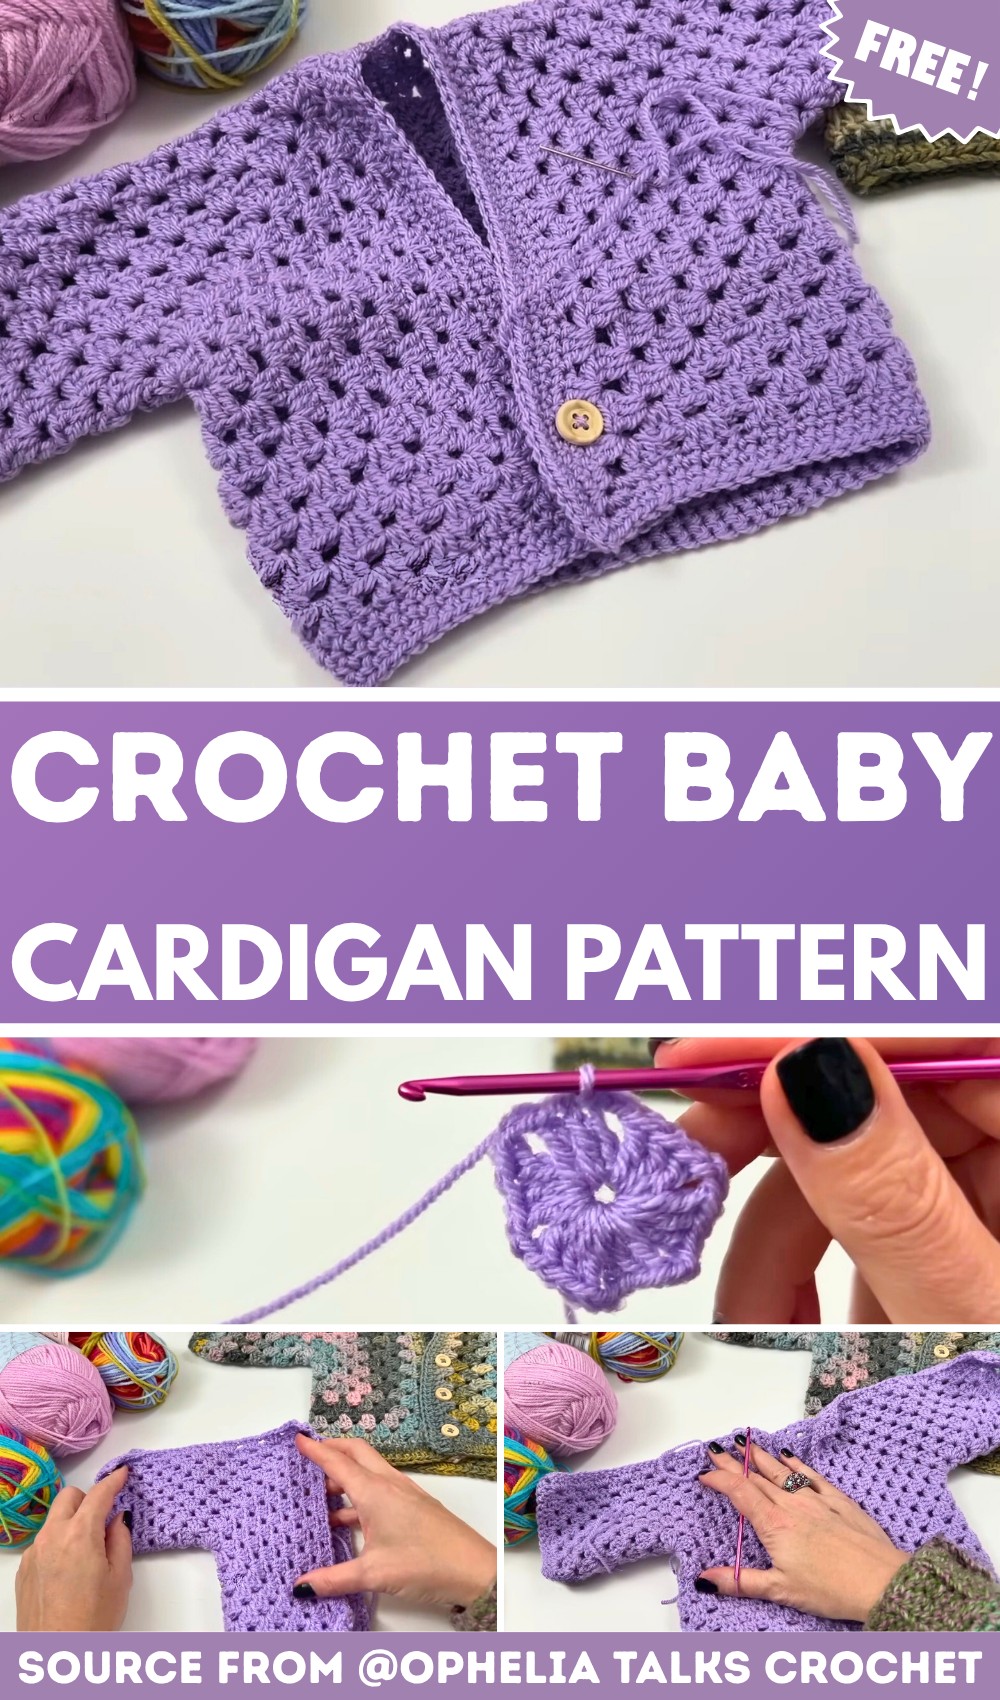
Crochet Baby Cardigan
This crochet cardigan uses soft, easy-to-handle yarn and features a straightforward design that’s quick to complete. You don’t need anything fancy; a small amount of DK yarn, a few buttons, and your love for crochet will do the trick. What’s truly wonderful is how adjustable it is. You can make a smaller version for newborns or size it up as babies grow.
Credit Ophelia Talks Crochet
Key Features and Construction Steps:
- Simple yet versatile design: Made from two crocheted hexagons, folded and joined to form the cardigan.
- Stitch Details: Uses American double crochet stitches (DC) and chain stitches to create a hexagon with a lovely drape.
- Customizable sizing: The size depends on the number of rounds in the hexagon, making it adaptable from newborn to toddler sizes.
- Seamless assembly: Additional shaping (like a back panel) is worked directly into the hexagon and joined for a clean, streamlined look.
- Personalized finishing touches: Add single-crochet edging, optional cuff shaping, or playful buttons for a polished look.
Overview of the Process:
This pattern begins with crocheting two large hexagons using double-crochet clusters, which naturally form a six-sided shape. The process starts with a simple magic ring, followed by chaining and clusters to form the first round. Subsequent rounds build on this foundation, adding corners with chain spaces and filling the sides with double crochets. The repetitive structure makes this a great meditative pattern, especially suitable for crocheters looking for a rhythm without complex counting.

Once both hexagons are complete, one side of each is widened by adding an extra row. This step adds fullness to the back portion of the garment, ensuring a relaxed fit for the baby. The hexagons are then folded in half, with the extra rows meeting at the back, creating a cute cardigan shape with sleeves naturally formed by the folds. Joining the pieces is a breeze, with slip stitches or single crochet used to create clean seams.

To finish the garment, simple single crochets are worked around the edges and sleeves to create a polished border. Optional decreases along the sleeves make the cuffs slightly tapered, ensuring a snug but gentle fit around the baby’s wrists. A similar edging can be added along the neckline and front for structure. Buttons can be sewn strategically through the stitches, eliminating the need for buttonholes.

Finally, the flexibility of the design allows for creative freedom. You can change the stitch pattern in the edgings, use colorful or variegated yarn for a playful look, or add extra rows to lengthen the body or sleeves. The adaptability makes this cardigan a go-to pattern for any season or occasion.

Video Tutorial
Materials
Make sure you have the following materials ready:
- Yarn: DK (double-knitting) weight yarn. Examples include Wendy’s Supreme DK or Stylecraft Special DK. You will only need about one ball of yarn.
- Crochet Hook: 3.5mm hook (slightly smaller than the standard 4mm to give tighter stitches).
- Buttons: Wooden buttons of appropriate size (with holes large enough to fit DK yarn).
- Needles:
- Darning needle for sewing in ends.
- A thinner hand-sewing needle with a large eye for attaching buttons.
- Scissors: To cut yarn.
Pattern Instructions
Foundation Steps
- Start with the Hexagon
- Create a slip knot and insert your hook.
- Round 1: Chain 4 and join to the first chain using a slip stitch to form a ring.
- Chain 2 (counts as the first dc), then crochet 2 more dc into the ring to form the first cluster of 3 dc.
- Chain 2, create another cluster of 3 dc into the ring. Repeat until you have 6 clusters in total.
- Chain 2, join with a slip stitch to the top of the first chain 2 at the start.
- Round 2 (Forming Corners)
- Move to the next cluster with 2 slip stitches.
- Chain 2 (counts as first dc), crochet 2 more dc into the corner space to form the first cluster.
- Chain 2, create another cluster of 3 dc into the same corner space.
- Repeat for each of the 6 chain spaces around to make 6 new corners.
- Repeat Rounds
- Round 3 onwards: For each round, make corners by crocheting “3 dc, chain 2, 3 dc” into each corner space.
- Add clusters (3 dc) in spaces between existing clusters along each side.
- Repeat rounds until desired size is achieved (e.g., 10 rounds for a 3–6 month cardigan).
Adding the Back Extension
- Once your hexagon reaches the desired size, add one row along one side of the hexagon to widen the back.
- Slip stitch to the nearest corner space, chain 2 (counts as the first dc), crochet 2 more dc into the same corner space.
- Work clusters (3 dc) along one side only.
- Finish the row with 3 dc in the last corner space, cut yarn, and pull through.
- Create a second hexagon following the same process and add the back extension similarly.
Joining Both Hexagons
- When the second hexagon has its back row complete, lay both pieces flat with the right sides facing outward.
- Use slip stitches to join the back extensions, starting with the first three stitches for a strong seam.
- Insert hook into corresponding stitches of both hexagons, yarn over, pull through all loops.
- Continue working slip stitches along the extension edge, joining clusters to clusters or spaces to spaces.
- Turn the cardigan inside out and slip stitch the shoulder seams (edges of the hexagon).
Creating Sleeves
- Begin a sleeve by making a slip knot and inserting your hook under the armhole.
- Work single crochets evenly around the sleeve opening.
- For a fitted cuff, reduce stitches: For example, work 5 single crochets followed by a reduction stitch. Repeat around the sleeve.
- Add additional rows of single crochets for desired cuff width.
Border and Edging
- Work single crochets around the cardigan opening (front edges, neckline, and bottom hem).
- For corners, crochet 2 single crochets, chain 2, and 2 single crochets into the same corner space to achieve a neat finish.
- Add multiple rounds for a wider edging. Optional: Experiment with decorative stitches like linen stitch for texture.
Adding Buttons
- Sew buttons onto one side of the cardigan using a sewing needle and yarn. Align the buttons at gaps naturally created by the crochet fabric.
- Test button placement by fastening through these gaps to ensure alignment.
Final Touches
- Weave in all loose ends.
- Gently block the cardigan if needed to even out stitches.
- Enjoy gifting or dressing your baby in the adorable handmade cardigan!
Pattern Question
Question: How do I adapt the size of the cardigan for different ages?
Answer: You can increase the number of hexagon rows and adjust the back width by adding more side rows. Use the baby’s current clothing measurements as a guide.
Troubleshooting and Suggestions:
- Stitch Consistency: Ensure your cluster stitches are consistently sized to prevent lopsided hexagons. Use a relaxed tension for a soft, baby-appropriate drape.
- Seam Placement: While joining the hexagons, take care to align stitches evenly for smooth seams, especially at the shoulders and back.
- Button Choice: Select buttons with sufficiently large holes for threading yarn, and sew them securely to avoid safety concerns.
- Sizing Adjustments: To make the cardigan bigger, simply add more rounds to your hexagons or increase the width of the additional back rows.
- Creative Variations: Experiment with textured stitches like the linen stitch for a unique border, or try contrasting colors for the cuffs or edging. You could even skip the buttons and use ties or toggle closures for a different look.