Easy Crochet Fingerless Gloves Pattern With Simple Stitches
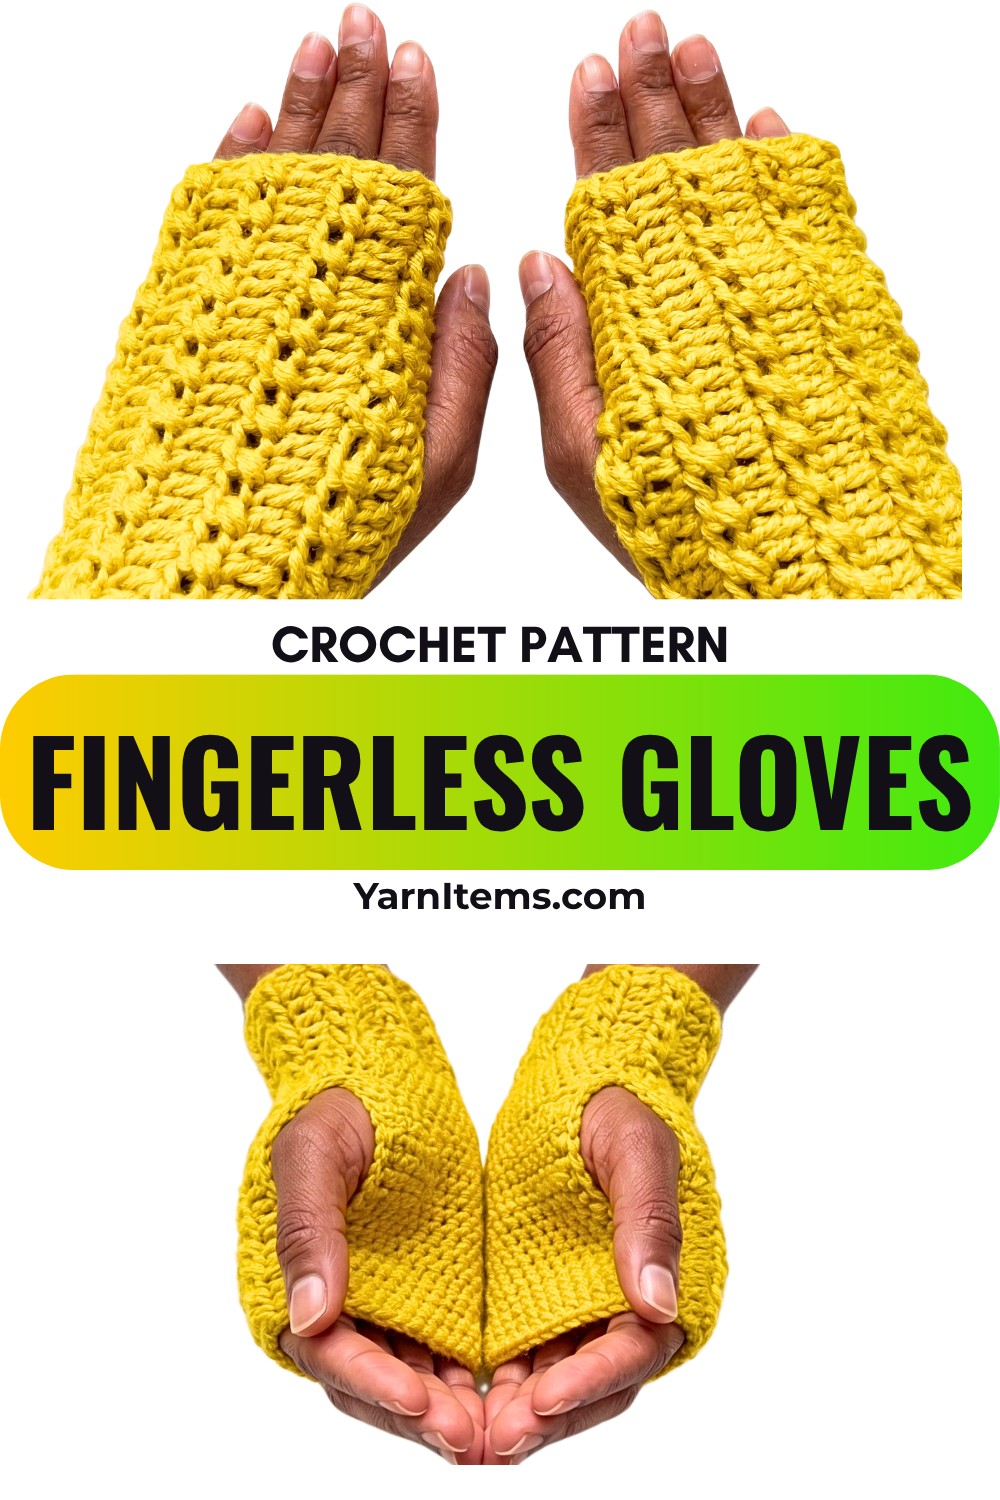
Keep your hands cozy while leaving your fingers free with these simple crochet fingerless gloves, made from a flat panel and finished with an easy thumb opening.
Crochet Fingerless Gloves Pattern
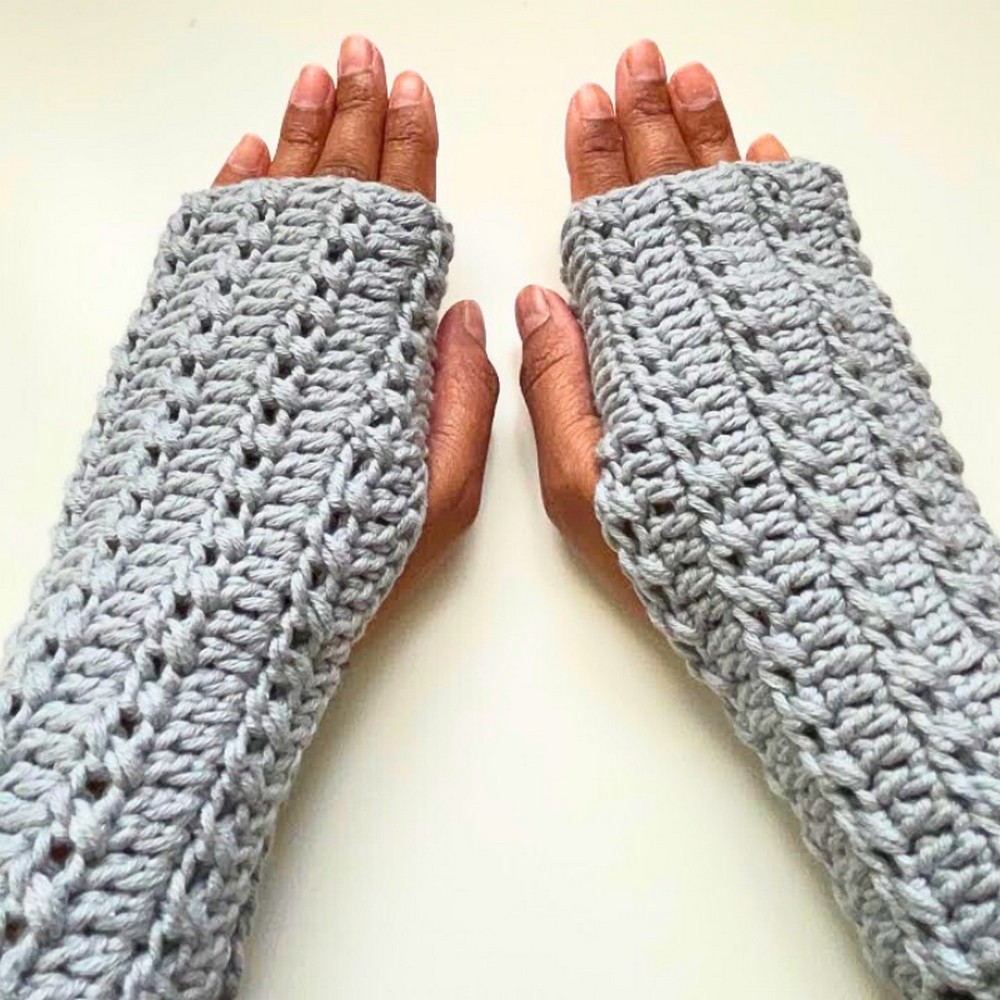
Fingerless gloves are a useful little crochet piece when you want warmth without covering your fingertips. This pair is worked flat in rows, using alternating double crochet and crossed half double crochet stitches to give the fabric a bit of texture while keeping the design straightforward.
The part that deserves the most attention comes when the flat crochet piece is folded and joined. The thumb opening is created during seaming rather than crocheted separately, so keeping the slip stitches loose and placing the opening correctly will make a noticeable difference to the final fit. This design also makes the gloves easy to adjust before you finish the second one.
Credit Anutha – The Crochet World
Materials & Tools Needed
- Yarn: 100% cotton yarn
- Crochet Hook: 3 mm
- Scissors
- Tapestry Needle: For weaving in ends
- Stitch Markers: Optional, but helpful when keeping track of stitches and row edges
Finished Size & Customization
The pattern is designed to fit an average adult hand.
Because the glove is made from a flat rectangle and then joined, you can adjust the fit before starting by changing the number of foundation stitches.
For a larger hand, add foundation stitches. For a smaller hand, reduce them. Keep in mind that the stitch pattern and yarn tension will also affect the finished width.
You can also customize:
- Glove width: Adjust the foundation stitch count.
- Glove length: Add or remove rows.
- Thumb opening: Change the number of stitches left unjoined during assembly.
- Yarn and color: Substitute another yarn weight if you also adjust the hook size and check the resulting fabric.
Pattern Abbreviations
This pattern uses US crochet terminology.
- ch: Chain
- sl st: Slip stitch
- dc: Double crochet
- hdc: Half double crochet
- YO: Yarn over
- st(s): Stitch(es)
- rep: Repeat
How the Gloves Are Made
Each glove starts as a flat panel. The rows alternate between regular double crochet and crossed half double crochet, creating a simple textured surface.
Once the panel is finished, fold it in half and join the edges. Instead of closing the entire side, you will leave a section open for the thumb.
That means the assembly is an important part of the pattern, not just a finishing step.
Foundation Row
Begin with a slip knot.
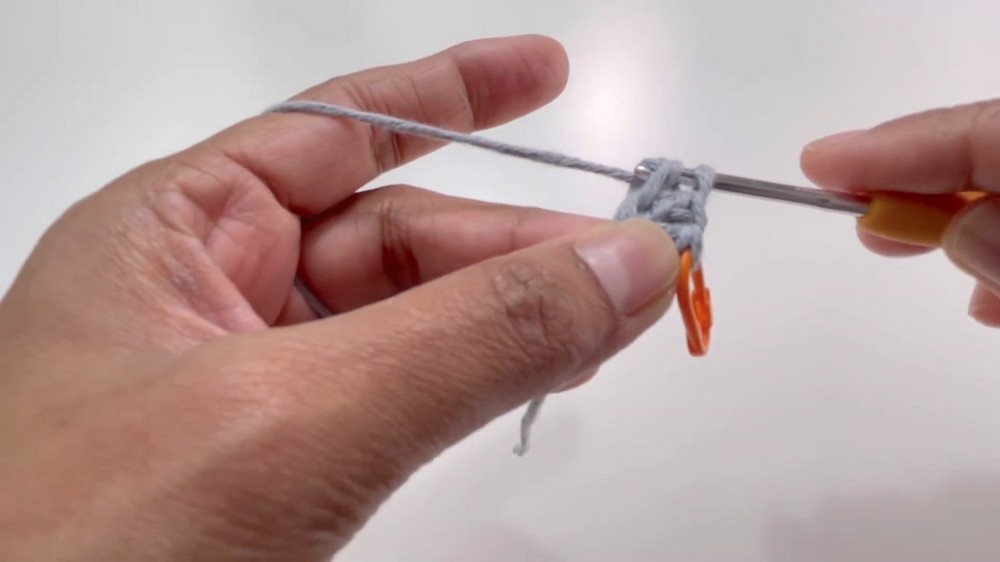
For this pattern, the foundation is made using 34 chainless double crochet stitches.
To make the chainless double crochet:
- Chain 2.
- Insert the hook into the last chain.
- Yarn over and pull up a loop, giving you 3 loops on the hook.
- Yarn over and pull through 1 loop to create the chain base.
- Yarn over and pull through 2 loops.
- Yarn over and pull through the remaining 2 loops.
- Repeat until you have 34 dc.
Place a stitch marker in the first stitch if that helps you identify the row edge.
Row 1: Double Crochet
- Chain 1. This does not count as a stitch.
- Turn your work.
- Skip the turning chain.
- Work 1 dc in each stitch across.
- You should have 34 stitches at the end of the row.
Keep the stitch count consistent here because the same width will be carried through the remaining rows.
Row 2: Crossed Half Double Crochet
This row creates the textured crossed-stitch effect.
- Chain 2.
- Turn.
- Skip the first stitch.
- Work 1 hdc in the next stitch.
- Now return to the skipped stitch and work 1 hdc into it.
- Repeat this crossed sequence across the row:
- Skip 1 stitch.
- Hdc in the next stitch.
- Hdc in the skipped stitch.
- Continue until you reach the end of the row.
Your stitch count should remain 34 stitches.
Stitch Placement Check
The crossed stitches can look slightly confusing when you first work them. The important point is that the skipped stitch is not left unused-it is worked immediately after the hdc in the following stitch.
If you accidentally skip a stitch without working back into it, the row will become narrower.
Rows 3-16: Alternate the Two Rows
Continue alternating the stitch patterns:
- Odd-numbered rows: Work the regular dc row.
- Even-numbered rows: Work the crossed hdc row.
Repeat until you complete 16 rows.
Before fastening off, check that the panel still has the same width from bottom to top. Uneven tension can make the sides of a small wearable piece look slightly slanted, so a quick measurement now can save you from correcting the seam later.
Prepare the Glove for Assembly
Once the 16th row is complete:
- Fasten off.
- Leave a yarn tail if you plan to use it for joining.
- Identify the smoother right side of the fabric.
- Fold the panel in half so the edges line up.
- Position the fabric so the wrong side is facing outward while you join the seam.
Take a moment to align the rows before starting. The two edges should sit evenly on top of each other.
Join the Lower Section
Begin at the bottom edge of the folded panel.
- Insert your hook through the corresponding first stitch on both layers.
- Yarn over.
- Pull through both layers to make a slip stitch.
- Continue working slip stitches through the next 12 stitches.
Keep these slip stitches relatively loose. Tight joining can pull the fabric inward and make the finished glove feel smaller than the crocheted panel.
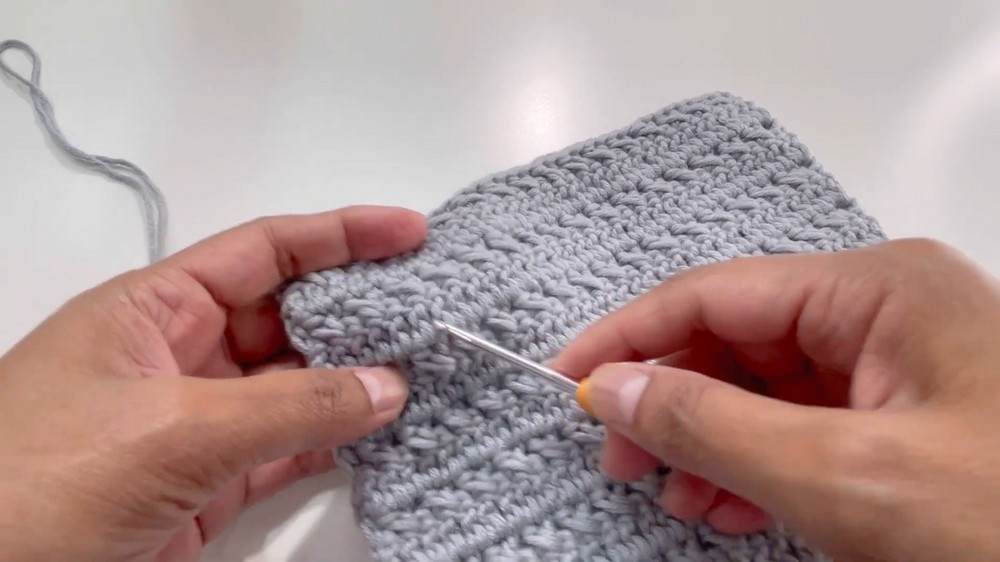
Create the Thumb Opening
This is the key assembly step.
After joining the first 12 stitches:
- Work 10 slip stitches on only one side of the panel.
- Do not join these stitches to the opposite side.
- Leave the corresponding 10 stitches on the other side unjoined.
- This open section becomes the thumb hole.
- After the opening, bring both layers together again.
- Resume slip stitching through the final 12 stitches.
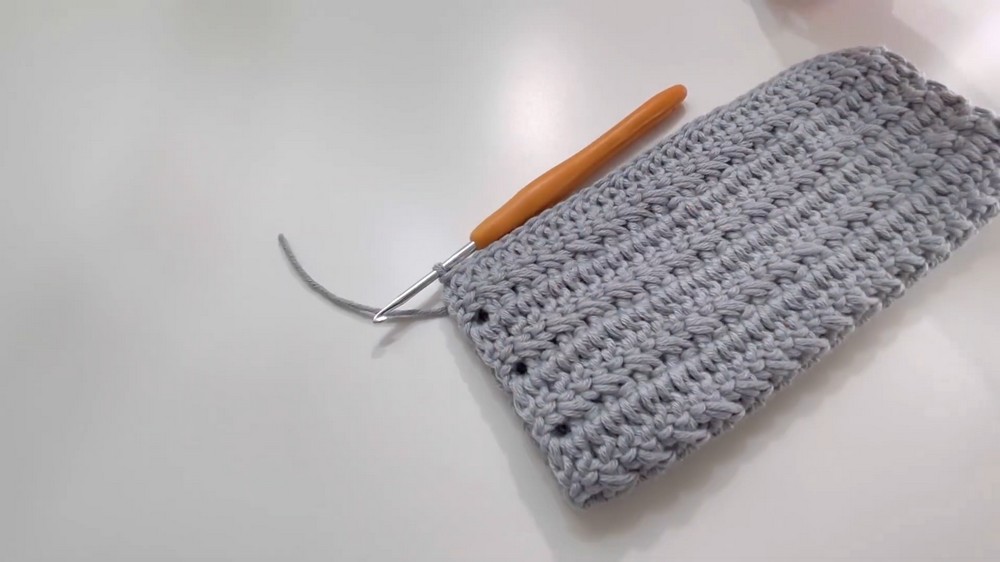
The finished seam should therefore have three sections: 12 joined stitches → 10-stitch thumb opening → 12 joined stitches
Thumb-Hole Check
Before fastening off, gently place the glove around your hand and check the thumb opening.
It should allow your thumb to move comfortably without making the palm seam feel tight. If the opening feels restrictive, you can adjust its size on the second glove by changing the number of stitches left unjoined.
Finish the Glove
When the final 12 stitches have been joined:
- Fasten off.
- Chain 1 to secure the yarn.
- Cut the yarn.
- Weave the loose end through the stitches with a tapestry needle.
- Trim any excess yarn.
Turn the glove right side out so the textured surface is visible.
Make the Second Glove
Repeat the same process for the second glove.
Try to keep the following details identical:
- Foundation stitch count
- Number of rows
- Crossed-stitch placement
- Number of joined stitches
- Size of the thumb opening
Making the first glove carefully gives you a useful reference for the second one, especially when placing the thumb hole.
Fit Check Before Finishing
Put the completed glove on your hand and check:
- Does the glove fit comfortably around your palm?
- Can your thumb move freely?
- Does the seam sit comfortably?
- Is the wrist opening snug without feeling tight?
- Is the glove long enough for your preference?
If the glove feels slightly snug, remember that the fabric can have some natural give, depending on the yarn and tension. If the opening itself is uncomfortable, adjust the thumb-hole section rather than simply pulling the seam tighter.
Optional Customization
Once you are comfortable with the basic construction, there are several simple ways to personalize the gloves.
Use a different yarn color for each glove, add a small crochet appliqué, or experiment with a contrasting color for the thumb-hole area. You can also make the gloves longer by adding more rows before assembly.
For a closer fit, reduce the foundation width. For a roomier glove, add stitches while keeping your tension consistent.
Final Thoughts
These fingerless gloves are a compact piece with a useful construction lesson built into the pattern. The rows themselves are simple, but the crossed hdc texture gives the finished fabric more visual interest than a plain dc panel.
The most important part is the final seam: keep the slip stitches loose and take a moment to check the thumb opening before fastening off. Once the first glove is assembled, the second one becomes much easier to repeat, and you can use the same basic construction to create different lengths, colors, and fits.
Video Tutorial