Free Crochet Star Ornament Pattern with Popcorn Stitches
Looking for a quick crochet star pattern? This three-round design features a textured popcorn center, three cheerful colors, and five pointed edges for a pretty handmade ornament.

A simple center becomes much more decorative as the rounds build outward. The first round creates ten evenly spaced double-crochet sections, the second adds raised popcorn stitches, and the final round turns those spaces into five clear star points.
The most important part is keeping track of how the spaces are used in each round. The popcorn stitches are worked in every chain-1 space, while the final round alternates between shaping a point and anchoring it with a slip stitch. Once that rhythm is established, the crochet star takes shape quickly.
Credit karma crochet
Materials Needed
- Crochet Hook: 2.5 mm
- Yarn: 3 colors
- Yarn needle for weaving in ends
- Scissors
You can choose any three colors you like. The original color examples are Orange for Round 1, Light Yellow for Round 2, and Pale Yellow for Round 3.
Abbreviations
- MR – Magic Ring
- ch – Chain
- sc – Single Crochet
- sl st – Slip Stitch
- dc – Double Crochet
- hdc – Half Double Crochet
- tr – Treble Crochet
- st(s) – Stitch(es)
Pattern Notes
This star is built in three distinct layers, and each round has a specific job.
- Round 1 creates 10 double crochets, separated by chain-1 spaces.
- Round 2 places 10 popcorn stitches, with chain-2 spaces between them.
- Round 3 uses those chain-2 spaces to create 5 star points.
Space Check: The chain spaces are especially important here. In Round 2, every popcorn is worked into a chain-1 space. In Round 3, the star points are worked in alternating chain-2 spaces, with a slip stitch anchoring the next space.
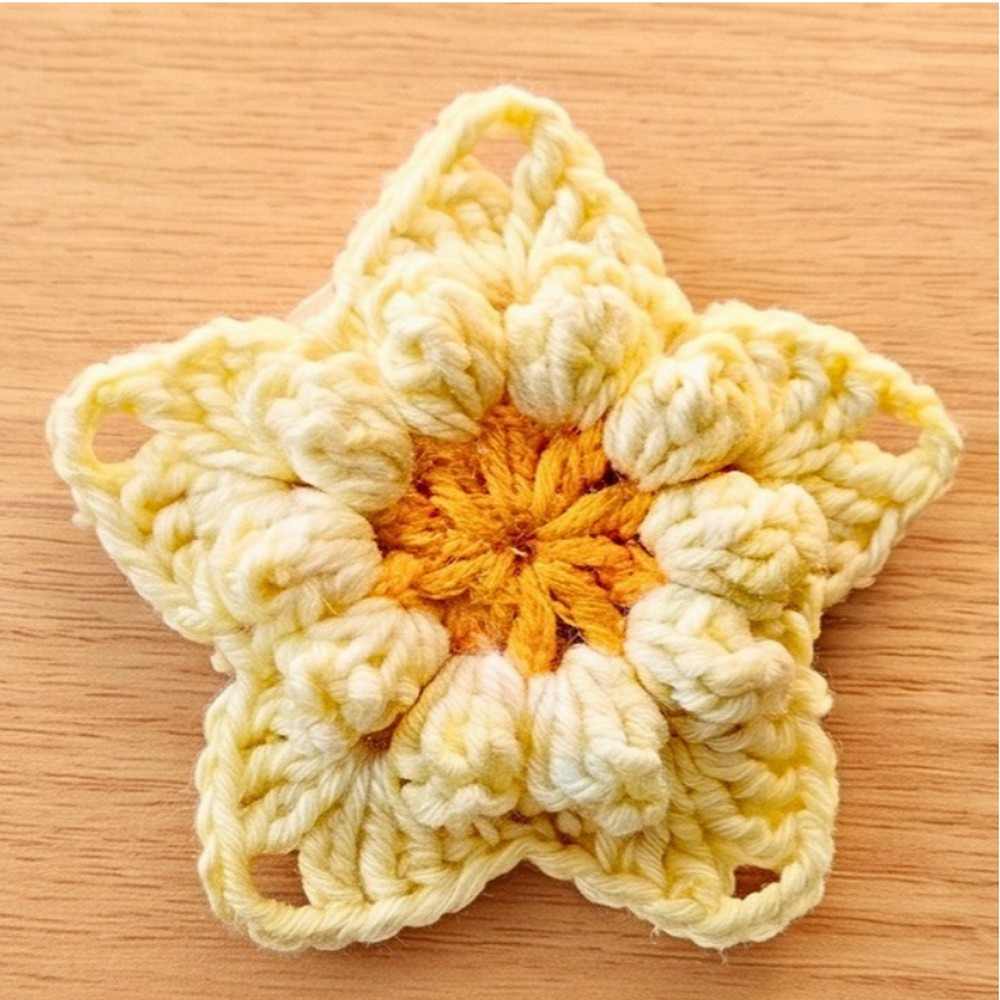
Crochet Star Pattern
Round 1: Center
Begin with your first yarn color. Orange is one example, but any color can be used.
Round 1: Start with a Magic Ring (MR), chain 1, and work 2 sc into the ring; this counts as the first double crochet (1 dc). Chain 1, then work (1 dc + 1 ch) into the ring 9 times. (10 dc total, separated by ch-1 spaces)
Slip stitch to the top of the starting stitch to join the round, then fasten off the yarn.
Center Check: Before moving on, you should have 10 dc with a chain-1 space between each one. These spaces are where all 10 popcorn stitches will be placed in the next round.

Round 2: Popcorn Stitches
Attach your second yarn color, such as Light Yellow, in any chain-1 space from Round 1.
Round 2: Work 5 dc into the same chain-1 space. Remove your hook from the active loop, insert it into the top of the first dc made, grab the active loop, and pull it through to form a popcorn stitch. Chain 2, then repeat this popcorn-stitch sequence in each chain-1 space around, working 5 dc into each space and chaining 2 between popcorns. (10 popcorn stitches)
Slip stitch to the first popcorn stitch to join the round, then fasten off.
Texture Check: Each chain-1 space from Round 1 should contain one popcorn stitch. When this round is complete, you should see 10 raised popcorns arranged around the center.

Round 3: Five Star Points
Attach your third yarn color, such as Pale Yellow, into any chain-2 space from Round 2.
This round is where the circular center changes into a five-point star. Each point uses one chain-2 space, while the next chain-2 space receives only a slip stitch.
Round 3: In the first chain-2 space, work 1 hdc + 2 dc + 1 tr, chain 3 to form the tip, then work 1 tr + 2 dc + 1 hdc in the same space; in the next chain-2 space, work 1 sl st to anchor the point.
Repeat this sequence around the star, creating one star point in one chain space and a slip stitch in the next. You will make exactly 5 star points.
Fasten off and weave in all your ends.
Point Check: Each star point should rise from its own chain-2 space, with the chain-3 section forming the tip. The slip stitch in the following space keeps the two sides of each point anchored before the next point begins.
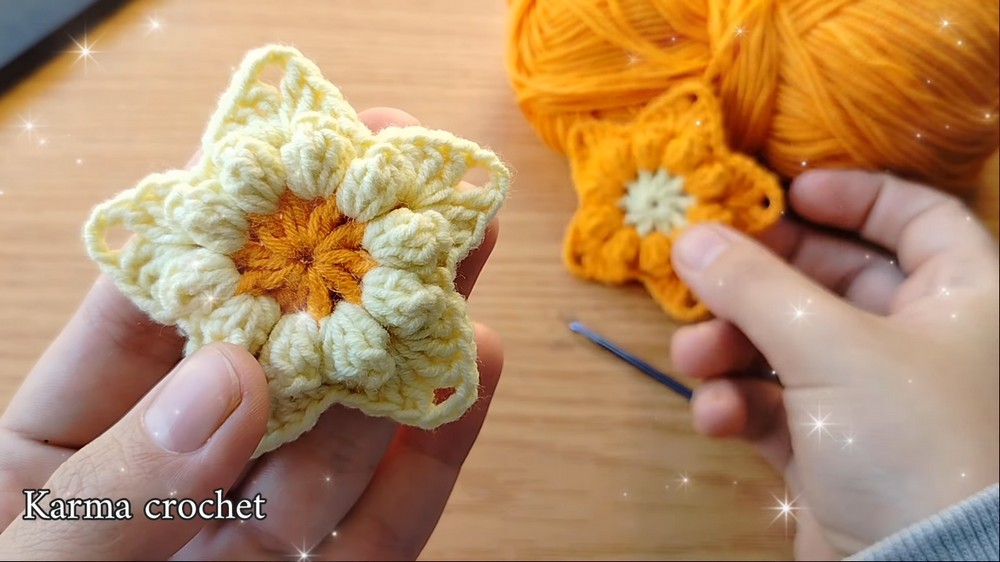
Finishing the Star
Once all five points are formed, take a moment to gently arrange the tips so they sit evenly around the center. Weave in all remaining yarn ends securely on the back.
The finished piece has a textured center surrounded by five pointed edges, giving you a small star that can work on its own as a decorative motif or be adapted for seasonal decorating.
Because the pattern is only three rounds, changing the three yarn colors is an easy way to give the same star a completely different look without changing its shape.