Crochet Stunning Crisscross Granny Squares with Unique Patterns
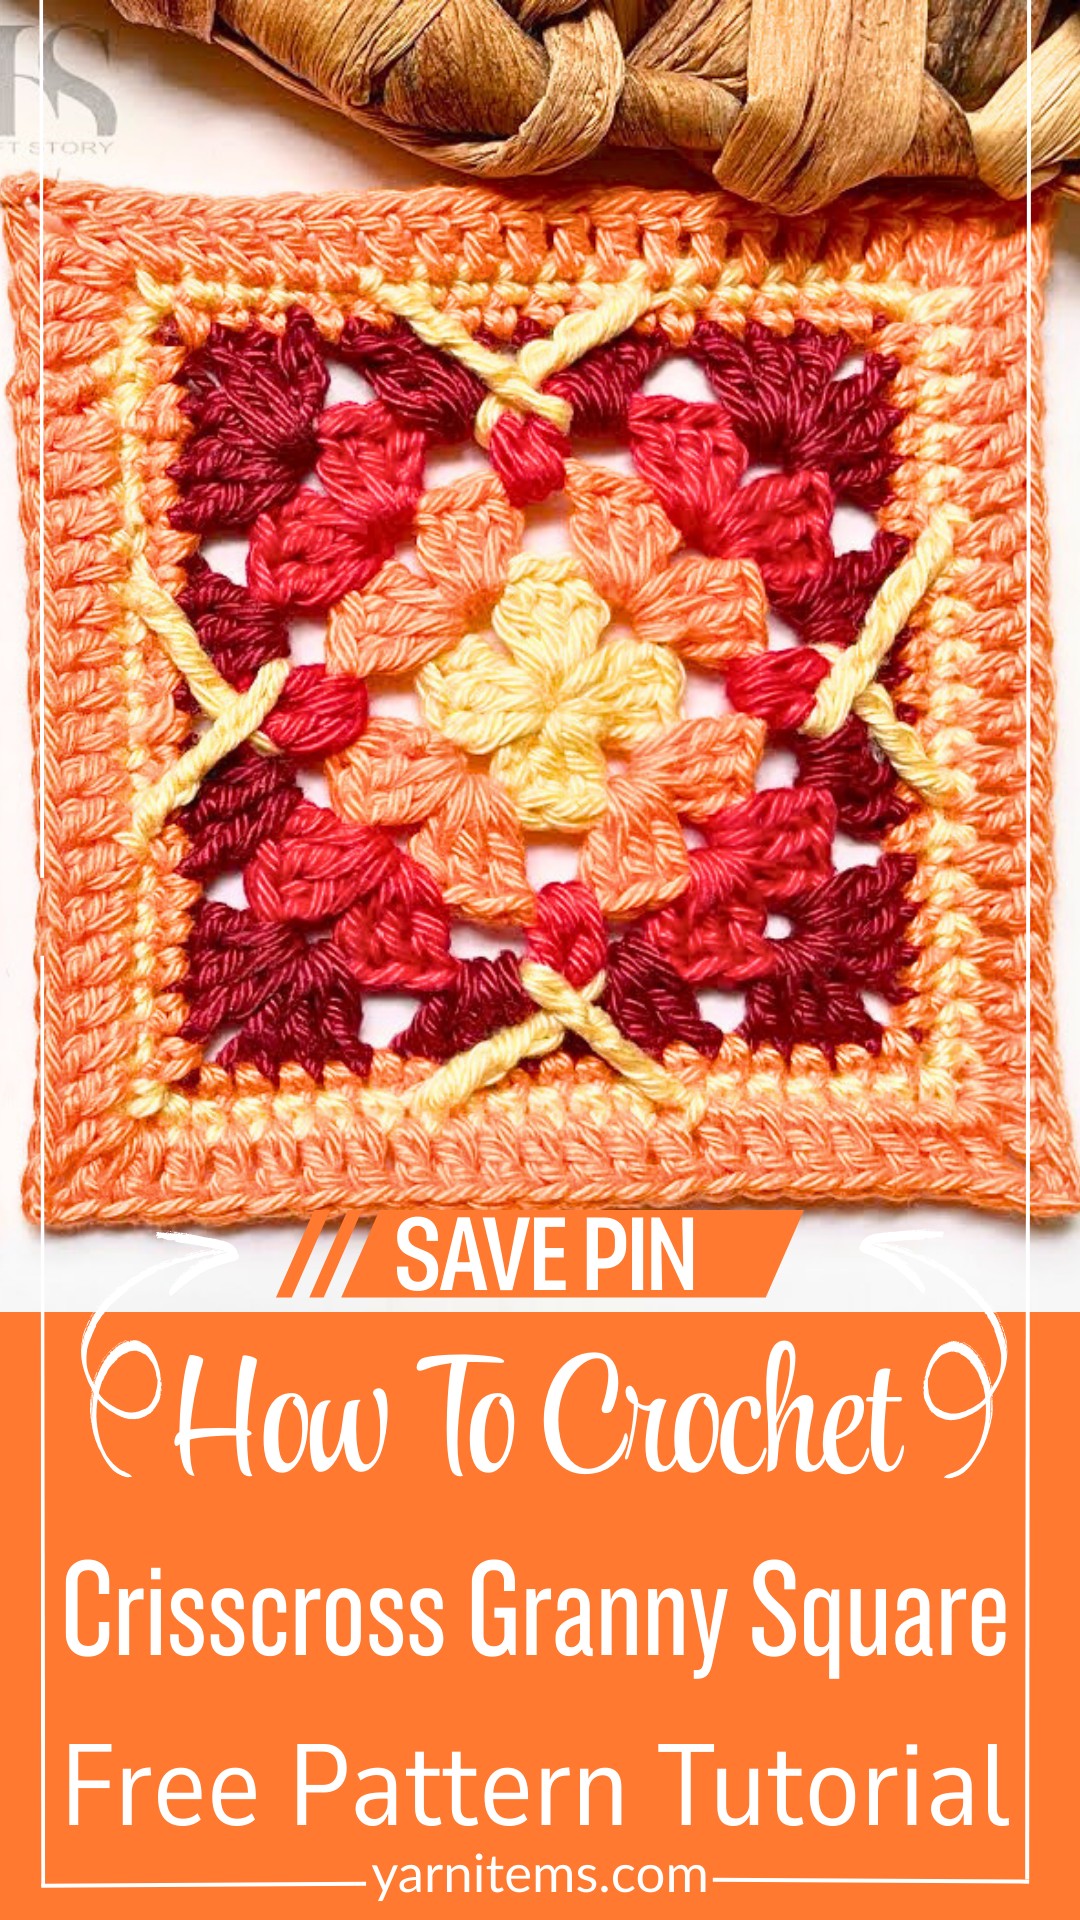
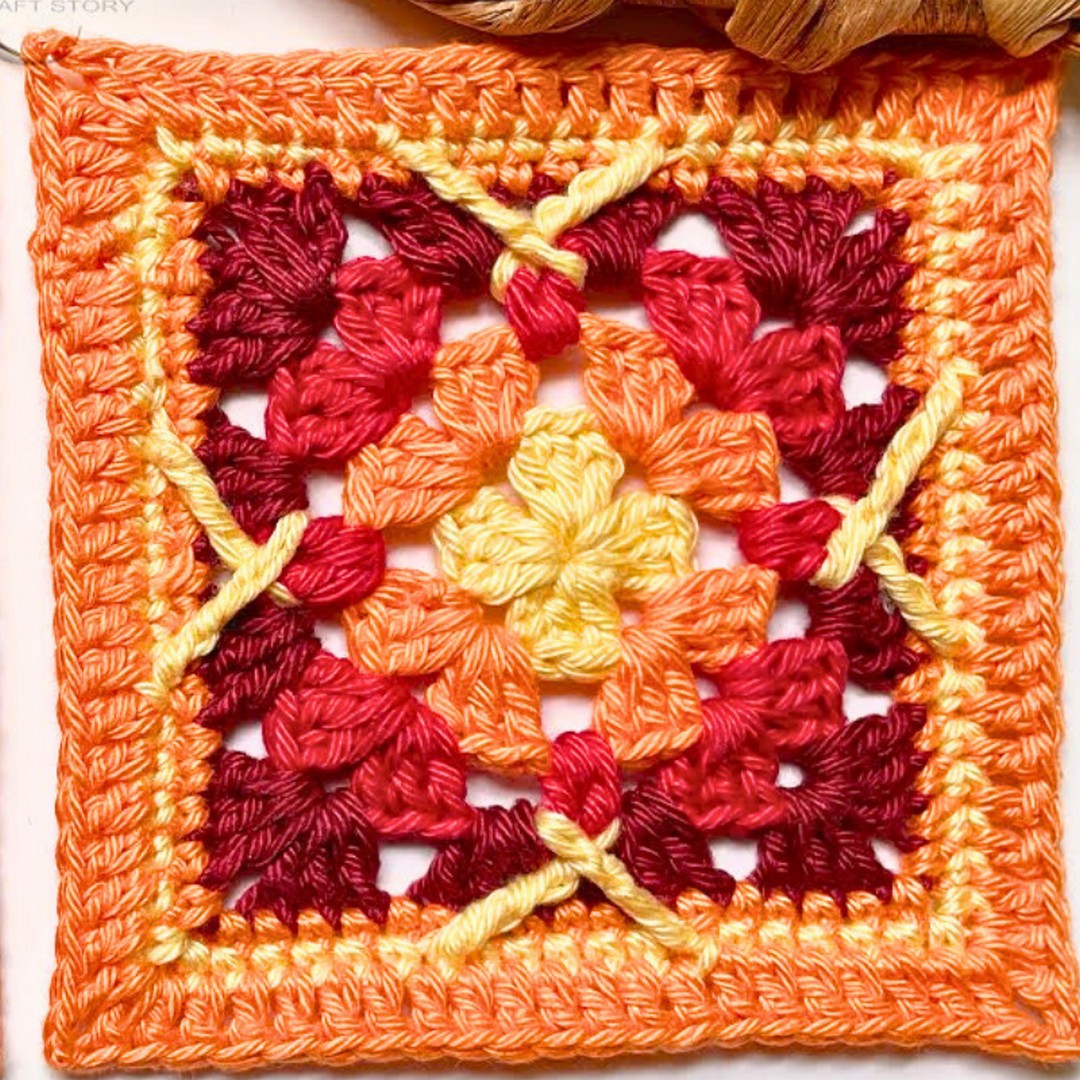
A striking crisscross texture gives this crochet granny square a fresh look that instantly stands out. The Crisscross Granny Square combines classic crochet charm with a woven-style effect that adds beautiful depth to every piece.
Its balanced design looks impressive while remaining neat and easy to appreciate. Rich color combinations make each finished piece feel lively, modern, and full of handmade character.
Bold texture and endless styling options make this square a wonderful addition to many crochet ideas. It works beautifully for blankets, cushion covers, bags, coasters, and decorative items that deserve a unique touch.
The repeating stitch pattern is approachable for beginners while offering plenty of creative freedom for experienced crocheters. Every finished piece brings warmth, color, and timeless style into your handmade collection.
Credit Beyond Diary
Materials & Tools Needed
- Yarn: 4 shades of cotton yarn (light yellow, orange, light red, dark red).
- You can use any yarn type with an appropriately sized hook for the yarn.
- Hook: 2.5mm crochet hook.
- Scissors: For cutting thread.
- Tapestry needle: For weaving in ends.
Finished Size & Customization Ideas
- Targeted size: The standard size will depend on the number of rounds completed.
- Customization:
- Use various shades of yarn for personalization.
- To make larger granny squares, repeat the rounds while increasing stitch counts in chain spaces.
Pattern Notes
- Joining method: Slip stitch joins are used at the end of each round.
- Chain spaces:
- Corners: Always chain 2 for corner spaces to maintain the square’s structure.
- Side chain spaces: Where applicable, chain 1 between stitch groups.
- Crisscross effect: Achieved by incorporating front post double treble crochets starting from Round 6.
Pattern Abbreviations & Terminology
- ch: Chain
- sl st: Slip stitch
- dc: Double crochet
- sc: Single crochet
- fpdtr: Front Post Double Treble Crochet (explained in detail below)
- Terminology follows standard US crochet terms.
Tips Before You Start
- Make sure your chain stitches are loose for a neat, flexible center.
- Block your finished square for straight edges and an even finished look.
- Use stitch markers at the corners for better tracking on larger squares.
- Ensure even tension when working double treble crochet stitches to avoid tight crisscross stitches.
Step-by-Step Detailed Crochet Instructions
Round 1: Foundation Ring
- Using light yellow yarn: Make a slip knot and ch 5.
- Form a ring by inserting the hook into the first chain and making a sl st.
- Into the ring:
- ch 3 (counts as 1st dc), then work 2 more dc (total 3 dc).
- ch 2 (corner created).
- Work 3 dc into the ring.
- Repeat ch 2, 3 dc two more times.
- At the end of the round, you should have 4 groups of 3 dc separated by ch 2.
- Join: Insert hook into the 3rd chain of the starting ch 3, and make a sl st.
- Cut yarn and fasten off.
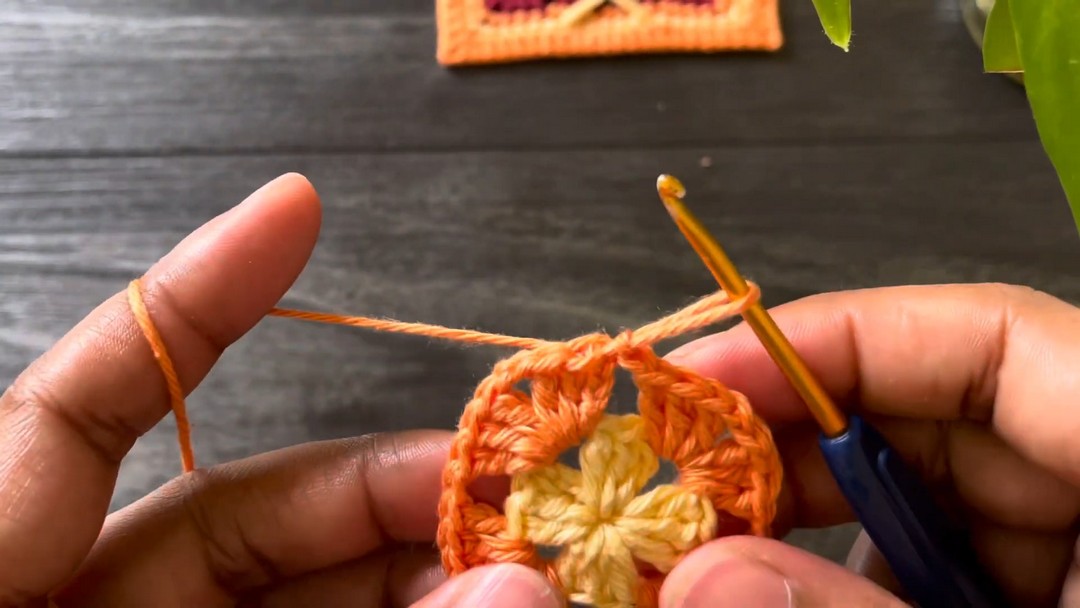
Round 2: Adding Orange Yarn
- Orange yarn: Attach yarn with a sl st to one of the corner spaces.
- Into the corner:
- ch 3 (counts as 1st dc), then 2 dc (total 3 dc).
- ch 2, 3 dc into the same corner space.
- Next corner:
- ch 1, 3 dc, ch 2, 3 dc into the corner.
- Repeat for all corners. Between corners, always work ch 1.
- Join: Insert hook into the 3rd chain of starting ch 3, and make a sl st.
- Cut yarn and fasten off.
Round 3: Adding Light Red Yarn
- Light red yarn: Attach yarn with a sl st to one of the corner spaces.
- Into the corner:
- ch 3 (counts as 1st dc), then 2 dc (total 3 dc).
- ch 2, 3 dc into the same corner space.
- Side spaces:
- ch 1, work 3 dc into the side chain-1 space.
- Repeat ch 1, and work into the next corner.
- Corners: Work 3 dc, ch 2, 3 dc. Follow the same instructions for all corners.
- At the end of the round, join with a sl st and fasten off.
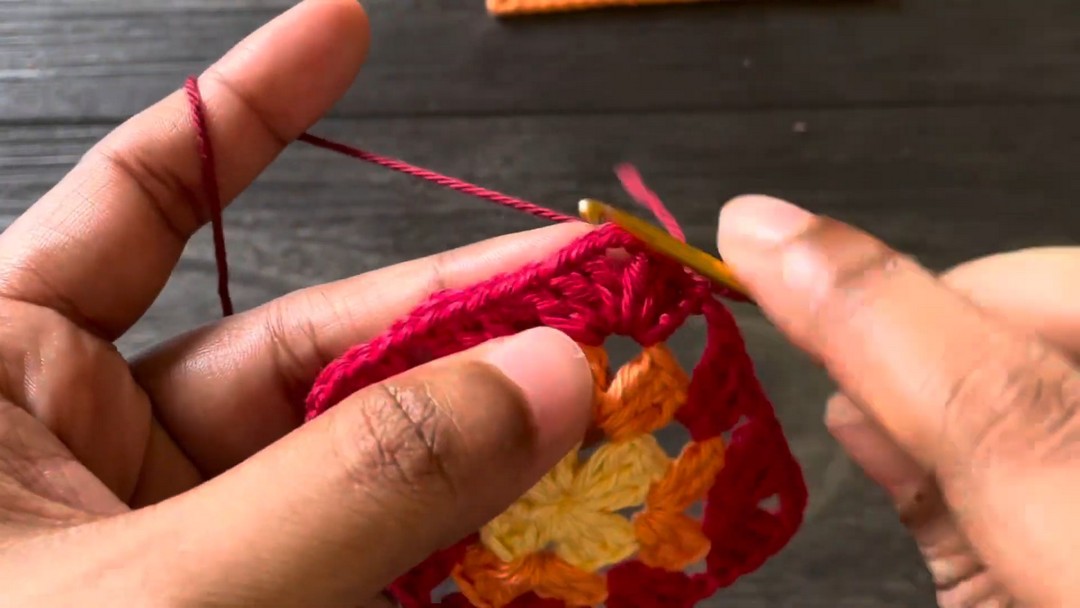
Round 4: Adding Dark Red Yarn
- Dark red yarn: Attach yarn with a sl st to one corner space.
- Repeat the instructions for corners and side spaces from Round 3.
- Ensure you finish the round with a sl st at the starting chain.
- Cut yarn and fasten off.
Round 5: Single Crochet Round (Orange Yarn)
- Orange yarn: Attach yarn into the top of any dc, ch 1, and make a sc.
- Work sc into each stitch along the sides, including chain spaces.
- Corners: Work 1 sc, ch 2, and 1 sc into each corner.
- Continue around the square, ensuring consistent sc in chain spaces.
- Join with a sl st, and fasten off.
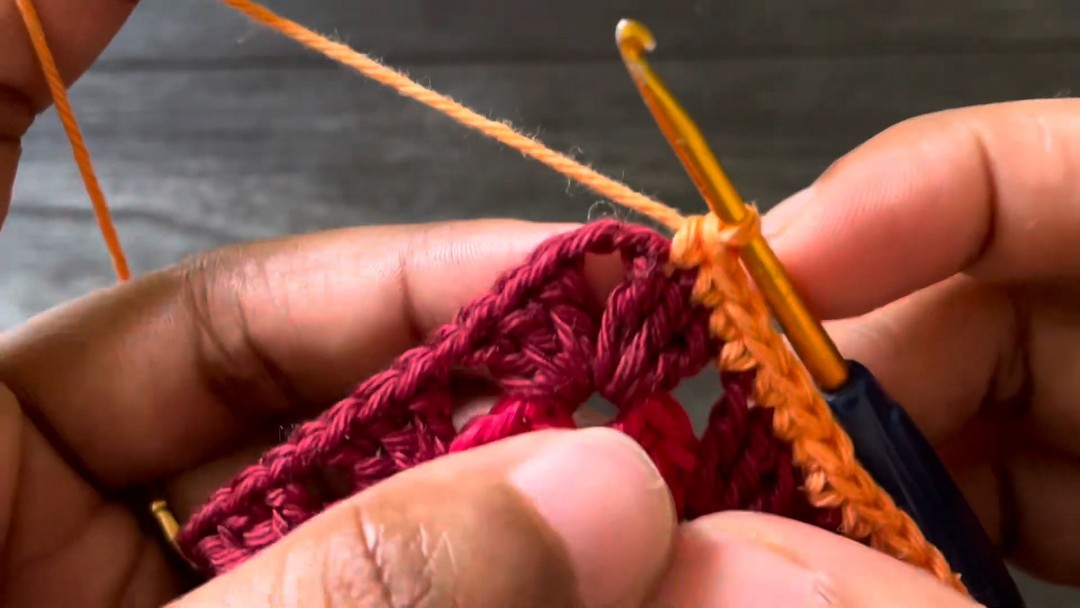
Round 6: Crisscross Effect (Light Yellow Yarn)
- Attach light yellow yarn: Start in the first stitch of any side.
- Work 5 consecutive sc, ending just before a chain space.
- Double Treble Crochet (DTR):
- Yarn over 3 times, insert hook into the front post of the corresponding dc from Round 3, and pull up a loop.
- Complete DTR by pulling through 2 loops at a time until only 1 loop remains.
- Skip 1 chain space, work 5 consecutive sc into the next stitches.
- Repeat crisscross pattern across the round until the end.
- Corners: Work 1 sc, ch 2, and 1 sc in corner spaces.
Final Round: Double Crochet Border (Orange Yarn)
- Attach orange yarn, then work dc into each stitch.
- Corners: Work 1 dc, ch 2, and 1 dc into each corner space.
- Continue around, join with a sl st, ch 1, and fasten off.
Final Assembly
- Blocking:
- Wet block or steam block to shape edges and flatten the square.
- This improves consistency and appearance between squares.
Conclusion
The Crisscross Granny Square pattern combines traditional granny square techniques with crisscross textures for visual interest. Customize with colors and sizes to suit your project needs. Be sure to block the square for best results! Happy crocheting!