Granny Square Pullover Crochet Pattern for Cozy Outfit
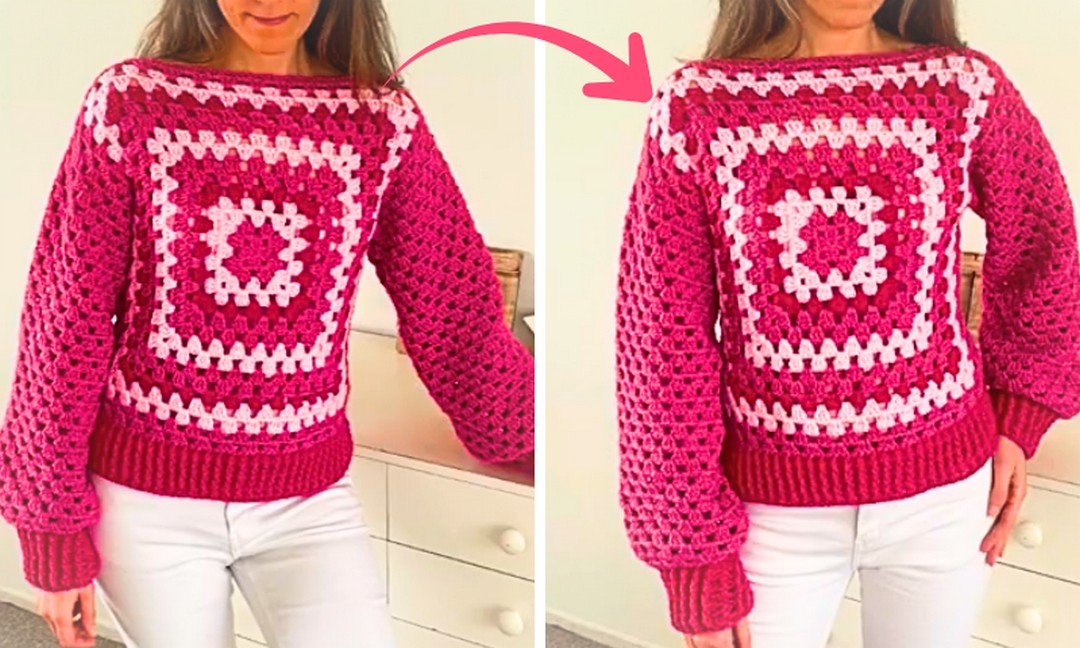
A timeless design comes to life with this colorful crochet granny square pullover. Every square adds a unique touch, creating a piece that feels both classic and refreshingly modern.
The relaxed shape makes it comfortable for everyday wear while letting the vibrant crochet pattern stand out beautifully. It is an eye-catching item that brings warmth, personality, and handmade charm to any wardrobe.
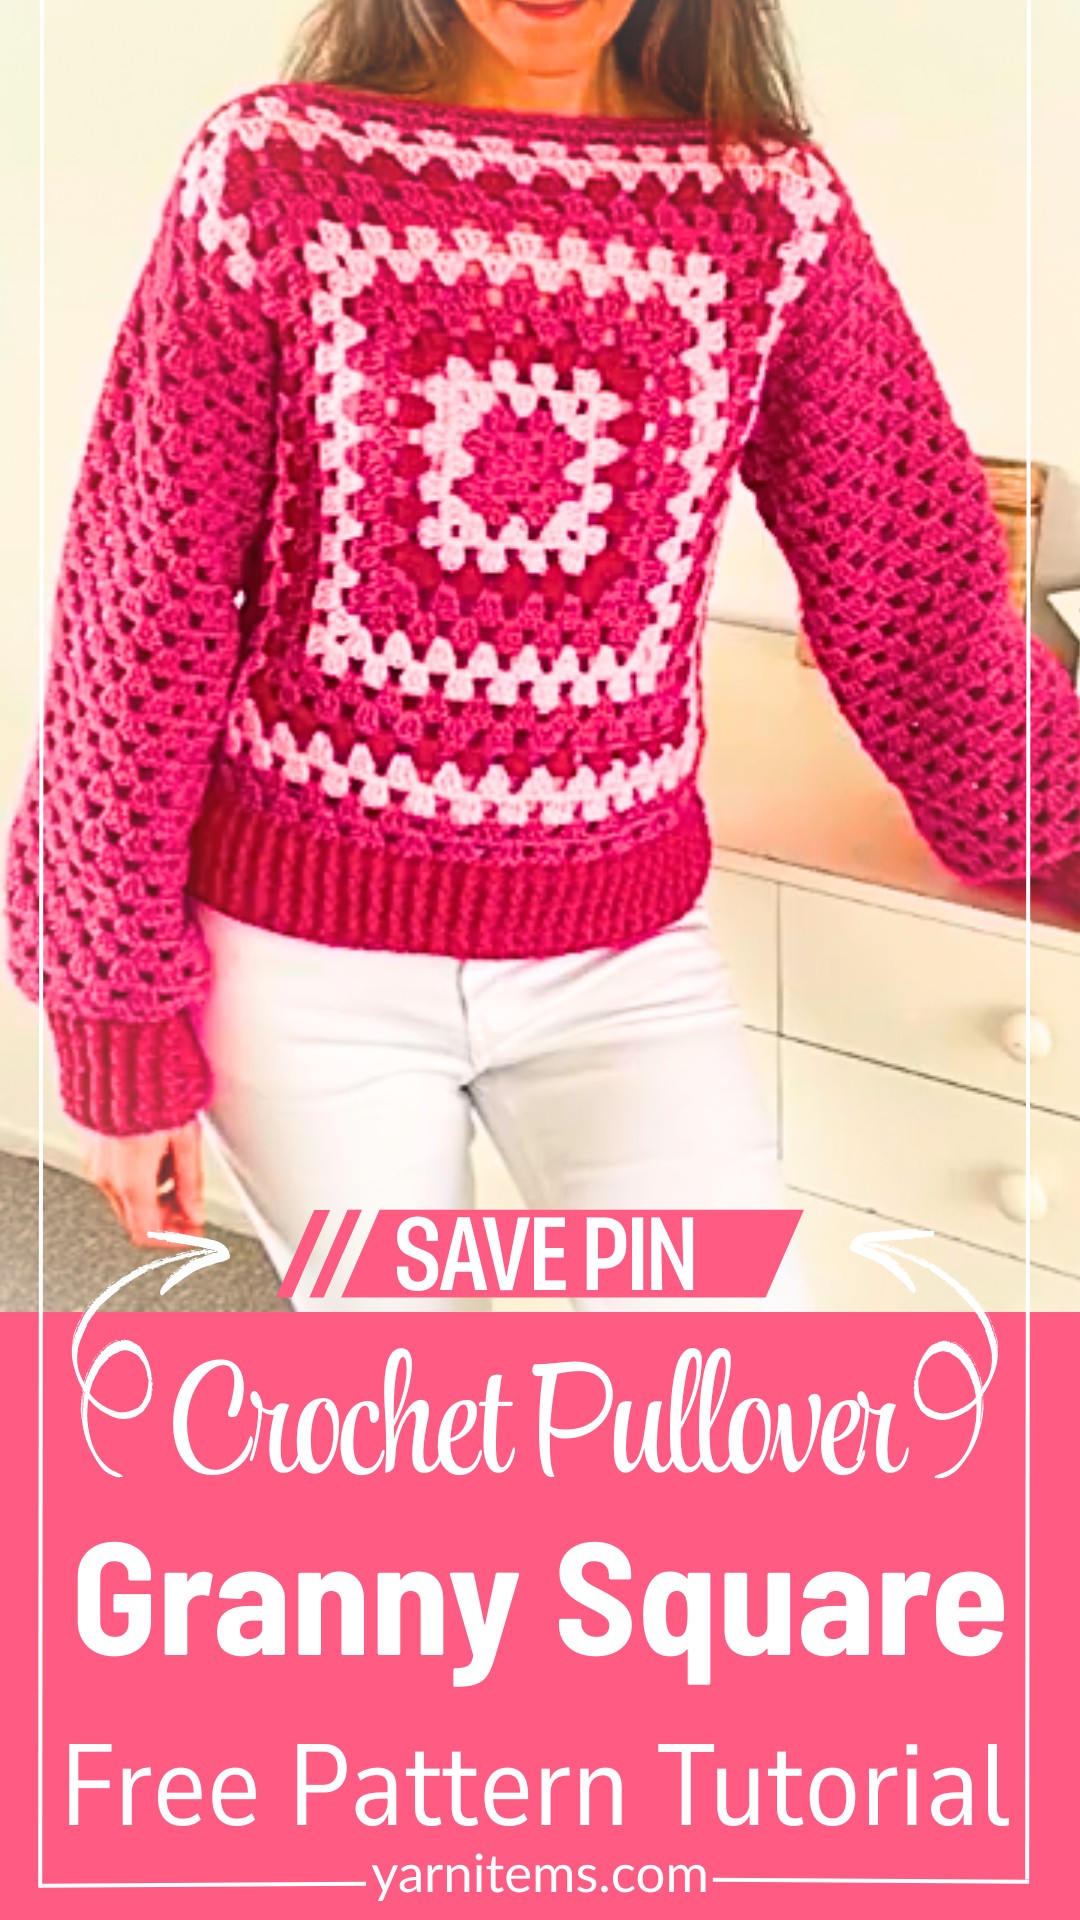
Bold colors and simple crochet stitches blend to create something truly special. This cozy piece can be customized with your favorite shades, making every version feel personal and unique.
It pairs effortlessly with jeans, skirts, or layered outfits for any casual occasion. The finished item offers lasting comfort while showcasing the beauty of traditional crochet granny squares in a stylish new way.
Credit Crochet & Yara
Materials & Tools Needed
- Yarn
- Acrylic light medium yarn
- Main Color (Dark Pink/Magenta): 3 skeins
- Ribbing and Extra Color (Hot Pink): 1 skein
- Extra Accent Color (Light Pink): 0.5 skein
- Acrylic light medium yarn
- Crochet Hook: 5.0 mm
- Notions:
- Scissors
- Darning needle
- Stitch markers
Finished Size & Customization Ideas
- Sample Size:
- Size Small — 16 rows total per main square panel, measuring 47 cm x 47 cm.
- Customization:
- You can adjust the pullover to fit any size by adding or subtracting rounds to the main granny square panels until the width matches your chest/shoulder fit.
- Custom colors can be arranged in any stripe or gradient pattern.
Pattern Notes
- Turning Work:
- After completing each row/round, turn your work [02:40].
- This helps prevent twisting or spiraling of the granny square.
- Color Placement:
- Always keep all yarn color transition tails on the same side (the back/wrong side) of the work [12:54].
Pattern Abbreviations & Terminology (US Terms)
-
MR: Magic Ring
-
Ch: Chain
-
Dc: Double Crochet
-
Sc: Single Crochet
-
Sl St: Slip Stitch
-
FpDc: Front Post Double Crochet
-
BpDc: Back Post Double Crochet
-
Sp: Space
Tips Before Starting
- Manage Yarn Tails:
- Always weave in or hide your yarn tails on the wrong side of your panels before assembling them.
- Use Stitch Markers:
- When joining panels, use stitch markers to accurately mark:
- Shoulder openings
- Neck openings
- Sleeve openings
- When joining panels, use stitch markers to accurately mark:
Crochet Sweater Step-By-Step Instructions
1. Main Body Panels (Make 2):
Round 1 (Main Color)
- Start with Magic Ring (MR).
- Ch 3 (counts as 1 Dc), work 2 Dc into the ring, then Ch 2.
- Repeat step 2 three more times (3 Dc, Ch 2 into the ring).
- Pull the MR tail to close the ring tightly. Sl St to the top of the initial Ch 3 to join the round.
Round 2
- Ch 3, then turn the work.
- Into the same corner Ch-2 space, work (2 Dc, Ch 2, 3 Dc), then Ch 1.
- In each of the other three corners:
- Work (3 Dc, Ch 2, 3 Dc) and Ch 1.
- Close round: Sl St to the top of Ch 3, cut the yarn, and secure the end.
Round 3 (Change to Light Pink)
- Turn the work. Attach new yarn to a corner space using a slip knot.
- In the corner space:
- Ch 3, 2 Dc, Ch 1.
- In the side Ch-1 space, work 3 Dc, Ch 1.
- In each corner, work (3 Dc, Ch 2, 3 Dc), followed by Ch 1.
- Continue around the square:
- Work 3 Dc, Ch 1 in all side spaces.
- Repeat (3 Dc, Ch 2, 3 Dc) in all corners.
- At the starting corner: Finish with 3 Dc, Ch 2, then Sl St to join. Cut yarn.
Round 4
- Turn the work and attach yarn in a corner space.
- In the corner space:
- Ch 3, 2 Dc, Ch 1.
- Work 3 Dc, Ch 1 in each side space across.
- In each corner:
- Work another (3 Dc, Ch 2, 3 Dc), Ch 1.
- At the last corner: Finish with 3 Dc, Ch 2, then Sl St to join. Cut yarn.
Rounds 5 to 16
- Continue the traditional granny square expansion pattern.
- Alternate or change colors as desired.
- Turn your work at the end of each row.
- For size small: Stop at 16 rows (~47 cm).
- Repeat these steps to create a second identical body panel.
2. Shoulder & Neckline Seaming
- Lay the two panels flat with the wrong sides facing up.
- Place stitch markers along the top edge to mark the shoulder seams, leaving an opening (~21 cm) in the center for the neckline.
- To join the shoulders:
- Attach yarn at the outer edge (shoulder corner).
- Use Sc stitches to seam the front and back panels vertically until reaching the neck marker.
- Ch 1 to secure, cut yarn, and weave in the ends.
- Repeat for the other shoulder.
3. Sleeves (Make 2)
Main Sleeve Body
- Lay the body flat and mark the sleeve openings on each side with stitch markers.
- Attach yarn at the underarm marker.
- Row 1:
- Ch 3, work 2 Dc in the same space, Ch 1.
- Work (3 Dc, Ch 1) in each space along the sleeve opening until reaching the opposite marker.
- Row 2:
- Ch 4, turn the work.
- Work (3 Dc, Ch 1) in each space across.
- At the row’s end, work 1 Dc into the top of the Ch 3.
- Row 3:
- Ch 3, turn the work.
- In the first space: Work 2 Dc and Ch 1.
- Continue (3 Dc, Ch 1) across all side spaces, finishing with 3 Dc in the last space.
Continue repeating Rows 2–3 to desired sleeve length (sample uses 30 rows).
Sleeve Decrease Base – Begin Decreases:
- Decrease Row 1:
- Ch 3, turn.
- Work 2 Dc in the same space.
- Work 3 Dc in each space across (omit Ch-1 spaces between groups to gather the sleeve cuff).
- Decrease Row 2:
- Ch 3, turn.
- Work 2 Dc in every space (no Ch-1 spaces).
- Finish the row by working 1 Dc into the top of the Ch 3.
- Switch to cuff ribbing color.
Sleeve Ribbing (Cuff)
- Row 1 (Base):
- Ch 3, turn.
- Dc in each stitch across.
- Row 2 (Ribbing):
- Ch 3, turn.
- Alternate 1 FpDc and 1 BpDc across the row.
- Rows 3–8:
- Repeat Row 2 for a total of 8 rows of ribbing.
- Cut a long tail (~80 cm) for seaming later.
Final Assembly
Folding & Side Seams
- Fold the sweater with the right sides together, along the shoulder seams.
- Use your hook (or a darning needle) to join:
- Sleeve cuff sides.
- Sleeve seams.
- Body side seams.
Bottom Hem Ribbing
- Attach yarn at the bottom edge of the sweater body.
- Work Dc stitches across for Row 1.
- For Rows 2–8:
- Alternate FpDc and BpDc for ribbing.
- Fasten off, and complete any remaining seams.