How to Crochet a Heart Granny Square Mini Bag
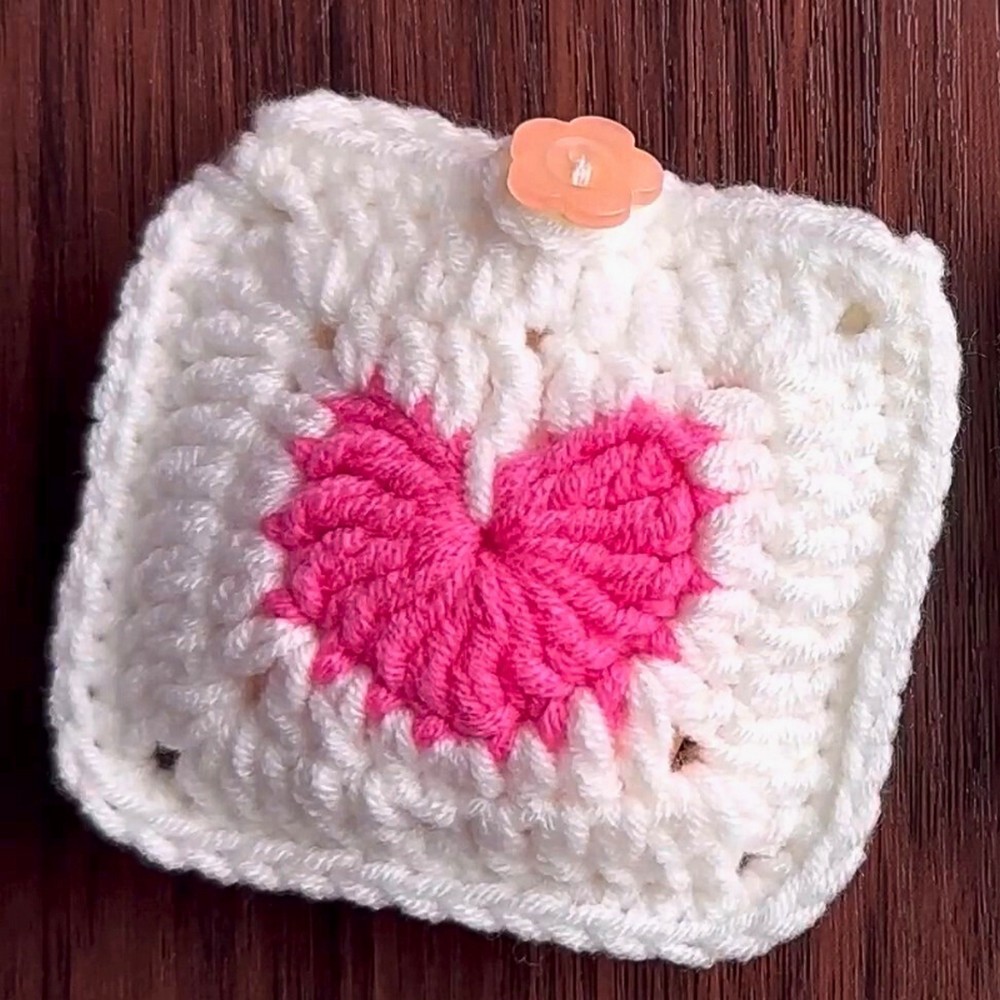
A tiny crochet bag with a heart-filled design instantly stands out. The Heart Granny Square Mini Bag combines a classic crochet pattern with a sweet heart motif that adds warmth and personality to every stitch.
Its compact size makes it perfect for carrying everyday essentials without feeling bulky. This handmade piece brings together beauty, practicality, and timeless granny square charm in one delightful design.

Beautiful details make even the smallest accessories feel special. This mini crochet bag is ideal for holding keys, a wallet, or other small essentials while adding a handmade touch to your outfit.
You can easily customize it with your favorite color combinations to create a piece that reflects your personal style. Whether you carry it yourself or gift it to someone special, this charming crochet item is both stylish and useful for everyday use.
Credit Vicky Handmade
Materials & Tools Needed
- Yarn:
- 4-ply milk cotton yarn, in two colors:
- Color A: Pink (heart center)
- Color B: White (granny square border & assembly)
- 4-ply milk cotton yarn, in two colors:
- Crochet Hook:
- Size 3.5 mm (US E-4)
- Notions & Accessories:
- Stitch markers (recommended: 4)
- Tapestry/yarn needle
- Scissors
- Sewing thread & needle
- Decorative flower button (or standard button)
Finished Size & Customization Ideas
Finished Size
- Approx. 8 cm x 8 cm (3.1″ x 3.1″)
- Perfect for small items like AirPods, earphone cases, lip balms, coins, or trinkets
Customization Ideas
- Color Combinations:
- Red & White for Valentine’s Day
- Pastel Pink & Cream
- Lilac & White
- Bag Strap Options:
- Add a keychain ring or lobster clasp.
- Crochet a simple chain strap (50–100 chains) for a mini crossbody/bag charm.
- Liners & Closures:
- Add a fabric lining for extra durability.
- Replace button loop closure with a small magnetic snap for a modern finish.
Pattern Note
Construction
- The pouch is made up of two identical heart granny squares worked in the round.
- The heart center uses Color A, then it’s squared off with Color B.
Assembly
- Join the two squares:
- Crochet along three sides using single crochet stitches.
- Leave the top open.
- Button Closure:
- Add a chain loop to the back top edge to secure it around a button sewn on the front.
Pattern Abbreviations & Terminology (US Terms)
- ch: chain
- sc: single crochet
- hdc: half double crochet
- dc: double crochet
- tr: treble (triple) crochet
- sl st: slip stitch
- st(s): stitch(es)
- MR: magic ring / magic circle
Tips Before You Start
- Magic Ring Closure:
Pull the tail tightly after Round 1 and weave it in securely with a tapestry needle to keep the center hole from loosening over time. - Stitch Markers:
Marking key stitches after Round 1 will make it effortless to place the corner stitches in Round 2.
Step-by-Step Detailed Crochet Instructions for Heart Granny Square
Round 1: Crochet the Heart Center (Color A – Pink)
- Start Magic Ring:
- Form a magic ring with Color A.
- First Side of Heart:
- Chain 3 (counts as a stitch/space in the foundation).
- Work 3 treble crochets (tr) into the magic ring.
- Work 3 double crochets (dc) into the magic ring.
- Heart Point (Bottom):
- Work 1 treble crochet (tr) into the magic ring.
- Second Side of Heart:
- Work 3 double crochets (dc) into the magic ring.
- Work 3 treble crochets (tr) into the magic ring.
- Close the Heart:
- Chain 3.
- Slip stitch into the magic ring, chain 1, pull the loop through, and cut the yarn, leaving a tail.
- Finishing Round 1:
- Pull the magic ring tail firmly to close the center hole completely.
- Knot both yarn tails securely at the back of the work.
- Weave in the ends thoroughly using a tapestry needle. Cut any excess yarn.
Marking Corner Stitches for Round 2
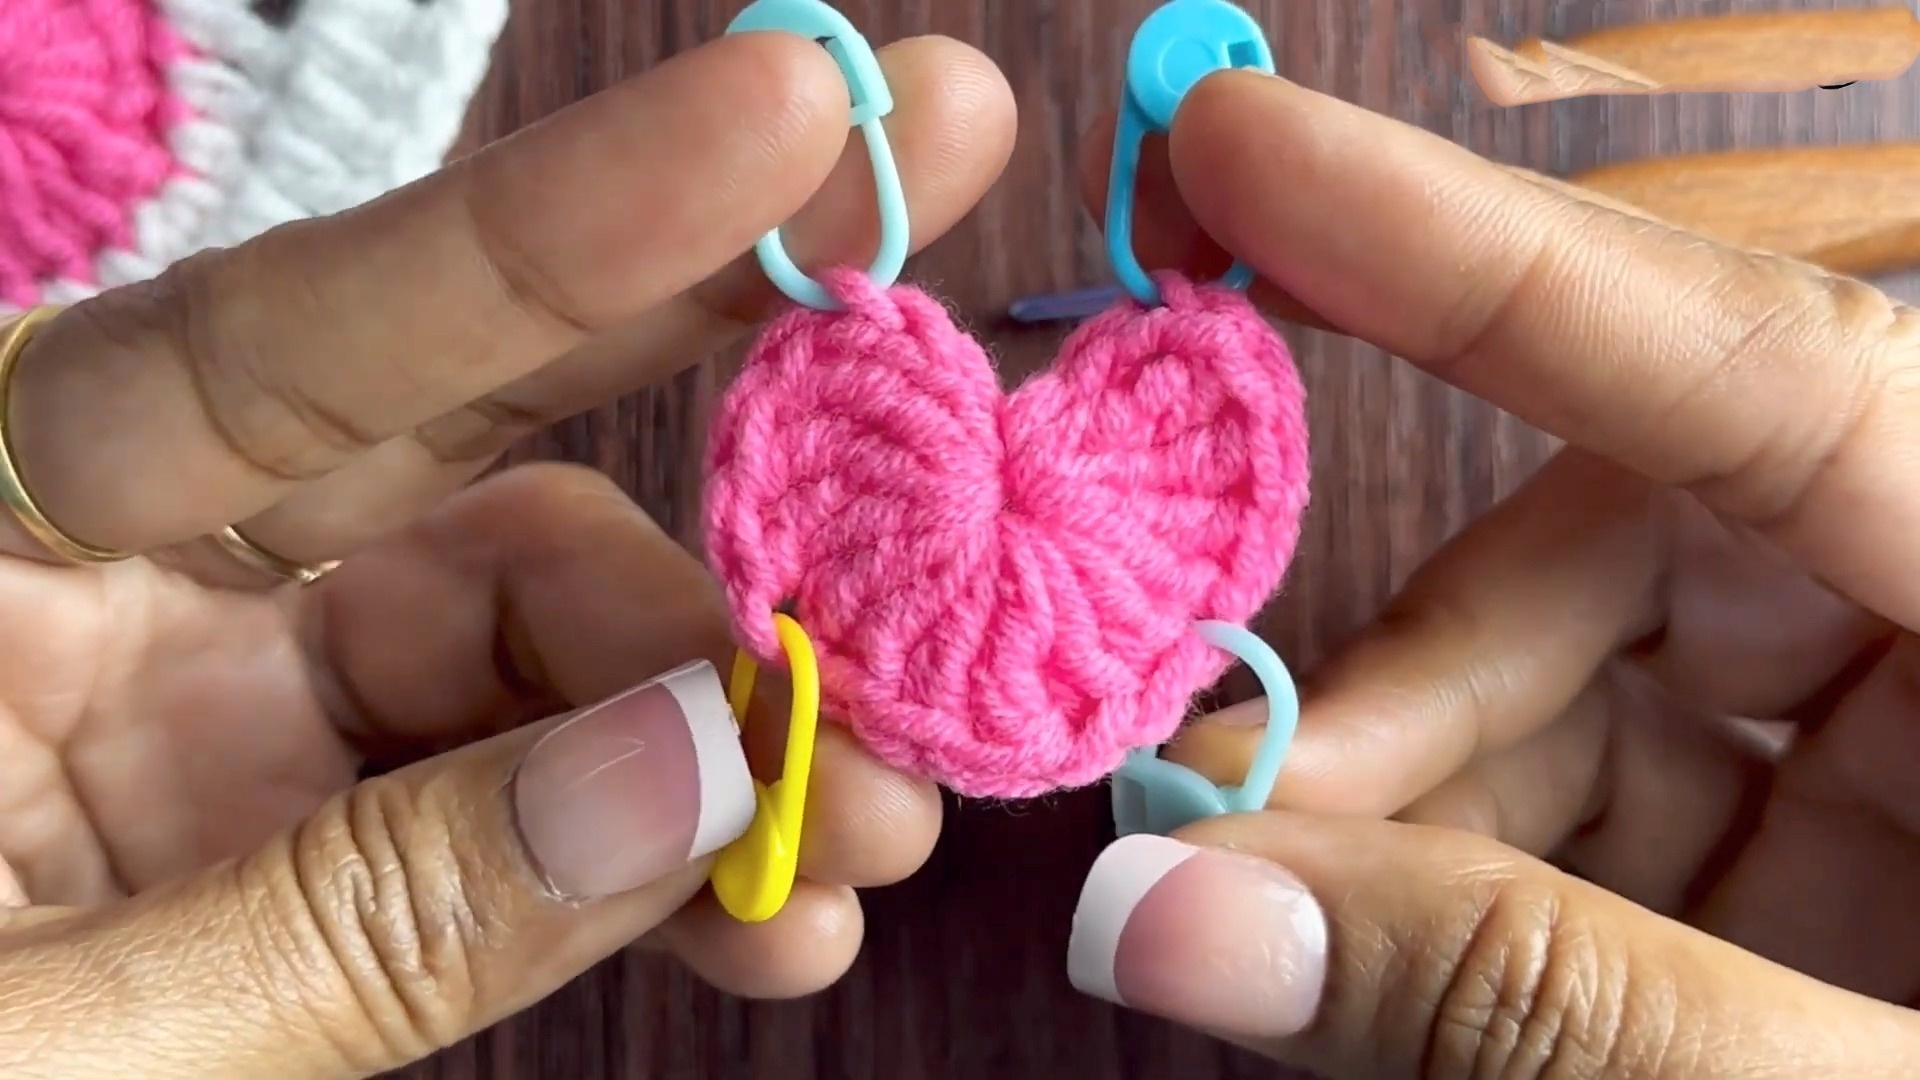
- Place stitch markers into Round 1 to identify where corner increases will go.
- Marker 1 (Right Corner): Count 3 stitches to the right of the center top dip; place the marker in the 3rd stitch.
- Marker 2 (Bottom Point): Place the marker in the bottom treble stitch.
- Marker 3 (Left Corner): Count 3 stitches to the left of the bottom point; place the marker in the 3rd stitch.
- Marker 4 (Top Left Arch): Place the marker in the stitch adjacent to the center top dip.
Round 2: Squaring the Heart (Color B – White)
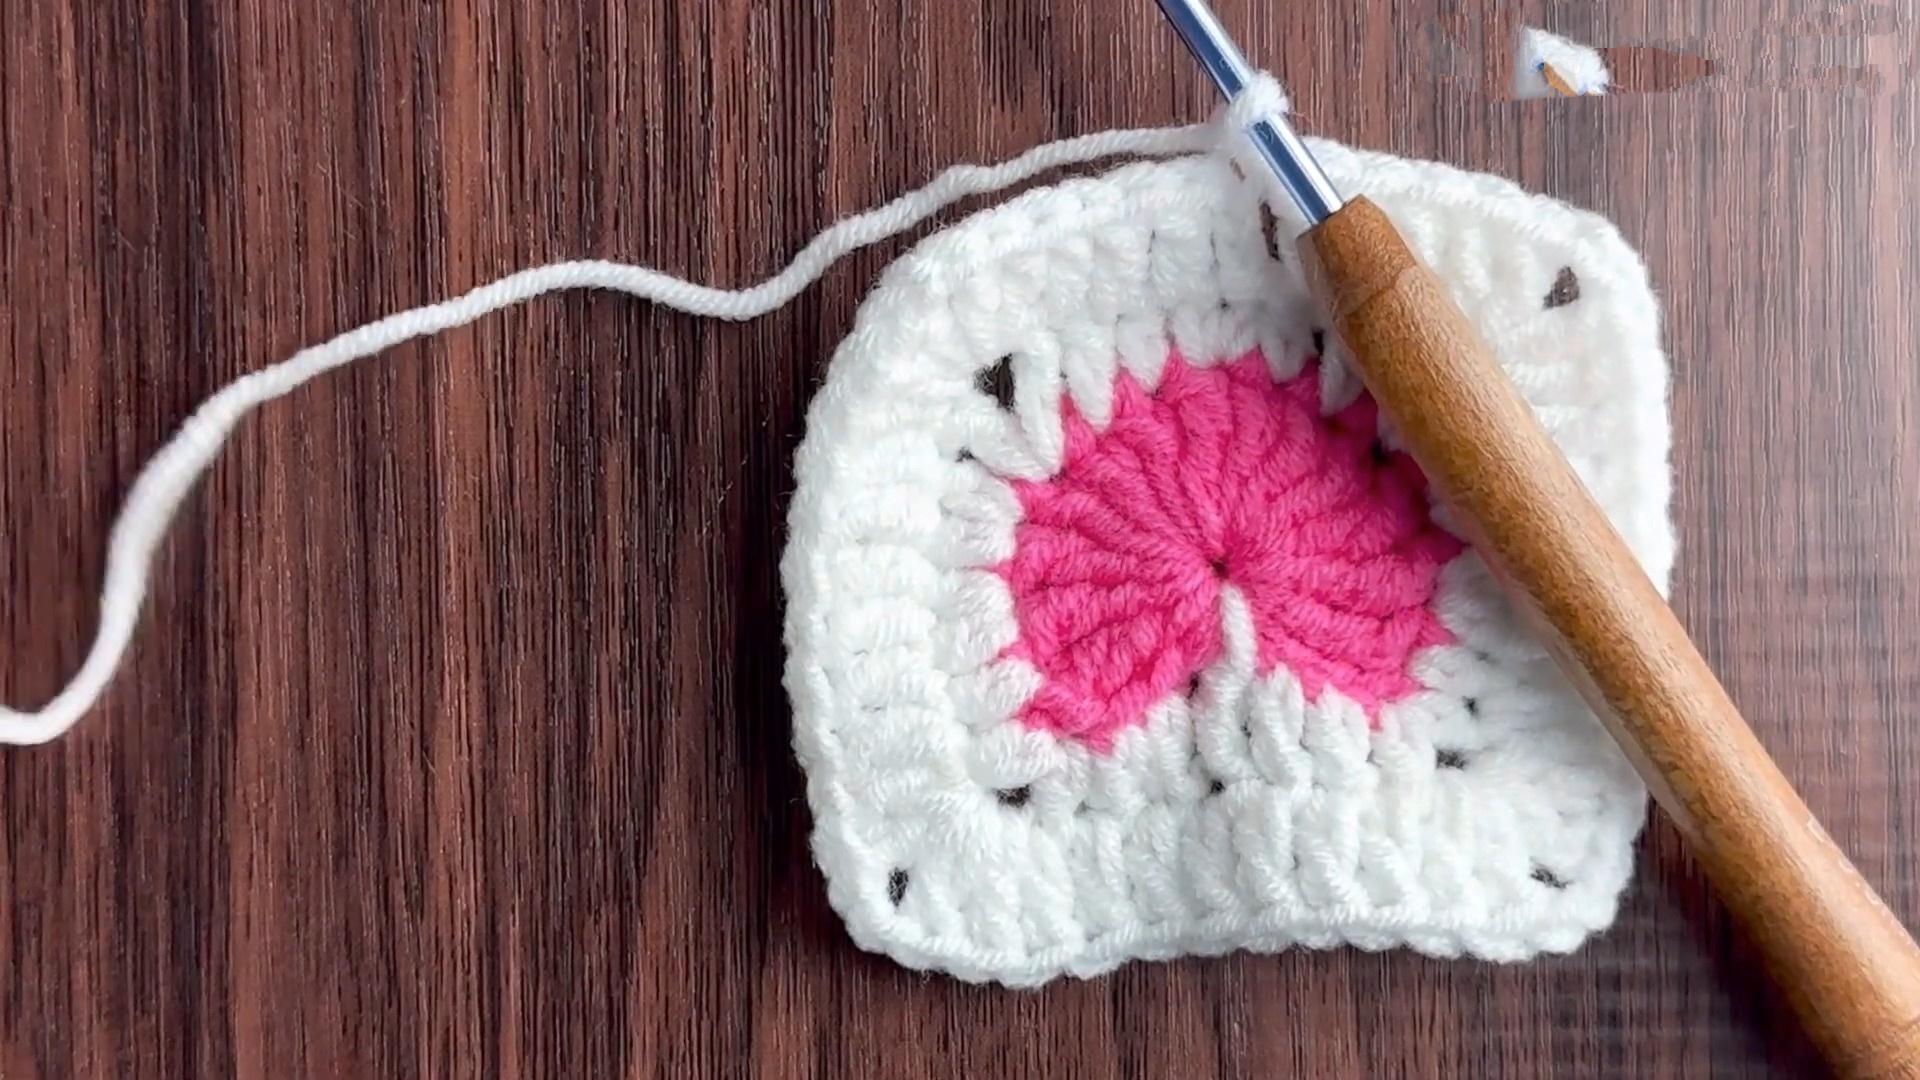
- Join Color B: At the top center dip of the heart, join Color B.
- Top Center Dip:
- Join Color B, chain 1, and work 1 single crochet (sc) in the same stitch as the dip.
- First Arch (Top Right to Right Corner):
- Work 1 half double crochet (hdc) in the next stitch.
- Work 1 double crochet (dc) in the next stitch.
- Corner 1 (Marker 1):
- In the marked stitch, work (1 double crochet, chain 2, 1 double crochet).
- Right Edge (Down to Bottom Point):
- Work 2 half double crochets (hdc) in the next stitch.
- Work 2 half double crochets (hdc) in the next stitch.
- Work 1 half double crochet (hdc) in the next stitch.
- Corner 2 (Marker 2 – Bottom Point):
- In the marked stitch, work (1 half double crochet, chain 2, 1 half double crochet).
- Left Edge (Up to Left Corner):
- Work 1 double crochet (dc) in the next stitch.
- Work 1 double crochet (dc) in the next stitch.
- Work 1 treble crochet (tr) in the next stitch.
- Work 1 double crochet (dc) in the next stitch.
- Work 1 double crochet (dc) in the next stitch.
- Corner 3 (Marker 3):
- In the marked stitch, work (1 half double crochet, chain 2, 1 half double crochet).
- Top Edge (Left Arch to Top Center):
- Work 1 half double crochet (hdc) in the next stitch.
- Work 2 half double crochets (hdc) in the next stitch.
- Work 2 half double crochets (hdc) in the next stitch.
- Corner 4 (Marker 4):
- In the marked stitch, work (1 double crochet, chain 2, 1 double crochet).
- Work 1 double crochet (dc) in the next stitch.
- Work 1 half double crochet (hdc) in the next stitch.
- Close Round 2:
- Slip stitch to the first single crochet.
- Total: 7 stitches per side with ch-2 corner spaces.
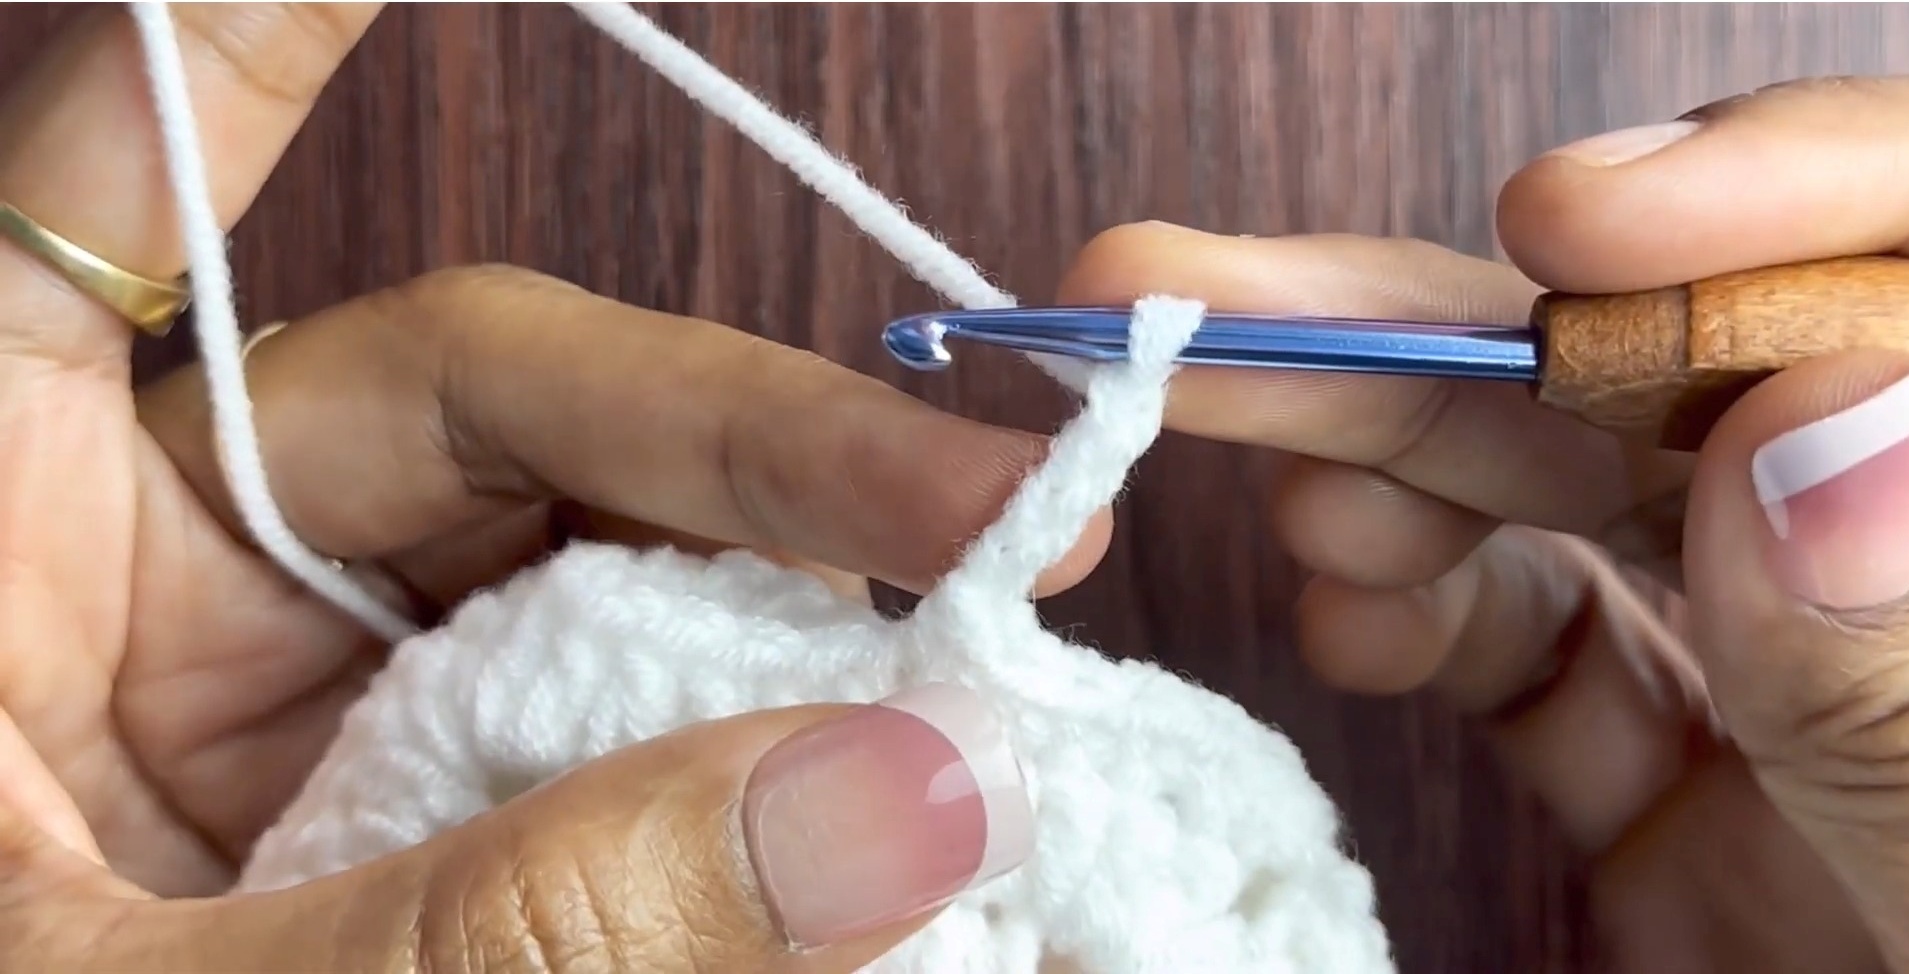
Round 3: Expand the Granny Square (Color B – White)
- Side 1:
- Chain 3 (counts as 1 dc).
- Work 1 double crochet (dc) in each stitch across to the corner space (7 dc total).
- Corner:
- In the chain-2 corner space, work (2 double crochet, chain 2, 2 double crochet).
- Side 2:
- Work 1 double crochet (dc) in each of the 7 stitches across.
- Corner:
- In the chain-2 corner space, work (2 double crochet, chain 2, 2 double crochet).
- Side 3:
- Work 1 double crochet (dc) in each of the 7 stitches across.
- Corner:
- In the chain-2 corner space, work (2 double crochet, chain 2, 2 double crochet).
- Side 4:
- Work 1 double crochet (dc) in each of the 7 stitches across.
- Close Round 3:
- Slip stitch to the top of the initial chain-3.
- Finish Off:
- Fasten off, pull the yarn through, and weave in all yarn ends securely on the back.
Repeat for a Pair:
- Make a second identical heart granny square by repeating Rounds 1–3.
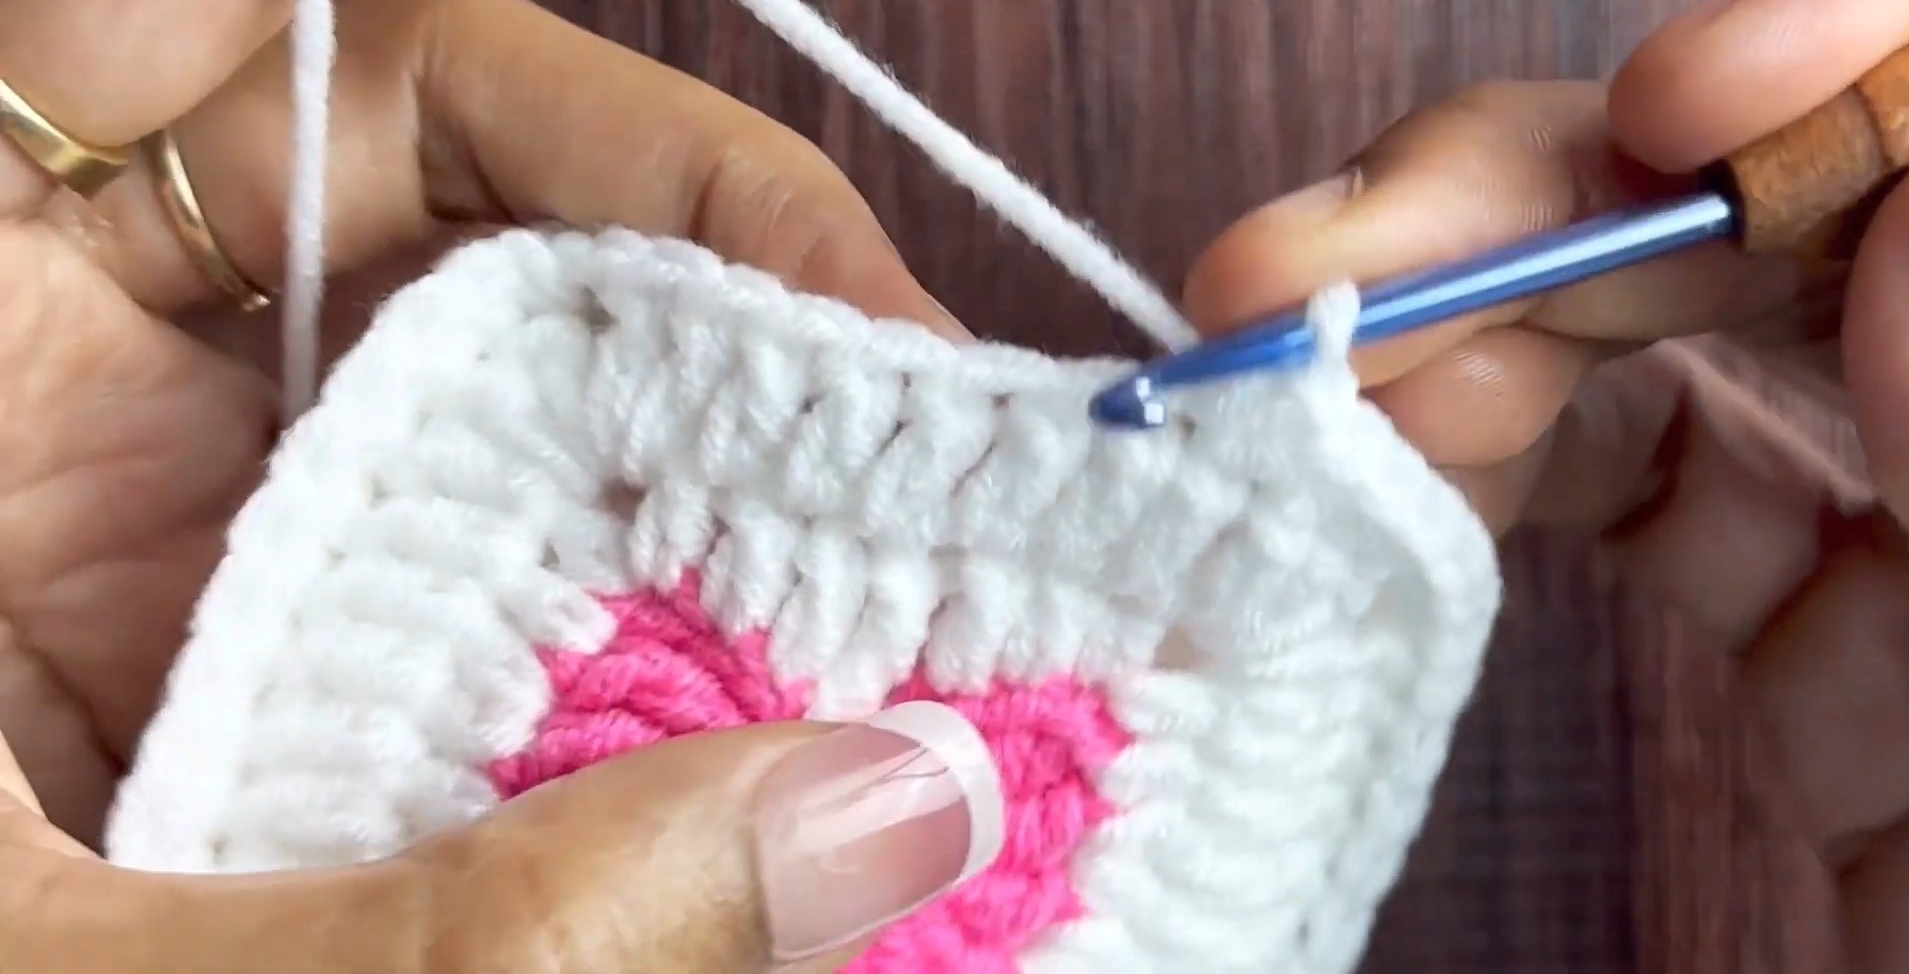
Final Assembly Instructions
Step 1: Joining the Two Squares
- Align the Squares:
- Place the two heart granny squares together with their wrong sides facing each other.
- Make sure the stitches along the sides (left, bottom, and right) are aligned. Leave the top edge open for the pouch opening.
- Start the Seam:
- Join Color B (white) to one of the top corners.
- Join with Single Crochet (sc):
- Work 1 single crochet (sc) through both layers of stitches along one side.
- Insert your hook through the layers so that the seam joins neatly on the edge of the pouch.
- Continue working 1 sc in each matching stitch through the front and back panels down the first side, across the bottom edge, and up the other side.
- Corner Stitches:
- In each corner space at the bottom (through both layers), work 2 single crochets (sc) to give the pouch a clean, rounded look.
- Close the Seam:
- When you reach the opposite top corner, fasten off the yarn and weave in all loose ends securely.
Step 2: Creating the Top Border & Button Loop
- Attach Yarn for Top Border:
- Attach Color B at the top back rim of the pouch opening.
- Work Border:
- Work 1 single crochet (sc) in each stitch along the top open edge to create a clean border. Make sure to work evenly across.
- Create Button Loop (Back Panel Center):
- When you reach the center stitch of the back top rim, create a loop for your button.
- Find the center stitch at the top back of the pouch.
- In this stitch:
- Work chain 8.
- Loop back and single crochet into the same center stitch to secure the chain.
- When you reach the center stitch of the back top rim, create a loop for your button.
- Complete the Border:
- Continue around the top edge, working 1 single crochet (sc) into every stitch until you return to the starting stitch.
- Slip stitch (sl st) to the first sc, fasten off, and weave in the ends as usual.
Step 3: Attaching the Decorative Button
- Position the Button:
- Locate the center dip of the heart on the front panel (the point where the heart shape curves inward at the top).
- Sew the Button:
- Using a hand needle and sewing thread, securely stitch the button to the front panel.
- Ensure the button aligns perfectly with the button loop on the back panel.
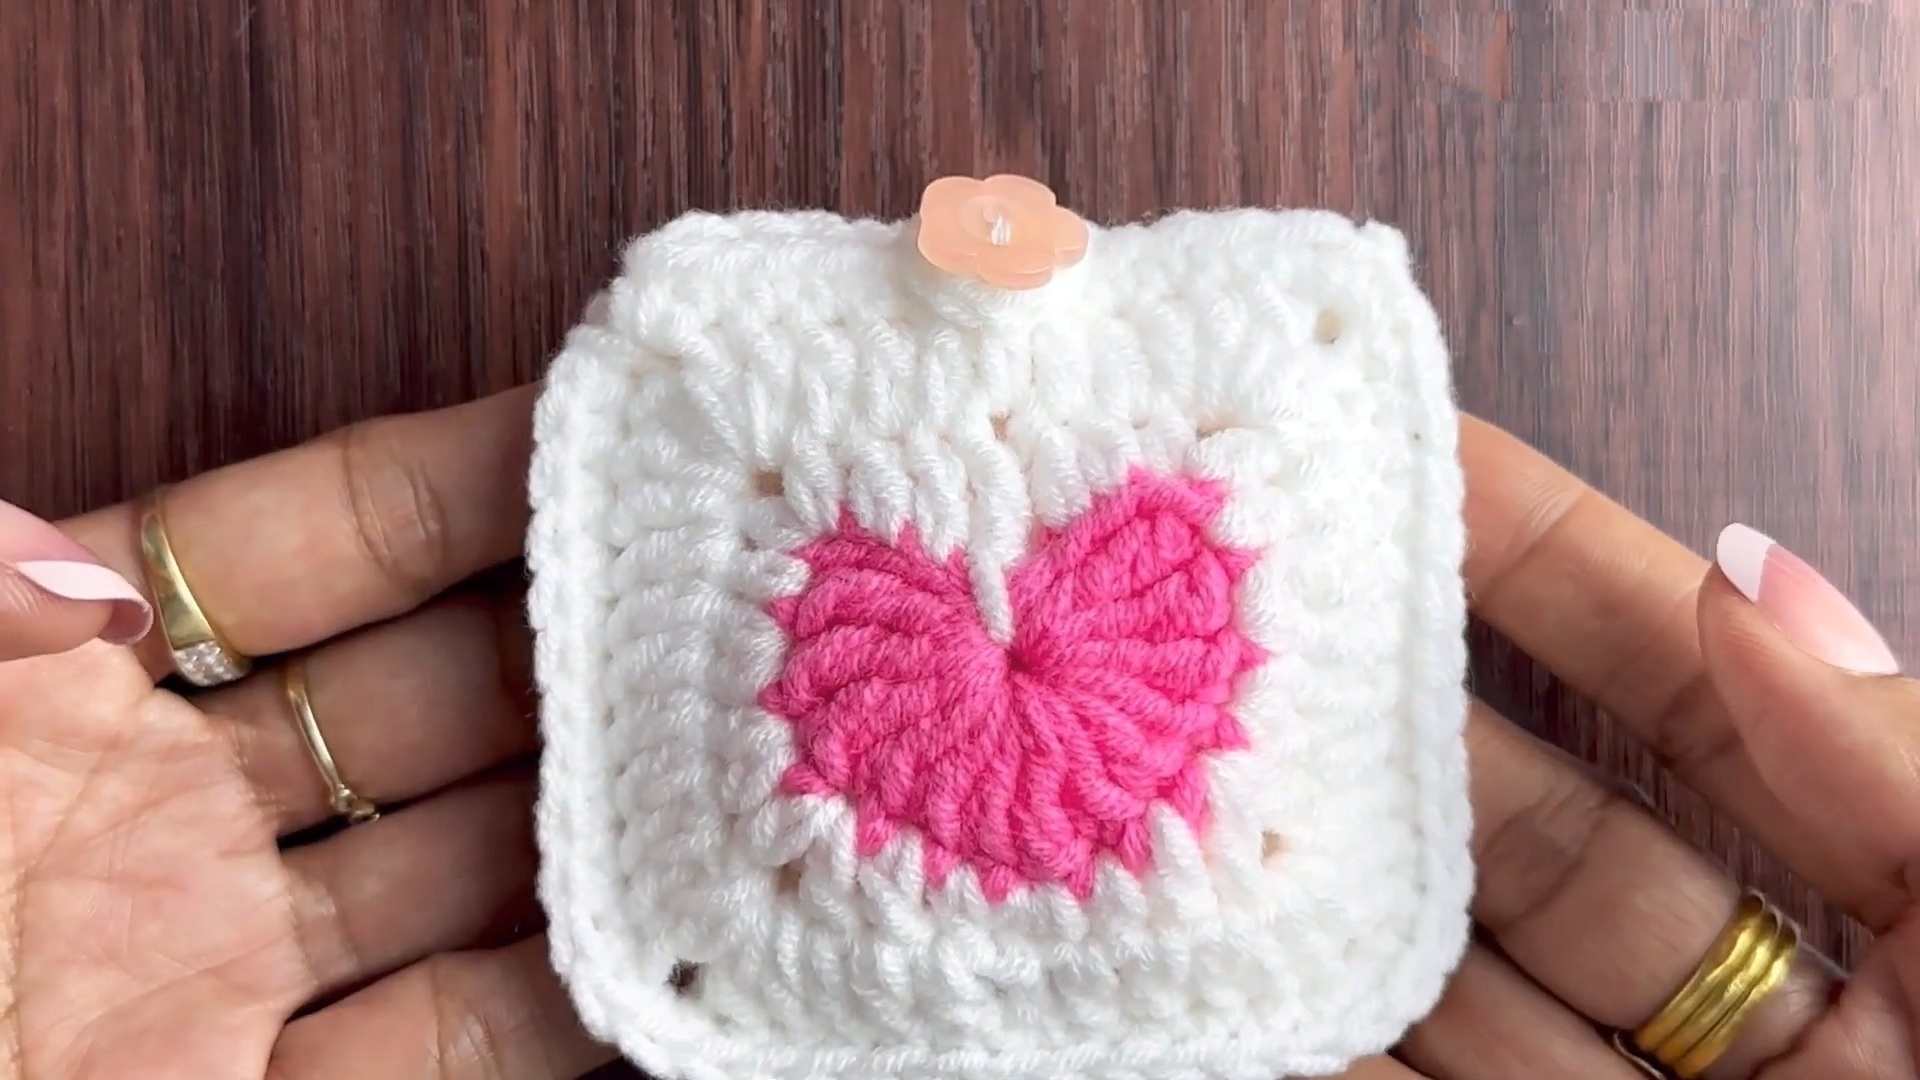
Conclusion
- Your Heart Granny Square Mini Bag is complete! Test the functionality by stretching the button loop over the decorative button to ensure a snug fit.
- Use your mini bag to keep small items like AirPods, keys, earphones, or lip balm safe and stylish!