Step-by-Step Crochet Checkered Sweater Tutorial
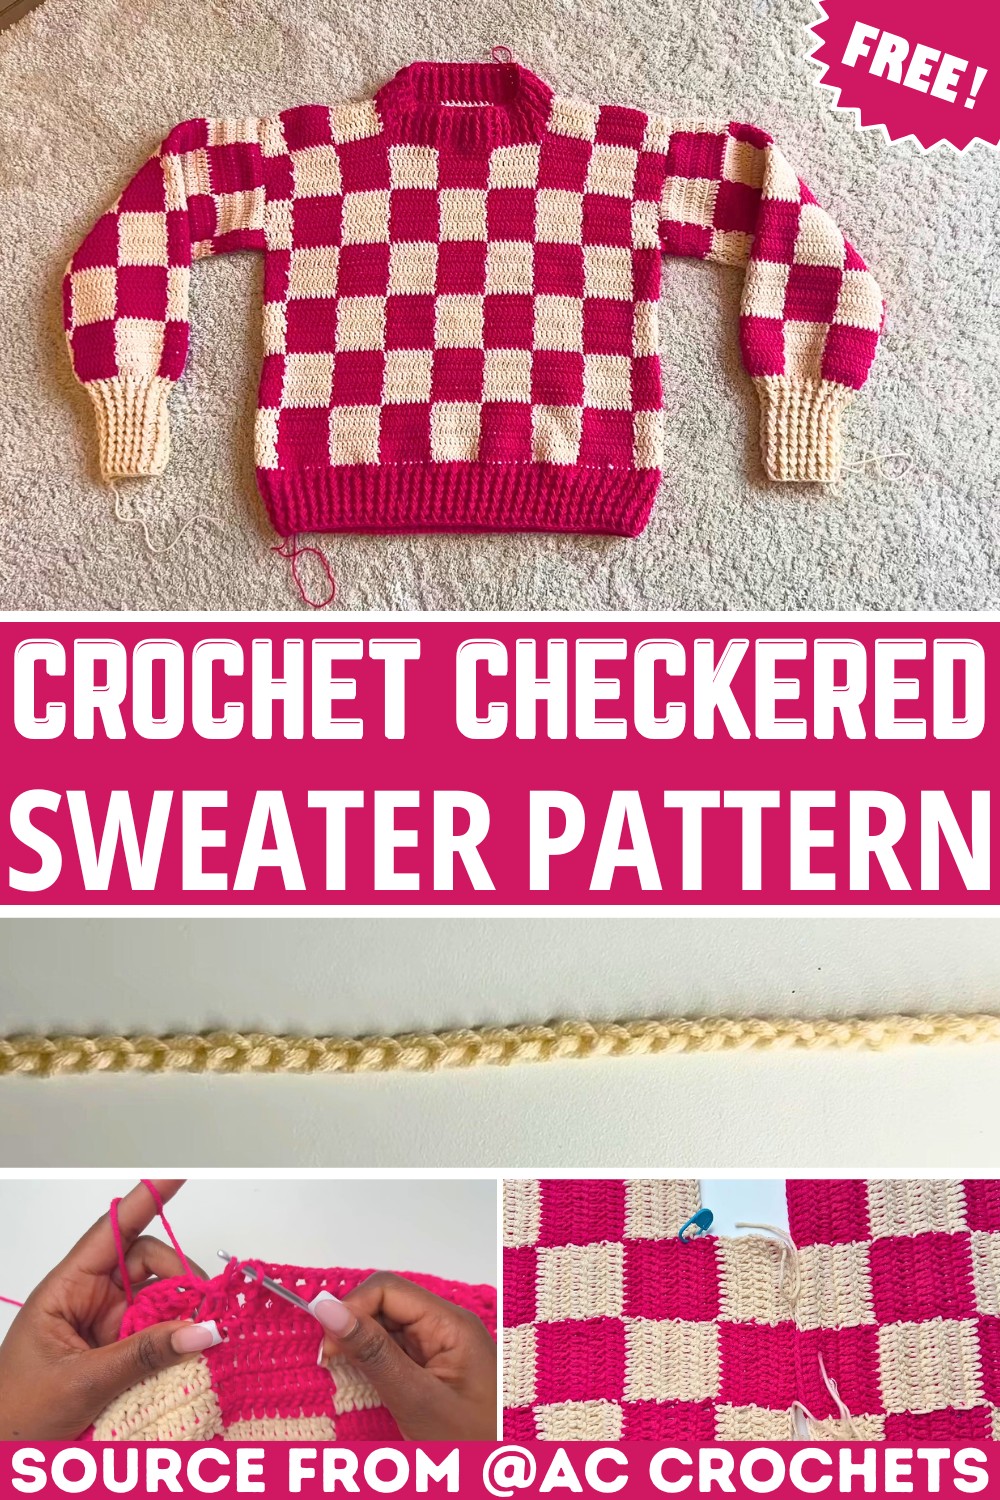
A bold checkered design can completely transform a handmade sweater into a standout wardrobe piece. This eye-catching crochet item combines soft texture with colorful blocks that create a timeless look for every season.
The pattern is easy to customize with different shades, making it simple to create a style that feels uniquely yours. From the first stitches to the final finishing touches, every crochet section comes together satisfyingly.
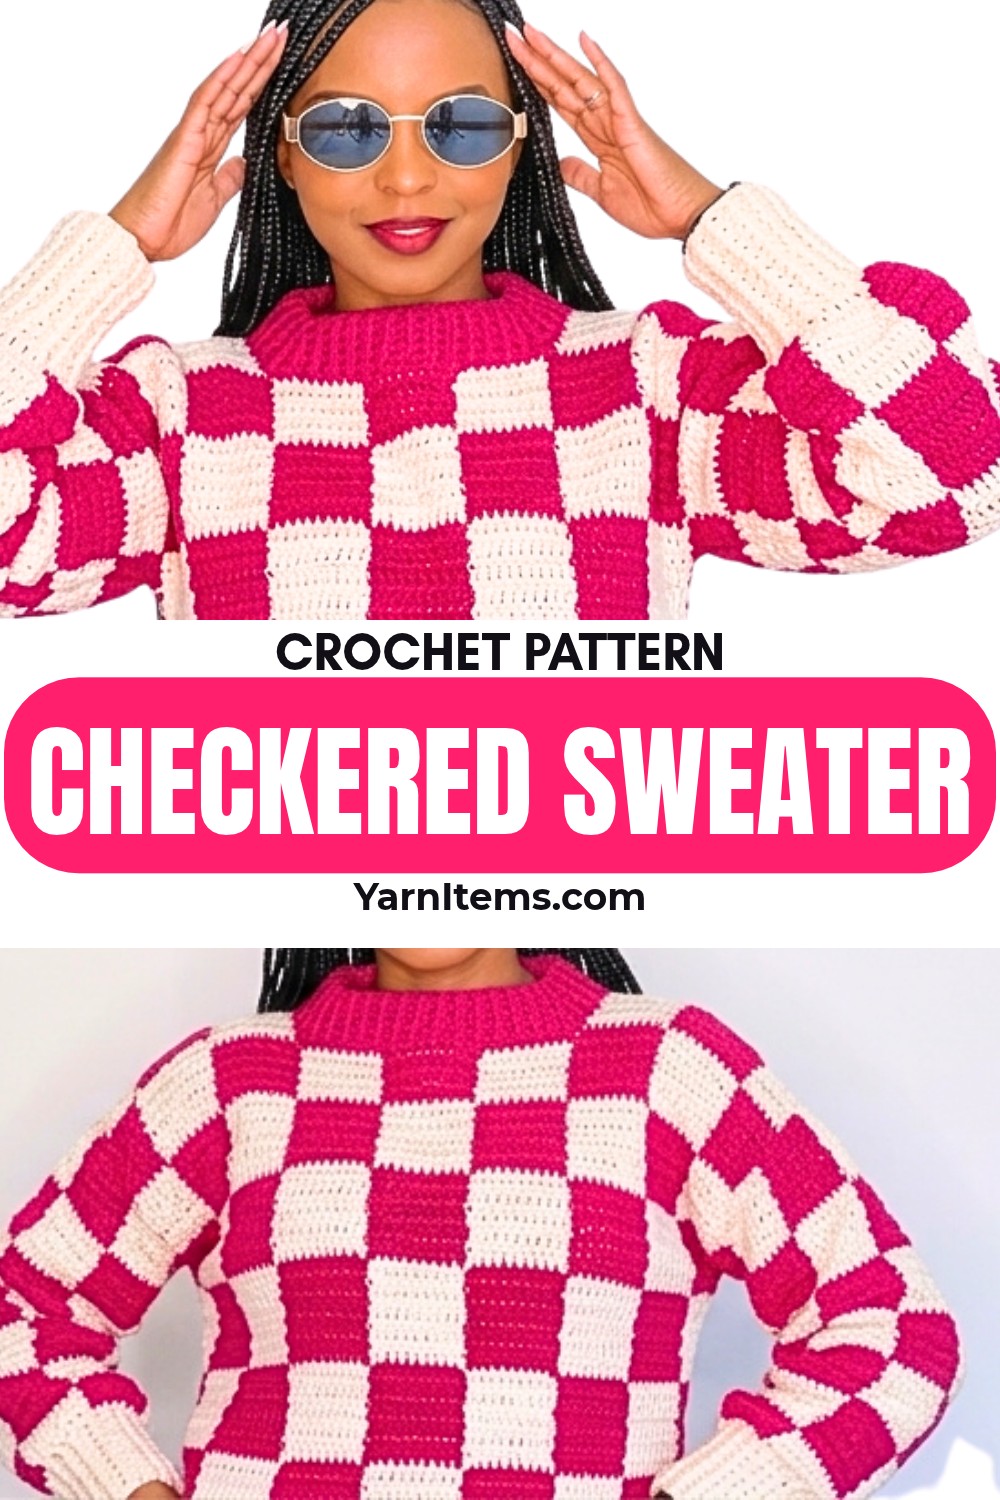
Every color block adds a fresh layer of personality, giving this crochet piece a modern yet cozy appearance. The instructions include helpful details for adjusting the size, shaping the neckline, adding sleeves, and finishing with neat ribbing for a polished result.
Using simple double crochet stitches and an easy color-changing method, the design stays enjoyable from beginning to end. Whether you’re making it for yourself or as a thoughtful handmade gift, this wearable piece is both stylish and practical.
Credit AC Crochets
Materials & Tools Needed
- Yarn Used: Durable Coif Fine (50g/105m per skein)
- Constituents: 58% cotton, 42% acrylic
- Weight: Size 3 (DK yarn)
- Colors: Cream and Deep Fuchsia (Hot Pink)
- Hook Size: 4.0 mm crochet hook
- Other Materials:
- Stitch markers
- Scissors
- Tape measure
- Tapestry/darning needle
Gauge
- 10 double crochet stitches = approx. 2.5 inches
- The chain distance for the foundation chain should measure approximately 18 to 22 inches across the chest based on your size. If it does not, adjust your tension or hook size.
Stitch Type
Here are the Pattern Notes summarized for clarity:
- Double Crochet (dc) stitches are used throughout the pattern.
Color Changes:
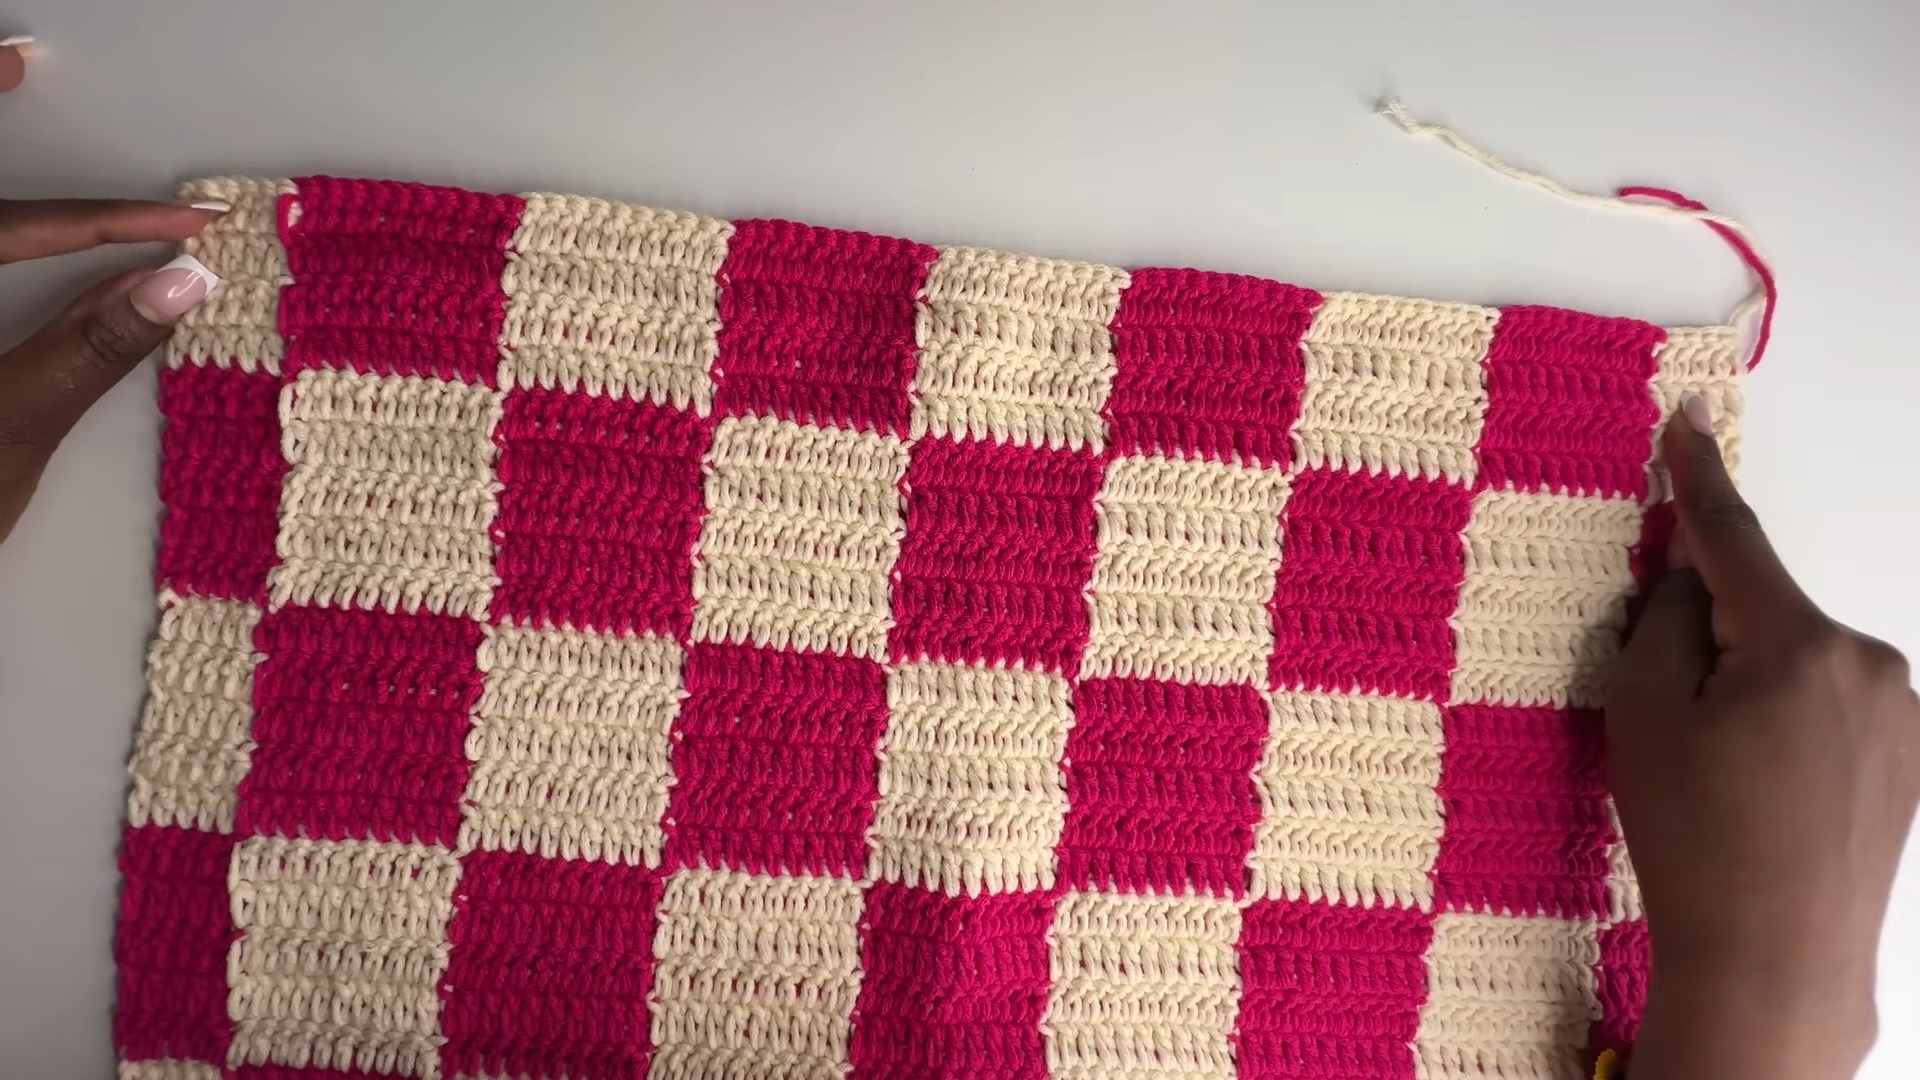
- Alternating blocks of cream and pink every 10 stitches across.
- Checkerboard effect achieved by swapping colors every 5 rows.
Foundation Chain Rule:
- Chain a multiple of 20 + 10 (to account for symmetry on both sides when joining front and back panels).
Color Carrying Technique:
- Use the Carry-Along Technique:
- Carry the unused yarn along each row to minimize cutting yarn between color changes.
Finished Size & Customization Ideas
Completed Sweater Dimensions:
- Example Size: Extra Small/S (back panel approx. 17.5–18 inches long).
- For a Different Size:
- Modify the foundation chain length: Use increments of 20 chains to adjust the width.
- Adjust the height: Customize the overall height based on your specific preferences or measurements.

Customization Ideas:
- Color Variations:
- Create the checkered design with multiple color combinations to suit your style.
- Ribbing Adjustments:
- Add ribbing at the hemline, neckline, or sleeves for extra texture and a snug fit.
- Length Adjustments:
- Extend or shorten the sleeves, neckline, or body of the sweater to improve comfort and fit tailored to your needs.
- Other Details:
- Include decorative stitching or embroidery to personalize your piece further.
Pattern Abbreviations & Terminology
(U.S. Terminology Used)
- ch – Chain
- dc – Double Crochet
- sl st – Slip Stitch
- fpdc – Front Post Double Crochet
- bpdc – Back Post Double Crochet
- st(s) – Stitch(es)
- yo – Yarn Over
Step-by-Step Detailed Crochet Instructions
Back Panel
1. Foundation chain:
- Begin with 80 chains (or multiples of 20, depending on size) for the extra-small size.
- Ensure that the total length measures between 18–22 inches.
2. Row 1:
- Chain 2 (turning chain, does not count as a stitch).
- Using double crochet (dc) stitches, work into the back loop of the chain:
- Start with 5 dc (cream).
- Change to pink as follows:
- Insert hook into the last st of the cream, pull through two loops of cream.
- Drop cream; join pink by pulling it through the remaining loop.
- Crochet 10 dc in pink, carrying the cream yarn along the row.
- Alternate between 10 dc in pink and 10 dc in cream, until 5 stitches remain.
- Finish with 5 dc in cream.
- Chain 2 and turn your work.
3. Rows 2–5:
- Repeat Row 1, maintaining the checkerboard pattern and alternating colors every 10 dc, ensuring carried yarn is hidden neatly.
4. Transition at Row 6 to continue the checkerboard effect:
- Start with pink (or the opposite color) for 5 stitches.
- Alternate cream and pink blocks for a checkerboard effect (5-row increments per block).
5. Continue Until Desired Length:
- The panel should measure approximately 17.5–18 inches tall (or customized height).
Front Panel
1. Follow the steps for the Back Panel:
- Work the same foundation chain, stitch pattern, and heights.
2. Create Neckline Shaping (Approx. 5 rows before finishing):
- Divide the panel into two halves (leave 3 squares unworked in the center).
- Work each side of the panel separately until the desired height matches the back panel.
Joining the Panels
1. Sew Shoulder Seams:
- Align the top of the front and back panels.
- Use the darning needle or slip stitches to join from the edges to the neckline opening.
2. Sew Side Seams:
- Fold the sweater inside out.
- Seam the sides and stop at the armhole opening.

Sleeves
1. Foundation Chain:
- Chain 60 sts for an XS/S size (adjust by multiples of 20 for other sizes).
- Follow the same checkerboard pattern (10 dc per block; 5 rows per block).
2. Work Until Desired Length:
- Add rows until the sleeve measures approximately 15.5 inches long, excluding the cuff (allow 3 inches more for ribbing).
3. Attach Sleeves:
- Align the center of the sleeve with the shoulder seam.
- Sew the sleeve to the body using a sewing needle or slip stitches.
- Close the sleeve by sewing along its length.
Ribbing (Bottom Hem, Sleeves, and Collar)
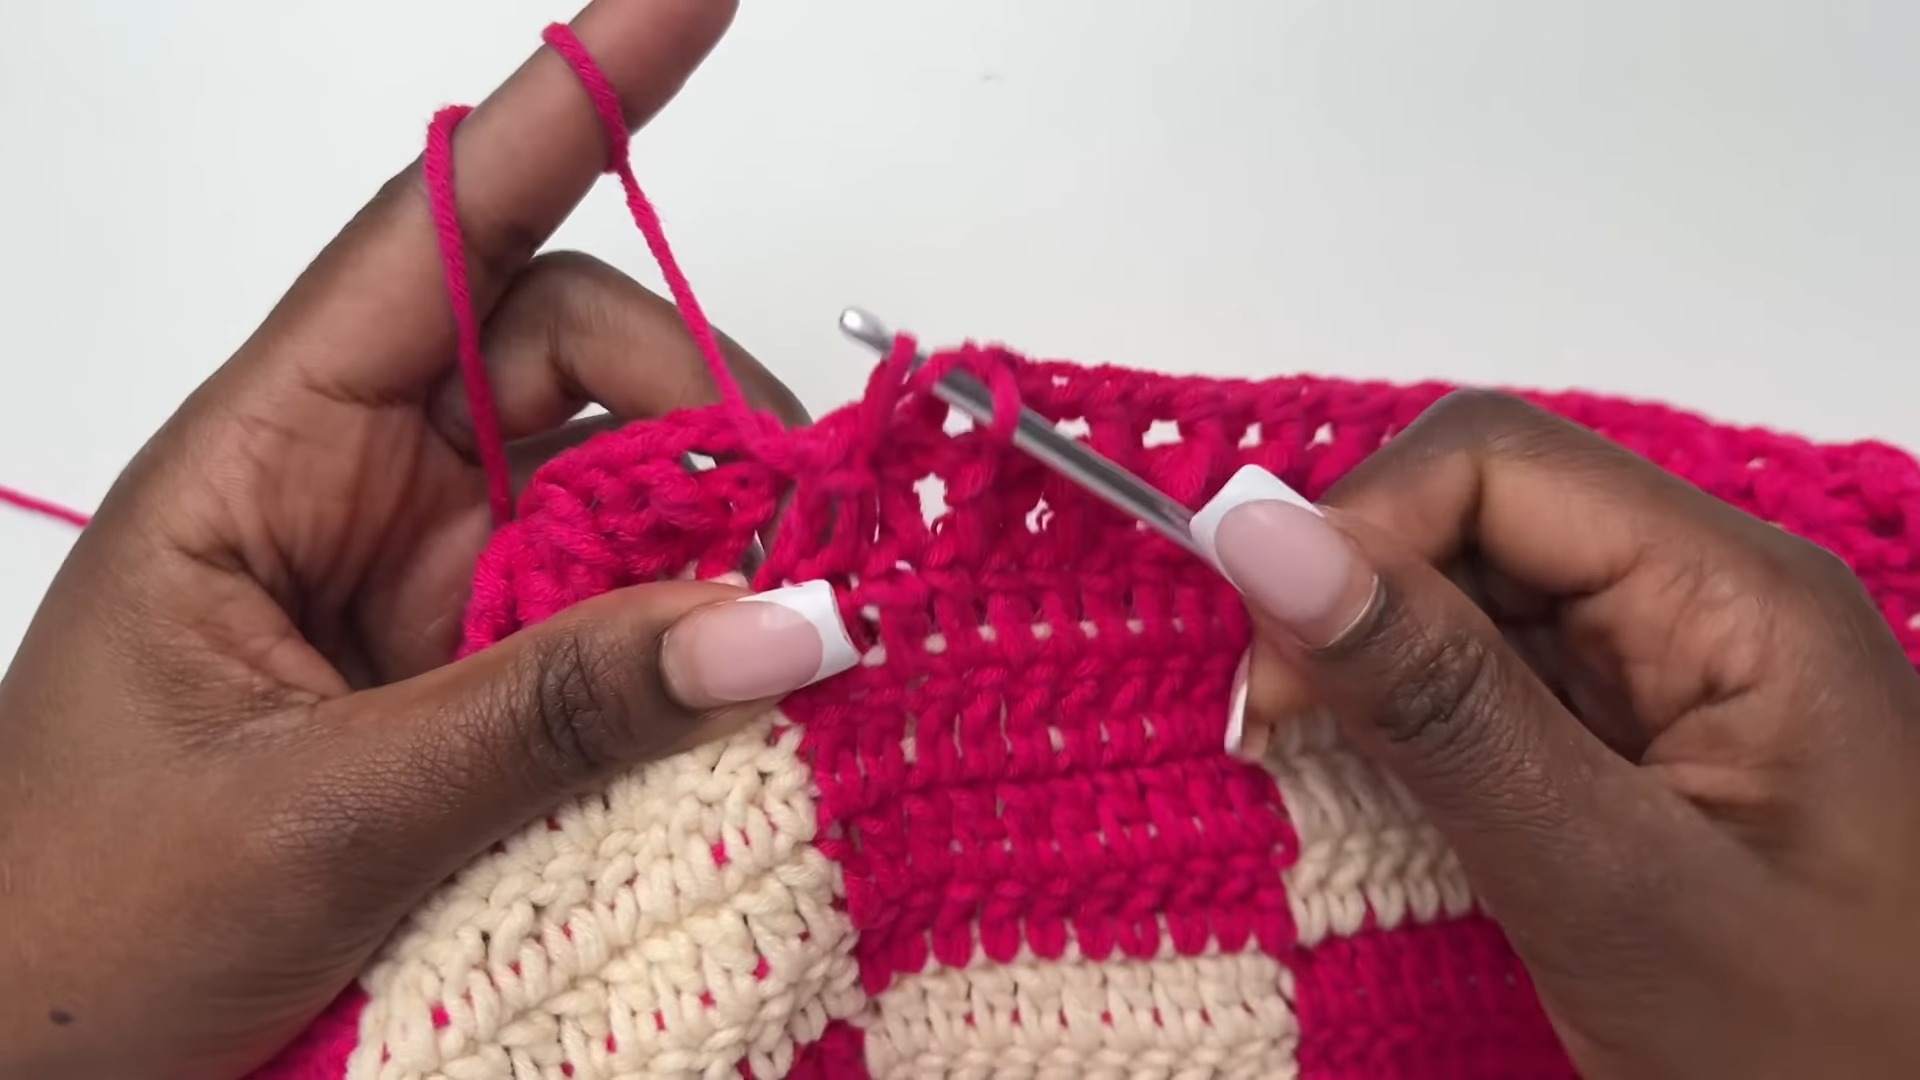
1. Bottom Ribbing:
- Reattach yarn at the bottom hem.
- Work a foundation dc row around.
- Add 6 rows of fpdc/bpdc ribbing (or desired number of rows).
- Reduce sts as necessary to achieve a snug hem.
2. Collar:
- Reattach yarn at the neckline.
- Work 1 row of foundation dc sts around the neckline.
- Add 4 rows of fpdc/bpdc ribbing.
- Incorporate decreases at corners to maintain shape.
3. Sleeve Cuffs:
- Start with a foundation row of dc, working reductions evenly across the wrist opening.
- Add 10 rows of fpdc/bpdc ribbing.
- Secure and weave in all ends.
Finishing
- Weave in all loose ends with a darning needle.
- Turn the sweater right-side out. Block gently if needed to shape.