Warm and Stylish Crochet Winter Hat Pattern
A single handmade winter crochet hat can completely change the way cold-weather outfits feel. This crochet piece blends warmth with timeless style, making it both practical and enjoyable to create.
Soft yarn and simple stitches come together to form an item that looks polished without feeling complicated. Every detail adds comfort while leaving plenty of room for personal touches.
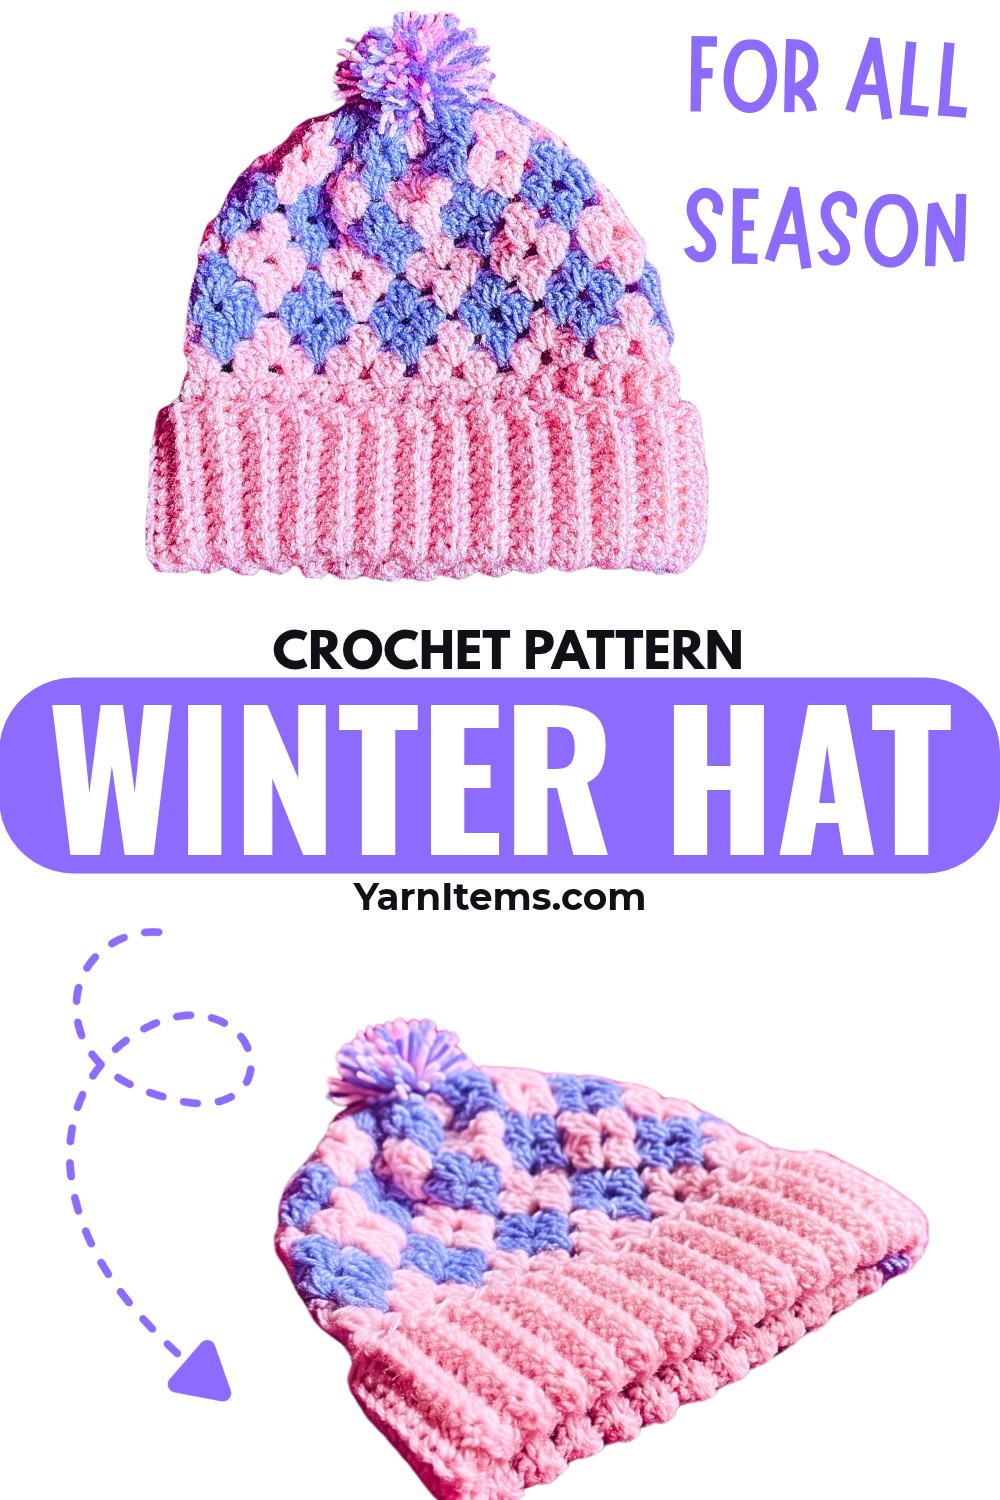
Nothing feels more satisfying than wearing something made with your own hands. This cozy crochet hat is perfect for everyday outings, relaxing walks, or thoughtful handmade gifts during the colder months. Its comfortable fit and classic design make it a versatile piece that pairs beautifully with different colors and styles. Beginners can enjoy the smooth process, while experienced crocheters can easily add their own creative flair.
Credit Novin’s TimePass
Materials & Tools Needed
- Yarn:
- Medium weight / Worsted weight yarn (Category 4)
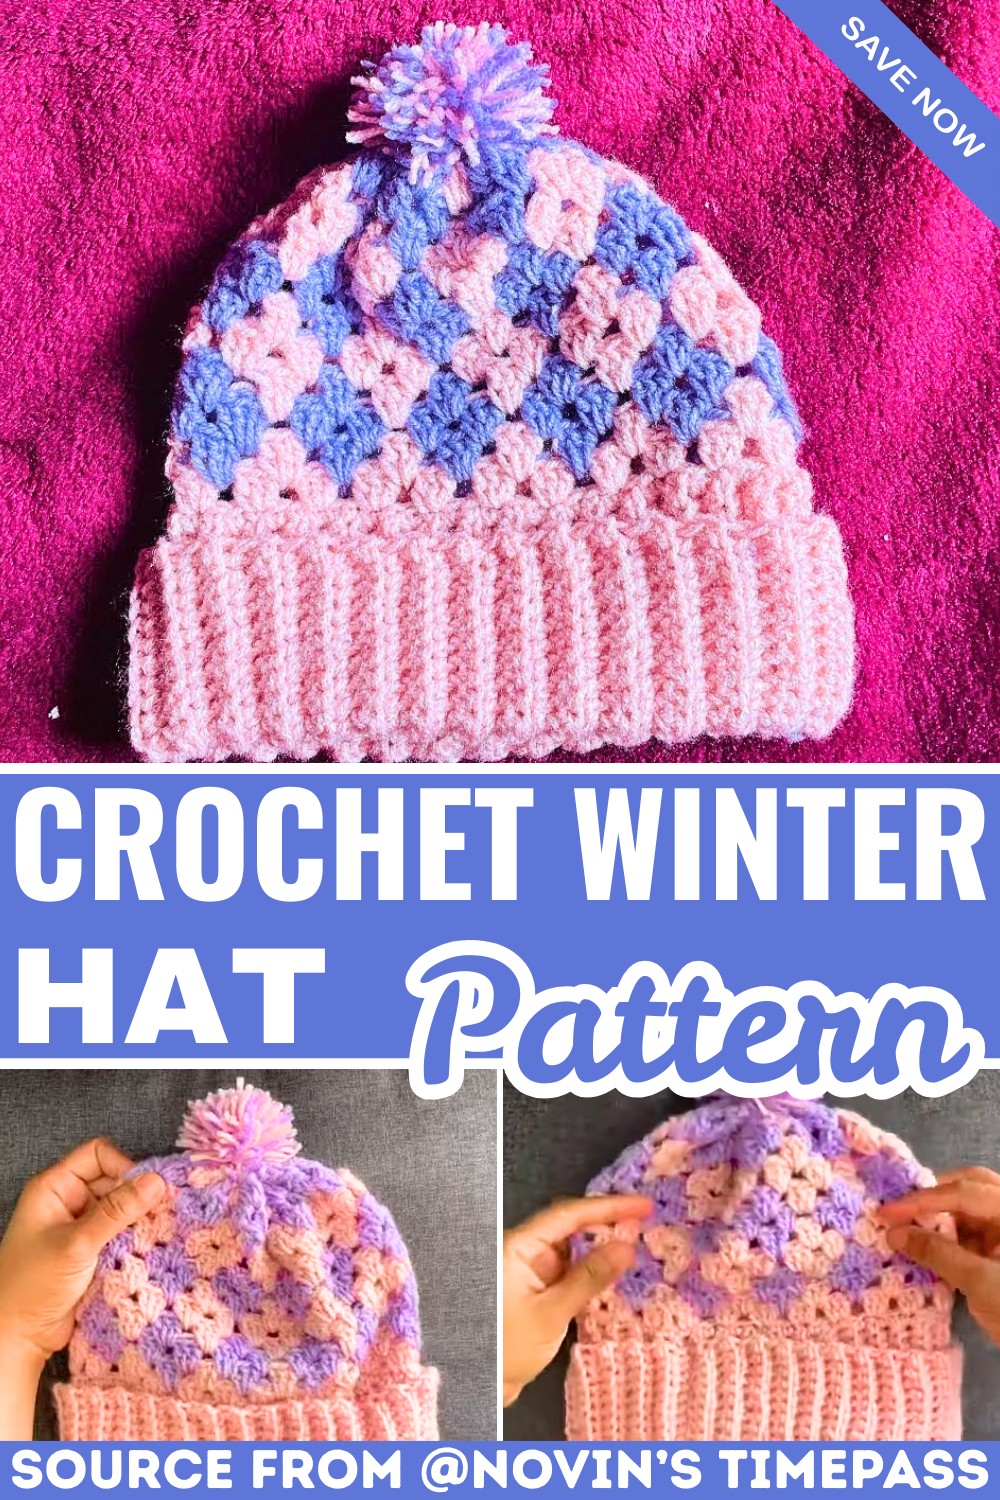
- Color A: Light Pink (brim and body pattern).
- Color B: Lavender / Light Purple (contrast for granny cluster motif).
- Crochet Hook:
- 4.0 mm or 5.0 mm crochet hook — choose based on your tension preference.
- Accessories:
- Scissors
- Yarn/Tapestry Needle (or a smaller hook) for weaving ends and cinching the top.
- Pom-Pom Maker Tool:
- Use a smartphone or a cardboard piece (~3.5–4 inches wide).
Finished Size & Customization Ideas
- Size: Fits adult/teen heads (approx. 20–22 inches).
- Customization Options:
- Brim Width: Adjust the brim chain count:
- Chain 23: Folded brim.
- Chain 12–15: Unfolded brim.
- Head Circumference: Add or omit ribbing rows in multiples of 2 for smaller/larger sizes.
- Hat Slouch/Height: Modify the stitch pattern rounds in the body section.
- Brim Width: Adjust the brim chain count:
Pattern Notes
- Construction Method:
- Ribbed Brim:
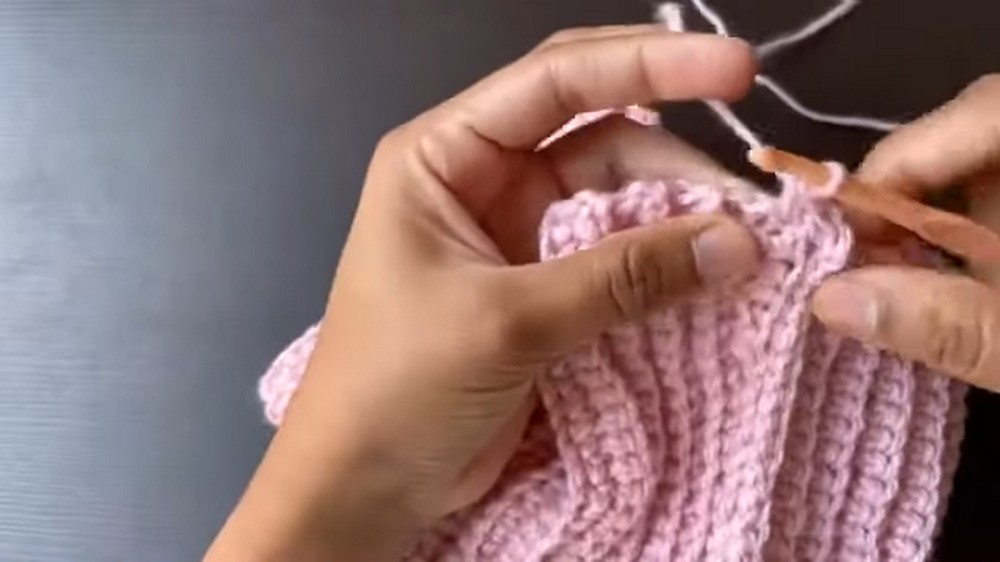
- Worked flat in back-loop-only single crochet rows.
- Slip-stitched into a tube once completed.
- Hat Body:
- Crocheted in continuous or joined rounds using granny cluster stitches.
- Alternate between Color A and Color B.
- Ribbed Brim:
- Special Notes for Chains:
- Ch 1 (at the start of rounds) does not count as a stitch.
- Ch 3 counts as 1 double crochet (dc).
Tips for Success
- Test your gauge to ensure the hat fits correctly.
- Keep your tension even when alternating colors.
- Use a stitch marker in continuous rounds to track progress.
- Personalize the pom-pom size for finishing touches!
Pattern Abbreviations & Terminology (US Terms)
- ch: chain stitch
- sc: single crochet
- blo sc: back loop only single crochet
- dc: double crochet
- sl st: slip stitch
- st(s): stitch(es)
- ch-sp: chain space
Tips Before You Start
- Consistent Tension
- Ensure your tension stays even when working the blo sc ribbing, allowing the brim to stretch comfortably.
- Color Changes
- Carry the Yarn: Handle the inactive yarn loosely along the inside back when changing colors.
- Drop and Pick: Follow pattern instructions when dropping and picking up colors.
Step-by-Step Detailed Crochet Instructions
Section 1: The Ribbed Brim (Color A – Pink)
1. Foundation Chain
- Start: Make a slip knot on your hook.
- Chain Stitch: Crochet 23 chains.
- Ensure your chains are even and not too tight.
2. Row 1 – Base Single Crochet
- Turn Your Work: Flip your work to prepare for Row 1.
- Start in 2nd Chain from Hook: Insert your hook into the second chain from the hook.
- Single Crochet (sc): Work 1 sc into each chain across the row.
Final Count: 22 Single Crochets (sc).
3. Rows 2 through 52 – Back Loop Only Ribbing
- Row Setup:
- Chain 1 (Ch 1), then turn your work to begin the next row.
- Work 1 Back Loop Only Single Crochet (blo sc) into each stitch across.
- Repeat Process: Continue this step for a total of 52 rows.
4. Joining the Brim into a Loop
- Fold Brim: Match Row 1 with Row 52 edges (short edges of the ribbing).
- Join:
- Insert your hook through corresponding stitches in both edges.
- Work 1 Slip Stitch (sl st) in each stitch across to create a seamless cylindrical band.
- Do Not Cut Yarn, as you’ll continue crocheting from this point onwards.
Section 2: Preparation Round on Brim Edge
1. Round 1 – Base Single Crochet Edge
- Long Edge of Ribbing: Turn the brim so you’re working along the long edge (where the rows meet).
- Chain: Ch 1 to begin this round.
- Single Crochet: Work 1 sc into the edge of each individual row around the brim’s top circumference.
Final Count: You should have 52 sc stitches. - Join: Finish the round by connecting the last sc with a sl st into the first sc of the round.
Section 3: Hat Body Pattern (Granny Cluster Shells)
1. Round 2 – First Granny Shell Round (Color A – Pink)
- Begin with Ch 3: Counts as 1 dc.
- 3-dc Cluster:
- Work 2 dc into the same base stitch, forming the first 3-dc cluster.
- Skip 2 stitches, then work 3 dc into the next stitch.
- Continue Pattern: Repeat this cluster pattern—skip 2 stitches, work 3 dc—until you complete the round.
- Join: Close the round with a sl st into the top of the initial Ch 3.
2. Round 3 – Contrast Color Integration (Color B – Purple)
- Start with Ch 3 (Color A): Begin the round with Color A.
- Switch to Color B:
- Insert your hook into the space between clusters.
- Yarn over with Color B (Purple) to create a 3-dc cluster in Color B.
- Alternate Colors:
- Continuing working clusters, alternating between Color A (Pink) and Color B (Purple) around the spaces.
- Join: Finish the round by connecting with a sl st into the starting Ch 3.
3. Rounds 4 through 11 – Checkerboard Pattern Repeats
- Continue Granny Stitch:
- For each round, work 3-dc clusters directly into the spaces/gaps between clusters from the previous round.
- Alternate colors (Color A – Pink, Color B – Purple) to build the offset checkerboard pattern.
- Goal: Complete a total of 10–11 rounds of the Granny Stitch for the main body.
Final Assembly & Top Cinching
1. Cinching the Top Open End
- Fasten Off: Leave a long tail of yarn (approx. 12–15 inches).
- Thread the Yarn Tail: Use a tapestry needle or crochet hook.
- Weave Through: Insert the needle (or hook) in and out through the gaps of the final round all the way around.
- Pull to Cinch: Firmly pull the tail yarn to gather and tightly close the top hole.
- Secure: Tie a tight knot on the inside of the hat and weave in all loose ends.
2. Creating the Pom-Pom (Smartphone Method)
- Template: Use a smartphone or a cardboard piece.
- Wrap Yarn: Wrap Color A and Color B yarn strands together around the device approximately 40 to 50 times.
- Remove Wrapping: Carefully slide the wrapped bundle off the template.
- Tie in Middle: Tie a separate yarn strand tightly around the middle of the bundle (double knot for security).
- Cut Loops: Use scissors to cut open the loops on both ends.
- Shape: Trim and shape the pom-pom into a dense and even sphere.
3. Attaching the Pom-Pom
- Insert Ties: Pull the long tying strands of the pom-pom through the cinched hole at the top of the hat to the inside.
- Secure: Tie the strands tightly against the inside top stitches.
- Weave Ends: Weave in all remaining yarn ends.
Conclusion
Turn the hat right-side out and fold up the bottom ribbed brim. Your crochet winter hat, featuring a granny-stitch body and a colorful pom-pom, is complete!