How to Crochet a Red-Green Festive Christmas Hat
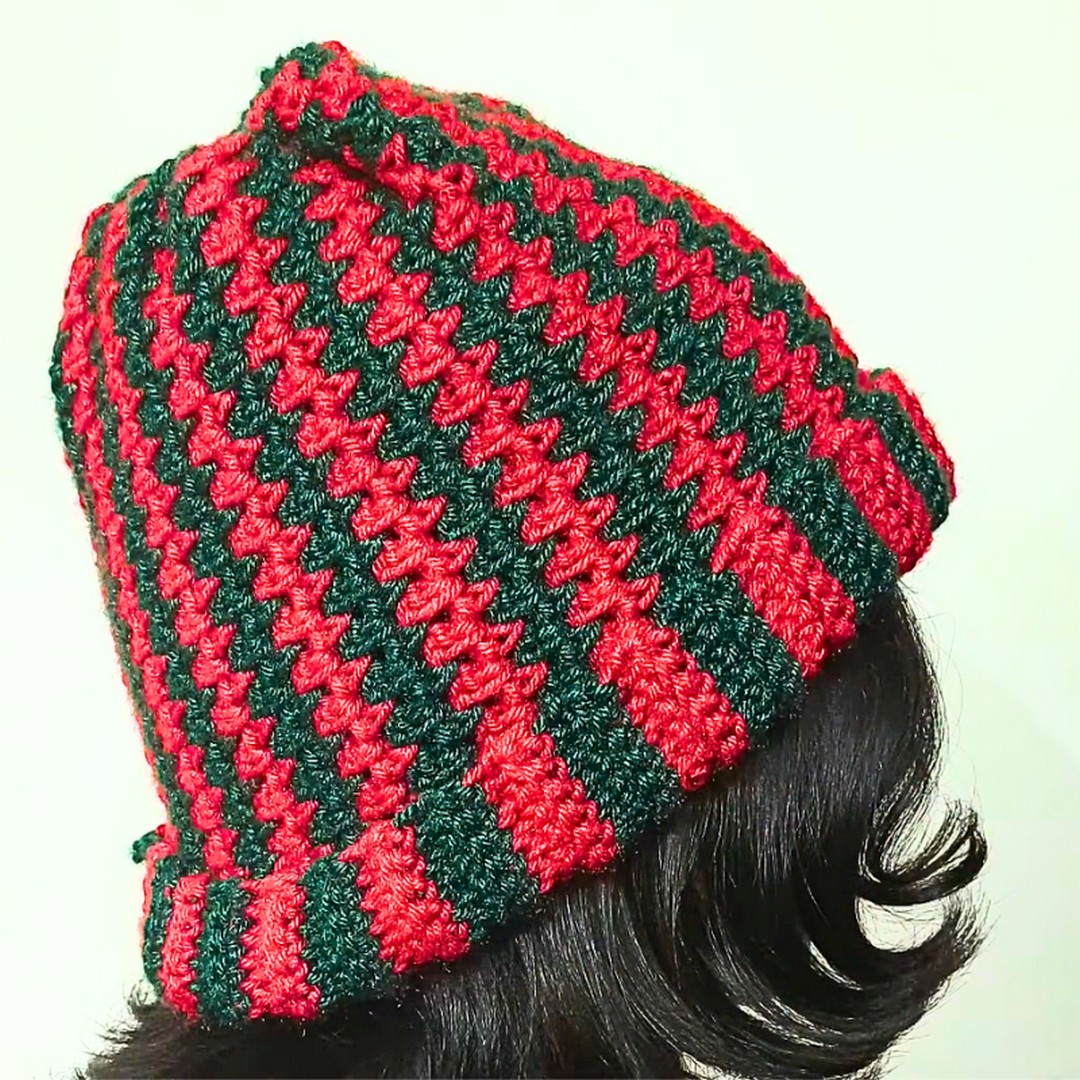
A red-and-green crochet Christmas hat instantly captures the spirit of the season without needing anything extra. The bold stripes, cozy folded brim, and classic winter shape make it a festive accessory you’ll reach for year after year.
If you’ve been looking for a handmade holiday crochet piece that’s both practical and eye-catching. This pattern is a wonderful place to start, and the next few steps show exactly how it comes together.
Crochet Festive Hat Pattern

The design is worked with simple crochet stitches that create clean stripes and a soft, comfortable fit. As you follow the instructions, you’ll build the brim, shape the hat, and finish it with your favorite look. Whether that’s a fluffy pom-pom or a timeless plain top. Grab your yarn and hook, then keep scrolling to see how each section comes together, one crochet stitch at a time.
Credit Vima’s Crochet
Materials & Tools Needed
- Yarn: 4-ply 100% polyester (Oswald Paris Beauty brand was used in the tutorial)
- Red and green yarn (or any festive colors of your choice)
- Crochet Hook: Size 5.5 mm
- Yarn Needle: With a big loop
- Scissors
- Measuring Tape

Finished Size
- Approximately 11 inches in height (including 2 inches brim for folding).
- Circumference: 21 inches (adjustable to your head size).
Customization Ideas
- Adjust the height if you want a longer brim.
- Swap colors for other themes, like blue and white for Hanukkah or pastels for winter style.
- Add a pom-pom to the top for extra holiday flair.
Pattern Abbreviations & Terminology
- Ch: Chain
- SC: Single Crochet
- Ch1-sp: Chain-1 Space
- BL: Back Loop Only
- Sl St: Slip Stitch
Terminology: This pattern uses U.S. crochet terms.
Step-by-Step Detailed Crochet Instructions
Step 1: Starting the Foundation
- Use red yarn and a 5.5 mm crochet hook.
- Begin with a slip knot and place it on your hook.
- Measure your chain length as you go — chain multiples of 2 until it reaches 11 inches (without stretching). This will include a folded brim of 1-2 inches.
- Example: Ch 34 if it equals 11 inches, but remember to measure your chain.
- Add 1 additional chain for the turning chain.

Step 2: Row 1 – Beginning the Stitch Pattern
- Work only in the back loops of the chain throughout the project.
- In the 2nd chain from the hook, place 1 SC.
- Continue working 6 SCs in total for the first section.
- Then, work:
- Ch1, skip 1 stitch, SC in the next stitch.
- Repeat this pattern (Ch1, Skip 1, SC) until the end.
- Finish this row with an SC.
Step 3: Switching Colors
- Before completing the last SC stitch, stop when 2 loops are remaining on the hook.
- Switch to green yarn by pulling the green yarn through both loops.
- Ch 1 to secure the color change.
- Turn your work.

Step 4: Row 2 (Green Color)
- Ch 1, then SC into the first ch1-sp of the previous row.
- Work the pattern:
- SC in each ch1-sp, then ch 1 and skip the SC stitches from the previous row.
- Repeat until the last 6 SCs.
- When you reach the last 6 SCs from the previous row, work these 6 SC stitches into the back loop only (BL) of each stitch.
- Ch 1 and turn your work.
Step 5: Row 3 (Back to Red Color)
- Before finishing the last SC of the row, stop with 2 loops on the hook.
- Switch back to red yarn by pulling through the red yarn.
- Ch 1 to secure the color change, then turn your work.
- Repeat the same Ch1-Skip1-SC in ch1-sp pattern across the row.
- End every row by working in BL only for the last 6 SCs.
Step 6: Alternating Colors
- Continue the same pattern, alternating between two rows of red and two rows of green.
- Ensure you always keep the color changes consistent and smooth.
- Example: When switching colors, always pull the new color through the last SC before finishing it.
Step 7: Measuring the Length
- Work back and forth in rows, alternating red and green colors, until the piece measures 21 inches in length.
- Measure by wrapping it around your head for a perfect fit.
- End with the green color to maintain a clean and even design.

Step 8: Assembling the Hat
Joining the Sides
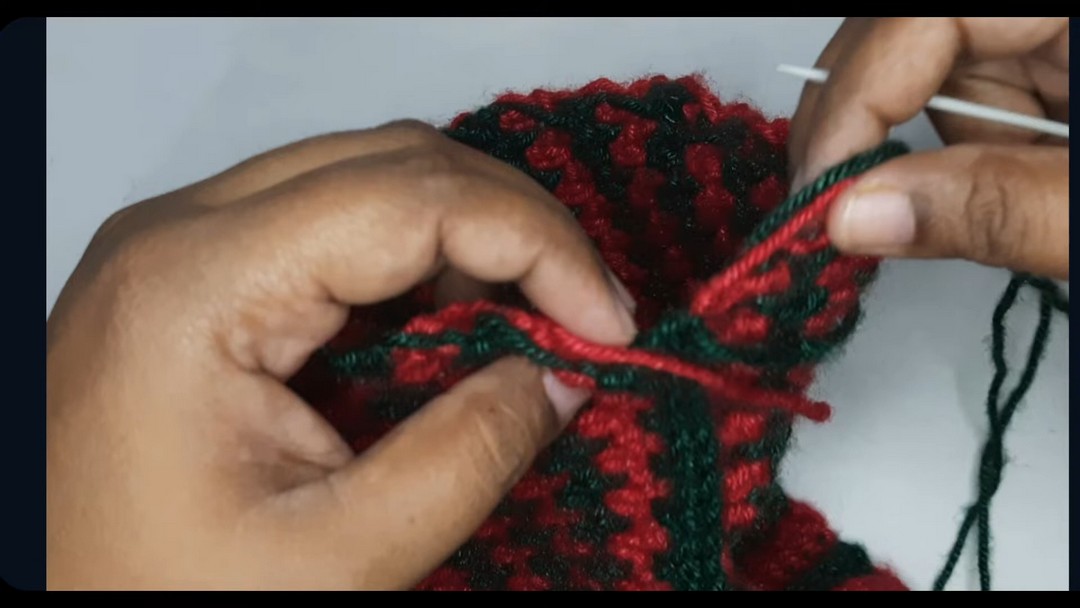
- Align the two edges of your rectangle, ensuring the red and green stripes are consistent.
- Use a yarn needle or slip stitch to join:
- Pick up the back loop of one edge and the corresponding back loop of the opposite edge.
- Sl st or sew across until the edges are fully joined.
Cinch the Top
- Thread the long yarn tail (left from your final row) onto a yarn needle.
- Sew around the top edge of the hat by weaving in/out through stitches (approximately every two rows).
- Once you’ve worked all the way around, gently pull the yarn to cinch the top closed.
- Reinforce the closure by sewing across the cinched opening, securing it tightly.
Step 9: Finishing Touches
- Flip the hat inside out to hide the seam.
- Fold the bottom edge up to create a cozy brim (1-2 inches).
- Optional: Add a pom-pom, tassel, or other decorations to the top.
Customization Notes
- Experiment with additional colors or use glittery yarn for a festive sparkle.
- Add embroidery, appliqués, or attach small bells for a cheerful touch.
Final Thoughts
This festive crochet hat is perfect for holiday events or as a gift! The alternating red and green give it a classic Christmas vibe, while the snug, flexible design ensures comfort and warmth.

Video Tutorial