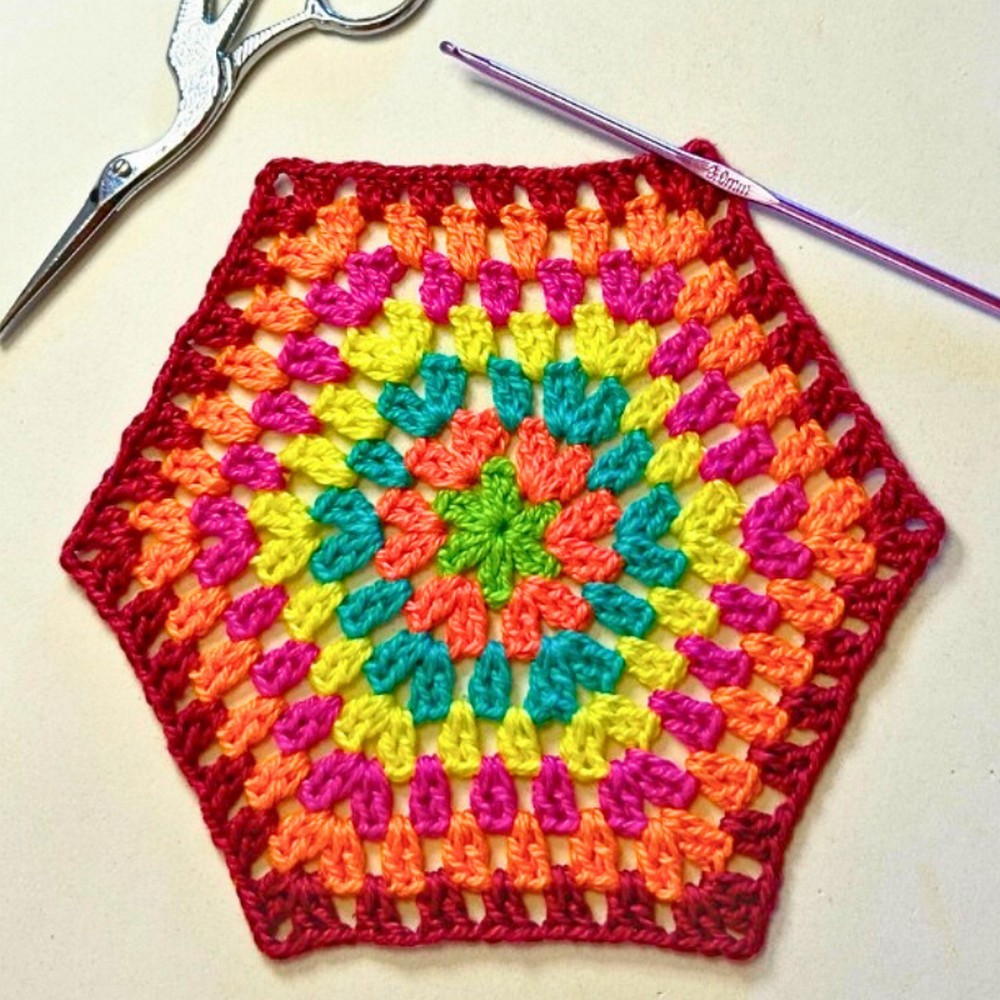
A crochet granny hexagon pattern begins with a small center. That slowly transforms into a six-sided motif through carefully repeated rounds. As the stitches expand, each corner takes shape and reveals the unique structure that separates it from a classic granny square.
The combination of simple granny clusters and balanced edges creates a crochet pattern that feels both familiar and fresh. With every round, the design grows into a versatile piece that can be customized with different yarn colors, textures, and sizes.
Crochet Granny Hexagon Pattern

After completing the hexagon, the real creativity begins as individual motifs can be joined to form a larger piece. Multiple hexagons can become blankets, cardigans, bags, cushions, or table runners. While a larger single crochet piece can add character as a rug or wall decoration. By repeating the same stitch sequence, the pattern can easily grow without losing its shape. Whether you are making your first motif or building a complete handmade piece. This crochet granny hexagon pattern offers a simple process with endless possibilities.
Credit Hook & Loop Crochet Tutorials
Materials & Tools Needed
- Yarn: 100% cotton yarn (choose your favorite colors; multiple colors recommended for contrast)
- Hook Size: 2 mm crochet hook
- Other Tools: Scissors and a yarn needle for finishing ends
Finished Size & Customization Ideas
- The hexagon size depends on the number of rounds you crochet.
- You can create small or large hexagons and join them together for blankets, bags, or other projects.
- Alternatively, continue increasing the rounds to make one large hexagon for standalone projects like rugs or wall hangings.
Pattern Abbreviations & Terminology
- ch: Chain
- sl st: Slip Stitch
- dc: Double Crochet
- fake dc: Substitute stitch for the first dc (achieved with a standing dc or chain)
- magic ring: Adjustable loop to begin a round
- standing dc: Double crochet stitch used at the start of a round without chaining (gives a neater finish)
- corner: A group of stitches forming the hexagon’s corner structure (typically 2 dc + ch 2 + 2 dc in the same space)
Note: US terminology is used for this pattern.
Step-by-Step Detailed Crochet Instructions
Round 1: Begin the Hexagon
- Create a magic ring.
- Crochet 1 fake dc (substitute stitch for the first dc).
- Work 1 dc + ch 1.
- Then 2 dc + ch 1 in the magic ring.
- Repeat the pattern until you have 12 dc and 6 chains in total.
(Note: You should end with 6 sections, each separated by a chain.) - Join with a sl st, ch 1, pull the yarn tight, cut it, and weave the tail in.

Round 2: Build the Foundation Corners
- With your second color, start with a standing dc in one of the chain spaces from Round 1.
- Work the first corner: 1 dc + ch 2 + 2 dc in the same chain space.
- Ch 1, then move to the next chain space.
- Work the second corner: 2 dc + ch 2 + 2 dc, ch 1.
- Repeat the corner pattern all around (6 corners total).
- Join with a sl st, ch 1, pull the yarn tight, cut it, and weave in the tail.

Round 3: Add More Definition
- With your third color, start with a standing dc into any 2-chain corner space.
- Work a corner: 1 dc + ch 2 + 2 dc.
- Ch 1, then crochet 2 dc into the next chain space, followed by ch 1.
- Move to the next corner space and work the corner: 2 dc + ch 2 + 2 dc, ch 1.
- Continue alternating between working corners and 2 dc stitches (with ch 1 between them) until the round is complete.
- Join with a sl st, ch 1, pull the yarn tight, cut it, and weave in the tail.
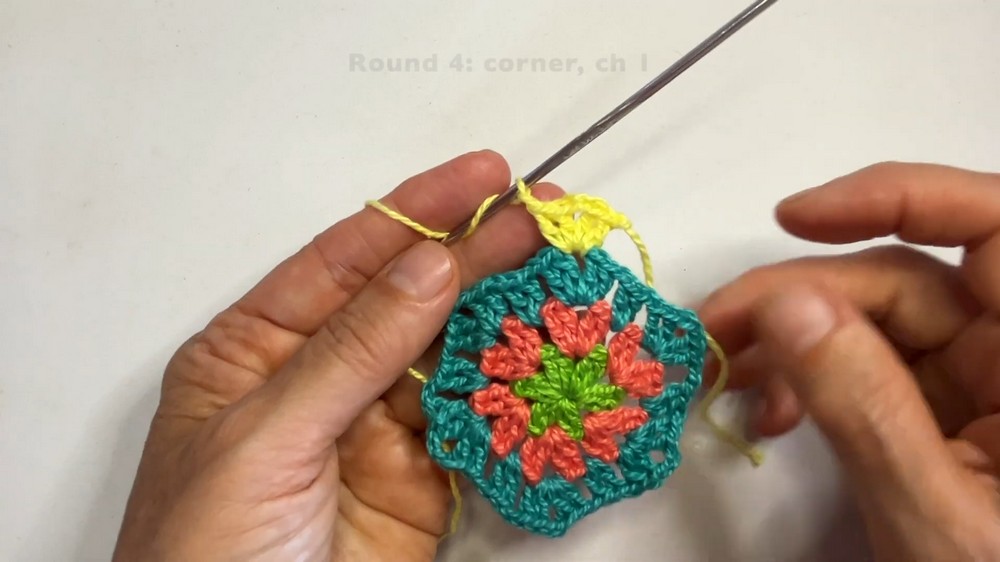
Round 4: Expand the Hexagon
- Begin a corner with standing dc in any 2-chain corner space.
- Work the corner: 2 dc + ch 2 + 2 dc.
- Ch 1, then work 2 dc into the chain space from the previous round. Add ch 1.
- Continue this pattern across the entire round:
- Corner above each existing corner.
- 2 dc into each chain space with ch 1 between them.
- Join with a sl st, ch 1, pull the yarn tight, cut it, and weave in the tail.
Round 5 (and Beyond): Infinite Hexagon Growth
- Change to a new color (e.g., your fifth color).
- Continue repeating the established pattern:
- Work corners with 2 dc + ch 2 + 2 dc.
- Work 2 dc into each chain space with ch 1 separating them.
- The hexagon can grow infinitely—simply follow the pattern structure as outlined.
- No limits: Make the hexagon as small or large as you want.
Joining Techniques
- If composing a project with multiple hexagons, you can join them using:
- Slip stitches (for seamless joins).
- Single crochet (for ridge-style joins).
- Experiment with different joining methods depending on your project.
Color Change and Finishing Tips
- Color Changes: Always fasten off and weave in the tails neatly when switching colors.
- Finishing: Ensure all tails are securely woven into the back of the work for a clean, polished look.