Free Crochet Mushroom Square Pattern With Video Tutorial
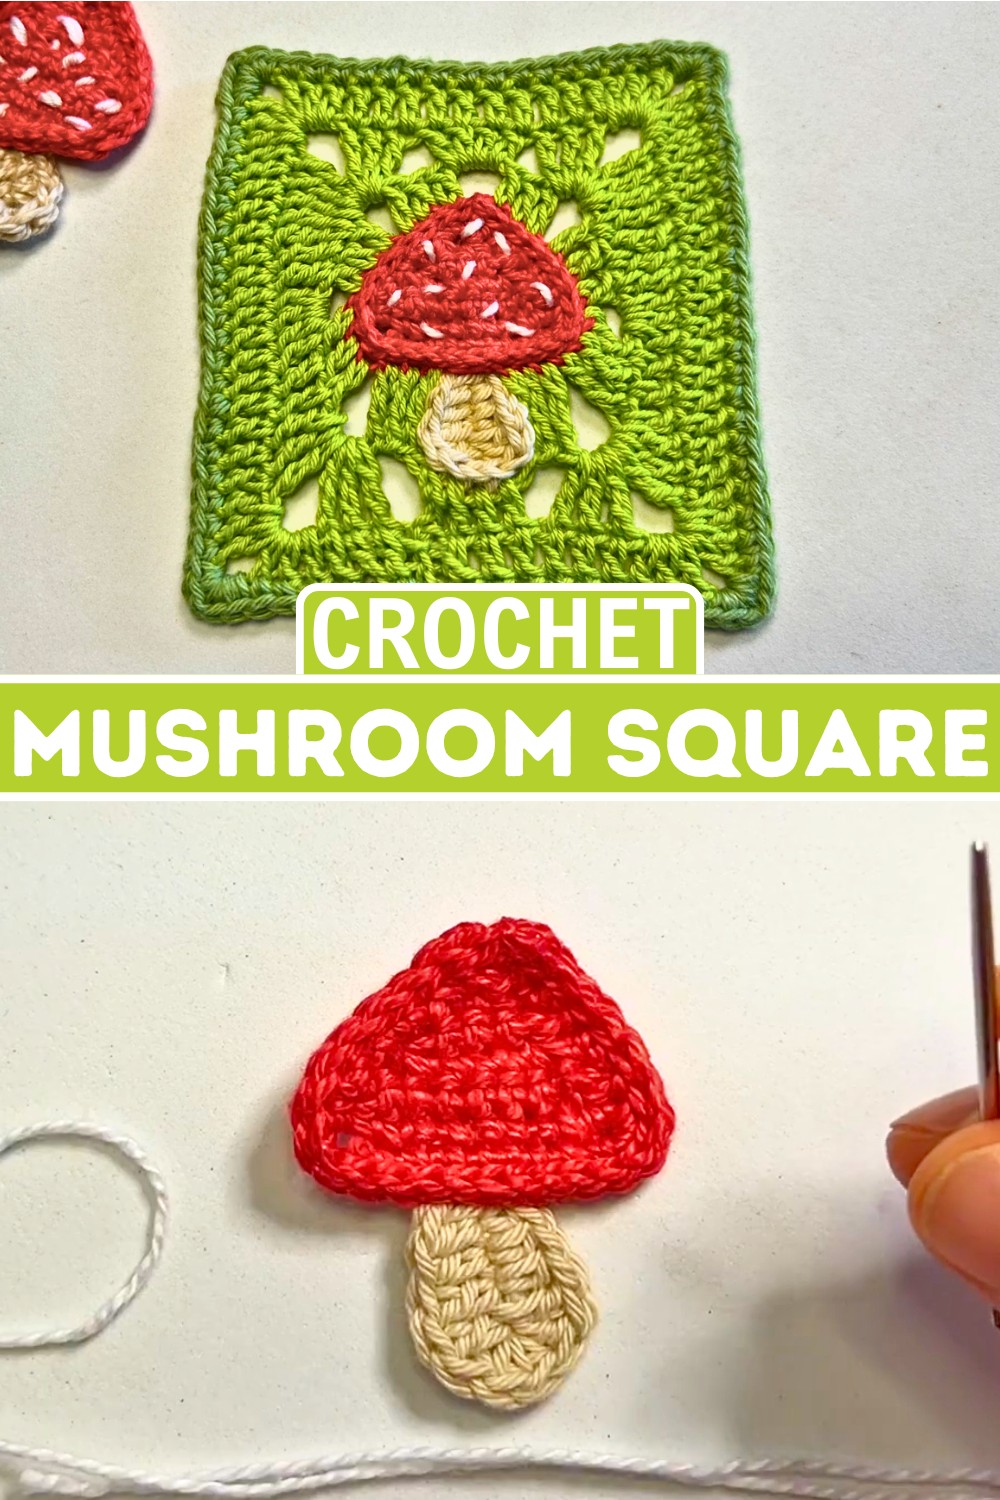
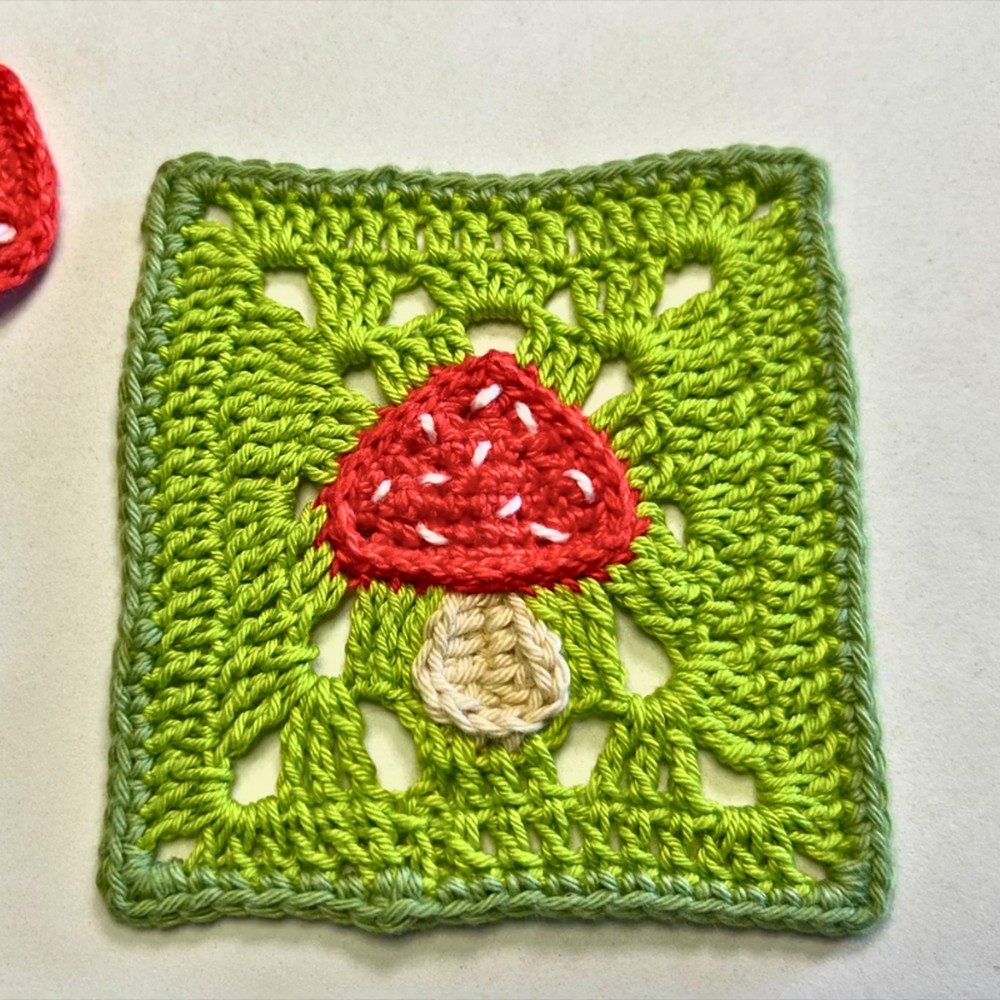
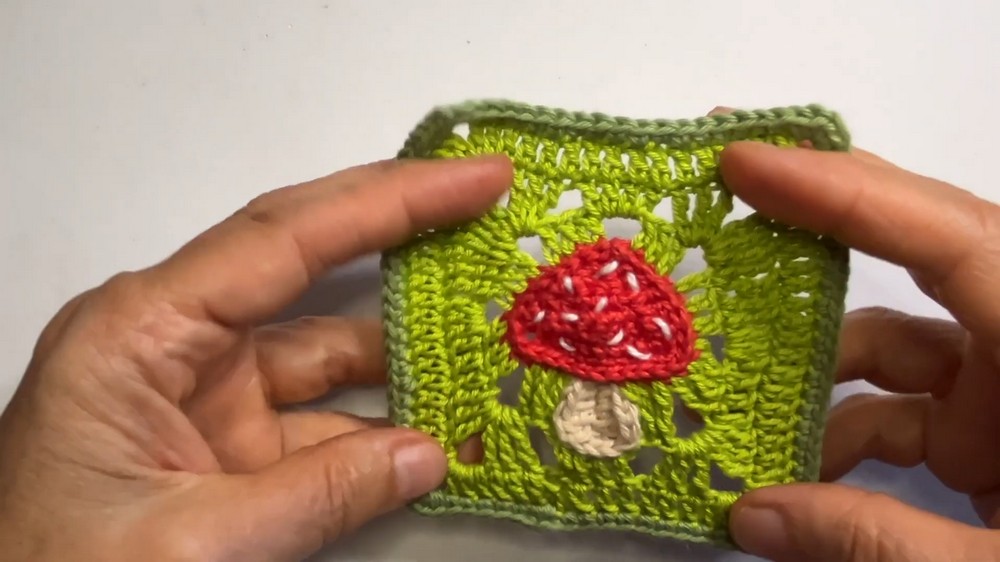
The Crochet Mushroom Square turns basic crochet stitches into a detailed woodland-inspired motif with a shaped mushroom design. Each round builds the square while adding texture, color placement, and clear stitch details that bring the mushroom pattern to life.
This creative crochet square is perfect for blankets, cushions, bags, and patchwork pieces. Where a nature-inspired touch can make the design more special.
Crochet Mushroom Square Pattern
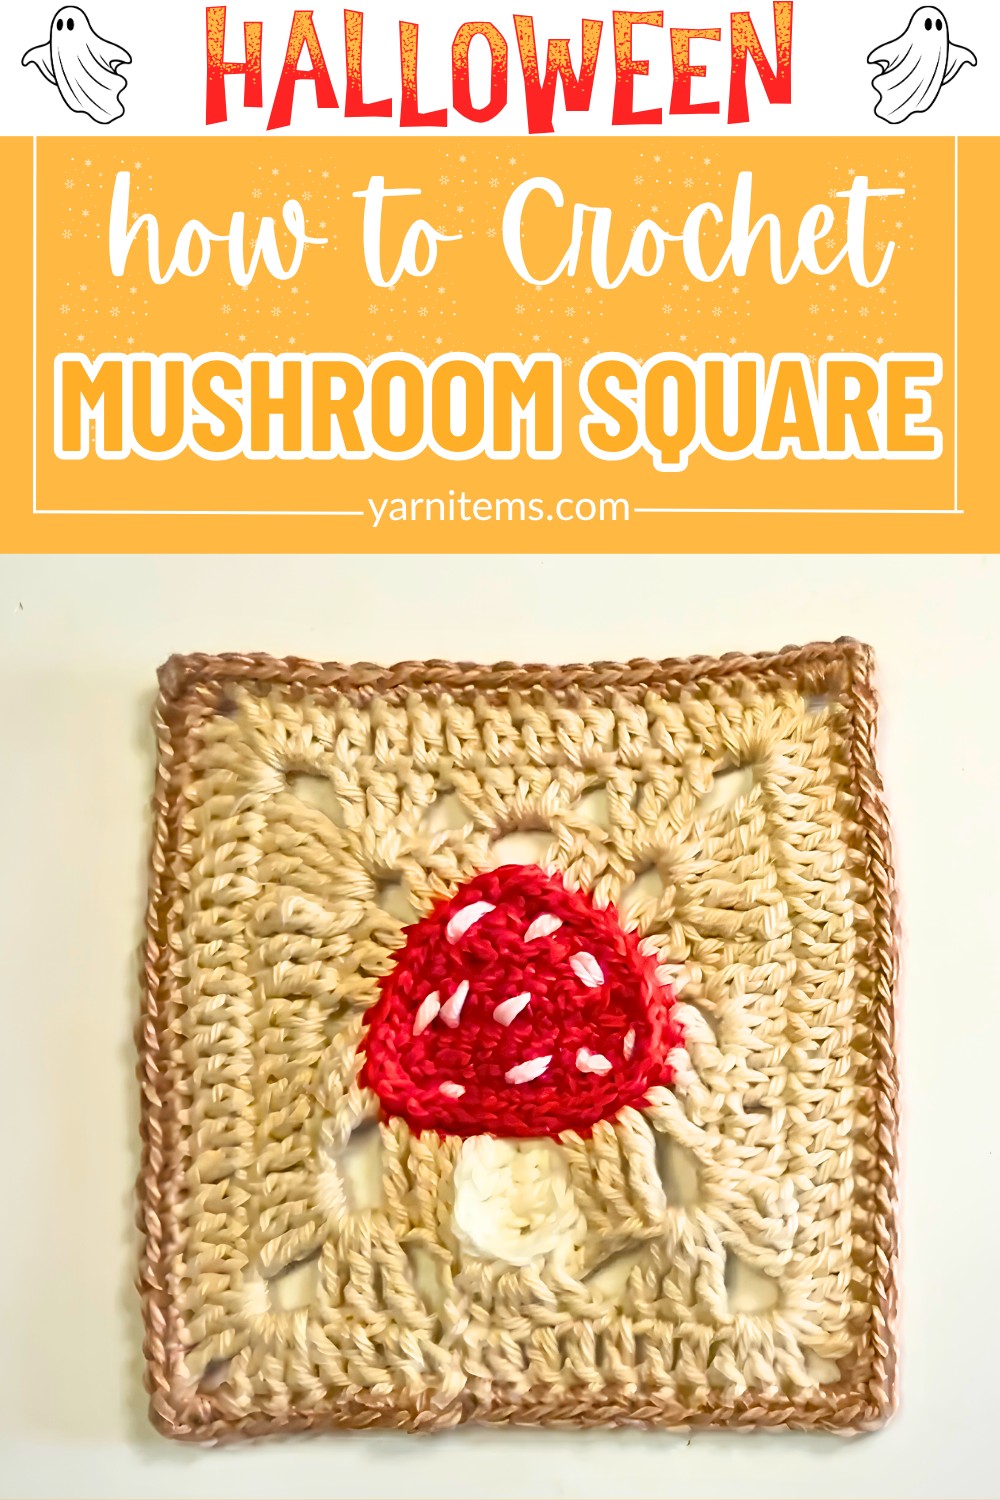
The charm of this Crochet Mushroom Square comes from the way simple stitches create a complete mushroom scene within a small handmade piece. From shaping the mushroom cap to arranging the colors and joining multiple squares, every step adds a new layer of creativity. Explore this pattern to discover how a few crochet techniques can transform a simple square into a detailed nature-inspired creation.
Credit Hook & Loop Crochet Tutorials
Materials & Tools Needed
- 100% cotton yarn in 5 colors:
- 3 colors for the mushroom
- 2 colors for the square background and border
- 2 mm crochet hook
- Tapestry needle (2 sizes may help with different tasks)
- A pair of scissors
Finished Size & Customization Ideas
- The size of the square depends on your yarn weight and hook size.
- Using a 2 mm hook and cotton yarn, the square is typically small and ideal for applications like blankets, cushions, or bags.
- For customization:
- Use different color combinations to match your projects.
- Experiment with lighter or heavier yarn for varied sizes.
- Add more rounds to the square or border for larger designs.
Pattern Abbreviations & Terminology
- ch: Chain
- sc: Single Crochet
- sc2tog: Single Crochet 2 Together (Decrease)
- hdc: Half Double Crochet
- dc: Double Crochet
- tr: Treble Crochet
- dtr: Double Treble Crochet
- sl st: Slip Stitch
- st: Stitch
- sp: Space
Step-by-Step Detailed Crochet Instructions
Part 1: The Mushroom (Cap and Stalk)
- Chain Foundation (Cap):
- Chain 14 (ch 14).
- Mushroom Cap:
- Row 1: 1 single crochet (sc) in each stitch, starting from the second chain stitch from the hook. (13 sc)
- Row 2: Chain 1 (ch 1) and turn. Work as follows:
- Decrease: sc2tog over the first 2 stitches.
- 6 sc.
- End with 1 sc2tog. (11 stitches total in this row)
- Row 3: Ch 1 and turn.
- 1 sc2tog.
- 4 sc.
- 1 sc2tog. (7 stitches total)
- Row 4: Ch 1 and turn.
- 1 sc2tog.
- 2 sc.
- 1 sc2tog. (5 stitches total)
- Row 5: Ch 1 and turn.
- Work 2 sc2tog. (Total decreases to 2 stitches)
- Row 6: Ch 1 and turn.
- Work 1 sc2tog. (1 stitch remains)
- Finishing the Cap:
- Ch 1 and turn.
- Work 1 sc in each stitch around the cap (total of 6 stitches along the edge).
- In the corners: Work 3 sc to round out the corner.
- Continue working the edge: 8 sc along one side, 3 sc in the opposite corner, and 6 sc along the other side.
- Ch 1, then work 1 slip stitch (sl st) all around.
- Pull up a loop, cut the yarn, and work a seamless stitch to finish.
- Mushroom Stalk:
- Chain 7 (ch 7).
- Work along the chain:
- 1 sc into the first chain.
- 1 sc into the second chain.
- 1 half double crochet (hdc) into each of the next two chains.
- 1 double crochet (dc) into the last chain.
- In the same last chain:
- Work 1 additional dc, 3 hdc, and 1 additional dc.
- Work down the opposite side of the chain (mirroring the previous side):
- 1 dc, 1 hdc, 1 hdc, 1 sc, 1 sc.
- Pull up a loop, cut the yarn, and leave a long tail for sewing.
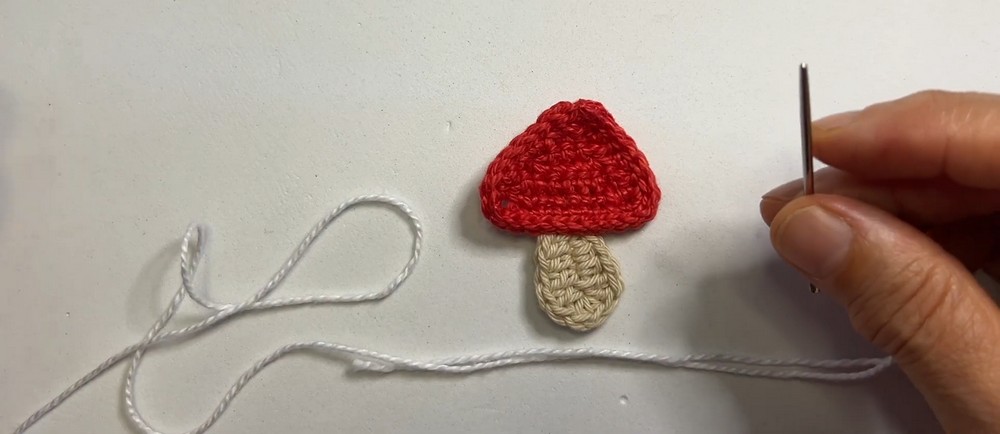
- Sew the stalk onto the cap using a tapestry needle.
- White Spots:
- Use white yarn to sew small circular or spot-like stitches around the cap to form mushroom spots.
At this stage, your mushroom is ready! You can use it as an applique or decoration.
Part 2: Turning the Mushroom into a Square
- Square – Round 1: Creating the Base
- With your square color, create a slipknot and attach it behind the third of the 3 corner stitches of the mushroom cap.
- Starting from this point, work as follows:
- Forming a Corner: Chain 3 (ch 3), and secure it with a slip stitch (sl st) in the third stitch.
- Work only into the back loops of the cap, leaving the front loops unworked.
- 1 treble crochet (tr) into the next 3 stitches.
- Ch 3.
- 3 tr, ch 2, 3 dc into the next spaces around the cap to form the square edges.
- Continue this as a pattern and close the round with a sl st.
- Square – Round 2: Expanding the Square
- Slip stitch into the chain space and ch 3 (this counts as 1 dc).
- Work as follows:
- 1 dc in each of the next 3 stitches.
- Corner: Work 3 tr + ch 3 + 3 tr into the chain space.
- 3 dc into the next chain space.
- Continue the pattern for all sides of the square:
- Corners: 3 tr + ch 3 + 3 tr.
- Sides: 3 dc in spaces and 1 tr or 1 dtr where described.
- End with a slip stitch into the top of the starting 3 chains.
- Square – Round 3: Final Square Rows
- Chain 3 (counts as 1 dc).
- Work 1 dc into every stitch around.
- Corners: Work 3 dc + ch 2 + 3 dc into each corner chain space.
- Close the round with a seamless stitch.
Part 3: Adding the Border
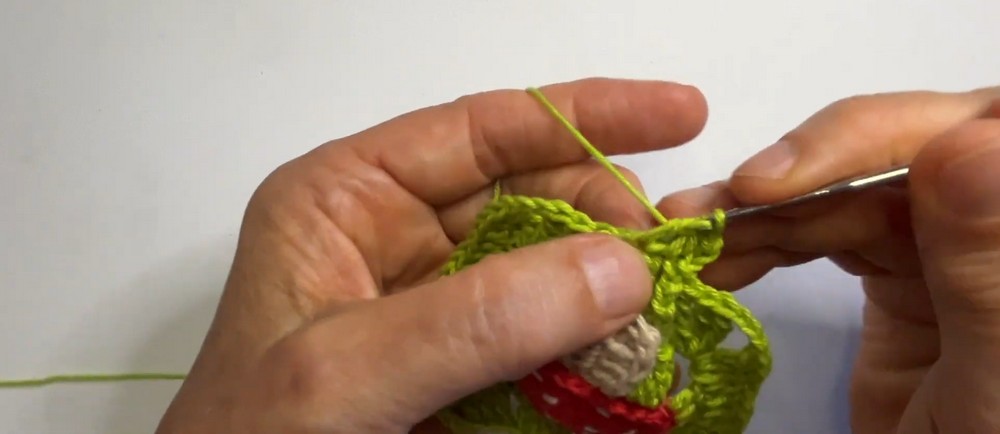
- Round 4 (Border):
- With a contrasting color, start with a standing single crochet (sc) into the top of the beginning 3 chains.
- Work 1 sc into each stitch all around the square.
- Corners: 2 sc + ch 1 + 2 sc into each corner.
- Continue working the border pattern all around and fasten off.
- Optional Blocking:
- For a perfect finish, lightly block the square by pinning it onto a foam board and gently spraying it with water. Allow it to dry for consistent sizing.
Customization Ideas
- Try different thread weights for varied results.
- Use the square as part of a larger project like a bag, blanket, or cushion.
- Alternate colors in the square rounds for fun patterns.