Easy Crochet Butterfly Pattern – Puff Stitch Wings Tutorial
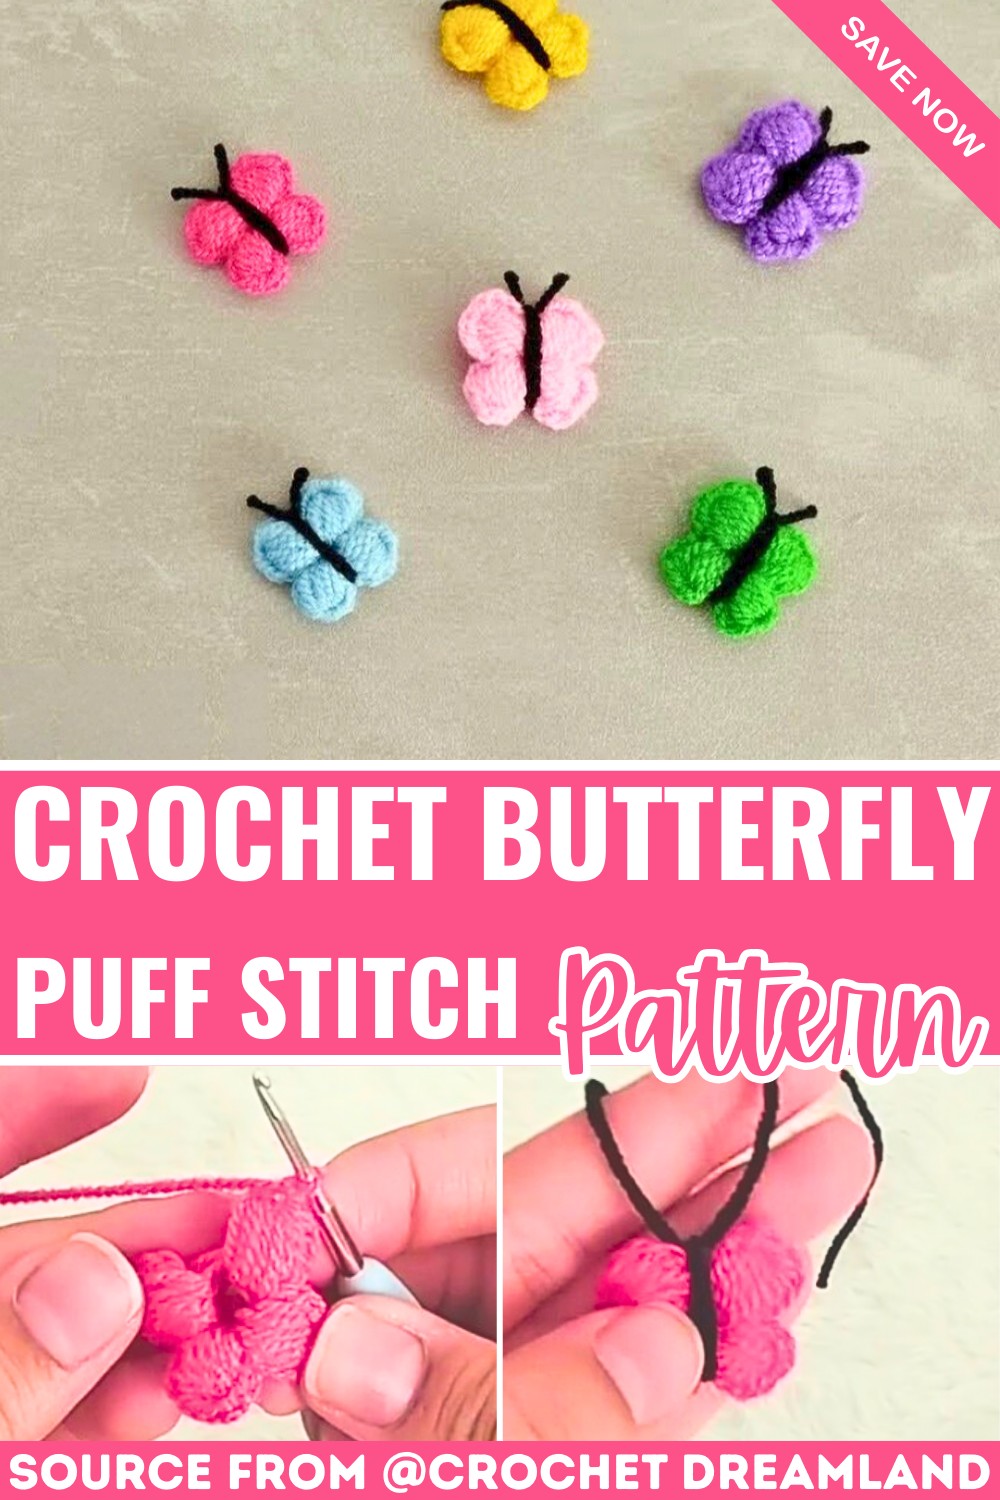
Need a quick crochet accessory with colorful wings? This tiny butterfly uses simple puff stitches and contrasting yarn to create a sweet decoration for gifts, bags, and handmade projects.
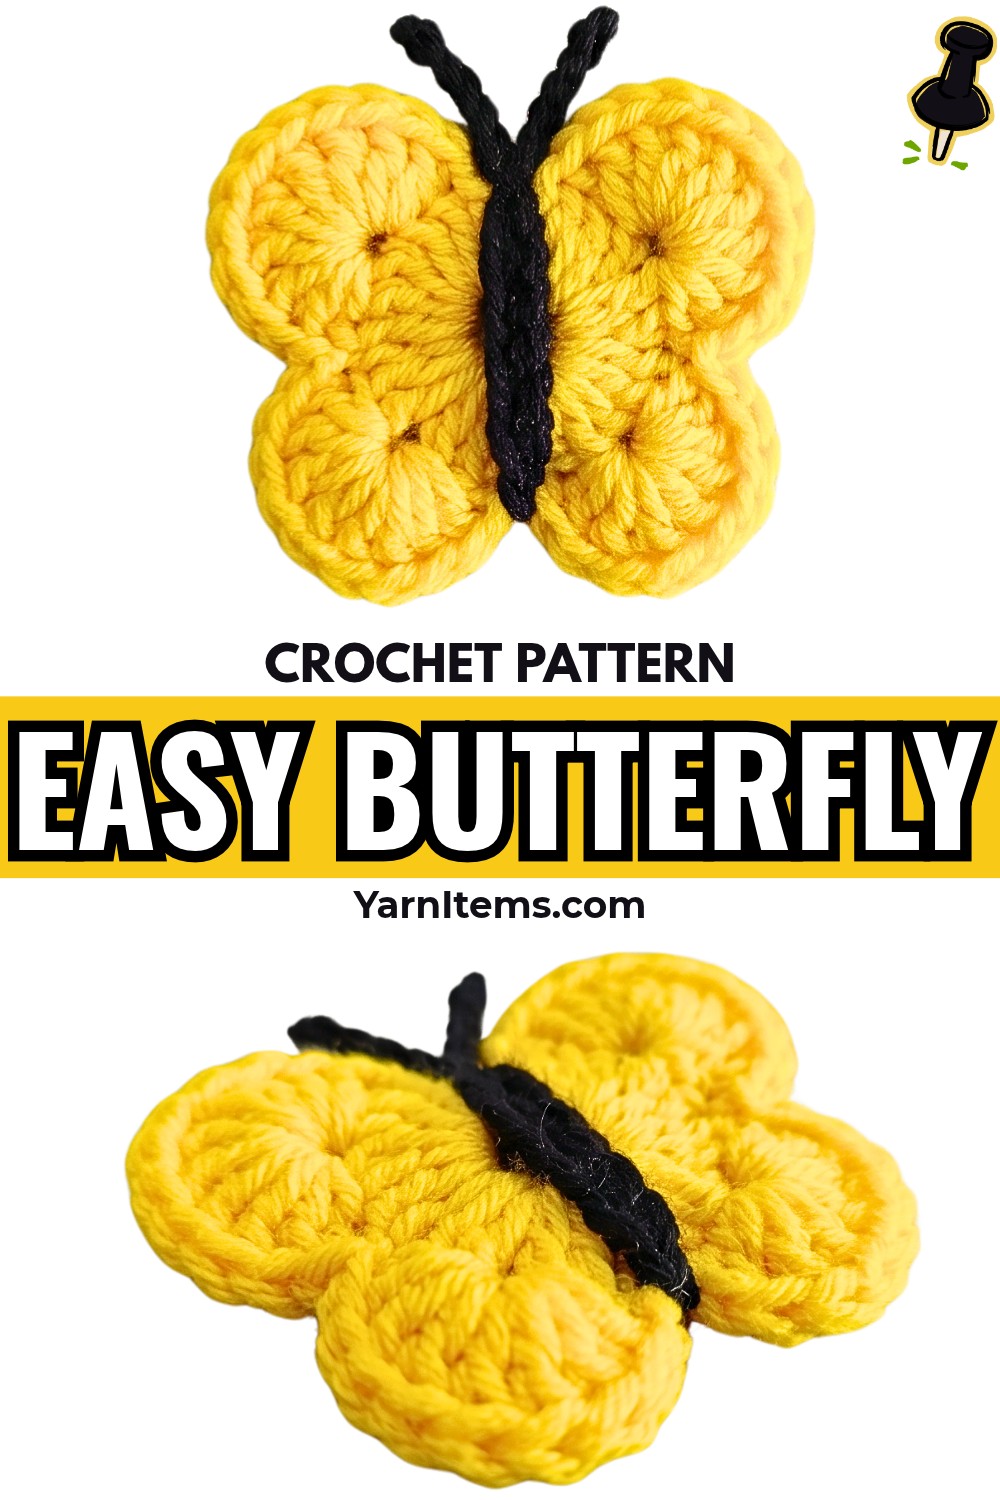
Colorful butterflies can brighten handmade accessories, bookmarks, appliqués, and seasonal decorations. This crochet butterfly uses just two yarn colors and one central ring, making it an approachable design for beginners learning how puff stitches create texture.
Inside, this crochet tutorial guides you through forming four wings, adjusting puff-stitch sizes, closing the center, and adding black yarn details. You’ll also find practical tips for keeping your crochet butterfly balanced and securing its finishing details. Let’s start with the center ring.
Credit Crochet dreamland
Materials & Tools
- Main-color yarn: Choose any color for the four wings.
- Black yarn: For wrapping the butterfly’s body and forming antennae.
- Crochet hook: Approximately 2 mm, or a size suitable for your yarn.
- Scissors: For trimming yarn ends.
- Yarn needle: Optional, for securing loose ends at the back.
Crochet Abbreviations
- MR: Magic ring
- ch: Chain
- sl st: Slip stitch
- YO: Yarn over
- Puff stitch: A textured stitch made by drawing up several loops before pulling through them together.

Step-by-Step: Crochet Butterfly
Step 1: Create the Center Ring
Start with the main wing color. All four wings will be worked into this central ring, so keep it open enough to accommodate the stitches.
- Form a magic ring.
- Hold the adjustable loop securely while preparing to work the first wing.
Teaching tip: Leave the ring adjustable until all four wings have been completed. Tightening it too early can make the remaining stitches difficult to insert.
Step 2: Crochet the First Upper Wing
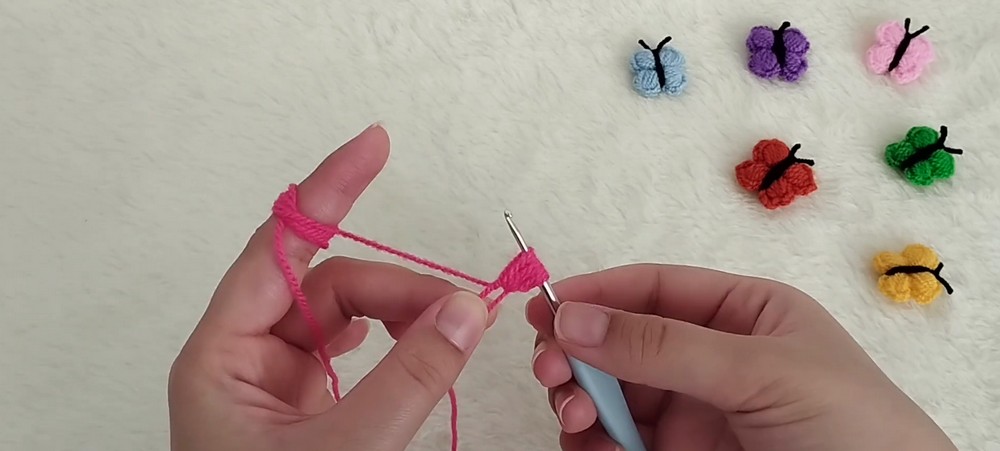
The first upper wing establishes the basic puff-stitch shape.
- Ch 3.
- Work a puff stitch into the magic ring by yarning over and drawing up a loop.
- Repeat the puff-stitch loop-building action until you have completed the five repetitions shown in the original tutorial.
- YO and pull through all loops on the hook.
- Ch 1 to secure the puff.
- Ch 3 and attach the wing to the magic ring with a sl st.
Check your work: The first wing should form a raised, rounded section extending away from the center.
Teaching tip: Keep the loops on your hook at a similar height. Uneven loops can make the puff lopsided or change the wing’s size.
Step 3: Add the First Lower Wing
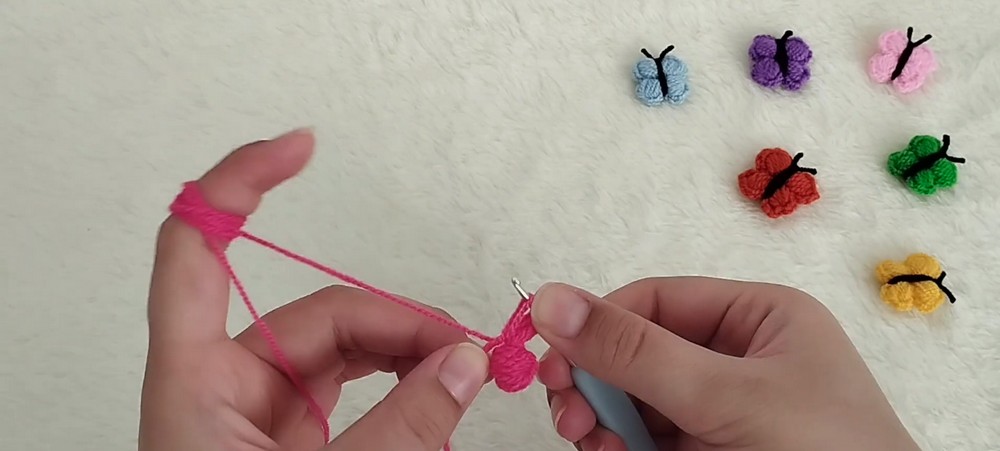
Continue around the same ring to create the first lower wing.
- Ch 3.
- Work the puff stitch into the magic ring, repeating the loop-building action five times.
- YO and pull through all loops on your hook.
- Ch 1.
- Ch 3 and secure the wing to the ring with a sl st.
Teaching tip: Keep this wing close to the first wing without pulling the connecting stitches too tightly. The two sections should remain distinguishable.
Step 4: Shape the Second Lower Wing
The second lower wing uses seven puff-stitch repetitions, creating a different wing size from the first lower wing.
- Ch 3.
- Work the puff stitch into the magic ring, repeating the loop-building action seven times.
- YO and pull through all loops on the hook.
- Ch 1.
- Ch 3 and join to the magic ring with a sl st.
Check your work: Three wings should now extend from the center. Keep the ring accessible so you can comfortably work the final wing.
Teaching tip: The extra puff repetitions create a fuller wing. Draw up loops carefully, leaving enough room on your hook to pull through them together.
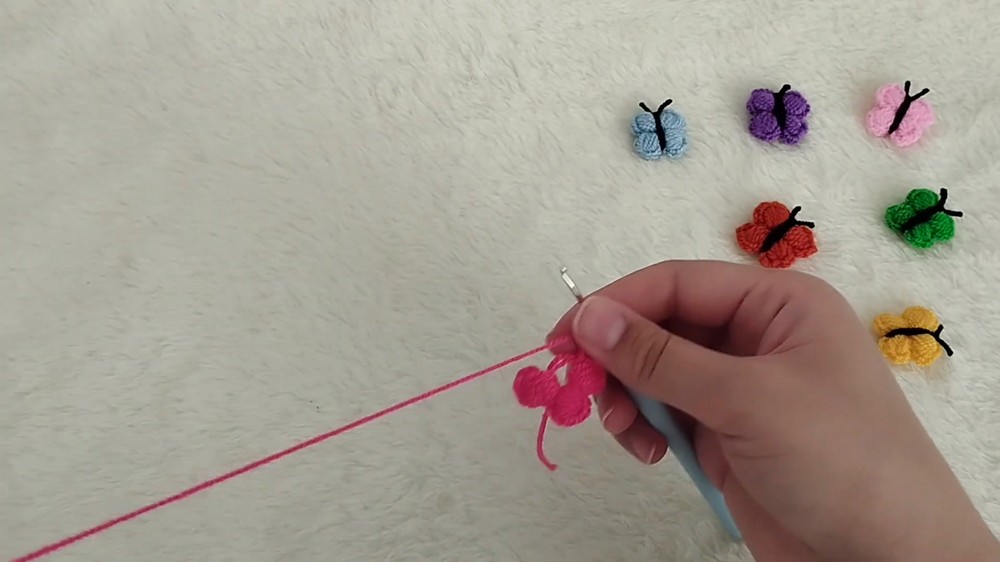
Step 5: Complete the Second Upper Wing
Work the final wing into the same center ring.
- Ch 3.
- Work the puff stitch into the magic ring, repeating the loop-building action seven times.
- YO and pull through all loops on your hook.
- Ch 1.
- Ch 3 and secure the wing to the ring with a sl st.
- Fasten off the main-color yarn.
- Pull the magic-ring tail firmly to close the center.
Important pattern note: The supplied tutorial breakdown lists different puff-stitch repetition counts for the four wings. Follow the original video for the exact placement and orientation of the final wing, since the written timestamps and sequence do not fully clarify its positioning.
Teaching tip: Arrange the four wings before tightening the center completely. Make sure the wing sections spread around the ring rather than bunching up on one side.
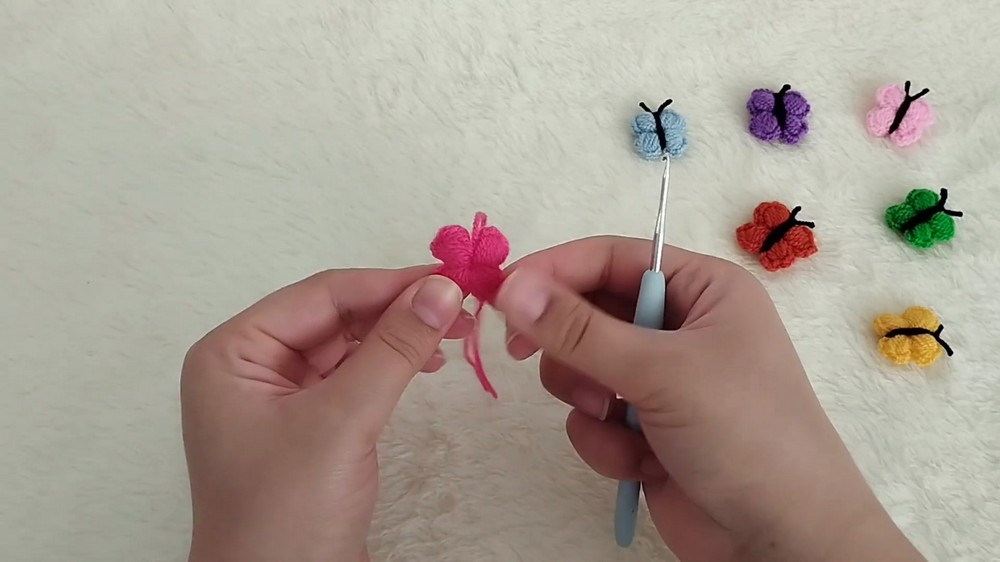
Step 6: Wrap the Butterfly’s Body
Yarn: Black
The contrasting body separates the wings visually and gives the butterfly its recognizable shape.
- Cut a suitable length of black yarn.
- Wrap it several times around the center hub between the upper and lower wings.
- Keep the wraps close together to form a narrow body.
- Tie or secure the yarn ends firmly at the back.
Teaching tip: Avoid wrapping so tightly that the wings fold inward. The body should hold the center together while allowing all four wings to remain visible.
Step 7: Form the Antennae
Use the remaining black yarn strands at the top of the body to create two antennae.
- Leave two short strands extending from the upper body area.
- Adjust their lengths to match.
- Trim the ends neatly.
- Secure the strands at the back so they do not loosen during handling.
Check your work: The antennae should extend from the top of the body, with both strands clearly visible.
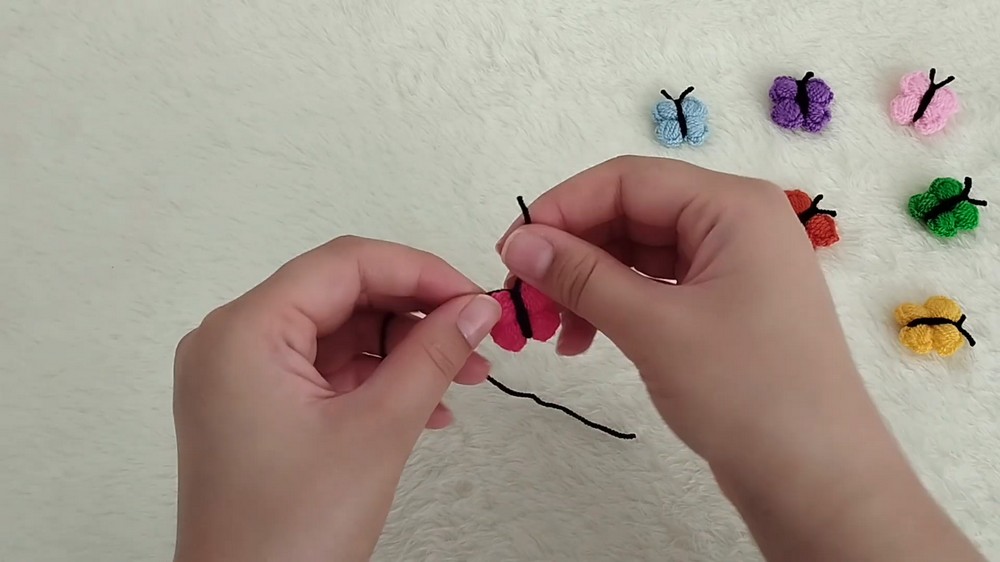
Step 8: Finish and Shape the Butterfly
Use the yarn needle to secure any loose ends on the reverse side.
- Check that the center ring is closed.
- Separate the four wings gently with your fingers.
- Confirm that the black body remains centered.
- Trim loose strands without cutting the securing knots.
Teaching tip: If one wing looks compressed, gently arrange it before attaching the butterfly to another item. Avoid pulling hard on the puff stitches, as this can distort their shape.
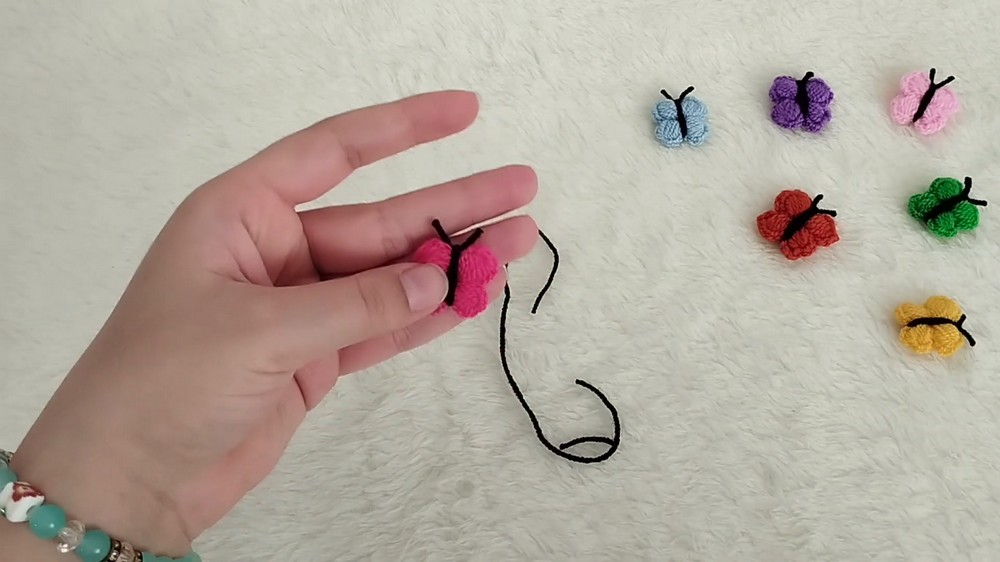
Ways to Use Your Crochet Butterfly
This small butterfly works well as a decorative accent for gift wrapping, greeting cards, hair accessories, bags, or other handmade projects. You can also create a collection in different wing colors to coordinate with birthdays, spring decorations, or personalized gifts.
For a more colorful effect, try contrasting yarn shades for different butterflies. Keep the same central-ring technique and experiment with the puff-stitch texture to create a coordinated set of tiny crochet decorations.