Cute and Functional Crochet Turkey Hotpad for Your Kitchen
A crochet turkey hotpad can do more than protect your table; it can instantly bring a cheerful fall feel to your kitchen. With its colorful feathers and cute turkey shape, this piece doubles as a practical kitchen accessory and a festive decoration for Thanksgiving. If you’re ready to make one yourself, this crochet pattern walks you through each stage in a simple, beginner-friendly way.
Crochet Turkey Hotpad Pattern
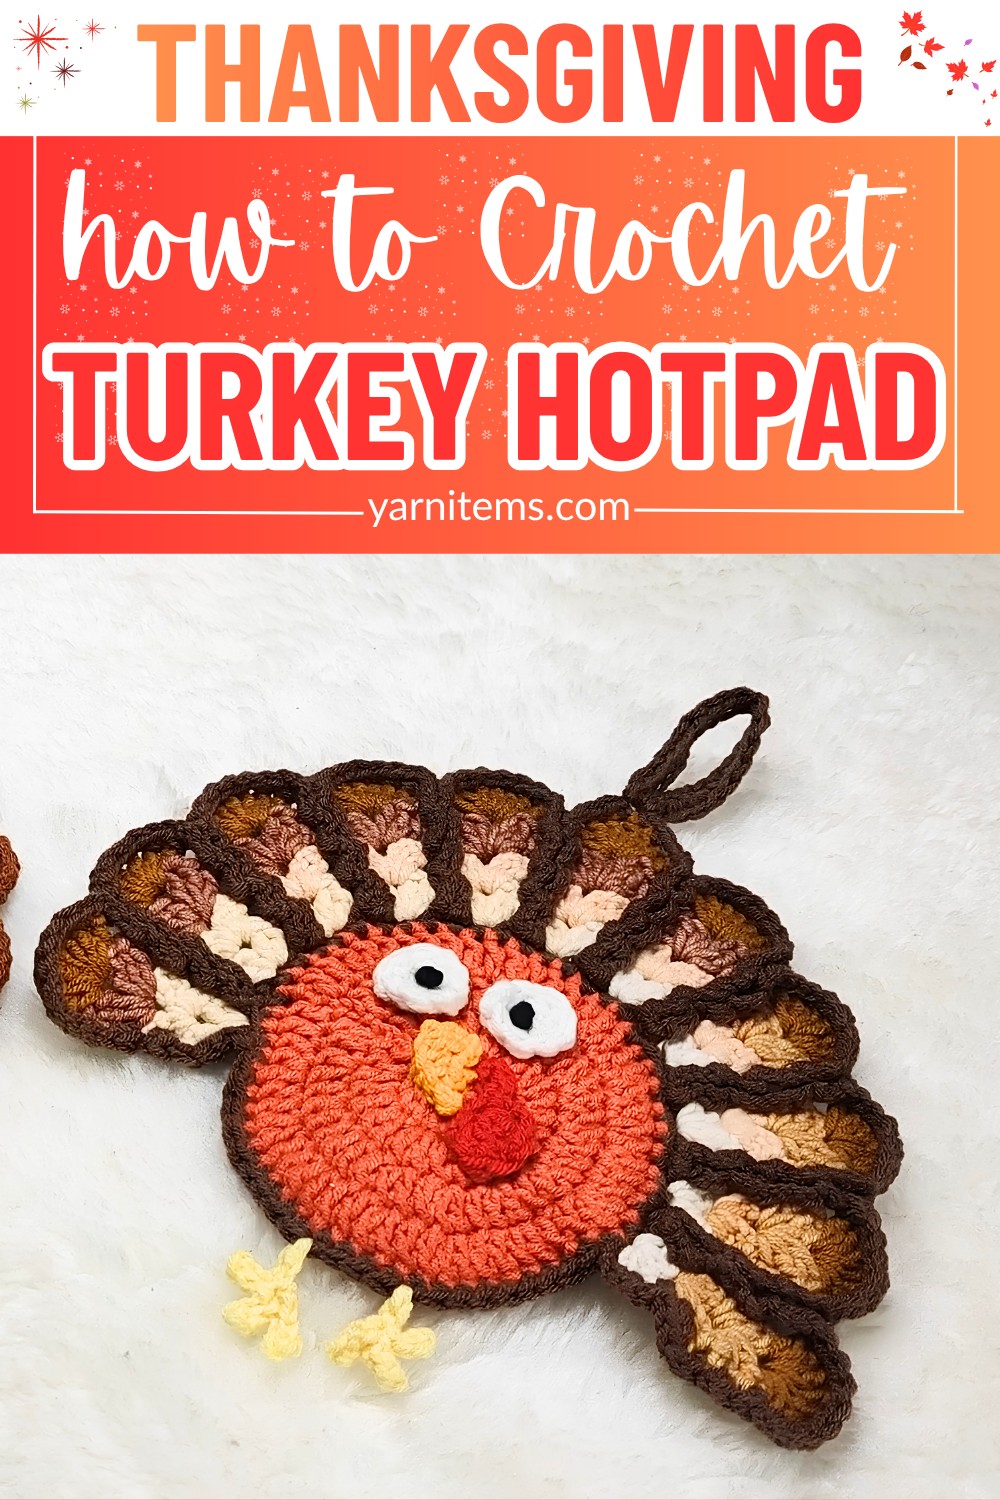
The instructions break the piece into clear, easy-to-follow crochet turkey steps. Making it enjoyable from the first stitch to the final detail. Keep scrolling to see how this charming turkey hotpad comes together and create a handmade crochet piece that’s sure to stand out in your kitchen.
Credit Ravella Design
Materials & Tools Needed
- Yarn: Standard cotton yarn/amigurumi cotton yarn in:
- Orange – main body center
- Brown (medium) – single crochet round around the orange and border/side detailing
- White – first shell/fan row
- Cream/Light beige – second shell/fan row
- Another color (e.g., light brown) – third shell/fan row
- Darker brown – large fan row (7 dc groups)
- White – eyes
- Black – eye centers
- Yellow – beak and feet
- Red – wattle (red hanging piece near beak)
- Hook: 3.0 mm crochet hook (main hook)
- Smaller hook: For weaving in ends (optional but recommended)
- Yarn needle: For sewing on eyes, beak, red wattle, and securing ends
- Scissors
Finished Size & Customization Ideas
The exact size isn’t stated, but with standard cotton/amigurumi yarn and a 3.0 mm hook, this makes a medium-sized hotpad suitable for:
- Hot pots/pans
- Hanging as a wall decoration
To customize:
- Use thicker yarn and a larger hook (e.g., 4 mm) for a bigger hotpad.
- Change the color order of the shell rows (white/cream/light brown/dark brown) to match your kitchen decor.
- Make multiple pieces as a gift set (especially for Thanksgiving).
Pattern Abbreviations & Terminology
Written in US terms:
- ch – chain
- sc – single crochet
- dc – double crochet
- hdc – half double crochet
- sl st – slip stitch
- MR / magic ring – magic ring (adjustable ring)
- st(s) – stitch(es)
- sp – space
Notes:
- Unless stated otherwise, chains at the beginning of rounds are not counted as a dc, except where the instructor explicitly says to count them as a dc.
- Work in the round for the center and shell sections, and in rows/sections for borders, feet, and hanging loop.
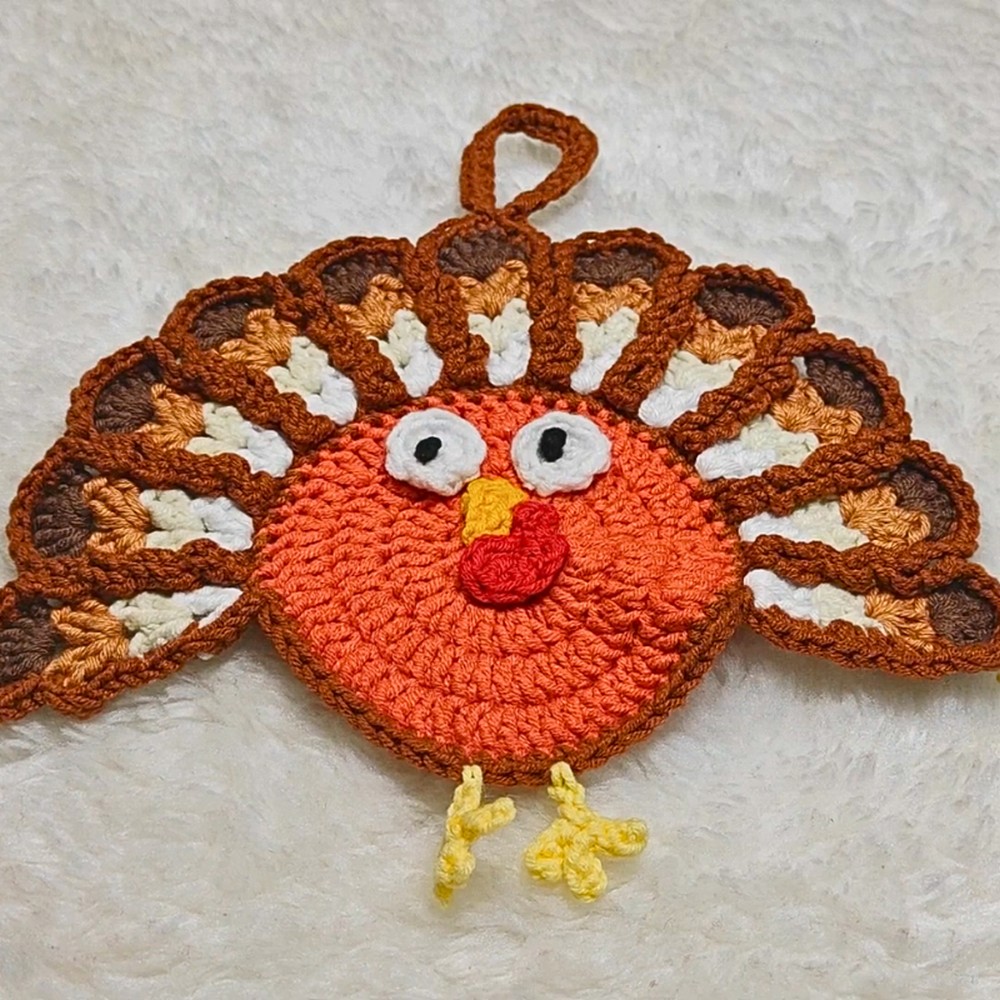
Step-by-Step Detailed Crochet Instructions
MAIN BODY – ORANGE CENTER
Round 1 – Orange (Center Circle)
- Make a magic ring.
- Ch 3 (this ch-3 is not counted as a dc in this project, but it does add to the total stitch count).
- Work 14 dc into the magic ring.
- Pull the ring tail tight to close the center.
- Join with a sl st into the top of the initial ch-3.
- You have 14 dc + the ch-3 = 15 “posts” around, but only 14 dc are counted as stitches.
- Round 1 complete.

Round 2 – Orange
- Ch 3 (do not count as a dc).
- In each st around, work 2 dc in each st.
- You’ll have 14 sts from Round 1 → 28 dc in this round (not counting the ch-3).
- Join with a sl st at the top of the ch-3.
- Round 2 complete with 28 dc.
Round 3 – Orange
Pattern: 1 dc in one st, 2 dc in next st around.
- Ch 3 (do not count as dc).
- In the same st where you made the ch-3:
- Work 1 dc (this is the first counted dc).
- Next st: 2 dc in the same st.
- Next st: 1 dc.
- Next st: 2 dc in the same st.
- Continue this pattern around:
- (1 dc in next st, 2 dc in next st) repeating.
- At the end of the round, join with a sl st in the top of the initial ch-3.
- Round 3 complete (a larger circle with an even increase pattern).
(Exact stitch count wasn’t explicitly recounted in the audio, but pattern is consistent: 28 stitches → (1,2) repeat = 14 repeats → +14 stitches → 42 dc.)

Round 4 – Orange
Pattern: 2 dc, 1 dc, 1 dc, 2 dc repeat.
- Ch 3 (do not count as dc).
- In the same st:
- Work 2 dc (this pair replaces the counted start).
- Next st: 1 dc.
- Next st: 1 dc.
- Next st: 2 dc in same st.
- Continue this pattern around:
- (2 dc in one st, 1 dc in next st, 1 dc in next st, 2 dc in next st, …).
- Join with a sl st in the top of the ch-3.
- Round 4 complete, forming a flat circle.
At this point, the orange center has 4 rounds.
Ending Orange Color
- After completing Round 4, do not join in the top of the ch-3 for the final closure step.
- Instead, the instructor:
- Inserts a hook into the first actual dc of the round (the first dc of the pair where 2 dc were made).
- Makes a sl st there to finish the round more neatly.
- Ch 1 and cut the orange yarn.
- Center circle is complete.
ROUND OF BROWN SC AROUND ORANGE
Use brown (medium brown) yarn.
- Join brown yarn anywhere around the orange circle, avoiding the same spot as the previous joins to prevent bulky knots.
- Fix the yarn: insert hook, pull up loop, ch 1 to secure.
- Work 1 sc in each st around:
- Place the previous yarn tail along the top of the stitches and crochet over it to hide.
- At the end of the round:
- Join with a sl st in the first sc.
- Ch 1 and cut the yarn.
- You now have a brown sc border around the orange center.

SHELL/FAN SECTION (TAIL FEATHERS)
You now work a series of shell rows in different colors, on top of the brown sc round.
Shell Row 1 – White
- Join white yarn into any st of the brown sc round.
- Fix yarn and ch 3 – this time, count this ch-3 as the first dc.
- In the same st:
- Work 1 dc (so with the ch-3, that makes 2 dc in the same st).
- Ch 1.
- In the same st:
- Work 2 dc again.
- You now have a shell: 2 dc, ch 1, 2 dc in one st.
Now:
- Skip 2 sts:
- Skip the next st and the following st.
- In the 3rd st:
- Work 2 dc, ch 1, 2 dc (same shell pattern).
- Repeat:
- Each shell: 2 dc, ch 1, 2 dc in same st.
- Always skip 2 sts between shells and work into the 3rd st.
- Continue until you have 11 shells in white:
- The instructor counted: “I made a total of 11 patterns”.
- At the end:
- Ch 1 and cut the white yarn.

Shell Row 2 – Cream (or light beige)
- Take your cream yarn.
- Insert hook into the center space of any white shell:
- This is the ch-1 space between the 2 dc + 2 dc.
- Join cream yarn and fix:
- Ch 3 (count as first dc).
- In the same space:
- Work 1 more dc (so 2 dc total).
- Ch 1.
- In the same space:
- Work 2 more dc.
- Shell is again 2 dc, ch 1, 2 dc.
Repeat:
- Go to the next shell’s center space:
- 2 dc, ch 1, 2 dc.
- Work this same shell into each of the 11 white shells.
- After completing all 11 shells:
- Ch 1 and cut the cream yarn.
Row 2 of shells is complete (cream layer).
Shell Row 3 – Another Color (e.g., light brown)
For this row, the structure changes: 3 dc, ch 1, 3 dc per shell.
- Join your next color (e.g., light brown) in the center space of any cream shell:
- Insert hook into the ch-1 space.
- Ch 3 – count this as the first dc.
- In the same space, work 2 more dc:
- Now you have 3 dc total (ch-3 + 2 dc).
- Ch 1.
- In the same space, work 3 more dc.
- Each shell: 3 dc, ch 1, 3 dc.
- Move to the center of the next cream shell:
- 3 dc, ch 1, 3 dc.
- Repeat across all shells:
- 11 shells total in this row.
- At end:
- Ch 1 and cut this yarn.
Row 3 shells are complete.
Shell Row 4 – Dark Brown (Large Fans, 7 dc)
In this row, you replace the shell structure with large fans of 7 dc.
- Take the dark brown yarn.
- Insert the hook into the space between the 3 dc on one side and the 3 dc on the other side of a shell (the center ch-1 space).
- Join the yarn and ch 3 – count this as the first dc.
- In that center space, work 6 more dc:
- You will have 7 dc total (ch-3 + 6 dc).
- Move to the center of the next shell:
- Again, work 7 dc in that center space.
- Continue around:
- 7 dc in each of the 11 shell centers.
- After the last group of 7 dc:
- Ch 1 and cut the yarn.
All tail feathers (shell/fan rows) are now complete.

WEAVING IN ENDS
- Turn the piece to the back.
- Use a small hook and/or yarn needle.
- For each color:
- Weave its yarn tail through stitches of the same color to hide it neatly.
- Go back and forth a few times to secure.
- Cut the excess yarn.
- For the magic ring center:
- Tie a small knot to secure the center from loosening, then weave and cut.
BROWN BORDER & SIDE “LADDER” STITCHES
Now you complete the brown edging and decorative ladder-like stitches up and around the tail.
Rejoin Brown at Side
- Take the same medium brown used for the first sc round.
- Join into the side area:
- The instructor rejoined near the first white shell region.
- Fix yarn with ch 1.
- Work sc up along the side:
- Insert hook into available spaces/stitches, adding sc as needed:
- Sometimes she places extra sc in corners to avoid gaps and to shape the edge.
Ladder Stitches (Chains and sc)
From the top of the side, you make small chained “bars” up and down between shells:
- When you reach the top edge:
- Ch 3.
- Insert hook into the appropriate spot below (or along) and make an sc to form a little bar.
- Repeat:
- Ch 3 → sc in a lower or adjacent point (creating a ladder-like effect).
- When you reach the area near the first shell row:
- Note the instructor refers to skipped stitches from the first shell row (remember we skipped 2 sts between shells).
- She:
- Inserts the hook from back to front into the first of the two skipped sts to anchor.
- Works an sc there.
- Ch 1 to turn and go back up:
- Insert hook into the second skipped stitch and sc.
- Ch 3, then sc in corresponding points going up again.
- She uses the same insertion points used when going down.
- When going up, she inserts the hook front to back and front again to secure.
- Continue this up-and-down ladder pattern along the side and across the top edge.
- Move over the top edge with single crochets:
- Work sc across, sometimes adding 3 sc at a top point to prevent stretching and shape the curve.
- Continue down the other side:
- Repeat the ladder sequence as on the first side.
At the final side:
- Make sc down to meet the starting point, adjusting:
- At some long spaces, she works 2–3 sc to fill gaps.
- At the end:
- Work sc into the last necessary space.
- Ch 1 and cut the yarn.
- Weave in the brown ends as before.
Now the main turkey body with decorative brown ladder border is complete.

EYES
White Eye Discs (Make 2)
- With white yarn, make a magic ring.
- Ch 3.
- Work 8 dc into the ring.
- With ch-3 counted, you have 9 dc total, but the tutor counts 8 dc plus the ch-3.
- Pull the ring tail tight.
- Join with a sl st into the top of the ch-3.
- Ch 1 and cut the yarn.
- Make a second eye the same way.
Weave in the ends, except for the tail you might use to sew to the main body.
Black Eye Center
- Cut a piece of black yarn.
- Fold it to find the center.
- Tie multiple knots in the same spot:
- Make 4–5 knots in the same location to form a small round “pupil”.
- Take one white disc:
- Insert a small hook right into the center of the disc.
- Place the knotted black piece into that center, pulling it through.
- Tie and secure on the back:
- Make a knot on the backside to fix the pupil.
- Weave in and cut the black ends on the back.
- Repeat for the second white eye.
BEAK (Yellow)
- With yellow yarn, ch 5.
- Turn back:
- In the 4th ch from the hook:
- Work a sl st.
- In the next (last) ch:
- Work 1 sc.
- Next, yarn over and in the next position:
- Work 1 hdc.
- In the final chain (tip):
- Work 1 dc.
- In the 4th ch from the hook:
- Ch 1 and cut the yarn, leaving a long tail for sewing the beak to the face.
This forms a small tapered beak.
RED WATTLE (Dangling Red Piece)
- With red yarn, ch 6.
- Count back 3 chains: 1, 2, 3.
- In the 3rd ch from the hook:
- Work 4 dc into that single chain.
- Ch 3.
- In the same chain space:
- Sl st to form a small loop at the top of the 4 dc cluster.
- Work back along the remaining chains:
- In next ch: 1 sc.
- In next ch: 1 sc.
- Continue sc to the end of the chain row.
- Ch 1 and cut yarn, leaving a tail for sewing.
This creates the red wattle that hangs next to the beak.
SEWING ON FACE PARTS
- Position the eyes:
- Place them symmetrically on the orange/brown center region as in the video.
- Using a white yarn needle:
- Sew around each eye, going through the white disc and the main body, but:
- Be careful that the white stitching does not show on the back side.
- Sew around each eye, going through the white disc and the main body, but:
- Position the beak:
- Centered below and between the eyes.
- Use the yellow tail:
- Sew the beak securely in place.
- Position the red wattle:
- Attach near/under one side of the beak as shown in the tutorial.
- Sew securely, weave in ends.
FEET
You make two feet in light yellow, directly attached to the bottom of the body.
First Foot
- With light yellow, ch 3.
- Decide where to place feet:
- The instructor holds the chain up to estimate the position at the bottom edge of the body.
- Join the chain to the bottom:
- Fix the first foot in place by anchoring the end of the chain to the chosen stitch at the bottom of the turkey (using sl sts).
- Now build toes with slip stitches and chains:
- From the anchor:
- Ch 3.
- Work sl st back along the chain to form the first toe:
- 1 sl st, 2 sl st, 3 sl st back into the center.
- Ch 3 again for the second toe.
- Work sl st down and back to the center.
- Ch 3 again for the third toe.
- Work sl st back to the center.
- (The instructor repeats a simple pattern: ch 3, turn, sl st back, insert in the center, etc., for three toes.)
- From the anchor:
- At the end:
- Ch 1 and cut the yarn.
- Weave in and hide all feet yarn ends on the back.

Second Foot
- Repeat the same process on the other side of the bottom, mirroring the first foot.
- Again, weave in ends.
HANGING LOOP
Use the same brown color as the border ladder stitches.
- Find the top center:
- Count 5 shell patterns across the top: 1, 2, 3, 4, 5.
- The 6th shell region is the center top.
- At the top of this center region:
- Join brown yarn.
- Ch 17.
- Bring the chain down to form a loop:
- Fix it by working 1 sc at the starting point between shells.
- Turn to the front:
- Work sc all along the chain:
- Insert into each ch and sc:
- 1 sc in each chain stitch along the loop.
- Insert into each ch and sc:
- Work sc all along the chain:
- At the end, insert the hook in the same spot you initially fixed the yarn:
- Sl st to secure.
- Ch 1 and cut the yarn.
- Weave in the loop’s yarn ends.
Final Notes
- Make sure all ends are woven in securely.
- The finished turkey hotpad can be used:
- As a hot pad/pot holder (cotton is heat-resistant).
- As a wall hanging (using the loop).
- You can make sets in different color schemes and gift them, especially around Thanksgiving.