Crochet Floral Lace Sweater Pattern with Flower Motifs & Cotton Lace
Here’s a floral lace crochet sweater with breathable cotton drape, repeating flower motifs, and adjustable sizing from panel width to sleeve length.
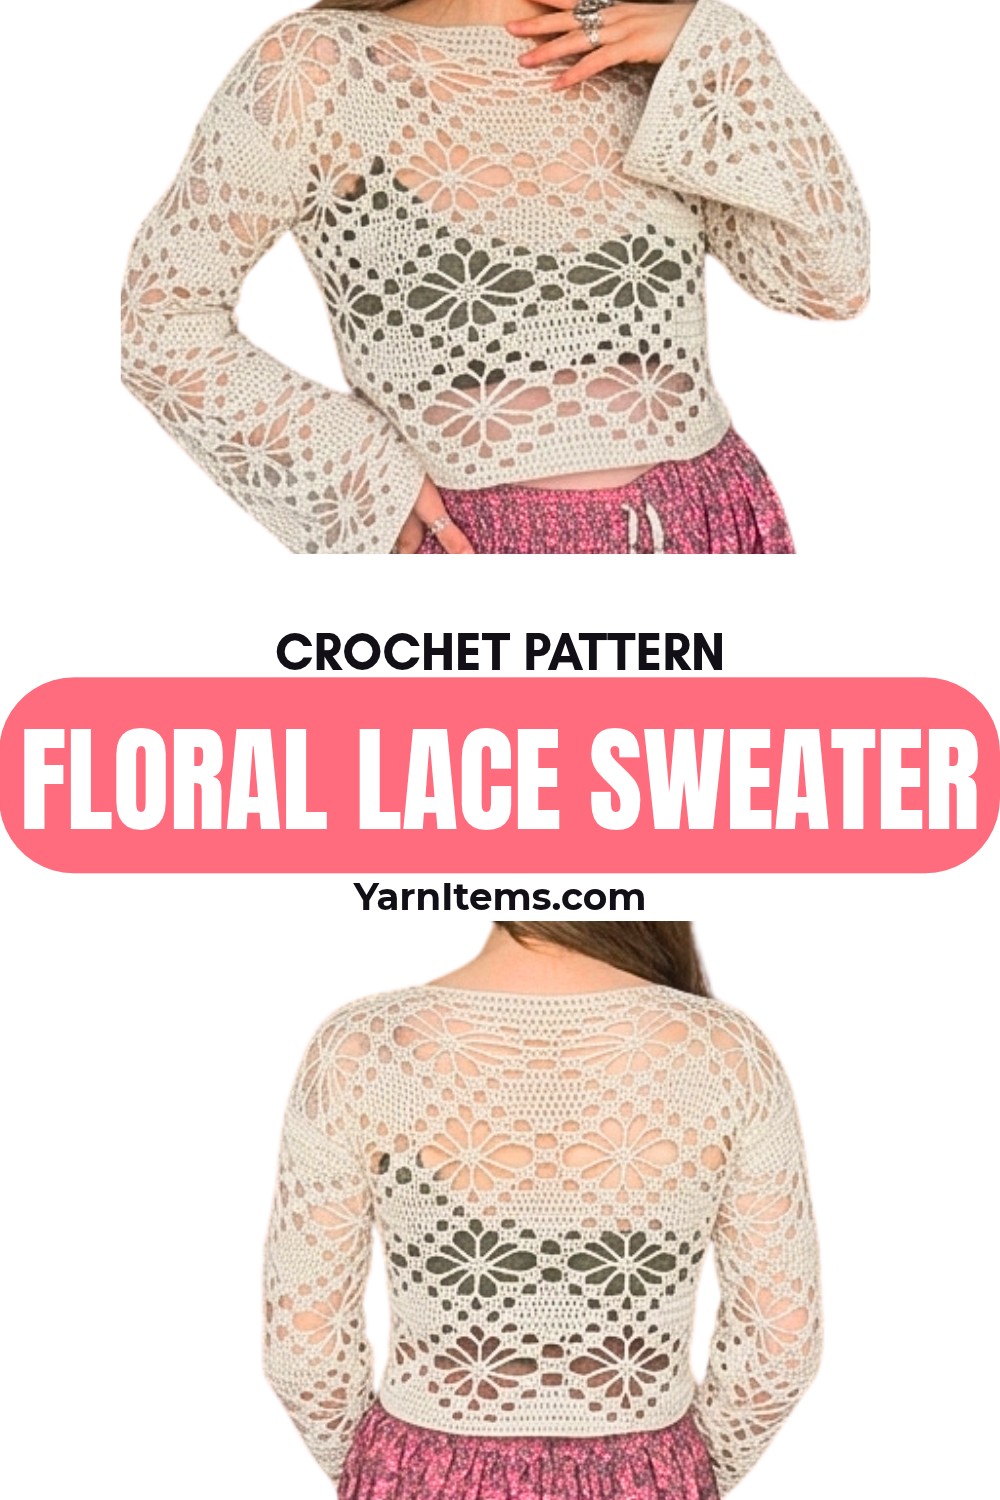
Lightweight cotton and open floral lace give this crochet sweater an airy feel suited to warm-weather dressing. Repeating flower motifs create visual interest without requiring complicated shaping, while panel-based sizing lets you adjust width and length around your measurements.
Once you understand how each flower develops across Rows 2–10, crochet pattern rhythm becomes much easier to follow. Pay close attention to skipped stitches, chain spaces, and turning-chain placement, since each detail helps keep flower motifs aligned from one row to the next.
Credit Hannah Drapinski
Materials & Tools Needed
- Yarn: Hobbii Sultan Solid 100% Cotton, Fine Size 2 Weight
- Crochet Hook: 4.5 mm
- Measuring Tape
- Stitch Markers
- Tapestry Needle: For sewing
- Blocking Mats
- Rust-Proof Pins
Choose Panel Width and Length
This sweater is highly customizable through flower repeats.
Each flower requires 25 chains, so the starting chain count determines panel width:
- 2 flowers: 50 chains
- 3 flowers: 75 chains – used for sleeves in tutorial
- 4 flowers: 100 chains – used for front and back body panels
For additional width, add more groups of 25 chains.
For additional length, repeat vertical flower sequences until panels reach desired measurement. Sleeves can follow the same principle.
Important Turning-Chain Note
At the beginning of every row, ch 2 does not count as dc. First dc goes into first stitch directly beside turning chain.
This detail is important throughout the pattern. Treating turning ch-2 as dc would reduce actual stitch placement and gradually shift flower alignment.

Abbreviations
- ch: Chain
- st(s): Stitch(es)
- sk: Skip
- sc: Single Crochet
- dc: Double Crochet
- tr: Treble Crochet
- sp: Space
Begin Floral Body Panels
Work front and back panels using the same flower sequence. Keep row counts and panel measurements consistent so shoulder and sleeve attachment points line up cleanly later.
Foundation Chain: Chain a multiple of 25 according to desired flower width; for 4 flowers, ch 100.
Row 1: Ch 2, not counted as st; work 1 dc in 3rd ch from hook; work 1 dc in every ch across entire row.
At the end of Row 1, count stitches and confirm the count matches the original foundation chain. This check is useful because every later flower repeat depends on correct starting width.

Build First Flower Repeat
Rows 2–10 create one complete floral lace cycle. After Row 10, Rows 3–10 are repeated to add more vertical flower repeats.
Row 2: Ch 2, turn; work 1 dc in first st and next 6 sts for 7 dc total; ch 2, sk 2, 1 dc in next st, 1 dc in next 3 sts for 4 dc total; ch 2, sk 2, 1 dc in next st, 1 dc in next 3 sts for 4 dc total; work dc in next 13 sts for 17 dc counting previous 4; repeat flower sequence around; finish row with 10 dc.
Row 3: Ch 2, turn; work 1 dc in first st and next 6 sts for 7 dc total; ch 2, sk 2, 1 dc in next st; work 2 dc in ch-2 sp and 1 dc in next st for 4 dc total; ch 2, sk 2, 1 dc in next st; work 2 dc in ch-2 sp and 1 dc in next st for 4 dc total; ch 2, sk 2, 1 dc in next st; dc in next 10 sts for 11 dc total; repeat sequence; finish row with 4 dc.
Row 4: Ch 2, turn; work 1 dc in first st; ch 2, sk 2, 1 dc in next; work 2 dc in ch-2 sp and 1 dc in next for 4 dc total; ch 4; work 1 tr in next ch-2 sp; ch 4, sk gap and work 1 dc in dc immediately before next ch-sp; work 2 dc in ch-sp and 1 dc in next for 4 dc total; ch 2, sk 2, work 1 dc in next 5 sts for 5 dc total; ch 2, sk 2, work 4 dc block consisting of 1 dc in dc, 2 dc in ch-sp, and 1 dc in dc; repeat sequence; finish row with 4 dc.
At this stage, treble stitches begin forming center points within the flower motif. Keep each ch-4 space open and avoid accidentally working into skipped gaps.
Row 5: Ch 2, turn; work 1 dc in first st; ch 2, sk 2; work 4 dc block consisting of 1 dc, 2 dc in ch-sp, and 1 dc; ch 6; work 1 sc in ch-4 sp before tr, 1 sc in top of tr, and 1 sc in ch-4 sp after tr for 3 sc total; ch 6; work 1 dc in dc before ch-2 sp, 2 dc in ch-sp, and 1 dc in next for 4 dc total; ch 3; sk 3 sts; make 4 dc block; repeat sequence.
Ch-6 sections begin opening flower petals. Keep 3-sc group centered around treble so next row can locate middle stitches correctly.
Row 6: Ch 2, turn; work 1 dc in frst st; ch 8; work 1 sc in ch-6 sp before sc cluster, 1 sc in each of 3 sc, and 1 sc in ch-6 sp after cluster for 5 sc total; ch 8; work 1 dc in dc before ch-3 sp, 3 dc in ch-3 sp, and 1 dc in next st for 5 dc total; repeat sequence; finish row with 4 dc block.
Count 5 sc carefully inside each petal section. These stitches become important reference points for Row 7.
Row 7 – Reverse Petals: Ch 2, turn; work 1 dc in first st; ch 2; work 4 dc in large ch-8 sp; ch 6; skip outer sc stitches and work 1 sc in each of 3 middle sc from 5-sc group; ch 6; work 4 dc group consisting of 3 dc in ch-8 sp and 1 dc in next dc; ch 3; sk 3 dc; work 4 dc group consisting of 1 dc in dc and 3 dc in ch-8 sp; repeat.
Middle 3 sc are intentional anchor points. Do not use outer sc from 5-sc group, because keeping center stitches controls placement of reversed petals.
Row 8: Ch 2, turn; work 1 dc in first st; ch 2, sk 2; work 4 dc block consisting of 1 dc and 3 dc in ch-6 sp; ch 4; work 1 tr in middle sc of 3-sc group; ch 4; work 4 dc block consisting of 3 dc in ch-6 sp and 1 dc in dc; ch 2, sk 2; work 5 dc block consisting of 1 dc, 3 dc in ch-3 sp, and 1 dc in dc; repeat.
Check each treble placement before moving forward. Middle sc should receive tr, so the flower center remains aligned.
Row 9: Ch 2, turn; work 7 dc block, including 2 dc in ch-sp; ch 2, sk 2; work 4 dc block consisting of 1 dc and 3 dc in ch-4 sp; ch 2; work 4 dc block consisting of 3 dc in ch-4 sp and 1 dc in dc; ch 2, sk 2; work 11 dc block, including 2 dc in previous ch-sps; repeat sequence.
Row 10: Ch 2, turn; work 7 dc; ch 2; work 4 dc block consisting of 1 dc, 2 dc in ch-sp, and 1 dc; ch 2; work 4 dc block; work 17 dc block incorporating previous 4 dc block and adding 13 more dc; repeat sequence; finish with 10 dc.
Row 10 closes one full floral cycle and brings fabric back toward solid sections. Once this row is complete, the next increase in length comes from repeating Rows 3–10.

Continue Floral Length
Rows 11 onward: After Row 10, repeat Rows 3 through 10 consecutively until panel reaches desired length.
Continue measuring panel as it grows rather than relying only on repeat count. Stop once body or sleeve reaches intended length.
Finish Panel Edge
Final Row: Work 1 dc in every stitch across entire row.
This final solid row mirrors Row 1 and gives the finished panel edge a consistent appearance for later seams.
Repeat complete panel sequence for second body panel.
Assemble Body
Once front and back panels are complete, lay both flat and prepare shoulder openings.
Shoulder Seams: Whip stitch front and back panels together along top shoulder sections, leaving middle opening free for head and neck.
Keep both shoulder seams equal in length so neckline remains centered.
Attach Sleeves
Sleeve panels use 3 flower repeats, beginning with 75 chains.
Sleeve Placement: Fold each sleeve panel in half lengthwise to find exact midpoint; align midpoint with shoulder seam on body panel; use stitch markers to hold sleeve securely in position.
Sleeve Seam: Whip stitch the top of the sleeve flat against the side of the body panel.
Repeat for opposite sleeve.
Check sleeve midpoint before sewing fully. Correct center placement keeps floral pattern balanced across shoulder and prevents sleeve from twisting.

Close Side and Underarm Seams
Turn sweater inside out so all seams face you.
Side and Underarm Seam: Begin at bottom body hem and whip stitch front and back panels together upward toward armpit; continue sewing down underside of sleeve toward wrist; repeat on opposite side.
Keeping the sweater inside out during this step hides seam work from the finished outer surface and makes stitching easier to inspect.
Shape Neckline
Neckline can remain naturally wide for relaxed styling, or it can be narrowed for more coverage.
Optional Neckline Adjustment: Thread a darning needle and sew 10 to 12 stitches together on both sides of top neckline.
Sew gradually and check the opening as you go. Removing too much width can make the neckline tighter than intended, while fewer sewn stitches preserve more off-the-shoulder drape.
Block Floral Lace
Blocking opens lace spaces and helps finished sweater settle into its intended shape.
Blocking: Spray finished sweater with water; lay flat on blocking mats; pin securely into final shape using rust-proof pins; allow to air dry for approximately 48 hours.
Shape lace gently rather than pulling aggressively. Focus on opening flower spaces evenly and keeping body and sleeves symmetrical.

Final Check
Before wearing, confirm both body panels have matching length, shoulder seams sit evenly, sleeves align with shoulder centers, and floral motifs remain consistent across joins.
Check lace after blocking as well. Open spaces should look relaxed and even, while cotton fabric should lie smoothly without excessive stretching.
This floral lace sweater gets its character from repeating flower motifs, lightweight cotton, and open spaces that allow airflow. Since width comes from flower count and length comes from repeating Rows 3–10, you can adapt both body and sleeves without changing core pattern rhythm.