This beautifully textured sweater is created using the elegant herringbone stitch, combined with simple techniques for shaping and finishing to produce a comfy, versatile garment.

A herringbone stitch sweater is a stunning and cozy handmade clothing piece you can create using simple crochet techniques. It’s a versatile and stylish sweater that’s perfect for keeping warm on a chilly day or adding a personal touch to your wardrobe. The crochet herringbone pattern gives this sweater a sleek, modern look that stands out while feeling gentle and soft to wear.
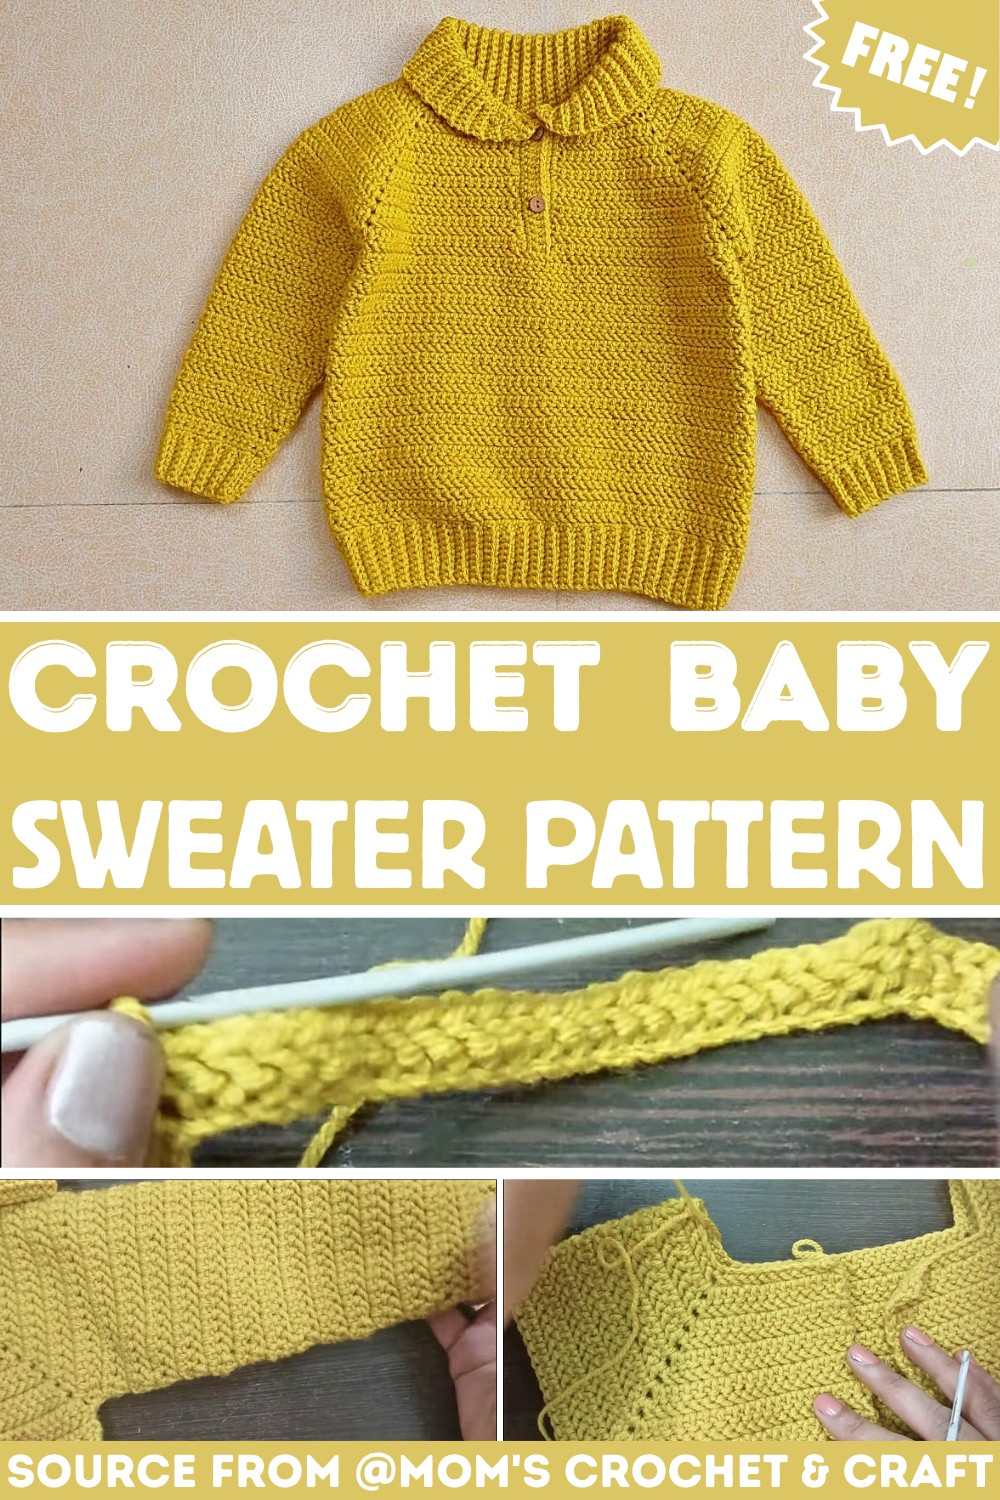
Crochet Herringbone Stitch Sweater
This crochet sweater is made with the herringbone crochet stitch, a technique that creates a beautiful diagonal texture. Even though it looks intricate, it’s approachable for those familiar with basic crochet techniques. You’ll love how versatile this sweater pattern is. Pair it with jeans for a casual day or layer it over your favorite outfit for extra warmth. The process is fun, and the result is a sweater you’ll be proud to wear.
Credit Mom’s Crochet & Craft
Key Features of the Pattern:
- Foundation Row: A simple 74-chain foundation sets the width for the body (15.5 inches).
- Herringbone Stitch Pattern: Alternating single crochets and skipped stitches create the signature texture.
- Front Edges & Joining: Clean edges are created with button panels or ties, joined seamlessly.
- Body Section: Rows 17–41 shape the body with a consistent herringbone stitch pattern.
- Bottom Ribbing: A back-loop-only single crochet adds stretch and structure.
- Sleeves: Worked from the armhole down, with decreases for a tapered fit.
- Collar: Added at the neckline with alternating single crochets for a polished finish.
- Finishing Touches: Seamless assembly and blocking ensure a professional look.
Construction Process in More Detail
The sweater begins with a 74-chain foundation row to create the base width of the garment. The rows are then worked in the herringbone stitch—a stunning textured stitch that alternates chain-1 and single crochet stitches. This easy-to-follow, staggered pattern creates a visually striking surface while maintaining a lightweight feel.

After completing the first 14 rows of herringbone stitches, you’ll shape the front edges that can be used for buttons, ties, or any edge detailing. By chaining 20 and working single crochet stitches, both sides receive a neat, sturdy finish. These edges are joined seamlessly in row 15 using slip stitches, marking the beginning of the sweater’s body.

The sweater’s body is worked from row 17 to row 41, maintaining the herringbone stitch’s staggered texture. This consistency brings out the sophistication of the stitch, while the straight rows shape the torso area beautifully. Once the body is completed, you’ll create the bottom ribbing by working single crochets into the back loop only. This small detail offers a stretchy, polished hemline that pairs beautifully with the textured body.

The sleeves are worked directly into the armholes, starting with single crochet stitches around the opening. Decreasing one stitch at the start and end of every fifth row ensures a tapered fit, making the sleeves flattering and comfortable. You can adjust the number of rows (28 suggested) for your desired sleeve length.

To complete the sweater, a stylish collar is added at the neckline. Single crochet stitches alternate with back-loop-only rows, creating a subtle, flexible ridge texture. This collar gives the piece a cozy, finished look that’s both modern and timeless.

Video Tutorial
Step-by-Step Pattern
Materials
Gather the following supplies before starting your crochet pattern:
- Yarn: Ganga Olivia Yarn (soft and durable, suitable for kids’ wear)
- Hook Size: 3.5 mm crochet hook
- Optional Tools:
- Yarn needle (for sewing seams)
- Stitch markers (to help track rows and sections)
- Tape measure (for checking gauge)
Pattern Instructions
Foundation Row:
- Create a chain of 74 stitches (15.5 inches long).
- Skip the first two stitches and begin working into the 3rd chain.
Starting the Herringbone Stitch Pattern:
- In the next 11 stitches, work herringbone stitches as follows:
- Chain 1, skip one stitch, then single crochet into the next chain.
- Repeat this across the row.
- Complete the row with the following sequence:
- Chain 1, skip one stitch, single crochet into the next chain.
Rows 2–14:
- Chain 1 and turn your work.
- Skip one stitch, then work herringbone stitches into every other stitch across the row. Repeat the staggered pattern for each row.
- Continue this process for a total of 14 rows.
Creating the Front Edges:
- To make the front edges for buttons or ties:
- Chain 20 stitches and turn your work.
- Work single crochet stitches into each stitch across the row for a neat edge.
- Repeat for both sides.
Joining the Front Edge:
- For row 15:
- Join yarn to the next space using a slip stitch.
- Hold the edges together and work slip stitches across four stitches to join the front edge.
Rows 17–41 – Body of the Sweater:
- Begin with chain 1 and turn your work.
- Crochet one stitch in each stitch across the row, maintaining herringbone patterns as needed.
- Repeat this process until you reach row 41, shaping the body of the sweater.
Bottom Edge of Sweater:
- Skip the first chain and work single crochets into each stitch using the back loop only technique.
- Use slip stitches to turn your work at the end of each row. Repeat this pattern for several rows to create a beautiful ribbing effect.
- Sew both edges of the bottom section together with a yarn needle, working from the wrong side for a seamless finish.
Sleeves:
- Begin at the middle stitch under the armhole and connect yarn.
- Work 1 single crochet stitch into each stitch around, joining the ends with a slip stitch.
- Decrease 1 stitch at the start and end of every 5th row to taper the sleeve.
- Crochet the sleeve for a total of 28 rows, adjusting the length as needed.
Creating the Collar:
- Attach yarn at the neckline and work single crochet stitches evenly across the collar.
- Skip corner stitches to maintain a smooth neckline.
- Repeat rows, alternating single crochets and back loop techniques, until the collar reaches your desired width.
Finishing Touches:
- Weave in all loose ends with a yarn needle.
- Block your sweater to shape it professionally, ensuring the herringbone stitch texture is even.
Troubleshooting and Suggestions
Troubleshooting Tips:
- Even Edges: The herringbone stitch pattern involves skipping stitches, which can cause uneven edges if you lose track of the counts. Mark the beginning and end of each row with stitch markers to keep your alignment consistent.
- Stitch Consistency: The herringbone stitch relies on even tension to maintain its textured appearance. Practice a few sample swatches to get a feel for the stitch before starting.
- Armhole Sizing: When working the sleeves, ensure the single crochet stitches around the armhole are evenly spaced to prevent puckering or tightness.
Creative Modifications:
- Color Combinations: Try using variegated yarn for the herringbone stitch to highlight its texture, or alternate two colors every row for a unique striped effect.
- Length Adjustments: Make the sweater longer or shorter by adding or reducing rows in the body section before attaching the ribbing.
- Embellishments: Add decorative buttons, embroidery, or crochet appliqués to the front panel or collar for a personal touch.
- Neckline Variations: Experiment with a V-neck or boat neck instead of the regular collar by decreasing stitches at the neckline.