
How to Crochet a Striped Sweater – Step-by-Step
Nothing feels more satisfying than turning colorful yarn into a cozy sweater you’ll reach for again and again. This striped crochet piece combines a relaxed oversized fit with bold color blocks, creating a timeless design that’s both comfortable and stylish.
Built in separate panels with neatly finished ribbed edges, it offers a polished handmade look without sacrificing simplicity. The finished crochet piece is perfect for cooler days and easy to pair with your favorite everyday outfits.
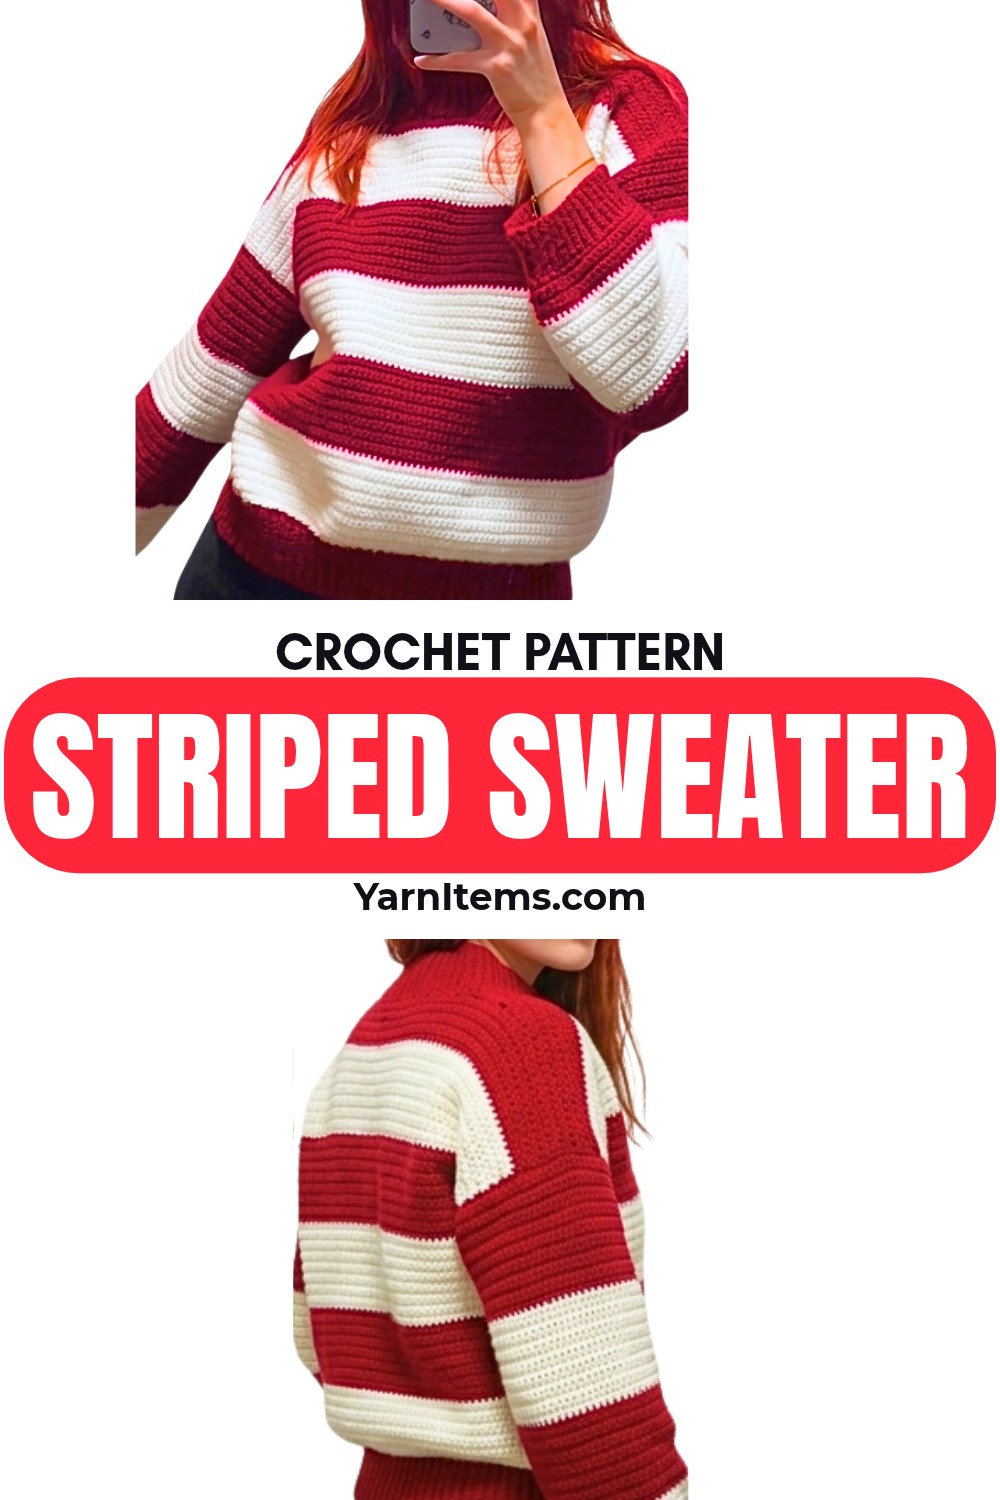
Carefully placed stripes, sturdy construction, and thoughtful customization options make this crochet sweater enjoyable to create from start to finish. The guide below includes the materials, gauge, stitch abbreviations, panel construction, sleeve shaping, assembly, and finishing details needed to complete the design with confidence. You’ll also find helpful sizing adjustments that allow you to tailor the fit to your personal preference. The result is a warm, versatile crochet piece that combines everyday comfort with classic handmade charm.
The Hidden Importance of Using the Right Tools
- Yarn:
- Red (350g)
- White (300g)
100% Polyacrylic / Acrylic yarn
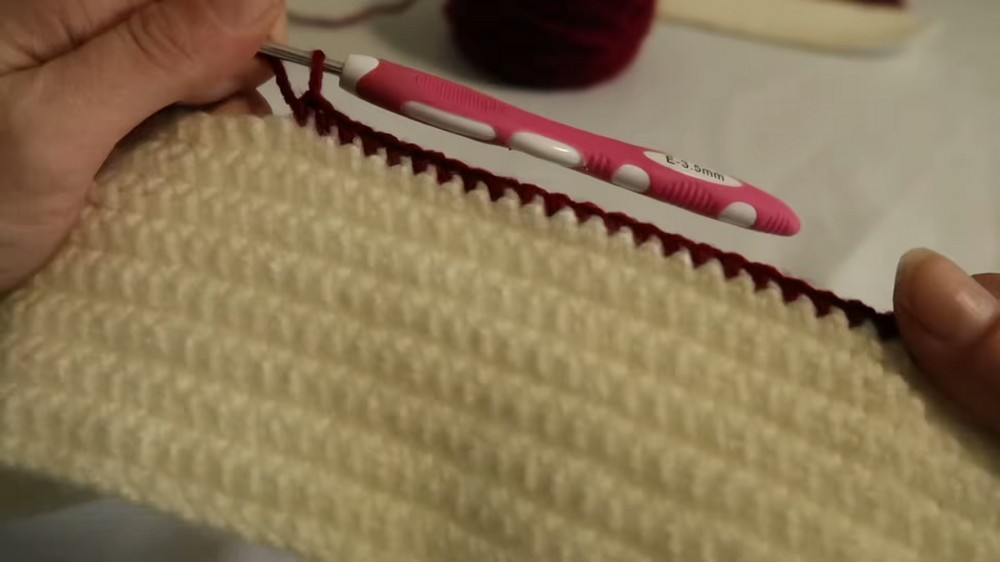
- Hook Size: 3.5 mm (Size E/4)
- Needle: Tapestry / Yarn Needle (for seaming with mattress stitch)
- Stitch Markers: At least 3–4 locking stitch markers
- Scissors
Gauge:
- Stitch:
- Body/Sleeves = Single Crochet (sc)
- Ribbing = Back Loop Only Slip Stitch (blo sl st)
- Fit Tip: Blocking is recommended for better drape and fit.
Pattern Tricks That Deliver Better Results
- Construction:
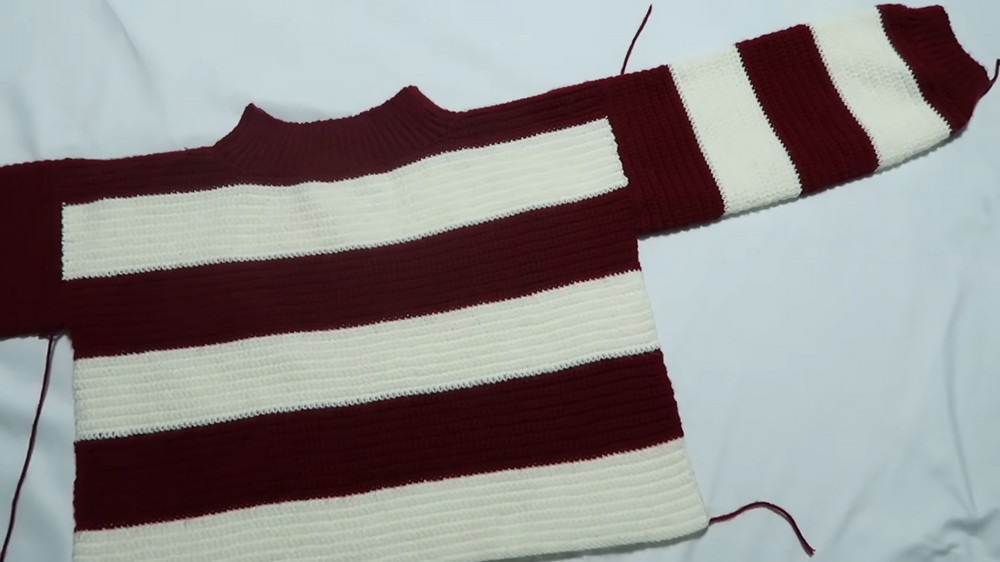
- Built in 4 panels (Front, Back, 2 Sleeves) joined with Mattress Stitch.
- Ribbing (cuffs, neck, hem) crocheted directly onto edges.
- Stripes:
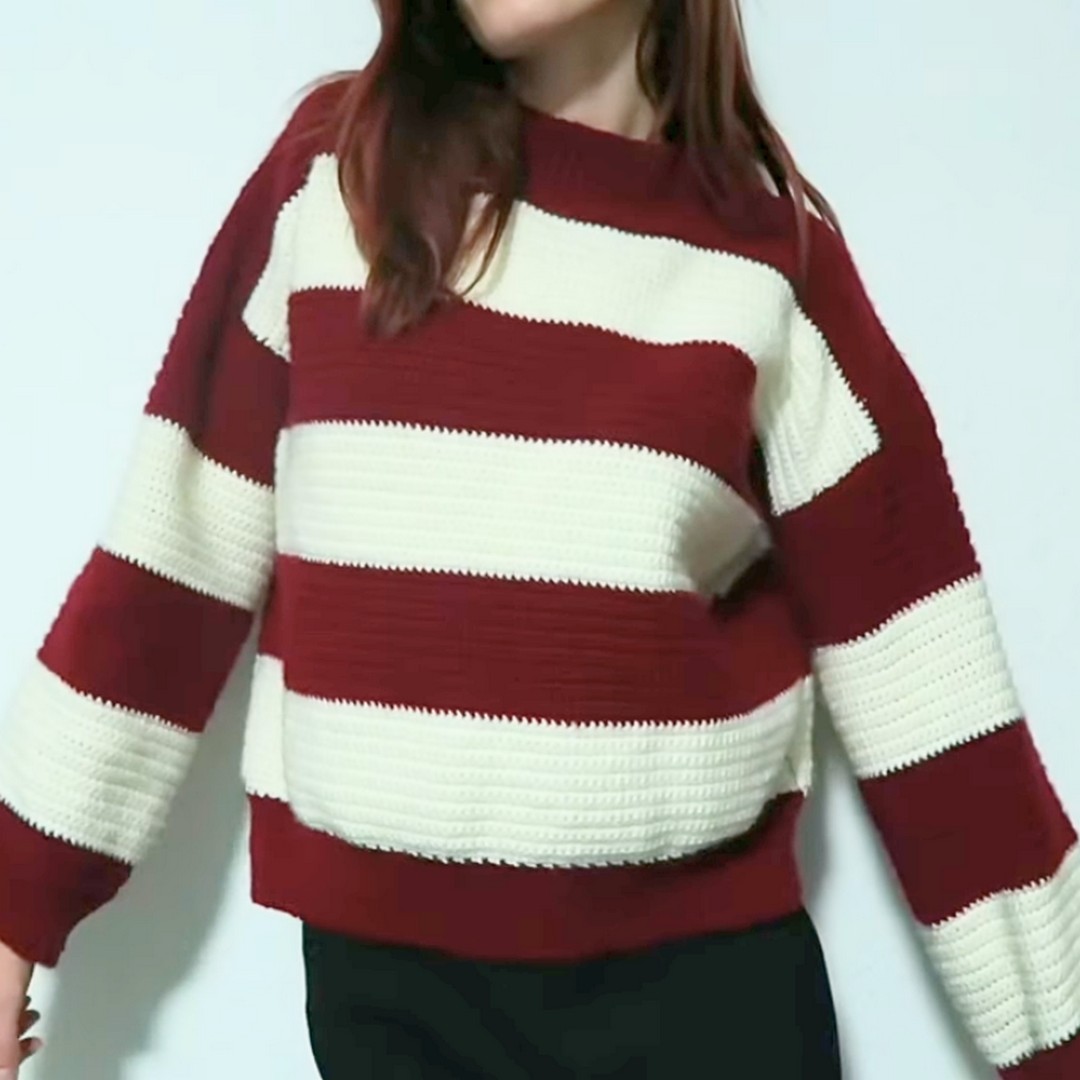
- 16 rows per color block, alternating between Red and White.
- Final stripe sequence starts with White.
- Customization Notes:
- Width: Adjust starting chains (must be an odd number).
- Length: Add or remove 16-row color blocks.
- Sleeves: Adjust starting chain for the desired arm width.
Common Terms That Beginners Often Miss
- ch: Chain
- sc: Single Crochet
- sl st: Slip Stitch
- blo: Back Loop Only
- sc2tog / dec: Single Crochet Decrease
- st(s): Stitch(es)
Choose the Right Size Without Regret
- Style: Oversized, relaxed fit
- Approximate Size: US Small/Medium (S/M)
The Easy Customization Method Nobody Talks About
1. Width Customization (Front/Back Panel)
Rule: The starting chain for the body must be an odd number.
- To make the body wider:
- Increase the starting chain in increments of 2 (e.g., 71 → 73 → 75, etc.), keeping it odd.
- To make the body narrower:
- Decrease the starting chain, again using odd numbers (e.g., 71 → 69 → 67).
Tip:
Measure your gauge (stitches per inch) and multiply by your desired width.
- Example: If your gauge is 3 stitches per inch and you want 20″ width:
3 × 20 = 60, then adjust to the nearest odd number (e.g., 59 or 61) to follow the pattern rule.
2. Length Customization
Rule: Work more or fewer 16-row color stripes.
- To make the garment longer:
- Add additional 16-row stripes until you reach your desired length.
- To make the garment shorter:
- Work fewer 16-row stripes.
Because the color pattern repeats every 16 rows, adding or removing full stripes keeps the color sequence and shaping consistent.
Tip:
Try the piece on (or measure it) after a few stripes to see how many more you need before armholes or hem.
3. Sleeve Customization
Rule: Adjust the starting chain for the sleeve to change arm width.
- To make the sleeve wider:
- Increase the starting chain count (again, usually keeping the same parity as the pattern; if the pattern uses odd chains, stick to odd numbers unless stated otherwise).
- To make the sleeve narrower:
- Decrease the starting chain count.
Practical approach:
- Measure around the fullest part of your upper arm.
- Use your stitch gauge to calculate the needed starting chain:
- Example: 3 stitches per inch, 13” upper arm → 3 × 13 = 39 chains.
- Adjust to match any pattern requirement (e.g., odd number, multiple of X).
Step-by-Step Instructions That Actually Work
1. Front Panel
- White Stripe (Rows 1–16)
- Starting Chain & Row 1:
- Start with a slip knot and chain (ch) 105 in White yarn.
- Start Row 1 by chaining 1 (ch 1) to turn, then work 1 single crochet (sc) in each chain across. (105 sc)
- Rows 2–16:
- Repeat: Ch 1 to turn, work 1 sc in each stitch (st) across. (105 sc per row)
- On the 105th sc of Row 16, switch to Red yarn by completing the last pull-through with the new color.
- Knot the ends and cut the White yarn.
- Starting Chain & Row 1:
- Middle Stripes (Rows 17–80)
Alternate color blocks as follows:- Rows 17–32 (Red): Ch 1 to turn, work 1 sc in each stitch for 16 rows. (105 sc per row)
- Switch to White yarn on Row 32.
- Rows 33–48 (White): Ch 1 to turn, work 1 sc in each stitch for 16 rows. Switch back to Red yarn.
- Rows 49–64 (Red): Work 16 rows of sc in Red. Switch to White yarn.
- Rows 65–80 (White): Work 16 rows of sc in White.
- Switch to Red yarn.
- You now have 80 rows completed.
- Shoulder Base Rows (Rows 81–82)
- Rows 81–82 (Red): Work two rows of 1 sc in each stitch. (105 sc per row)
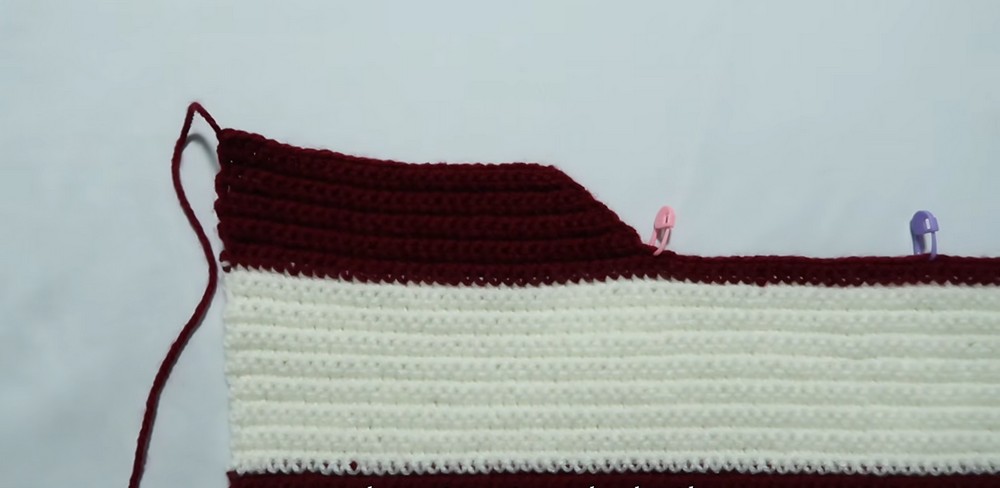
- Fold panel in half to find the center (53rd stitch) and place a stitch marker.
- From the center marker, count 20 stitches to the left and 20 stitches to the right, placing additional markers.
- The 39 center stitches will form the neck hole gap.
- First Shoulder (Right Neck Shaping)
- Attach Red yarn and work the right side of the shoulder using these steps:
- Neck Row 1: Work 1 sc in each stitch until reaching the stitch directly in front of the outer marker.
- Neck Row 2: Ch 1 to turn, make a decrease (sc2tog) in the first 2 stitches, then work 1 sc in each remaining stitch to the edge.
- Neck Row 3: Ch 1 to turn, work 1 sc in each stitch until the last 2 stitches, then sc2tog.
- Neck Rows 4–10: Repeat Rows 2 & 3 alternately, ending with 10 rows total for this section.
- Cut yarn, leaving a long tail for seaming.
- Attach Red yarn and work the right side of the shoulder using these steps:
- Second Shoulder (Left Neck Shaping)
- Attach Red yarn to the outer left edge and repeat the same process (Neck Rows 1–10), working decreases along the inner neck edge.
- Cut yarn, leaving a long tail.
2. Back Panel
- Follow the same instructions as for the Front Panel to create a matching Back Panel.
3. Sleeves (Make 2)
- Sleeve Main Body:
- Starting Chain: With Red yarn, ch 68.
- Rows 1–16 (Red): Ch 1 to turn, work 1 sc in each stitch for 16 rows.
- Rows 17–32 (White): Switch to White yarn and work 16 rows of 1 sc in each stitch.
- Rows 33–48 (Red): Switch back to Red yarn and work 16 rows of 1 sc in each stitch.
- Rows 49–64 (White): Switch to White yarn and work 16 rows.
- Rows 65–67 (Red): Work 3 additional rows in Red.
- Sleeve Cuff Ribbing:
- At the end of Row 67, ch 10 + 1 to turn (11 chains total).
- Row 1: Work 1 slip stitch (sl st) in each of the 10 chains back toward the sleeve edge. Skip 1 stitch on the sleeve edge and sl st into the next stitch.
- Row 2: Ch 1 to turn, work 1 slip stitch in back loops only (blo sl st) in each of the 10 stitches.
- Repeat until ribbing is attached around the sleeve wrist edge.
- Join the first and last rows of ribbing with sl st, fasten off, and leave a long tail for seaming.
- Repeat for the second sleeve.
Assembly & Seaming
- Shoulder Seams:
- Lay the Front and Back panels together (right sides facing).
- Align shoulder edges with stitch markers and sew together using Mattress Stitch.
- Neck Ribbing:
- Attach Red yarn to one side of the neck opening.
- Ch 15 + 1 to turn (16 chains total).
- Row 1: Work 1 sl st in each chain back to the neck edge, skip 1 stitch, and sl st into the next stitch on the neck edge.
- Row 2: Ch 1 to turn, work blo sl st in each of the 15 stitches.
- Repeat this process around the entire neck opening.
- Join the first and last ribbing rows with sl st to form the collar.
- Attach Sleeves:
- Position each sleeve centered over the shoulder seam.
- Use stitch markers to ensure alignment (68 rows of body to 68 stitches of sleeve).
- Sew sleeves to the body using Mattress Stitch.
- Side & Sleeve Seams:
- Fold the sweater flat with the wrong side facing out.
- Sew from the sleeve cuff up to the armpit and down the body side seam using Mattress Stitch.
- Bottom Hem Ribbing:
- Attach Red yarn to the bottom hem corner.
- Ch 15 + 1 to turn (16 chains total).
- Work blo sl st ribbing around the hem, connecting it to the body at each turn.
- Join first and last ribbing rows to close the bottom.
Achieve a Picture-Perfect Finish
- Weave in all loose ends using a tapestry needle.
- Turn the sweater right side out.


One Comment