Free Crochet Diamond Granny Stitch Beanie Hat Pattern
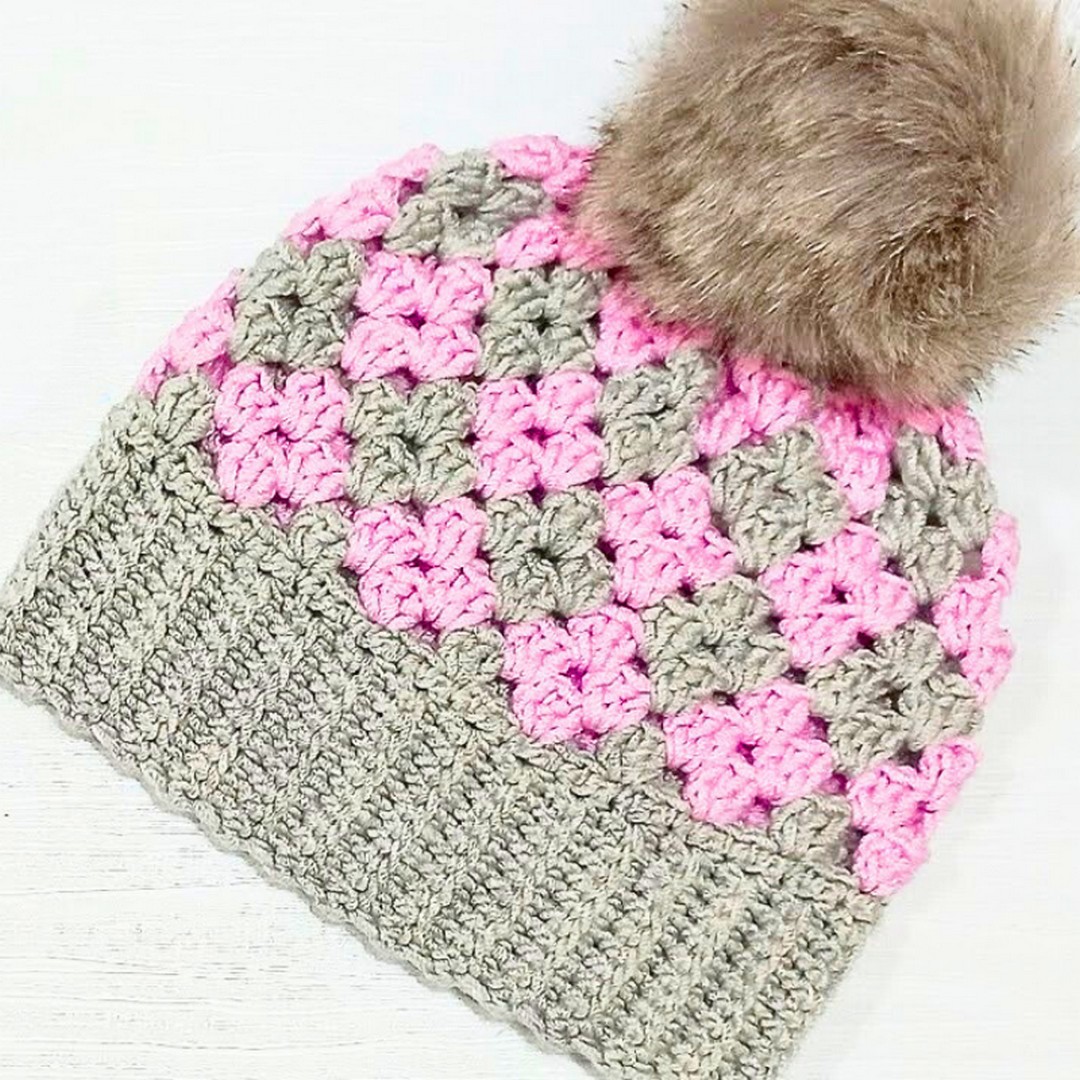
The charm of this crochet Diamond Granny Stitch Beanie lies in its eye-catching texture that looks far more detailed than it actually is. Soft yarn, simple stitches, and clever color placement come together to create a cozy piece that feels both playful and polished.
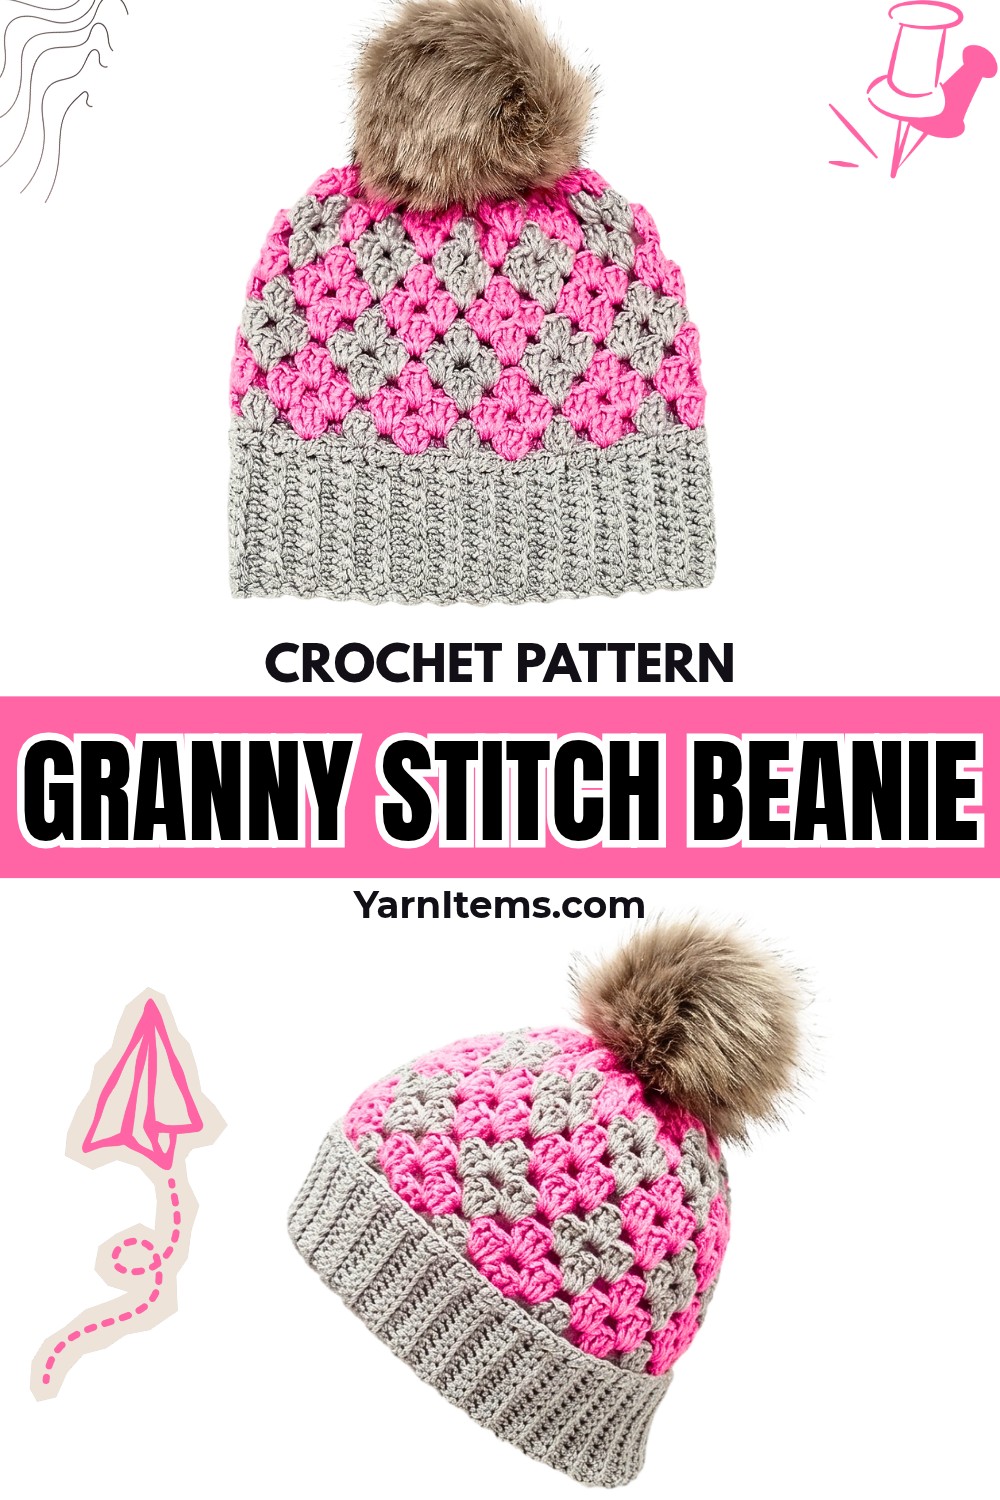
Designed for little ones aged 1 to 3 years, it can also be adjusted for larger sizes with a few easy changes. The finished crochet item is warm, comfortable, and perfect for everyday wear during cooler weather.
Every section of this beanie is built in a smooth and enjoyable sequence, making the process easy to follow from start to finish. A stretchy single crochet brim provides a comfortable fit, while granny stitch groups gradually form the beautiful diamond effect across the body.
The brochure also shares helpful sizing tips, color-changing guidance, and neat finishing techniques to give the piece a clean, professional look. Finish it with a fluffy pom-pom, and you’ll have a handmade crochet item that’s as fun to wear as it is to create.
Credit zhavin crochet
How Long Will This Really Take?
Making this beanie hat depends on your crochet speed and familiarity with the pattern:
- Estimate: Beginners may take 3-4 hours, while experienced crocheters may finish it in 2-3 hours.
Who Is This Pattern Perfect For?
- This pattern is ideal for beginners who are comfortable with basic stitches like single crochet and double crochet.
- Perfect for creating a child-sized beanie (1-3 years old) or customizable for larger sizes with simple modifications.
- A thoughtful gift idea for children during winter months.
Materials & Tools Needed
- Yarn: Lita Baby Yarn (Category 3 / DK Weight Yarn).
- Hooks:
- 3 mm hook (for the brim).
- 4 mm hook (for the body).
- Tapestry Needle: To weave in ends and close the top.
- Scissors: To cut yarn.
- Optional: Pom-pom maker for decoration.
Pattern Notes
- The hat is worked bottom-up.
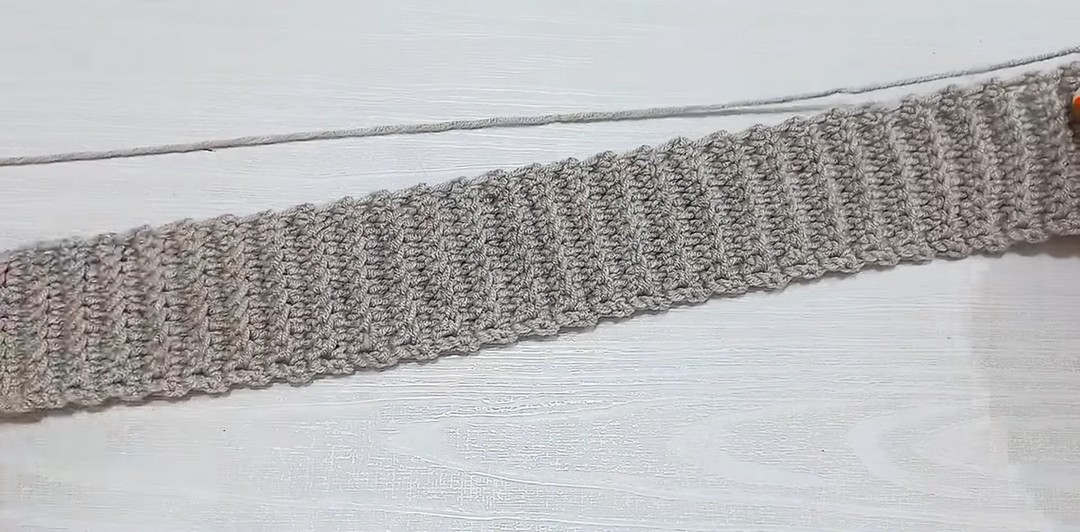
- The brim is worked as a rectangle in single crochet rows, then seamed into a tube.
- The body is created using diamond granny stitch groups with two alternating colors.
- Be sure to work in multiples of 3 rows/stitches.
- Color changes occur on the last loop of the third double crochet in each group.
Pattern Abbreviations & Terminology
(US Crochet Terms)
- ch: Chain
- sc: Single Crochet
- dc: Double Crochet
- sl st: Slip Stitch
- st(s): Stitch(es)
- beg: Beginning
Finished Size & Customization Ideas
- Child-Sized Beanie: Fits 1-3 years old.
- Brim length: ~16 inches (varies based on the head circumference).
- Height of the hat: ~7.5–8 inches.
- To customize:
- For a larger size, add more rows to the brim.
- Add more rounds to the body section for a taller hat.
Helpful Tips Before You Start
- Accurate Measurements: Adjust the brim’s row count to your recipient’s head circumference.
- Tension Consistency: Keep tension even while working slip starts and color changes.
- Swap yarn color combinations to experiment with different looks.
Helpful Resources to Master This Skill
- Basic Skills to Know:
- How to make a slipknot, chain, and slip stitch.
- Working single crochet (sc) in the back loops only.
- Changing colors in crochet.
- Refer to video tutorials or pattern guides for the Diamond Granny Stitch.
Step-by-Step Detailed Crochet Instructions
Step 1: Brim
- Foundation Chain: With a 3 mm hook, make a slipknot and chain 12 chains.
- (Adjust the chain count if you prefer a wider or narrower brim.)
- Row 1: Skip the first chain, work 1 sc in each chain across the row (11 sc total). Ch 1, turn.
- Row 2: Work 1 sc into both loops of the first and last stitches. Work 1 sc into the back loop only for the 9 middle stitches. Ch 1, turn.
- Repeat Row 2: Continue until the brim’s length matches the desired head circumference. The rows should be in multiples of 3 (e.g., 60 rows for child size).
- Join the Brim: Fold the band in half and slip stitch through both loops of the last row and the foundation row to form a tube.
Step 2: Body of the Hat
Switch to a 4 mm hook.
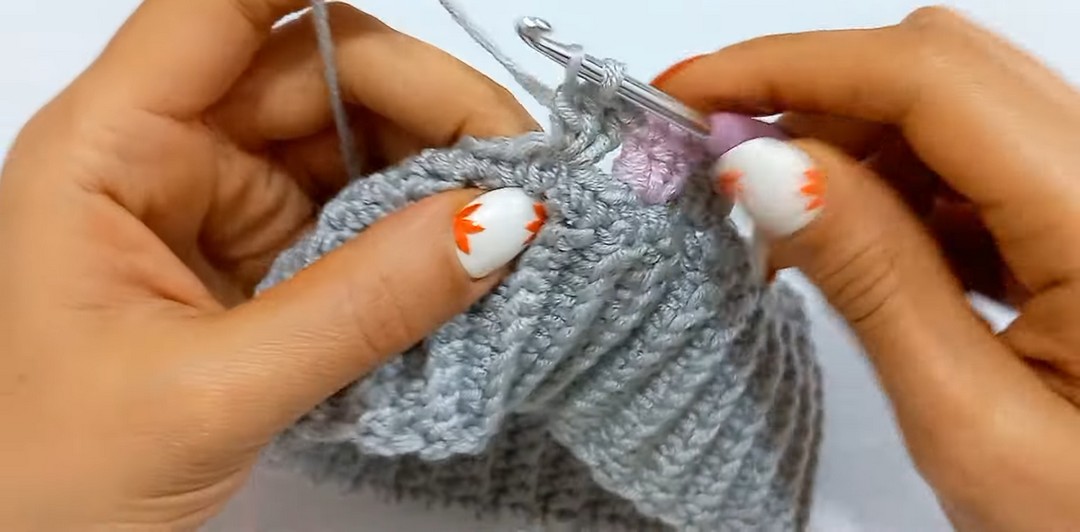
Round 1: Single Crochet Round
- With the larger hook, ch 1. Work 1 sc into the top of each brim row (60 sc total for 60 rows). Sl st into the first sc.
Round 2: Start Granny Stitch with Diamond Pattern
- Work 3 chains (or a substitute for the first double crochet) into the same st.
- Work 2 dc into the same st, creating the first group of 3 dc.
- Before completing the third dc, join the second color by pulling it through the last two loops.
- Skip 2 sts, work 3 dc into the third st (first color). Before finishing the third dc, pick up the second color and finish the stitch with it.
- Repeat this pattern, alternating colors for each group of 3 dc. At the end of the round, sl st with the same color into the first st.
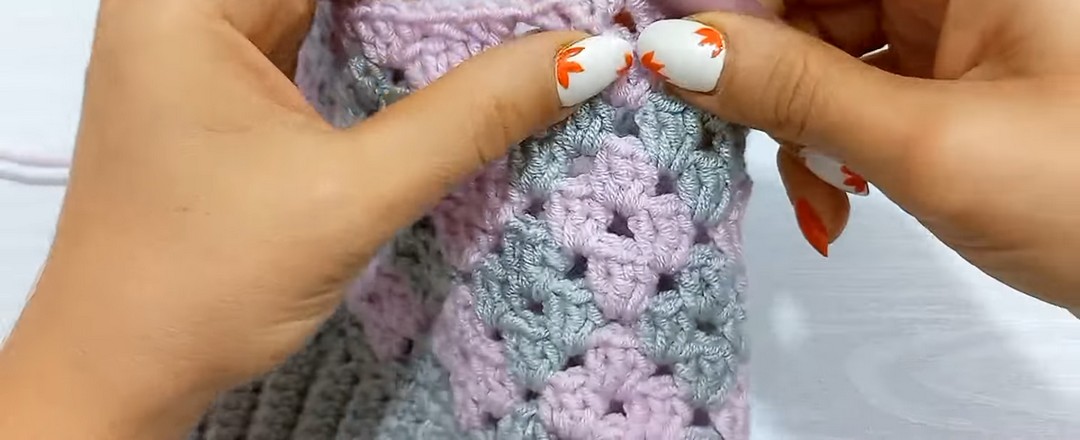
Rounds 3–5: Granny Stitch Continuation
- Start each round with the same yarn color as the last dc in the previous round.
- Work 3 dc into each space between groups from the previous round, alternating colors as before.
- Continue for three rounds, ensuring that each color aligns vertically with its corresponding section.
Height Repeats
- Continue repeating Rounds 2-5 until the hat reaches a total of 11 rounds or the desired height.
Step 3: Decreasing for the Crown
- Round 12: Work 2 dc into each space of the granny stitch groups, alternating colors as before.
- Round 13: Work 1 dc into each space to close the opening further.
Assembly & Finishing
- Fasten off and leave a long tail.
- Use a tapestry needle to weave through the front loops of each stitch in the final round. Pull tightly to close the top of the hat securely.
- Tie off and weave in all loose ends.
- (Optional) Attach a pom-pom to the top of the hat for decoration.
Care Tips to Make It Last Longer
Here are some detailed care tips to help your item last longer:
- Hand Wash in Cold Water
- Use cold water to prevent shrinking, color fading, or fabric damage.
- Avoid using hot water, as it can weaken fibers over time.
- Use Mild Detergent
- Opt for a gentle detergent that’s free of harsh chemicals.
- Avoid bleach or fabric softeners, as they can break down delicate materials.
- Do Not Wring
- After washing, press out excess water gently with your hands.
- Wringing can stretch or distort the fabric and compromise its shape.
- Lay Flat to Dry
- Place the garment on a clean, dry towel or drying rack.
- Reshape as needed to maintain its original form.
- Avoid hanging, as this may cause stretching or deformation.
Double-Check Before You Finish!
- Ensure All Color Changes Are Tight but Not Taut
Be cautious during color transitions to prevent loose or overly tight joins. This ensures the fabric lies flat and avoids any puckering or distortions. - Check for Even Stitch Tension Throughout the Hat
Consistent tension is key! Take a moment to assess your stitches to ensure a uniform look and comfortable fit.
Bonus Ideas You’ll Want to Try Next
- Create Matching Mittens or a Scarf Using the Diamond Granny Stitch
Extend your creativity by making a cozy set! Use the intricate diamond granny stitch to create mittens or a matching scarf that pairs beautifully with your current projects. - Experiment with Self-Striping or Variegated Yarns for a Unique Look
Bring your work to life with vibrant colors! Self-striping or variegated yarns can add an eye-catching twist to your patterns without requiring extra effort. - Add Embellishments Like Buttons, Bows, or Appliqués
Take your creations to the next level with fun embellishments. Attach buttons, bows, or crochet appliqués to give your projects a personalized and professional touch.
Conclusion
Congratulations! You’ve now created an adorable child-sized Diamond Granny Stitch Beanie Hat. Customize it for other sizes or explore additional color variations to make it your own. Happy crocheting!