
Holiday Block-Stitch Winter Crochet Hat Pattern
Turn two holiday colors into a textured winter crochet hat with stretchy ribbing, bold block stitches, adjustable length, and a gathered crown.
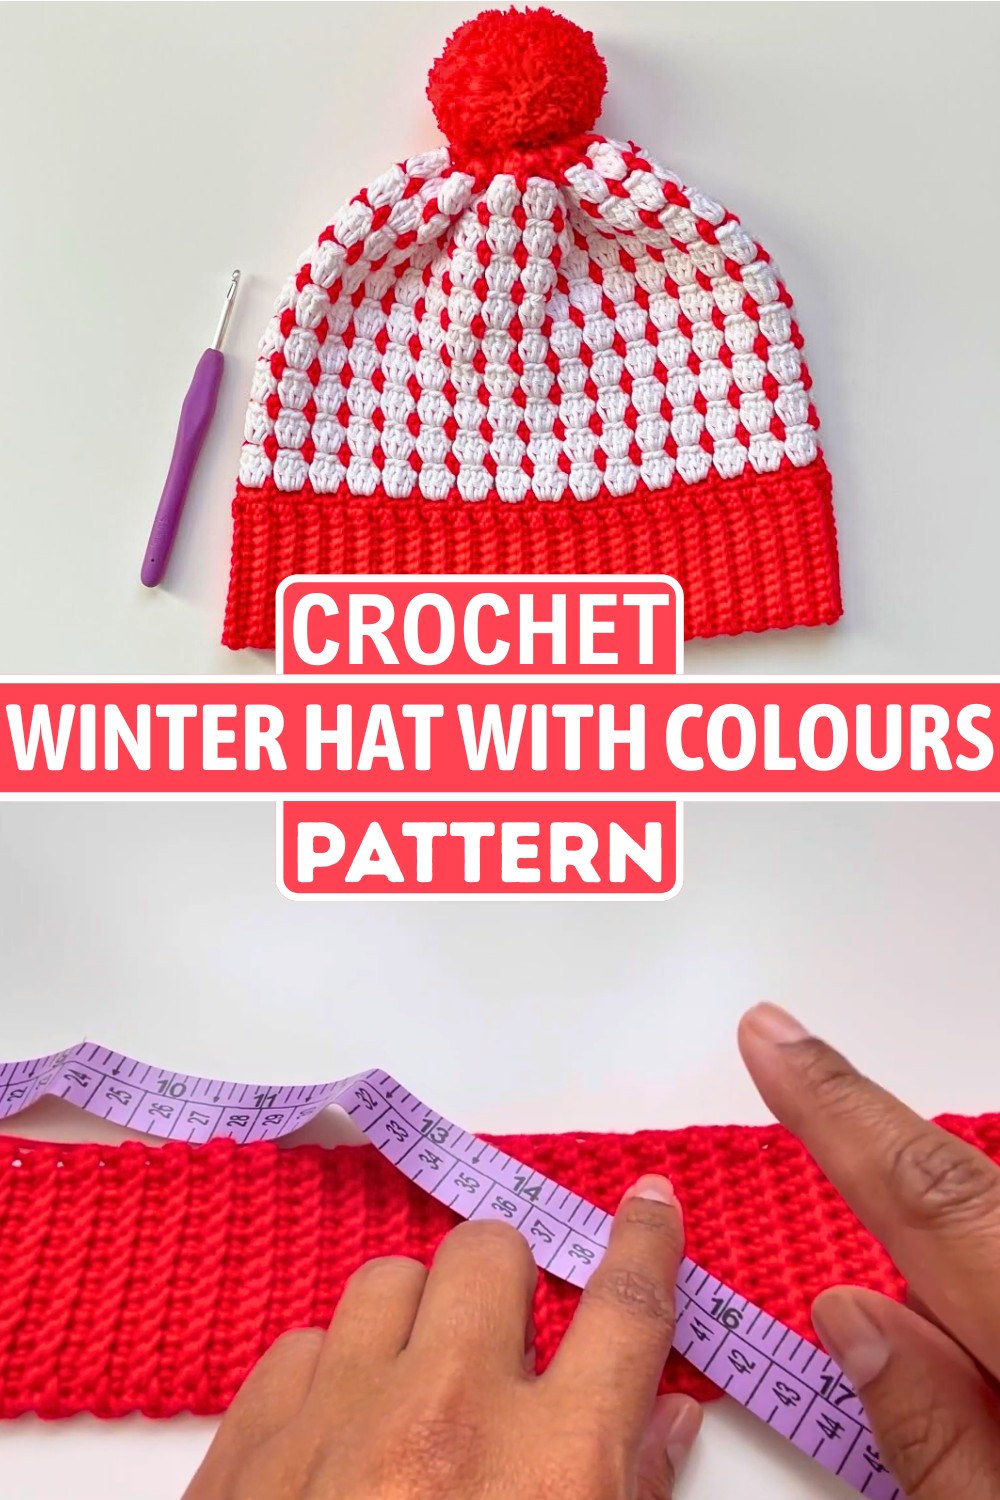
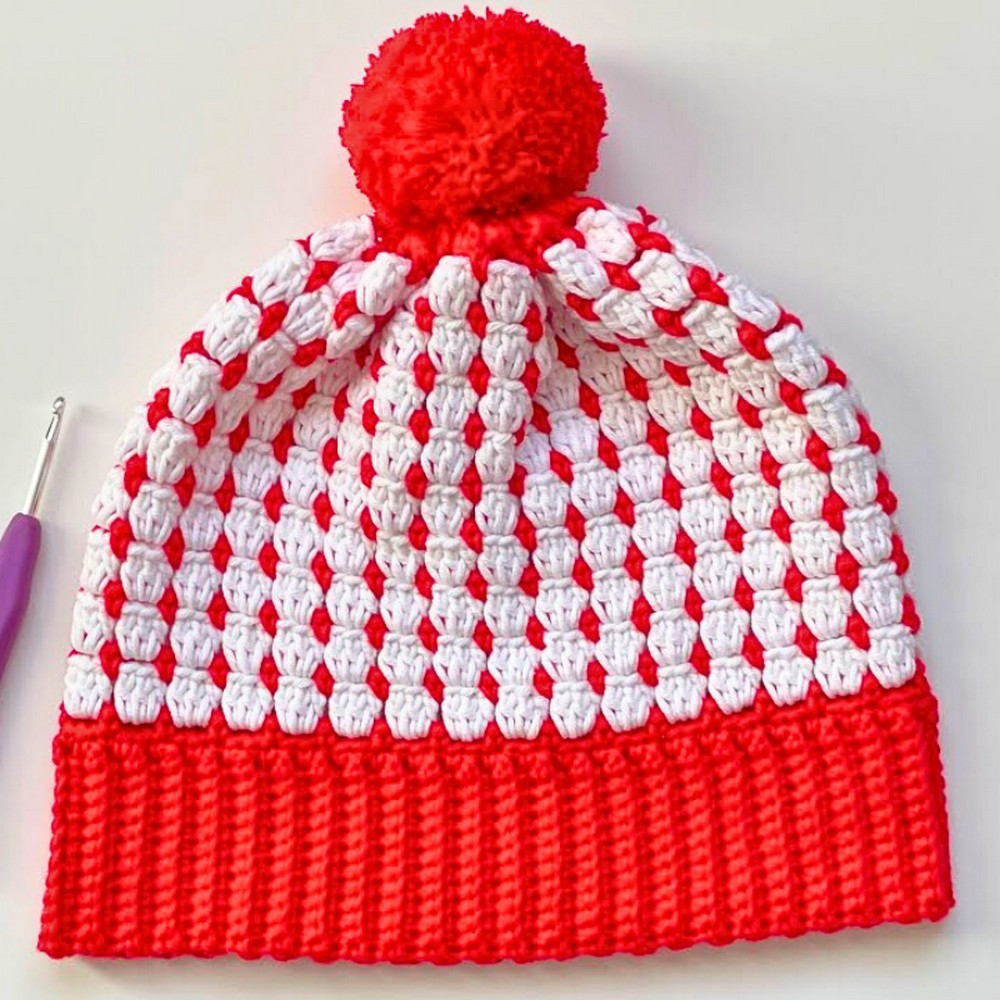
Crochet this holiday block-stitch winter hat for festive texture without complicated shaping. Ribbed rows create a flexible brim, while alternating color blocks give the finished hat its cheerful winter character. Crochet details stay simple enough to make the piece feel practical for seasonal wear, gifting, or matching holiday outfits.
This crochet pattern moves from a flat brim to a joined hat body, then builds height through repeating block stitches before crown shaping closes the top. Crochet makers can adjust brim length in multiples of 3 rows and change body height by repeating core rounds, with guidance for color changes, stitch placement, joining, gathering, and finishing.
Credit Cuddly Crochet Critters
Materials & Tools Needed
- Yarn: 100% cotton yarn in holiday colors, using Color A as main color and Color B as second holiday color.
- Hook: 4.0 mm crochet hook.
- Notions: Tapestry needle, stitch marker, and optional handmade pom-pom for top.
Finished Size & Customization
- Finished brim length: Approximately 20 inches (51.5 cm).
- Brim adjustment: Work more or fewer rows to change length, but keep total row count as a multiple of 3 so block stitch pattern remains aligned.
- Hat height adjustment: Repeat block stitch sequence from Rounds 3 and 4 more or fewer times before working crown decrease round.
Pattern Abbreviations & Terminology
- ch = Chain
- sc = Single crochet
- hdc = Half double crochet
- dc = Double crochet
- sl st = Slip stitch
- BLO = Back loop only
- st(s) = Stitch(es)
- rnd(s) = Round(s)
- row(s) = Row(s)
Step-by-Step Crochet Hat Process
Build Ribbed Brim
The hat begins as narrow ribbing worked flat. This gives brim its flexible structure before short ends are joined into one band.
Foundation Chain: Using Color A, make slip knot on hook and chain 13.
Why this starts here: Chain count creates 12 working stitches for every brim row. Keeping this count consistent makes later joining much easier.
Row 1: Turn work. Skip first chain from hook, insert hook into second chain, yarn over and pull through, then complete 1 single crochet. Continue with 1 single crochet in each chain across. You should have 12 single crochets. Chain 1 and turn.
Check before moving on: Count 12 stitches across. If count is different, correct it now rather than carrying an uneven edge through 96 rows.
Row 2: Skip chain-1. Insert hook into back loop only of first stitch and make 1 single crochet BLO. Continue with 1 single crochet BLO in every stitch across. Finish with 12 single crochets BLO, then chain 1 and turn.
Why BLO matters: Working through back loops creates horizontal ribbing and gives brim its flexible texture. Inserting hook through both loops here would change brim appearance and stretch.
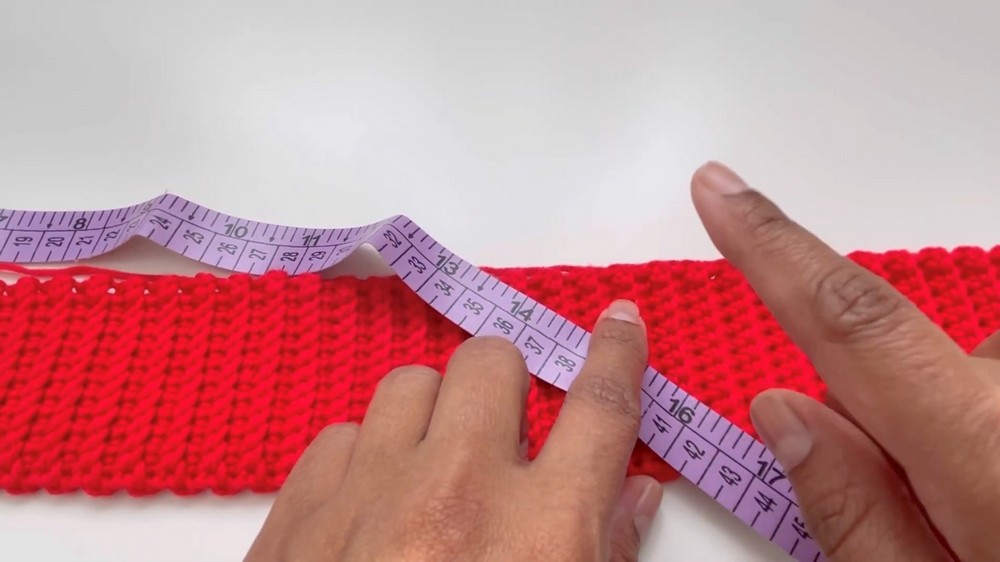
Rows 3-96: Repeat Row 2 for every remaining brim row, continuing with 1 single crochet BLO in each stitch, chain 1, and turn after every row. Stop after Row 96.
Keep this count in mind: Total brim rows must stay divisible by 3. With 96 rows, finished brim measures approximately 20 inches (51.5 cm).
For custom length: Add or remove rows as needed, but keep final row count as multiple of 3. This keeps later block-stitch rhythm aligned.
Join Brim into Band
Bring both short ends together, matching foundation-chain side with final-row side.
Joining: Insert hook through both loops of foundation chain on one side and back loop of corresponding final row on opposite side. Work 12 slip stitches across to connect both edges.
Why this join happens now: Hat body will be worked around this joined edge, so brim needs to become one continuous band before first round begins.
Check before turning: Make sure all 12 joining points are secure and edges are aligned. Turn work so right side faces you, then chain 1.
Establish Hat Body
With brim now joined, work single crochets around its uneven edge. This converts vertical brim rows into foundation for circular hat body.
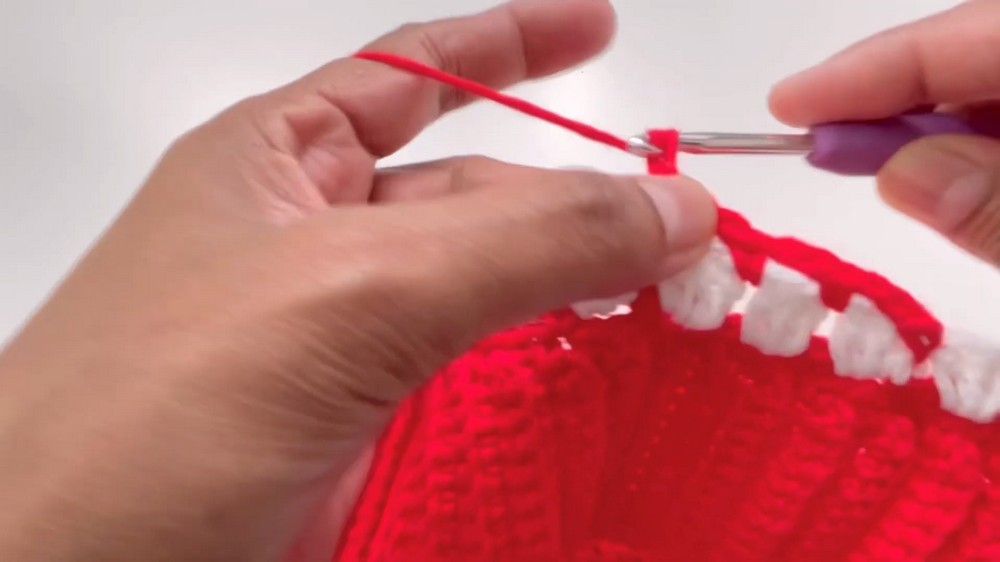
Round 1: Work 96 single crochets evenly around brim edge, using 1 single crochet per brim row. Place stitch marker in first stitch if helpful. Slip stitch into first stitch to close round, then remove stitch marker if no longer needed.
Why 96 stitches: Each brim row receives one single crochet, so 96 brim rows create 96 stitches around hat body. Keeping this relationship even helps block-stitch repeats sit correctly.
What to check: Look around edge before starting Round 2. Stitches should be distributed evenly without large gaps or bunching.
Create Chain Spaces for Block Stitch
Round 2 prepares open spaces where Color B clusters will sit.
Round 2: Work 1 single crochet into first stitch. You may place stitch marker here. Chain 2, skip next 2 stitches, then work 1 single crochet into next stitch. Repeat [ch 2, skip 2 stitches, 1 sc in next stitch] around.
Join with slip stitch into first single crochet. Work 1 extra slip stitch into first chain-2 space to move into position for next round.
Why these spaces matter: Chain-2 gaps become working spaces for 3-double-crochet clusters. Keeping skipped stitches and chain spaces consistent prevents block pattern from shifting.
Look before changing color: You should see repeated open chain-2 spaces all around hat, with single crochets separating them.
Build First Color Block Round
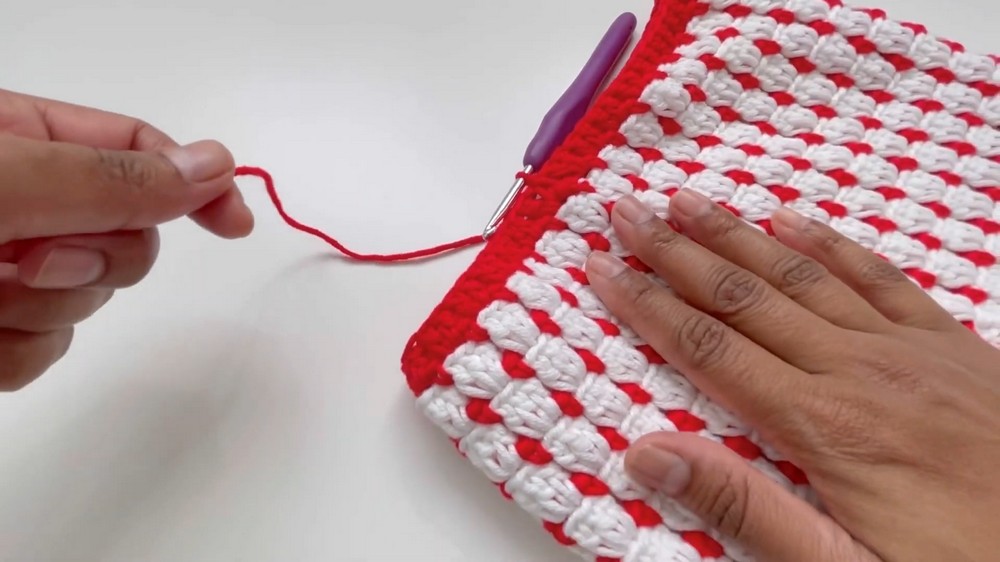
Round 3 introduces Color B and creates first visible row of raised block clusters.
Round 3 – Color B: Attach Color B into chain-2 space. Chain 1; this single crochet and chain 1 count as first double crochet. Work 2 more double crochets into same chain-2 space for 3 double crochets total.
Skip single crochet and move into next chain-2 space. Work 3 double crochets there. Continue [3 dc in each ch-2 space] around.
Join with slip stitch into chain-1 space of first double crochet. Move hook into space between first 3-dc cluster and next cluster.
Teaching Guide – cluster placement: Work each 3-dc group inside chain-2 space, not into single crochet. This placement creates open spaces between blocks and keeps color pattern visible.
Check your fabric: Each block should contain 3 double crochets. If one space receives only 2 or 4 stitches, correct it before continuing.
Return to Main Color
Round 4 brings Color A back and creates chain spaces for next Color B block round.
Round 4 – Color A: Bring Color A from back and pull loop through current space. Make slip stitch to secure. Into same space, pull up loop, yarn over, and pull through 2 loops to make 1 single crochet.
Chain 2, skip next 3-double-crochet cluster, then work 1 single crochet into next space between clusters. Repeat [ch 2, skip 3-dc cluster, 1 sc in next space] around.
Join with slip stitch into first single crochet. Work 1 extra slip stitch into first chain-2 space to transition.
Why this round follows Color B: Round 4 rebuilds chain-2 spaces needed for next set of 3-double-crochet blocks. This alternating rhythm creates repeating texture instead of stacking clusters directly on one another.
Check before continuing: Chain-2 spaces should sit between clusters, giving you clear working points for next Color B round.
Repeat Block Stitch for Hat Height
Rounds 5-20 build most of hat body by alternating Color B cluster rounds with Color A chain-space rounds.
Rounds 5-20: Repeat Round 3 with Color B, making 3 double crochets in each chain-2 space, followed by Round 4 with Color A, making 1 single crochet and chain 2 between clusters.
Continue alternating these two rounds until Round 20 is complete.
Teaching Guide – height control: This repeat determines most of hat body height. For taller hat, continue this Round 3/4 sequence for additional repeats. For shorter hat, use fewer repeats before crown shaping.
Color check: Round 3 uses Color B, while Round 4 returns to Color A. Keeping this order consistent preserves holiday color blocks.
Before crown shaping: Finish Round 20 completely, then cut Color B because remaining shaping continues with Color A.
Shape Crown with Smaller Blocks
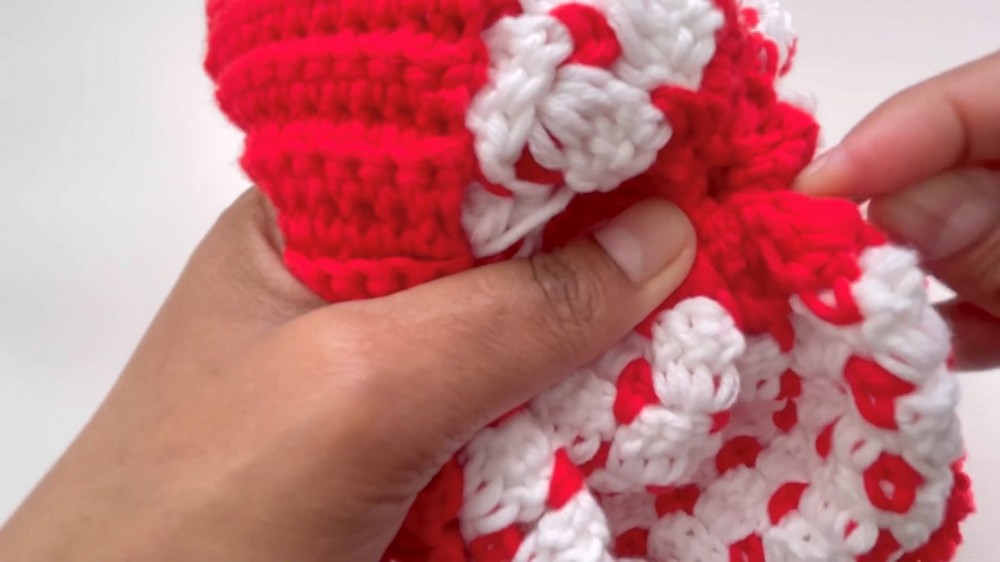
Crown shaping begins by reducing each chain-2 space from 3 double crochets to 2. This starts narrowing top before gathering.
Round 21 – Color A: Slip stitch into chain-2 space and chain 1. Work 1 single crochet and 1 chain into same space, counting this as first double crochet, then work 1 additional double crochet into same chain-2 space for 2 double crochets total.
Skip single crochet and move to next chain-2 space. Work 2 double crochets there. Continue working 2 double crochets in every chain-2 space around.
Join with slip stitch into first stitch/chain-1 space.
Why this reduction happens here: Smaller clusters reduce fullness around crown, making gathered closure easier and helping top draw inward rather than leaving excess fabric.
What to look for: Crown should begin narrowing while remaining open enough for final gathering. If clusters are worked into single crochets instead of chain spaces, shaping will not follow intended pattern.
Close and Gather Crown
Cut Color A, leaving long yarn tail for gathering and sewing. Secure last stitch.
Thread yarn tail onto tapestry needle.
Work needle in and out through stitches around top edge using one stitch in, one stitch out until you travel completely around crown.
Teaching Guide – gathering: Keep needle path around top edge rather than passing randomly through body stitches. This gives yarn tail enough control to pull crown inward evenly.
Pull yarn tail firmly to gather top completely closed.
If small loop remains, make second pass through randomly placed top stitches and pull again. Once opening is fully closed, tie secure knot and weave loose ends inside hat.
Check closure: Top should be tightly gathered with no noticeable open hole. Avoid pulling so aggressively that surrounding stitches distort or yarn breaks.
Add Optional Holiday Pom-Pom
Make matching pom-pom if desired and securely attach it at cinched top center.
Why this comes last: Pom-pom attachment depends on final crown position, so adding it earlier can interfere with gathering and closure.
Your holiday block-stitch winter crochet hat is now ready to wear, gift, or style with seasonal outfits.


One Comment