Free Crochet Granny Square Bag Pattern for Any Occasion
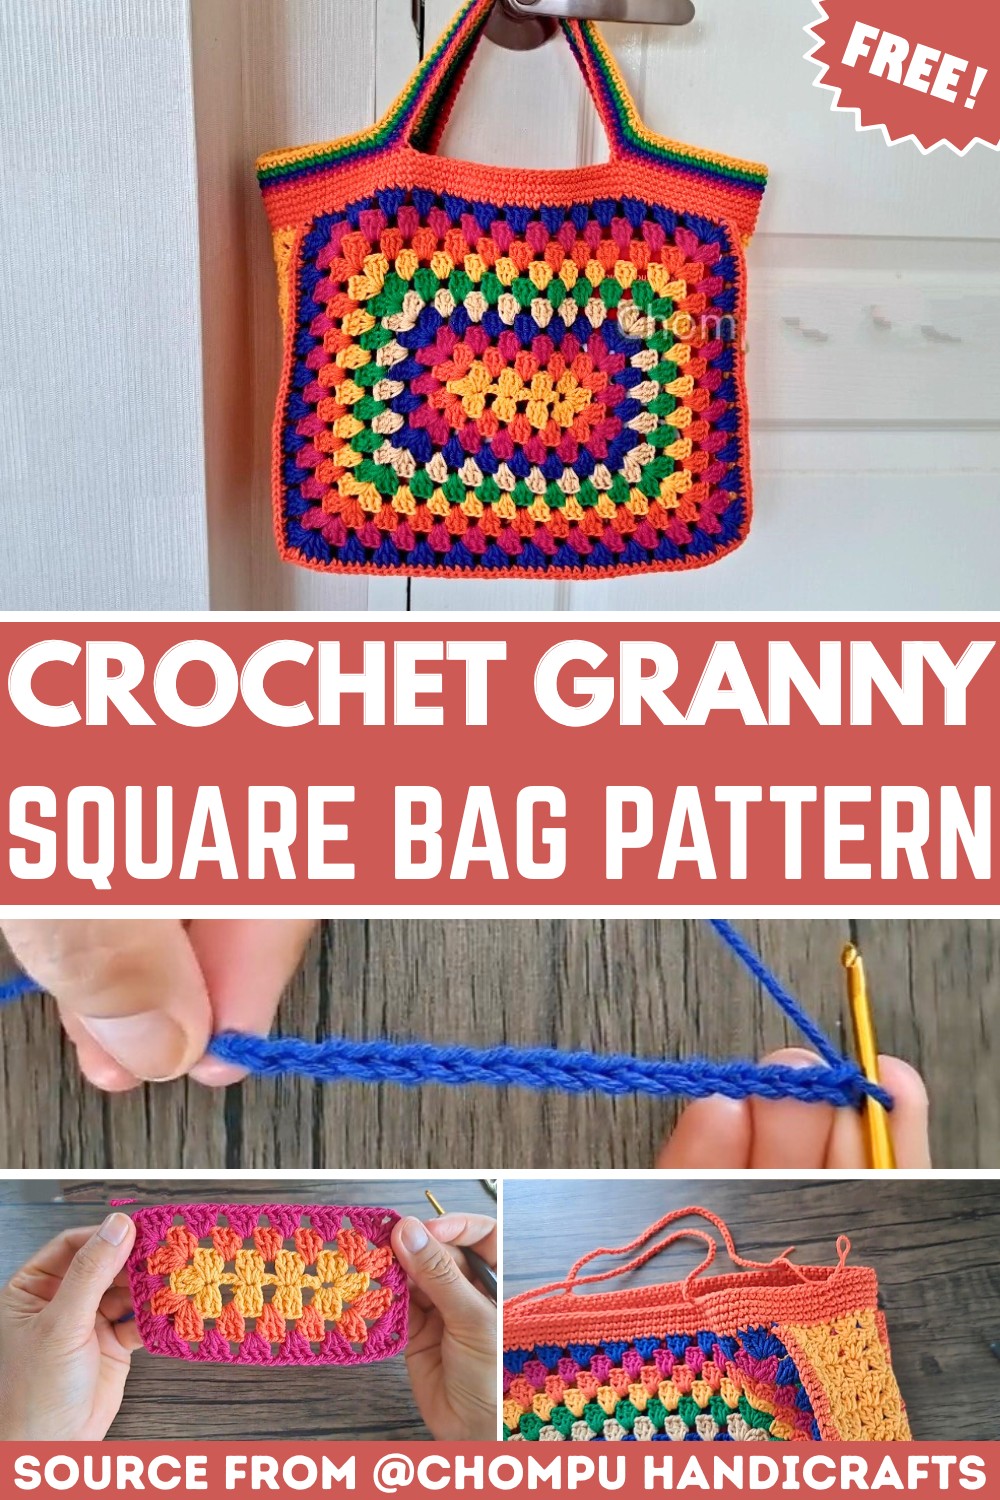
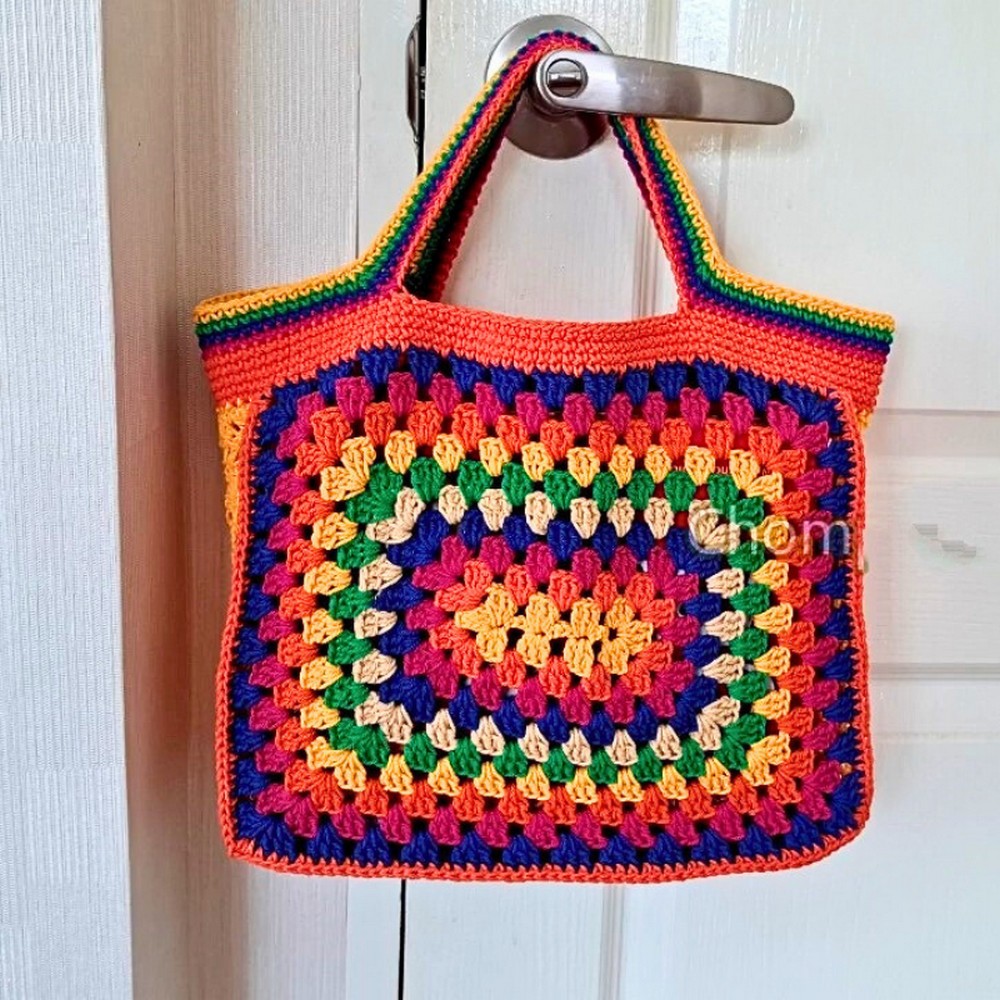
A burst of colorful crochet granny squares transforms an everyday bag into a standout accessory. This charming piece blends timeless crochet style with modern practicality, making it easy to carry wherever the day takes you.
Its lightweight design feels comfortable while offering enough space for your daily essentials. Every detail adds a handmade touch that makes the item feel truly one of a kind.
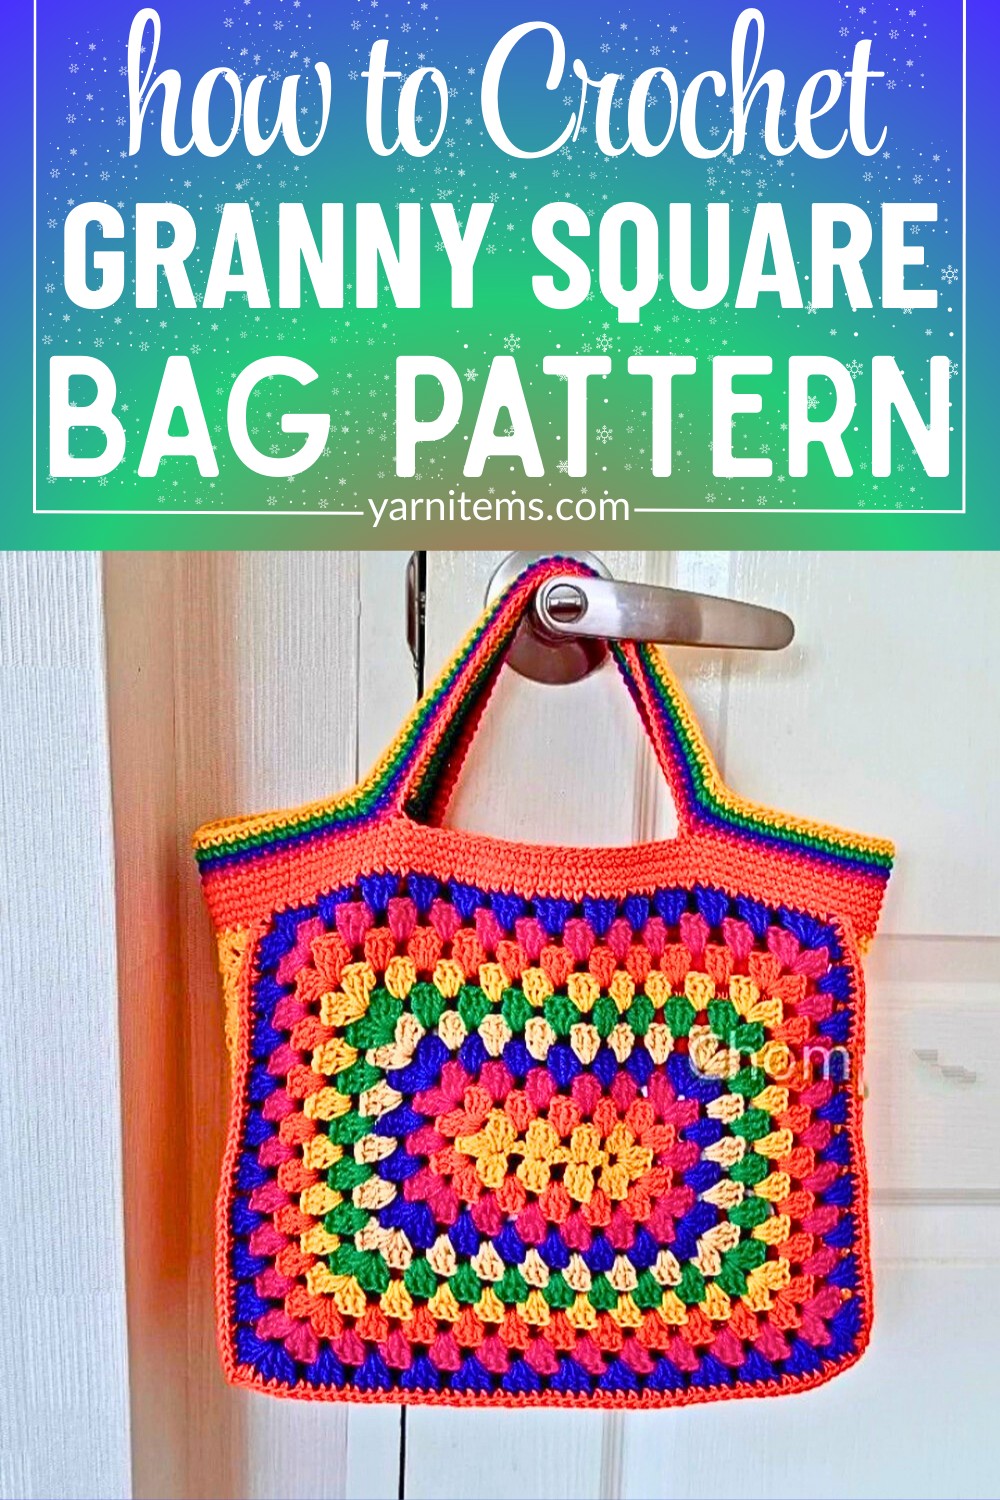
Classic crochet motifs come together to create a piece that is both useful and stylish. You can mix your favorite colors to give the bag a personal look that reflects your own taste.
It pairs beautifully with casual outfits, weekend trips, or relaxing afternoons outdoors. The finished item is durable, eye-catching, and perfect for adding handcrafted charm to your collection.
Materials & Tools Needed
- Yarn: Soft Cotton Cord / Cotton Soft 2.0 mm
- Suggested colors: Yellow, Orange, Red/Pink, Magenta, Dark Blue, Beige/Tan, Green (approx. 5–6 vibrant or rainbow colors).
- Crochet Hook: 3.0 mm (Tulip 5/0).
- Accessories:
- Yarn needle
- Scissors
- Stitch markers
Finished Size
- Dimensions:
- Depth: Approx. 10 cm
- Width: Approx. 32 cm
- Height (excluding handles): Approx. 28 cm
Customization Ideas
- Color Combinations:
- Create your design with pastel tones, monochrome shades, or ombre gradients for a unique look.
- Adjust Handle Height:
- Change strap height by altering the chain count in the strap foundation round.
- Additional Features:
- Include a fabric lining or a magnetic snap closure for better functionality and enhanced security.
Pattern note
- Panels:
- Front Panel: Large rectangular granny square.
- Back Panel: Large rectangular granny square.
- Bottom Gusset Panel: Single crochet worked into a long rectangle.
- Side Gusset Panels: Created using a V-stitch or cluster-stitch pattern.
- Joining:
- All panels are joined with single-crochet borders.
- Upper Trim & Handles:
- The upper bag trim and handles are worked directly around the top opening in continuous single crochet rounds.
Pattern Abbreviations (US Terms)
- ch: chain
- sl st: slip stitch
- sc: single crochet
- dc: double crochet
- st(s): stitch(es)
- sp: space / chain-space
- [ ]: denotes repeats or stitch groups
Tips Before You Start
1. Tension
- Maintain consistent tension, especially on the granny square corners and side gussets, to ensure the panels stay flat and even.
2. Weaving Ends
- Fasten off and weave in loose ends after each color change round on the main panels to simplify the assembly process later on.
3. Stitch Markers
- Use stitch markers to mark the handle base points on both the front and back panels.
- This ensures the straps are symmetrical on your project.
Detailed Crochet Instructions
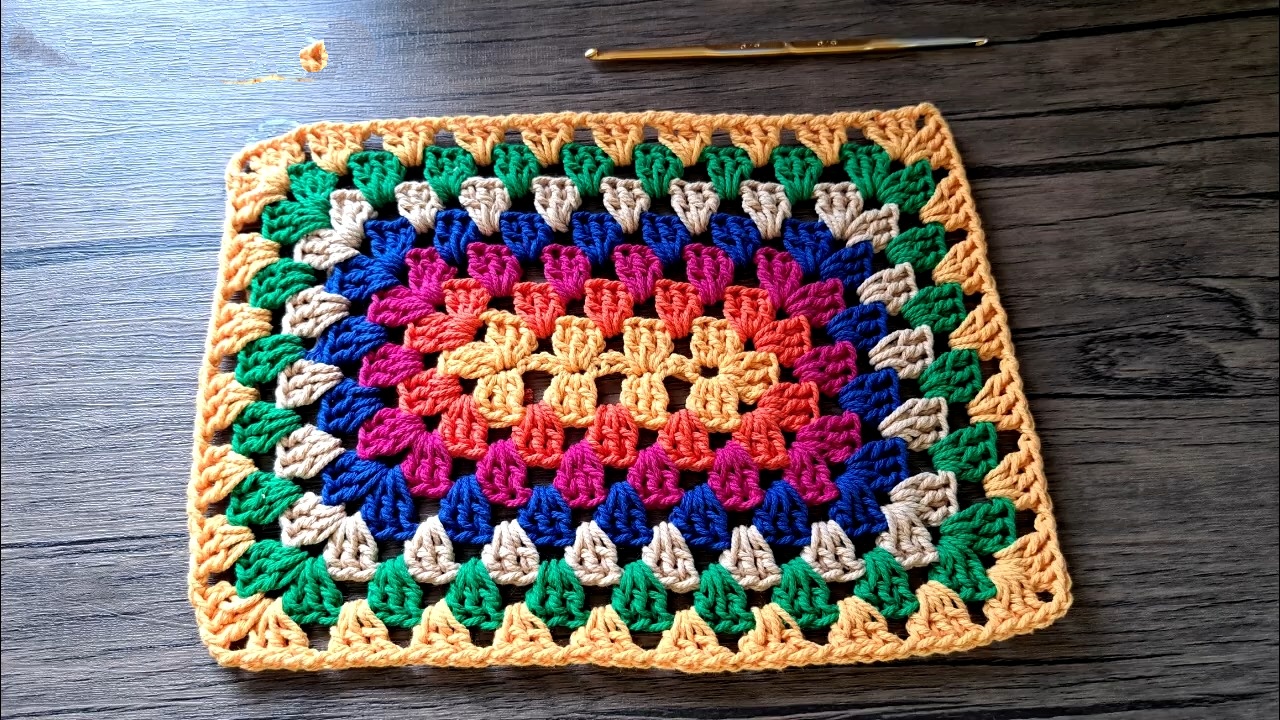
Main Granny Square Panels (Make 2)
Foundation & Round 1 (Color A – Yellow)
Foundation Chain:
- Start with a slip knot.
- Chain 13.
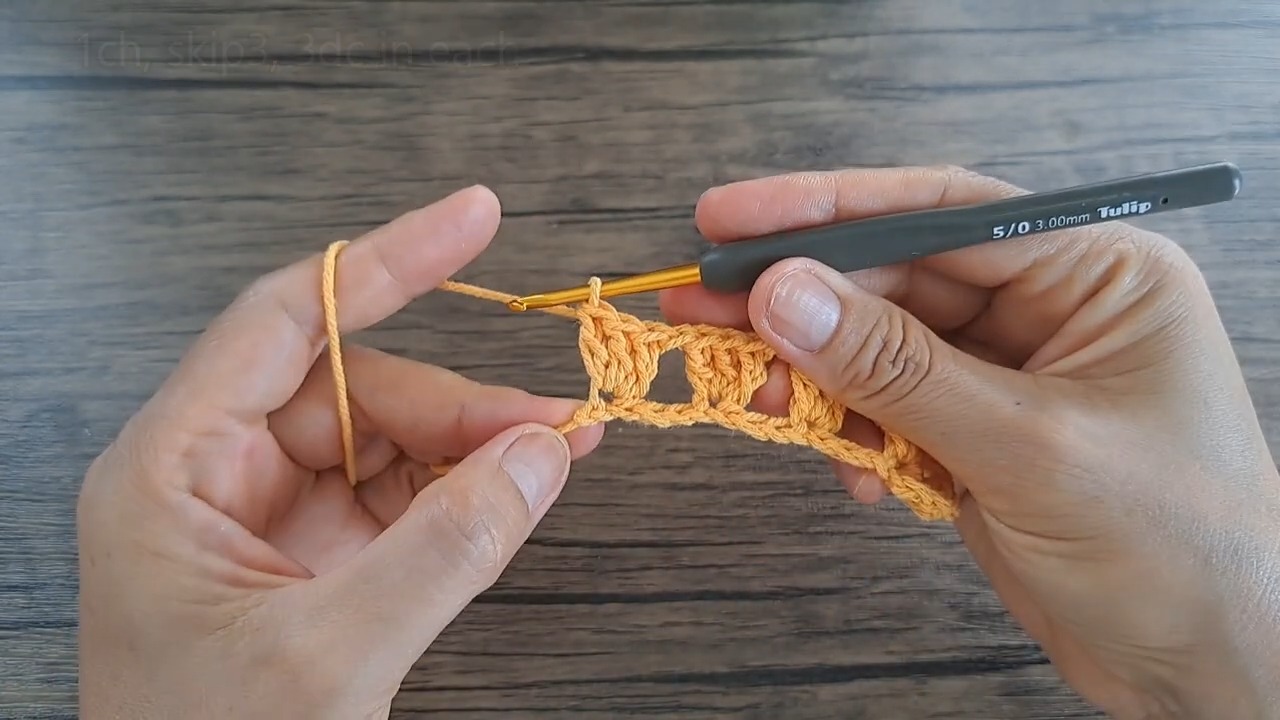
Round 1 Steps:
- Ch 3 (counts as 1 dc).
- In the 4th chain from the hook, work 2 dc.
- Ch 2, then make 3 dc in the same chain (this forms the first corner).
- Ch 1, skip 3 chains, make 3 dc in the next chain.
- Ch 1, skip 3 chains, make 3 dc in the next chain.
- Ch 1, skip 3 chains, then work [3 dc, ch 2, 3 dc, ch 2, 3 dc] in the last chain (this creates a turn with 2 corners).
- Flip the foundation to the opposite side:
- Ch 1, make 3 dc in the next chain space.
- Ch 1, make 3 dc in the next chain space.
- Ch 2, make 3 dc in the starting chain space (completes the final corner).
- Ch 2, sl st to the 3rd chain of the starting ch-3 to join. Fasten off.
Round 2 (Color B – Orange)
Steps:
- Join Color B in any ch-2 corner space.
- Ch 3 (counts as dc), then make 2 dc in the corner space.
- On the sides: [Ch 1, skip 3 dc, 3 dc in ch-1 space] across.
- At each corner: Work [3 dc, ch 2, 3 dc] in every ch-2 corner space.
- Sl st to the top of the starting ch-3 to join. Fasten off.
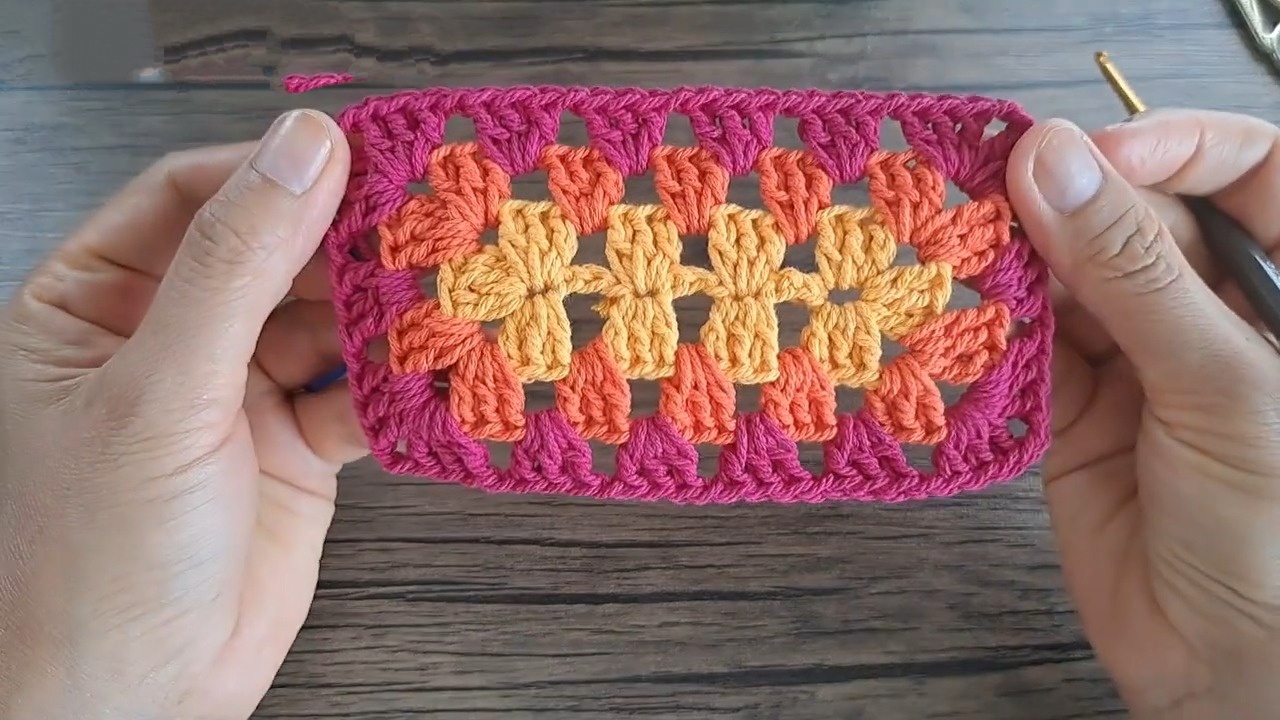
Rounds 3–10 (Color Changes)
Repeat the established granny square pattern for Rounds 3–10, changing colors for each round:
- Sides: Work 3 dc in each ch-1 space, separated by ch 1.
- Corners: Work [3 dc, ch 2, 3 dc] in each ch-2 corner space.
Fasten off after Round 10. Make 2 panels in total.
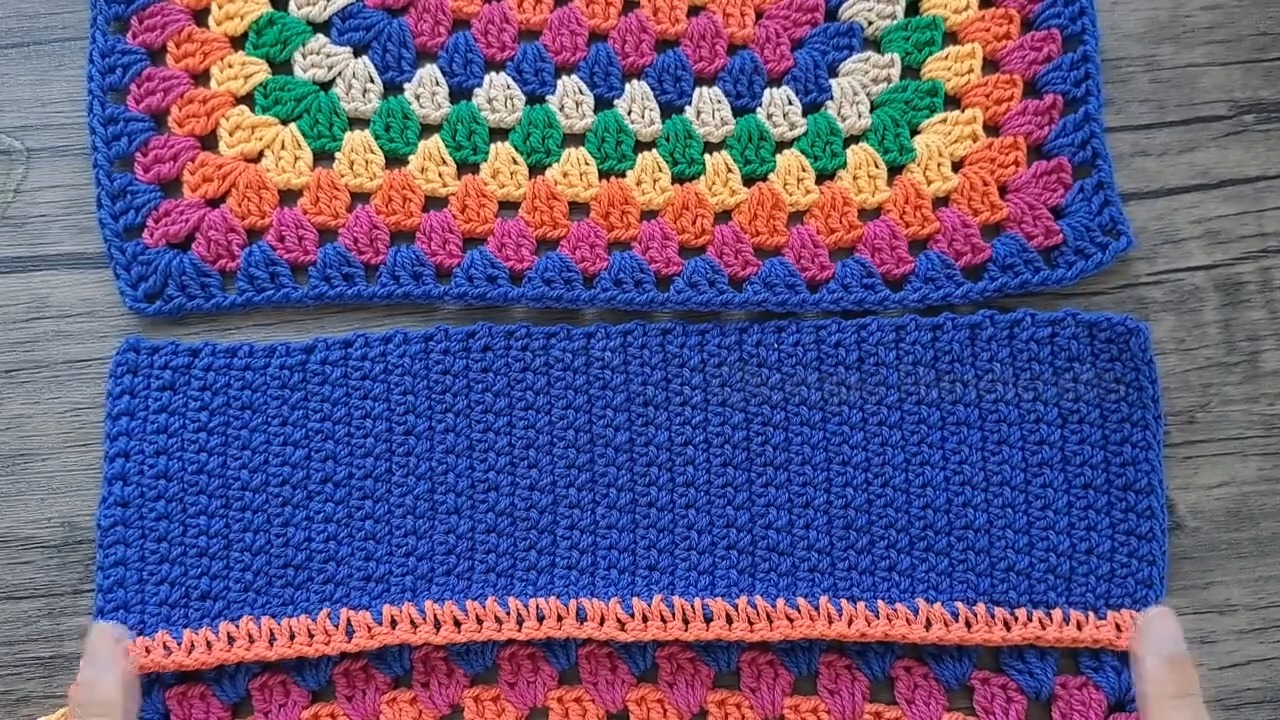
Bottom Gusset Panel (Dark Blue)
Foundation & Rows:
- Start with a slip knot, then ch 15.
- Row 1: Ch 1, turn, work sc in the 2nd chain from the hook and each chain across (15 sc total).
- Rows 2–52:
- Ch 1, turn, work 1 sc in each stitch across (15 sc per row).
- Repeat for 52 rows total.
- Fasten off, leaving a tail for sewing or weave in ends.
Side Gusset Panels (Make 2 – Beige/Orange)
Foundation & Rows:
- Start with a slip knot, then ch 15.
- Row 1:
- Ch 3 (counts as 1 dc), work dc in the 4th chain from the hook, and each chain across (15 dc total).
- Row 2:
- Ch 3, turn, [skip 2 stitches, 3 dc in next stitch] across. End the row with 1 dc in the last stitch.
- Rows 3–13:
- Repeat the cluster/v-stitch pattern for 13 rows total.
- Fasten off. Make 2 panels.
Summary of Panels:
- Main Granny Square Panels: 2 (Yellow, Orange, Pink, etc.; 10 rounds each).
- Bottom Gusset Panel: 1 (Dark Blue; 52 rows).
- Side Gusset Panels: 2 (Beige/Orange; 13 rows each with v-stitch clusters).
Final Assembly
Panel Joining (Single Crochet Edging)
Joining the Panels
- Align the Panels:
- Place the main front panel and bottom dark blue panel together, ensuring edges align properly.
- Start at a Corner:
- Join Color C (Orange) at one corner of the aligned panels.
- Single Crochet to Join:
- Working through both layers simultaneously, use single crochet (sc) along the edge to join the bottom gusset to the front panel.
- Repeat for the Side Gussets:
- Align each side panel (Beige/Orange) with the main front panel and attach it using sc edging.
- Follow the same technique as you did for the bottom gusset.
- Join the Back Panel:
- Once the front panel, bottom gusset, and side gussets are attached, repeat the process with the back panel, creating the 3D bag structure.
2. Top Rim & Integrated Straps
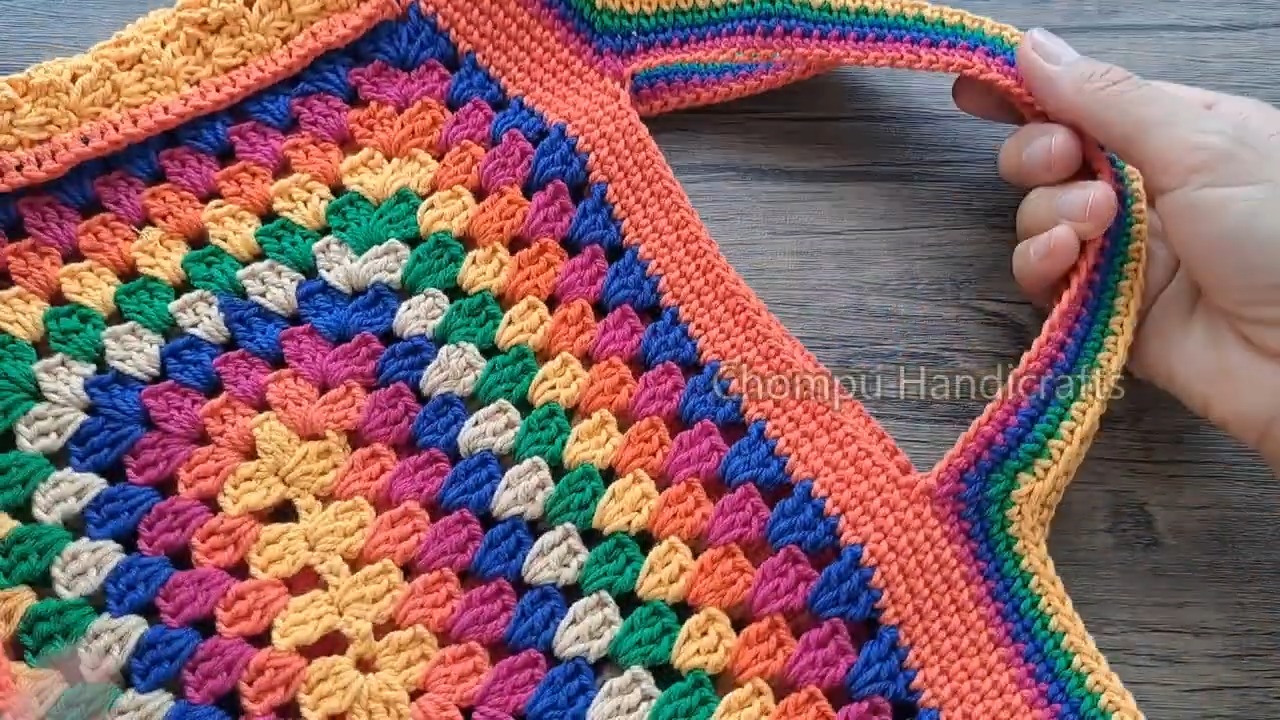
Round 1: Base Rim
- Join Yarn:
- Attach yarn at the top side seam of the assembled bag.
- Work Single Crochet Around:
- Work 1 sc evenly into each stitch around the entire top opening of the bag.
- Complete the Round:
- Join the round with a slip stitch (sl st).
Round 2: Strap Foundations
- Start the Handles:
- Single crochet (sc) across the side and front panels until you reach the first strap marker point.
- First Handle:
- Ch 50 (to form the handle).
- Skip the center portion of the front panel and join the chain with a sc at the second strap marker.
- Work to the Back Panel:
- Single crochet across the remaining front stitches, then move to the back panel.
- Second Handle:
- Ch 50, skip the center section of the back panel, and join the chain with a sc at the corresponding marker point.
- Finish the Round:
- Single crochet (sc) through the remaining stitches until you reach the start of the round.
Rounds 3–5: Strap Thickness & Edging
Round 3:
- Work sc in every stitch, including the top rim, and 1 sc in each of the 50 handle chains on both sides.
Rounds 4–5:
- Repeat the process, working sc around the rim and handles to build strap thickness and improve durability.
Final Step:
- Fasten Off:
- Finish with an invisible join for a seamless look.
- Weave in all remaining ends using a yarn needle.
Conclusion
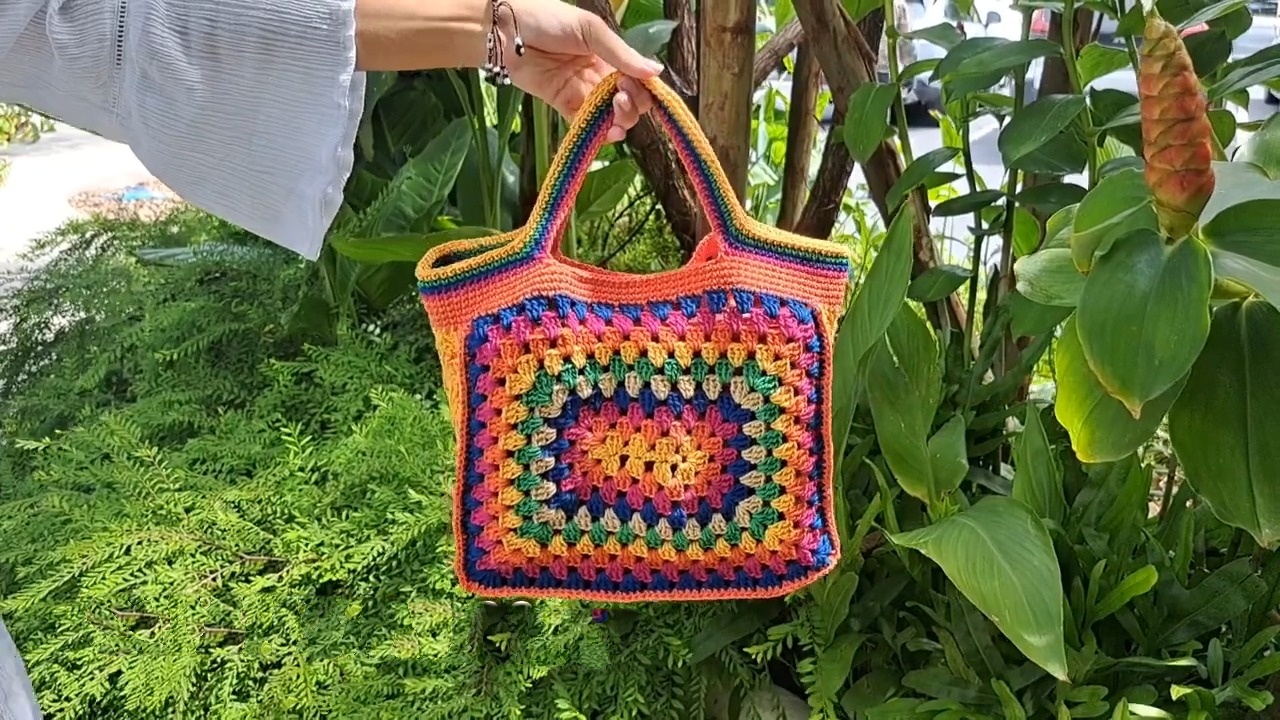
Congratulations! Your Crochet Granny Square Tote Bag is now complete!
- Features:
- Bright rainbow granny square panels with smooth transitions of color.
- Structured gussets for durability and practical use.
- Sturdy built-in handles with reinforced thickness.