Made-to-Measure Crochet High Waist Mesh Shorts Pattern
Looking for breezy crochet shorts that actually fit your measurements? These high-waist mesh shorts use simple increases and a drawstring for a flexible custom fit.

High-waisted, airy, and easy to adjust, these crochet mesh shorts are designed to follow your measurements rather than force you into a fixed size. The open double-crochet fabric makes them especially suited to lounging, pajama wear, or layering over swimwear as a beach cover-up, while self-striping yarn can add plenty of color without changing yarn by hand.
Getting the fit right starts at the crochet waistband and continues through the hips and thighs, so this pattern gives you specific measuring points as the shorts grow. You’ll shape the waistband, build each leg panel separately, match the increases on both sides, join the legs, and finish with a simple drawstring that lets you fine-tune the waist.
Credit maxine
Start With the Waist Measurement
Because these shorts are made to measure, your waistband is not based on a preset stitch count. Instead, you will crochet the ribbed band until it reaches your waist measurement when given a good stretch.
This stretchy measurement matters because the waistband needs to sit securely rather than hang loosely. You’ll also need to pay attention to the number of drawstring holes before joining the band: the finished waistband must have an even number of holes around it.
Materials & Tools
- Weight 4 yarn, such as Caron Cotton Cakes, or Weight 4 skinny chenille, such as Loops & Threads Skinny Chenille in “Orange Stripe.” Choose yarn that is approximately 60 yards per ounce.
- 4.0 mm crochet hook for the waistband and drawstring.
- 4.5 mm crochet hook for the main body of the shorts.
- Tape measure for measuring the waistband, hips/glutes, and thighs.
- Scissors.
- Darning needle.
- Stitch markers.

What Makes These Shorts Adjustable?
The shorts are built around three measurements rather than one fixed size. First, the waistband is worked to your waist measurement. Next, the body gains width through center increases until the panel reaches half of the widest part of your glutes. Finally, edge increases continue until the panel is wide enough to wrap securely around your thigh.
The mesh fabric comes from double crochets, leaving natural gaps throughout the shorts. That makes the finished fabric particularly useful for relaxed lounge or pajama shorts and as a beach cover-up. A self-striping yarn can also create a colorful patterned effect without requiring manual color changes.
Crochet the Waistband
Use the 4.0 mm hook for the waistband. The ribbing is worked horizontally, and the skipped stitch in the drawstring-hole rows creates openings that will later hold the waist tie.
Foundation: ch 10.
Row 1: Skip the first ch from the hook, work 1 sc in each of the remaining 9 chs (9 sc), ch 1, turn.
Row 2 – Drawstring Hole Row: Work 4 BLO sc, ch 1 and skip the next st, then work 4 BLO sc (8 sc, 1 ch-1 space), ch 1, turn.
Row 3: Work 4 BLO sc, place 1 regular sc directly into the ch-1 hole from the previous row, then work 4 BLO sc (9 sc), ch 1, turn.
Row 4: Work 9 BLO sc across, ch 1, turn.
Continue repeating Rows 2–4 until the waistband reaches your specific waist measurement when given a good stretch. Stop on a repeat of Row 3, the row where you work a sc into the drawstring hole, and make sure the total number of drawstring holes around the waistband is even.

Close the Band Before Starting the Body
Fold the waistband in half so the two short ends meet. Insert the hook through the first stitch of the front edge and the corresponding first stitch of the back edge, then sc the two edges together. Continue across all 9 stitches to close the waistband.
Once the seam is complete, ch 1 and turn the waistband sideways. You are now ready to work around its long bottom edge.
Establish the Body and Your Center Increase
Switch to the 4.5 mm hook for the main body.
Work an even number of sc evenly around the bottom edge of the waistband. For spacing, work 1 sc per row, or 2 sc for every ridge you see. Sl st into the first sc to join, pull tight, ch 1, and immediately place a stitch marker in this first stitch.
Before beginning Panel 1, use your base-round stitch count to locate the center increase accurately. For example, if you have 114 sc, divide that number by 2 to get 57 stitches for one panel. Then divide 57 by 2 to find the center point: 57 ÷ 2 = 28.5. Round up to 29, then add 1, giving you 30. In this example, the first increase is placed in the 30th stitch.
That calculation is important because the center increase controls how the panel expands toward the widest part of your glutes.

Shape Panel 1
Center Increases
Row 1: From the ch 1 on the waistband, work 30 BLO dc, then in the 31st st work a dc inc (2 BLO dc in one st), place a stitch marker in the second dc of this increase, then work BLO dc in the remaining sts until you reach your half-waistband count, such as the original 57 sts in the example.
Row 2: ch 1, turn, work regular dc in each st until you reach the stitch marker, remove the marker, place a dc inc in that st, put the marker in the second dc of the new increase, then continue with regular dc to the end of the panel.
Repeat Row 2 until the panel covers half of the widest part of your glutes. Keep the marker in the newest second stitch of the center increase so you always know where the next increase belongs.
Move the Increases to the Edges
Once the panel has reached the required glute width, the center shaping is finished. Remove the center marker before moving to the next stage.
Edge Increase Row: ch 1, turn, place a dc inc in the very first st, work regular dc across the panel, then place a dc inc in the very last st.
Repeat the edge increase row until the panel is wide enough to wrap securely around your thigh. These increases now expand both sides of the panel instead of adding width at its center.

Turn Panel 1 Into a Leg
When you finish the final edge increase row, do not ch 1. Bring the two sides of the panel together and sl st into the first stitch of the row to form the connected leg tube.
Round 1: ch 1, place a stitch marker, turn your work, work regular dc all the way around the leg opening, then sl st into the first marked st.
Repeat Leg Rounds: ch 1, turn, and repeat the circular round until the shorts reach your desired length; ch 1 and cut a long tail.
Keep track of the number of center-increase rows, edge-increase rows, and leg rounds you make. Those counts will be needed when you create Panel 2 so both sides match.
Build Panel 2 to Match the First
Panel 2 follows the same general shaping, but its center-increase marker is positioned from the opposite direction. The easiest way to keep the two sides balanced is to use Panel 1 as your reference rather than trying to recreate its measurements from memory.
First, count how many stitches you made on Panel 1 before the first increase. For example, you might have 26 stitches from the center front seam.
Row 1: With the shorts facing right-side out, attach your yarn with a sl st to the very next unworked sc on the front of the waistband, ch 1, work 26 BLO dc, place a dc inc (2 BLO dc) in the 27th st, place your stitch marker in the first dc of this increase, then work BLO dc across the remaining unworked waistband sts.
Row 2: Count the number of center-increase rows completed on Panel 1, ch 1, turn, work regular dc until you reach the marker, place a dc inc and put the marker in the first dc of the increase, then work regular dc to the end of the row.
Repeat Row 2 until you have completed exactly the same number of center-increase rows as Panel 1.
Edge Increase Rows: Count the edge-increase rows from Panel 1, ch 1, turn, place a dc inc in the first st, dc across, place a dc inc in the last st, and repeat until you match the row count from the first leg.
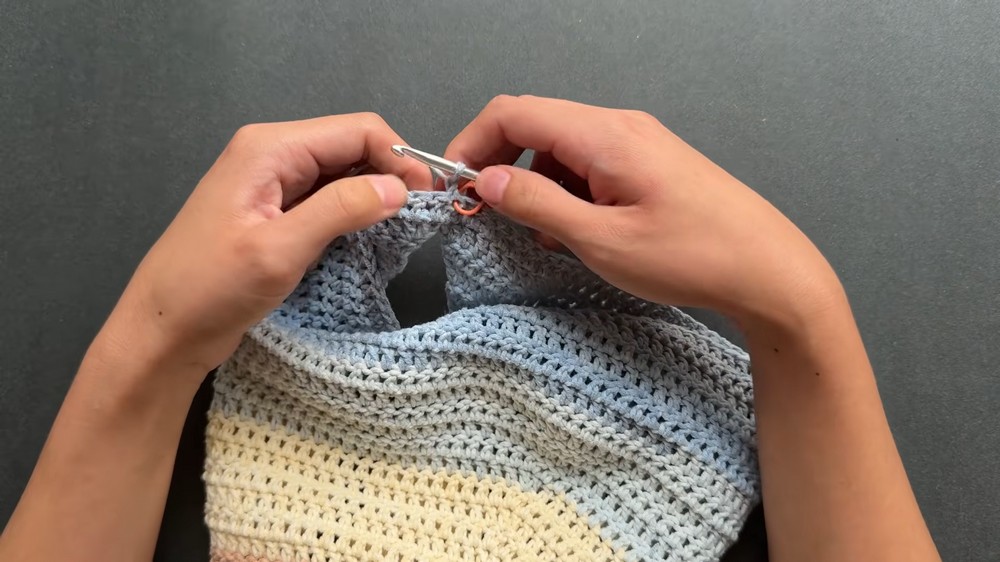
Leg Tube: Join the edges with a sl st to form the tube, ch 1, turn, and dc around, then sl st to join; repeat for the same number of rows as the first leg, ch 1, and cut a long tail.
Matching these counts is what keeps the two legs at the same height and width. The panels do not need a separate fixed-size stitch count because the measurements you established while making Panel 1 become your guide for Panel 2.
Join the Open Crotch Seam
With both legs complete, turn the shorts entirely inside out so the seam can be worked from the wrong side.
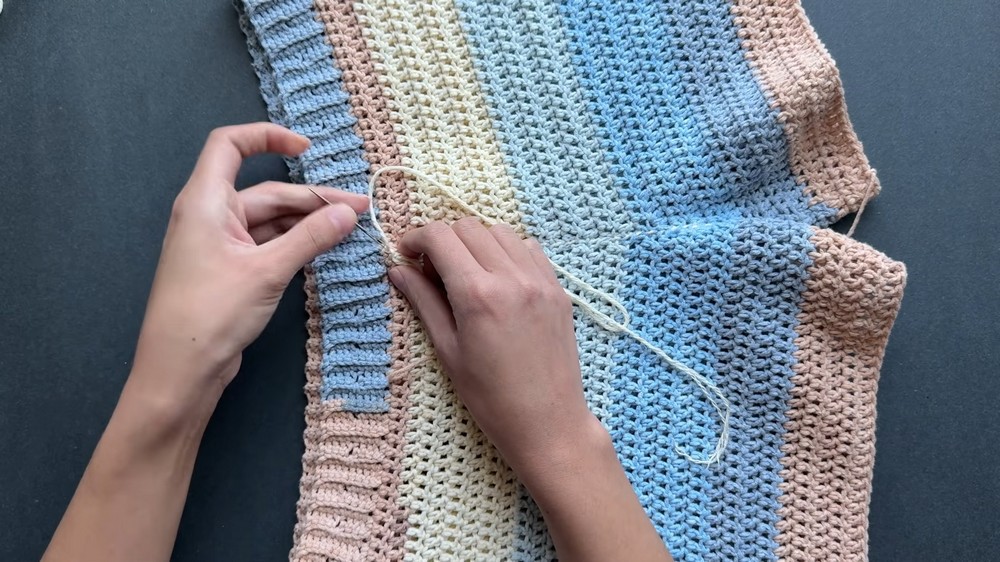
Cut a strand of yarn approximately three times the length of the open crotch seam and thread it onto your darning needle.
Starting at the very edge of the front waistband, whip stitch the two panels together down the seam. Pass the needle through corresponding stitches on both panels and keep the stitches tightly spaced so the seam does not leave unwanted holes.
When you reach the back waistband edge, reinforce the final stitch by passing the needle through it twice. Cut the yarn and securely weave in the remaining ends.

Make the Drawstring
Switch back to the 4.0 mm hook for the drawstring.
Drawstring Chain: ch a length that is double your waist measurement.
Working exclusively into the back bar, or bump on the back, of the chain, place 1 sc in every ch across. ch 1, cut the yarn, and pull through.
Before threading the tie, count the drawstring holes on one half of the waistband, from the front center seam to the back center seam. The direction in which you begin weaving depends on whether that half contains an odd or even number of holes.
- Odd number of holes: Start from the inside of the shorts and go outward through the first hole next to the seam.
- Even number of holes: Start from the outside of the shorts and push inward through the first hole.
Weave both sides of the drawstring in and out through the holes until the two ends meet at the center front.
Final Fit Check
Turn the shorts right-side out and check the waistband, crotch seam, and leg lengths. The waistband should sit at your intended high-waist position, while the drawstring gives you another way to fine-tune the fit.
The most important fit points are the measurements you used during shaping: the waist for the waistband, the widest part of the glutes for the center increases, and the thigh circumference for the edge increases. Because the shorts are made to measure, those checkpoints determine the finished proportions more reliably than a fixed stitch count.
Weave in any remaining ends with your darning needle. Your custom-measured high waist mesh shorts are ready to wear.